
Level 7
HARDHow to solve Sand Loop level 7? Get instant solution for Sand Loop 7 with our step by step solution & video walkthrough. Sand Loop 7 tips and guide.
Play Sand Loop Now
Experience the puzzle challenge firsthand
Game Screenshots
Sand Loop Level Guides
Sand Loop Level 7: Complete Strategy & Walkthrough Guide
Level Overview: The Deep Blue Bottleneck
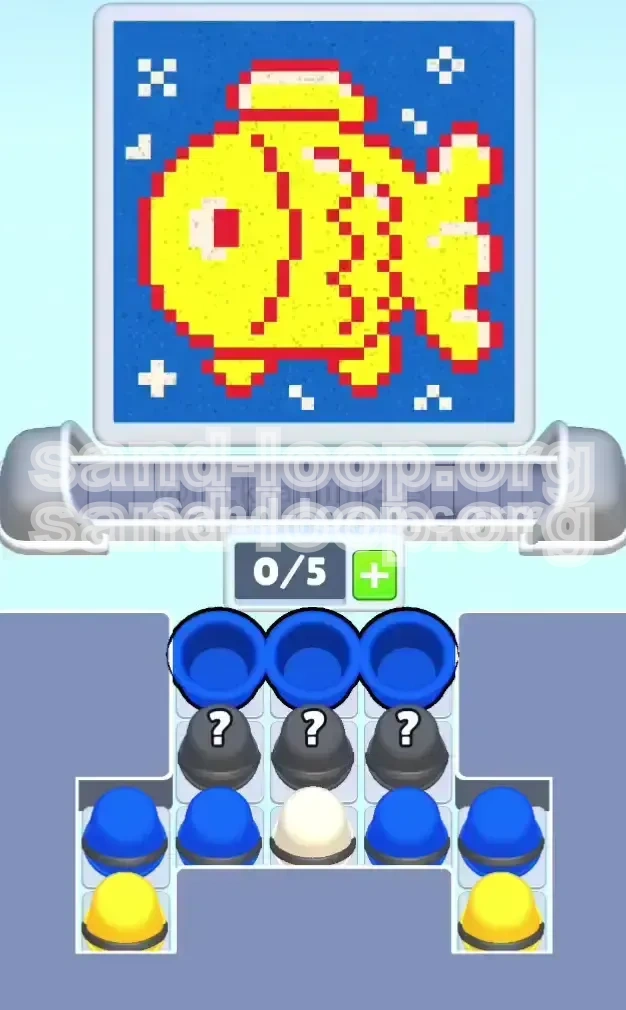
Welcome to the most challenging stage of the early game: Sand Loop Level 7. This level introduces a harsh lesson in resource management and spatial reasoning. The setting takes you deep underwater, where you must paint a vibrant fish consisting of three distinct color layers: a massive Blue undercoat, a mid-tone Yellow body, and precise White highlights.
Why Players Fail Here
The difficulty spike in this level comes from the "Supply Tray" mechanics. Unlike previous levels where paint was readily available, Level 7 buries essential colors (specifically White and Red) behind piles of useless Blue cups. The game tempts you with a 5-slot conveyor belt, but filling it is a death sentence. You are fighting against a hidden "Slot Economy"—every space you fill is a commitment you cannot undo.
The Perfect Ratio Strategy
To secure 3 stars, you cannot simply paint; you must balance. The winning ratio for this level is roughly 50% Blue, 30% Yellow, and 20% White. Many players rush the Blue because it covers the most area, only to find themselves with 95% Blue progress and 0% White access, leading to an inevitable "Color Deadlock." This guide focuses on maintaining that delicate balance.
Core Mechanics: The Slot Economy
In Level 7, the conveyor belt is not a tool; it is a trap. If you fill all 5 slots, you lose the ability to react to new spawns. If a critical Red cup appears while your belt is full of Blue, you cannot grab it. By the time your belt clears, the Red cup will be gone. We will employ a "3-Slot Max" strategy to keep our options open.
Understanding the "Mystery" Variable
Three stacked cups marked with a "?" sit in the tray. These contain randomized colors. In this walkthrough, we treat these as "Emergency Brakes" rather than primary tools. Using them early is gambling; using them late is strategy. We will discuss the precise mathematical moment to trigger them.
Step-by-Step Walkthrough: Phase 1 (0% - 40%)
The Opening Move: Resist the Blue
As the level starts, you will see a tray flooded with Blue cups. Your instinct will be to grab them. Do not do this. Grab exactly one Blue cup and place it in the first slot. Stop. Watch it travel. This 4-second travel time is your thinking window.
Establishing the Yellow Rhythm
While the first Blue cup is traveling, look for Yellow cups. They usually spawn on the flanks of the tray. Load one Yellow cup into the second slot. Now you have a stagger: Blue pouring, followed by Yellow. This alternation prevents the Blue meter from spiking above 20% while you get your Yellow engine running.
The Tray Shuffle Technique
After the first two cups clear, the tray will shift. You will likely see a White cup buried in the center or back row, blocked by two Blue cups. This is your first major hurdle. You must clear those blocking Blue cups to free the White.
Execution: Freeing the White Cup
Here is the specific move sequence: Load the blocking Blue cups only if your current Blue meter is below 30%. If it is higher, wait. Your goal is to pick up those blocking Blue cups, move them to the belt, and discard them (by pouring) to reveal the White cup underneath. This is "tray maintenance."
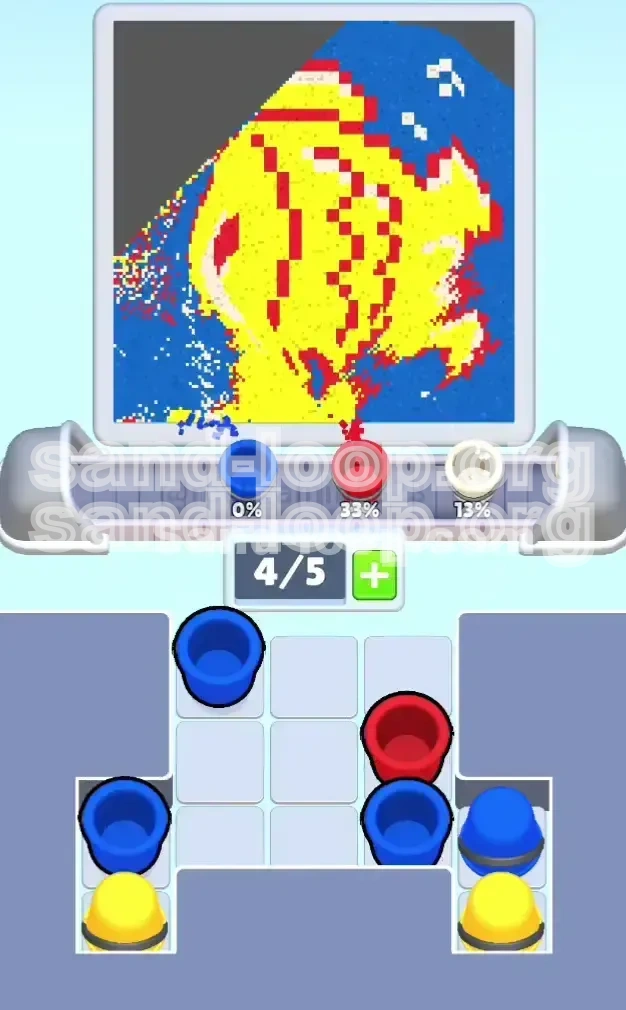
Milestone Check: 40% Progress
By the time you hit 40% progress, your meters should look like this: Blue (45%), Yellow (35%), White (10%). If you have 60% Blue and 0% White, you are off track. Restart. The White meter must start moving early, or the level becomes mathematically impossible later.
Step-by-Step Walkthrough: Phase 2 (40% - 75%)
The Danger Zone: Speed Acceleration
At 40%, the conveyor belt speeds up. This is where most players panic. The natural reaction is to tap faster to compensate. You must do the opposite. Slow down. Treat every tap as a permanent decision.
The "Lowest Color" Rule
Stop looking at what colors are available. Start looking at what colors are needed. If your Blue is at 60% and Yellow is at 45%, ignore the Blue cups completely, even if they are right in front of you. Hunt for the Yellow. If you fill a slot with a color that is already high, you are wasting a slot.
Managing the Red Bottleneck
Red cups (used for the outline) are rare. You might see one appear in the tray while your belt is full. If you have an open slot, grab it immediately, even if you don't need it right this second. Taking it off the tray puts it into your "inventory" (the belt). If you leave it on the tray, it might de-spawn or get buried again.
Strategic Slot Management
In this phase, keep your belt at 3/5 or 4/5 capacity. Never 5/5. Why? Because if you have 5 cups queued, and a "Mystery Cup" spawns, or a rare Red appears, you are helpless. Keeping one slot open is your safety valve. It allows you to react to the tray's RNG (Random Number Generation).
Mid-Game Crisis Protocol
What if three cups pour at once and spike your Blue to 80%? Stop tapping. Take your hands off the screen. Watch the meters settle. Do not load the next cup until the active pour is 100% finished. Panic-loading is the #1 cause of death in Phase 2.
Step-by-Step Walkthrough: Phase 3 (75% - 100%)
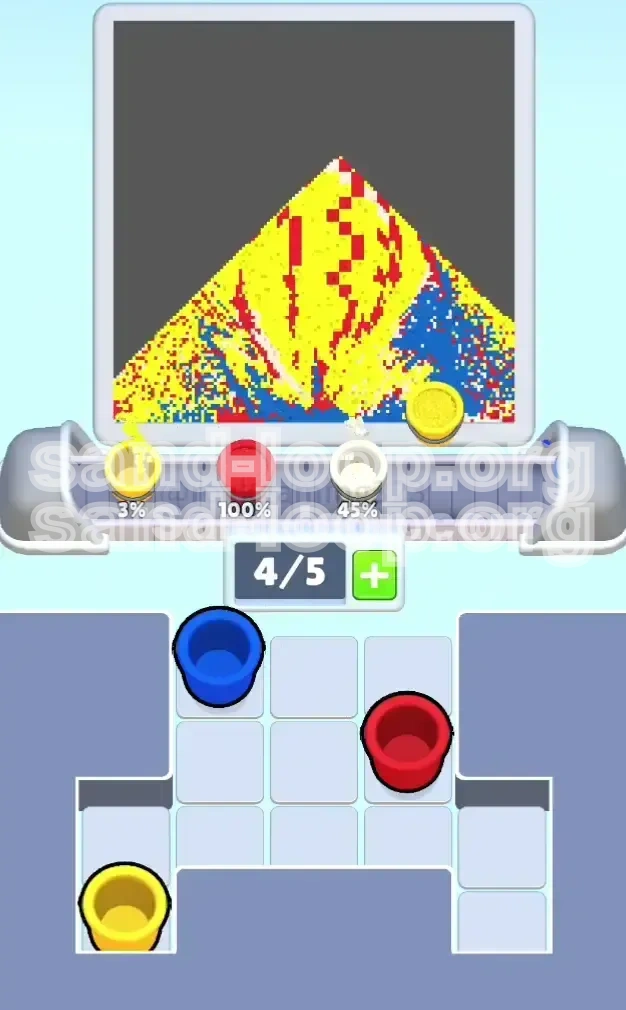
The End Game Calculation
You are now in the "Red Zone." All meters are high. Small fills now represent huge percentage gains. A single White cup might jump you from 75% to 95%. You must calculate the "Liquid Value" of every cup before loading it.
Triggering the Mystery Cups
This is the time to use the Mystery Cups (if you haven't already). Ideally, you saved the stack from the beginning. If you are at 90% Blue / 90% Yellow / 80% White, grab a Mystery Cup. If it gives you White or Blue, you win. If it gives you Yellow, you are still safe. If it gives you a color you don't need, hope the "Lead Time" (travel delay) gives you a moment to react.
The "Wait and Verify" Method
At 95%, do not trust your eyes. Watch the meter numbers, not the cup graphics. Sometimes a cup looks full but pours slowly. Wait until the number stops ticking up before loading the next cup. One millisecond of overlap here can cause a 101% overflow.
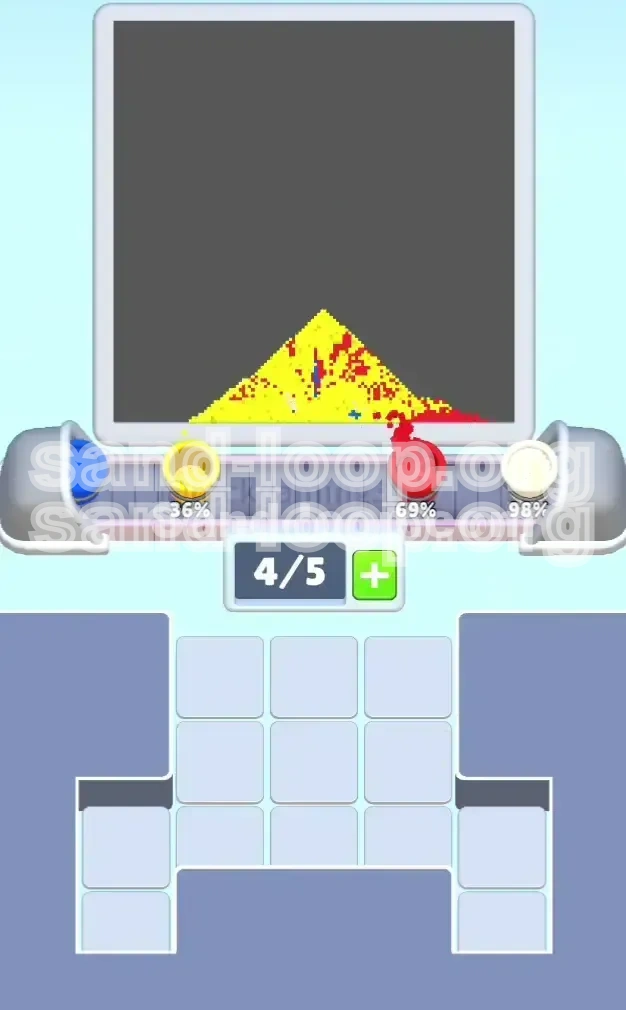
The Final 5%: The Empty Slot Strategy
When you are at 98% on two colors and 95% on the third, do not load anything. Let the belt clear. Often, the momentum of the liquid in the funnels will settle and push the last 2% automatically. Loading a fresh cup at 99% is the most common way to lose a won game.
Winning Animation
Once the third meter hits 100%, the level ends instantly. You don't need to wait for the cup to finish pouring. As soon as that number clicks over, the "Victory" screen triggers. This means sometimes you can win "by accident" as a cup is mid-air, but relying on this is risky.
Common Mistakes & Stuck Solutions
Mistake #1: The "Full Belt" Syndrome
Filling all 5 slots feels productive, but it removes your agency. If the game gives you a bad RNG roll, you have no way to mitigate it because your queue is full.
Fix: Discipline yourself to never exceed 4 loaded cups. Treat the empty slot like a life jacket.
Mistake #2: Ignoring the "Back Row"
Players often focus on the front row of the tray. However, in Level 7, the best colors (White/Red) are often hidden in the second or third row, blocked by junk Blue cups.
Fix: Before every tap, scan the entire tray grid. Identify what is blocking the good colors and clear the debris first.
Mistake #3: Early Mystery Cup Usage
Using the Mystery Cup at 20% progress is dangerous. If you get Blue, you gain nothing. If you get White, you might overfill because you haven't built up the buffer for it yet.
Fix: Pretend the Mystery Cup doesn't exist until you reach Phase 3.
Solution: What to Do If You Are "Stuck" at 95%
You have two colors at 100%, and one is stuck at 95%. You have no matching cups on the tray. This is the "Stuck Scenario."
Action: This is the only time you should aggressively cycle the tray. Load any available cup to force the tray to shuffle and spawn new items. It is a gamble, but at 95%, you have no other choice. Pray for a Mystery Cup spawn.
Solution: Recovery from Overload
If you accidentally load a Blue cup at 98% Blue, you might think it's over. But the "Travel Time" (approx. 3 seconds) is your grace period. Sometimes, if you are lucky, the pour will be slightly slow, or the meter will round down.
Action: Do not quit immediately. Watch the pour. If it hits 101%, you restart. If it stops at 100%, you win. Never give up until the "Game Over" screen actually appears.
Speed Run Tips & Pro Strategies
Pre-Loading the Lead Time
Advanced runners know the cup takes 3.5 seconds to pour. You can shave seconds off your time by loading the next color cup while the current one is still pouring, provided they are different colors. This creates a seamless stream of paint without gaps.
The "Gap" Exploit
Intentionally leave a 1-slot gap between your color groups. For example: [Blue] [Empty] [Yellow]. This gap ensures that if the Blue cup overfills slightly, you have a micro-second buffer before the Yellow cup starts pouring, preventing a cascade failure.
Mental Tray Mapping
Speed runners memorize the tray spawn logic. The tray usually spawns in a predictable pattern: Outer rim first, then center. By anticipating where the White cup will appear next, you can clear the path before it even spawns, saving precious seconds.
Risk vs. Reward in Phase 1
For a fast time, you can load two Blue cups at the very start (instead of one) to blast through the first 20% of the level. This is risky. If you do this, you must follow it immediately with two Yellow cups to balance the meter. This "Double Tap" strategy is high variance but can save 10+ seconds on a successful run.
Optimal Cup Threading
Keep your belt composition diverse: [Blue] [Yellow] [White] [Blue] [Yellow]. Avoid grouping identical colors: [Blue] [Blue] [Blue]. Grouping identical colors causes "Meter Clumping," where your percentage jumps in erratic spikes, making it hard to control. A diverse belt creates a smooth, linear progression graph that is easier to manage and faster to complete.