
Level 9
HARDHow to solve Sand Loop level 9? Get instant solution for Sand Loop 9 with our step by step solution & video walkthrough. Sand Loop 9 tips and guide.
Play Sand Loop Now
Experience the puzzle challenge firsthand
Game Screenshots

Sand Loop Level Guides
Level 9: The Beach Umbrella - Comprehensive Strategy Guide
Welcome to the "Beach Umbrella," Level 9 in Sand Loop. Do not let the serene summer vibe fool you; this level represents a significant spike in difficulty, shifting the focus from simple filling to structural logic. In this stage, you are not just painting; you are acting as a structural engineer. The challenge lies in the "Vertical Dependency"—the colors you need most for the mid-section of the painting (the horizon) are buried at the very bottom of the supply tray. This guide will dismantle the level's mechanics, providing a foolproof path to 3-star completion without getting stuck in a color trap.
1. Level Overview: Understanding the "Beach Umbrella" Challenge
Level 9 is a Logic Puzzle disguised as a casual sorting game. The primary difficulty stems from the physics of the sand flow and the arrangement of the supply tray. Unlike previous levels where you could simply tap cups in the order they appear, this level requires you to ignore the top layers initially to access the critical bottom layers.
The Logic Trap
The game tries to trick you into clearing the top rows first. However, doing so blindly fills your canvas with incorrect layers. You must resist the urge to "clean" the tray and instead focus on "mining" specific columns.
Structural Analysis
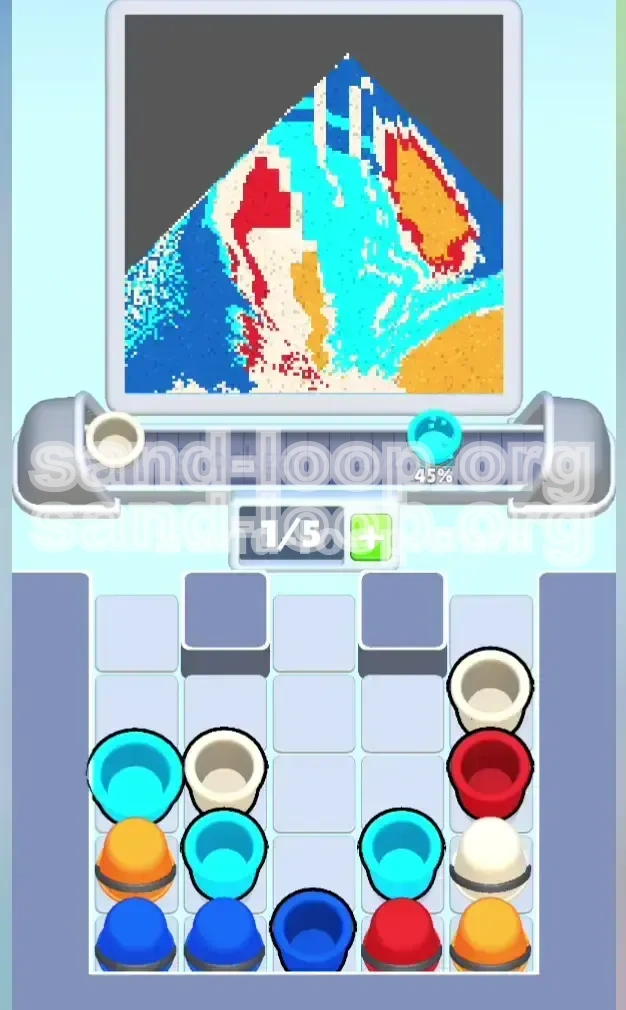
The target image is a cross-section of a beach scene: Orange Sand (bottom), Water (middle right), Umbrella (middle left), and Sun/Sky (top). The game spawns colors in the reverse order of need for the bottom layers, forcing you to dig.
The "Horizon Line" Bottleneck
80% of failed attempts on this level happen because the player runs out of space before creating the horizon line. The Dark Blue cups are trapped under Orange and White blockers. If you don't create a path to them early, you will lose.
Slot Management Dynamics
With a 0/5 slot capacity, you have very little room for error. You cannot hold onto "useless" colors hoping to use them later. You must dispatch them immediately, even if it means slightly overfilling a section.
The 40-40-20 Rule
Think of your clicks in percentages: 40% of your effort goes into digging for the bottom blues, 40% goes into careful layering of the umbrella stripes, and only 20% goes into finishing the top sun/sky details.
2. Primary Objectives: Your Mission Checklist
To conquer Level 9, you must stop thinking about "colors" and start thinking about "excavation." Here is exactly what you need to achieve to clear the stage.
The Orange Foundation
Your first objective is to secure the base. The entire bottom 20% of the canvas is Orange sand. You must clear the three massive Orange buckets from the top row immediately to establish this base.
Excavate the Deep Blue
This is the Critical Path Objective. You must clear Columns 1 and 2 down to the very bottom row to release the Dark Blue cups. Without these, the ocean horizon will never form, and the level is mathematically impossible to finish.
Stripe Perfection
You must construct the Umbrella on the left side. This requires alternating Red and White with precision. A single double-tap error can merge two red stripes, ruining the aesthetic and forcing a restart if you are aiming for perfection.
Sky and Sun Capping
Only after the ocean and umbrella are stable should you look to the top right. You need to reserve a specific amount of Cyan for the sky and Orange/Red for the sun details to close out the level.
Prevent "Color Bleeding"
You must prevent the Red Umbrella color from bleeding into the Cyan Water color. Since they share a boundary in the middle of the canvas, filling one too fast can spill over into the other's territory. Keep them distinct.
3. Detailed Walkthrough: Step-by-Step Execution
Follow this sequence exactly. It is designed to minimize backtracking and ensure that you are never left waiting for a specific color to spawn.
Phase 1: The "Orange Blockade" Clear (Moves 1-10)
As soon as the level starts, ignore everything else. Look at the top row. You will see three large Orange buckets occupying Columns 1, 3, and 5.
- Action: Tap the Orange bucket in Column 1.
- Action: Tap the Orange bucket in Column 3.
- Action: Tap the Orange bucket in Column 5.
- Result: This dumps a massive amount of orange sand at the bottom, instantly completing the beach foundation. Crucially, it removes the "lid" covering the rest of the tray.
Phase 2: The Vertical Dig for Horizon (Moves 11-25)
Now the top row is gone. You need to look at Columns 1 and 2 specifically. Your goal is the bottom of the tray.
- Analyze: Look past the White or Red cups in the middle of the tray. Focus on the Dark Blue at the bottom.
- Action: In Column 1, tap whatever is blocking the Dark Blue (usually a White or small Orange cup). You might not need this color yet, but you must move it to get to the blue.
- Action: Do the same for Column 2.
- Priority: As soon as a Dark Blue cup is exposed in these columns, tap it immediately. Send it to the canvas. This secures your ocean horizon before the canvas gets too crowded.
Phase 3: The Umbrella Rhythm (Moves 26-50)
With the horizon started, shift focus to Columns 3 and 4 for the Umbrella. This is a rhythmic task.
- Pattern: You need Red, then White, then Red.
- Execution: Tap Red. Wait for it to flow (roughly 50% fill). Tap White. Wait. Tap Red.
- Note: Do not tap Red again while Red is still flowing heavily, or you will lose the stripe definition. You want distinct bands of color, not a blob.
- Integration: While alternating, keep an eye on Column 4. You often need to clear Cyan cups here to keep the water level rising evenly with the umbrella.
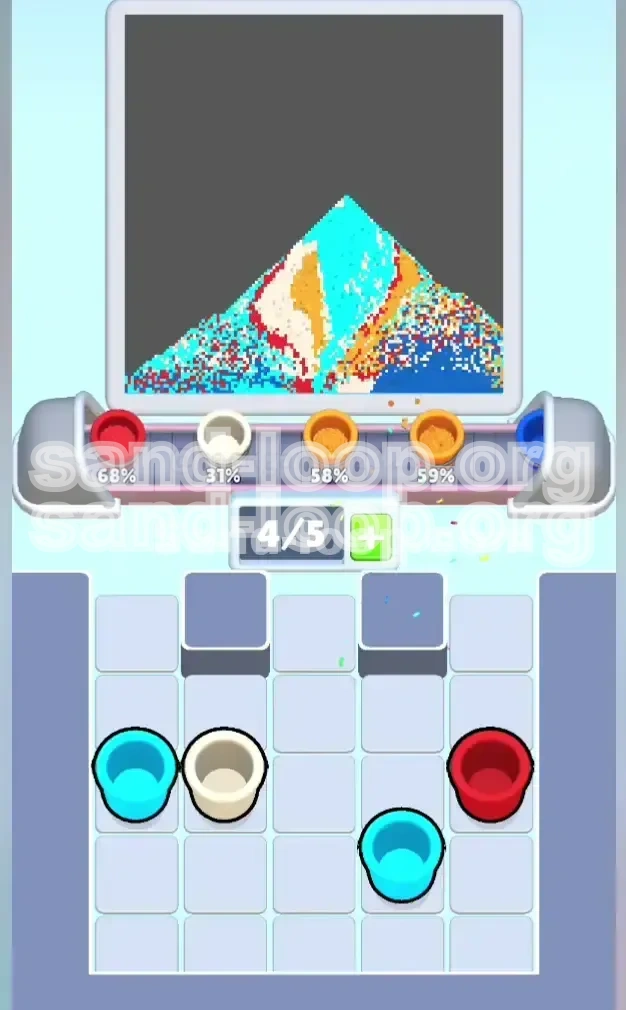
Phase 4: Cyan Filling and Sky Gaps (Moves 51-70)
By now, the bottom is done, and the middle is filling. You likely have scattered Cyan and White cups.
- Action: Look for Cyan cups in the middle rows. These are for the sea.
- Action: Tap Cyan to fill the right side of the canvas up to the horizon line.
- Action: Use remaining White cups to fill the "sky" area (upper middle) if the target image requires it, or use it to finish the umbrella tip.
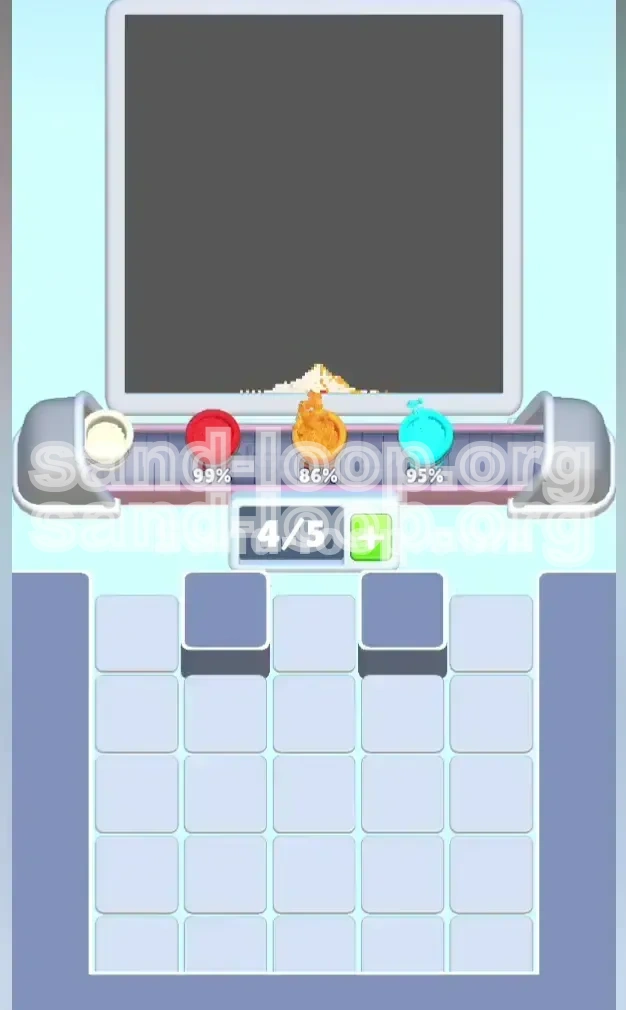
Phase 5: The Solar Finale (Moves 71+)
The final stretch. The tray should be mostly empty except for the bottom right corner.
- Target: Top Right Corner.
- Resources: You should have saved 1 Orange and 1 Red cup from the very bottom right of the tray for this.
- Action: Tap Orange to fill the sun body.
- Action: Tap Red to create the sun's rim/corona.
- Cleanup: If you have any lingering Cyan cups, dump them in the top center to complete the sky.
4. Color Order Strategy: Processing the Palette
The "Order of Operations" is the secret weapon in Sand Loop. Processing colors in the wrong order is the number one reason players get stuck with a full tray and no moves.
Priority Tier 1: The Excavators (Orange & Red)
Even if you don't need the color yet, you must tap Orange and Red cups if they are sitting on top of critical colors (like Blue). Treat these as "Trash" that needs to be removed to unlock the good stuff. Do not hoard them.
Priority Tier 2: The Structural Base (Dark Blue)
Dark Blue is your most valuable resource. It is the scarcest color in the tray (only 3-4 cups usually). It defines the boundary between sea and sky. It must be tapped the moment it is accessible, or you risk it getting buried behind fresh spawns.
Priority Tier 3: The Volume Fillers (Cyan & White)
These colors make up the bulk of the image (Water and Umbrella). You process these to keep the canvas rising. However, you can afford to let these sit in the tray for a few seconds while you dig for Blue.
Priority Tier 4: The Detailers (Reserved Red/Orange)
This is the exception to the "Excavator" rule. You need to mentally mark one specific Red and one specific Orange cup from the bottom right of the tray as "Do Not Touch." These are for the final Sun details. Never use these for general digging.
The Flow State Sequence
理想的点击序列应该是:
1. Dig (Top Orange/Red)
2. Base (Dark Blue)
3. Build (Cyan/White Stripes)
4. Cap (Sun Details)
5. Key Tips & Common Mistakes to Avoid
Understanding the theory is good, but avoiding the pitfalls is how you actually win. Here are the specific mistakes that ruin Level 9 runs.
Mistake: The "Stripe Bleed"
The Error: Tapping Red, then tapping Red again immediately because it looks like there is room.
The Fix: The Red sand has a viscosity delay. It takes a split second to settle. If you double-tap, you will merge two stripes into one wide blob. Always pause for 0.5 seconds between Red taps to let the texture settle.
Mistake: Ignoring the Tray Physics
The Error: Focusing only on the canvas and ignoring that the tray is shifting.
The Fix: The game is called "Sand Loop" for a reason. When you clear a cup from the top, the cups below slide up. Always look at what is coming next from the bottom of the column, not just what is currently available.
Mistake: Premature Sun Building
The Error: Seeing the Orange cups and immediately filling the Sun in the top right.
The Fix: If you build the Sun first, you lose the Orange cups needed to dig out the columns hiding the Blue Horizon. You must use the top-row Orange cups for digging/foundation first. Save the bottom-right Orange for the Sun.
Mistake: The "Full Slot" Panic
The Error: Letting your holding slots (0/5) fill up completely with random colors.
The Fix: Keep 1 slot open at all times. If you are holding 4/5 colors and none fit the current gap, pick one that is "least wrong" and dump it in a corner. You can usually bury mistakes under later layers. A full tray means Game Over.
Mistake: Misaligning the Horizon
The Error: Dumping Dark Blue too early or too late, resulting in a jagged horizon line.
The Fix: The horizon is a flat line. Ensure your canvas has filled up with sand to the exact level of the horizon before you dump the Dark Blue. If you dump it while the canvas is empty, it will pool at the bottom and disappear.
6. Speed Run & Optimization Guide
Once you have mastered the logic, you might want to aim for a faster time or a higher score. Here is how the pros handle Level 9.
The "Rapid Tap" Foundation
At the very start (Move 1-3), you can tap the three top Orange buckets almost simultaneously. Since they all go to the "Beach" area at the bottom, the order doesn't matter. Tapping them fast clears the board 2 seconds quicker.
Parallel Processing
Don't wait for the Red sand to finish flowing before looking for the next White cup. While Red is flowing, scan the tray for the location of the next White cup. Your eyes should always be 2 moves ahead of your hands.
The "Blue Tunnel" Shortcut
In Column 1, if you see a stack of White cups blocking the Blue, do not tap them one by one if you don't need the White yet. Instead, check if you can bypass them by focusing on Column 2's Blue first. Sometimes creating the horizon from the right side (Col 2) is faster than digging through Col 1.
Pre-loading the Slots
If you know you need a Red for the umbrella and a Blue for the water, try to have one of each in your holding slots before you clear the space for them. This minimizes the downtime between filling one section and starting the next.
Efficiency Metrics
A perfect run of Level 9 typically takes about 45-60 seconds. If you are going over 2 minutes, you are likely hesitating too much on color choices. Trust the logic: Orange (Top) -> Dig, Blue (Bottom) -> Horizon, Rest -> Fill.