
Level 102
HARDHow to solve Sand Loop level 102? Get instant solution for Sand Loop 102 with our step by step solution & video walkthrough. Sand Loop 102 tips and guide.
Play Sand Loop Now
Experience the puzzle challenge firsthand
Game Screenshots
Sand Loop Level Guides
Sand Loop Level 102: Complete Walkthrough & Strategy Guide
Level Overview: The Dual-Tone Split
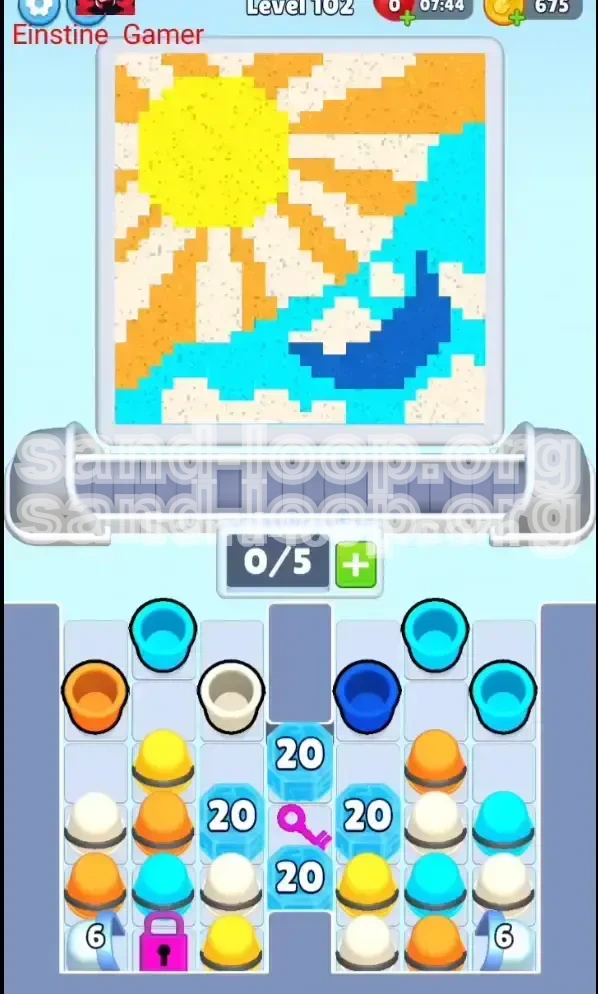
Welcome to Level 102 of Sand Loop. This stage is designed to test your ability to manage two conflicting themes: a blazing, high-intensity Sun section on the top-left and a fluid, color-sensitive Ocean section on the bottom-right. Unlike previous levels where you could focus on one area at a time, this level forces you to multitask between breaking a heavy physical barrier and preparing for precise color logic.
The level is structurally divided by a massive central Ice Pillar. This obstacle acts as a gatekeeper, preventing you from accessing the bottom-left generator until a specific quota of cups has been processed. You will face a "supply bottleneck" where space is tight, and the wrong color placement can clog your conveyor belt instantly.
Primary Objectives
- Destroy the Central Ice Pillar: You must process 20 cups successfully to shatter the ice wall blocking the Pink Key.
- Acquire the Pink Key: This item is essential for unlocking the Yellow and White color supply required for the Sun and Clouds.
- Execute the "Sea Crescent" Logic: Accurately place Dark Blue pigment within a Cyan background without running out of specific Dark Blue cups.
- Manage Board Space: Keep at least one slot open in your tray (4/5 occupancy) to prevent soft-locks during the rapid-fire opening phase.
Difficulty Analysis
This level is rated Hard primarily due to the "Ice Tax." You are forced to play with limited resources for the first 40% of the match. If you waste early Yellow or Orange cups on the wrong zones, you will not have enough inventory to complete the Sun details later. Furthermore, the Dark Blue crescent in the water requires precise timing; it accounts for less than 5% of the total pixel area but consumes 20% of your focus.
Phase 1: The "Ice Tax" Strategy
Understanding the Hit Counter Mechanic
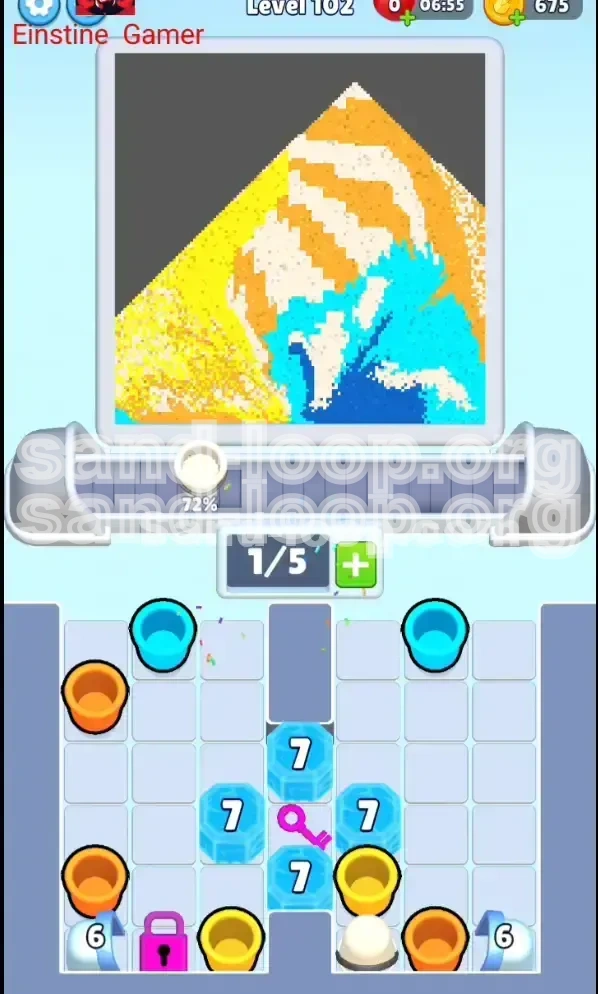
The giant Ice Blocks in the center of the screen display a number: 20. This is not a health bar, but a completion counter. It does not matter which colors you use to lower this number; your only goal here is throughput. Every single cup that leaves your conveyor belt and enters the picture reduces this count by one.
Actionable Tip: Do not try to be precise during this phase. Do not aim for specific pixel edges. Simply fill any cup that appears and launch it. Speed is your only priority. The faster you clear cups, the sooner you regain board control.
The 4/5 Rule: Avoiding Deadlocks
Your tray has 5 slots. If you allow all 5 slots to fill up with cups that do not match the current sand stream color, the game enters a deadlock state where you cannot make a move.
Mathematical Tip: Keep your capacity at 80% (4/5 slots filled). By maintaining one empty slot, you give yourself a buffer to cycle through incoming cups until a matching color appears. If you are holding 5 cups, you are at the mercy of the RNG (Random Number Generator) for the next color.
Opening Hand Optimization
At the start, the game usually feeds you Cyan and Orange. Since the top-left Sun is inaccessible (blocked by logic/ice) and the bottom-right water is open, prioritize filling the large Cyan ocean areas first.
- If you see Cyan: Fill it immediately and dump it into the bottom-right ocean.
- If you see Orange: You can use these to start roughing in the Sun rays, but don't obsess over details yet.
- If you see Dark Blue: Be careful. Do not use Dark Blue on the main ocean body. Save it or place it only if you are 100% sure of the location.
Handling the "Left-Side" Starvation
During the first 20 cups, the left side of your tray (near the future Pink Lock) is functionally useless for storage. You are essentially playing a game of Tetris with only half the board available.
Tactical Advice: Use the right side of your tray for holding cups you intend to use soon. Use the left side for cups you plan to discard or fill quickly. Do not let cups linger on the left side, or they will block the falling Pink Key later, causing a momentary panic that can break your rhythm.
Mistake to Avoid: Perfectionism
The most common failure in Phase 1 is trying to paint the Sun perfectly while the Ice Counter is still high. Do not do this. The Ice Pillar restricts your movement. Accept that the first 15-20 cups will be "messy." You can fix overlaps and errors in Phase 3. Right now, your only job is to feed the machine.
Phase 2: The Key and Lock Logic
The Pink Key Event
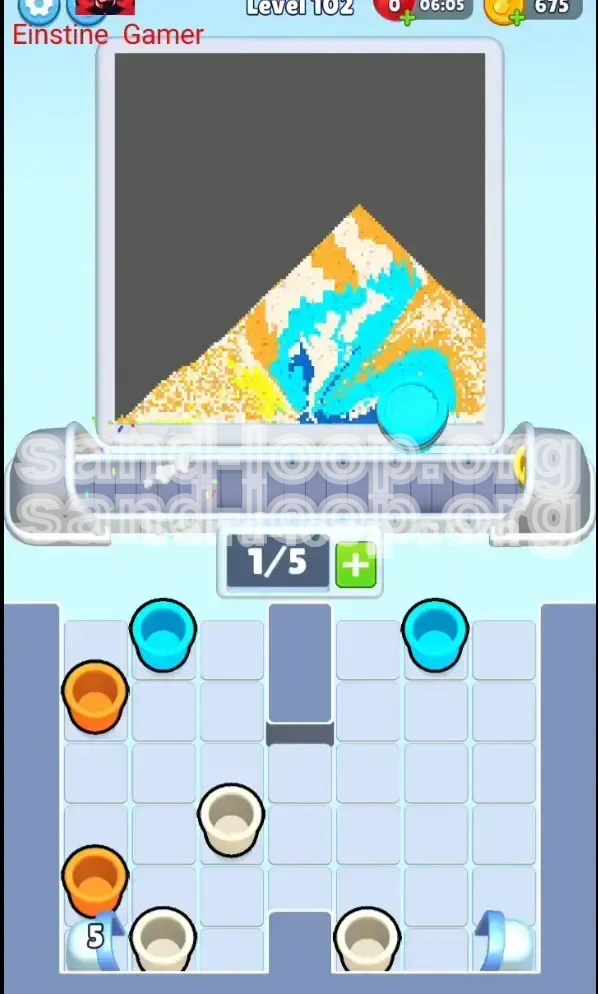
The moment you process the 20th cup, the Ice Pillar shatters. This is a critical audio-visual cue. A Pink Key will drop from the top of the screen.
Important: You do not need to catch the key with a cup. It will automatically fall into your inventory or trigger the unlock sequence. However, you must ensure your tray is not so cluttered that you miss the visual confirmation of the unlock.
Unlocking the "6-Generator"
With the key collected, the Pink Lock in the bottom-left corner opens. This reveals a generator labeled "6". This number indicates the approximate number of high-value cups (Yellow and White) it will produce.
This is the turning point of the level. The bottleneck is removed. You now have access to the colors required to finish the level (Yellow for the Sun core, White for clouds/foam). The difficulty shifts from Speed to Management.
Board Expansion
Destroying the ice connects the left and right halves of your tray. This significantly increases your maneuverability.
Strategy: Now that the board is whole, start moving "useless" cups (e.g., excess Blue when you are working on the Sun) to the far edges of the tray. Keep the center clear for active merging and filling.
Color Cycling Expectations
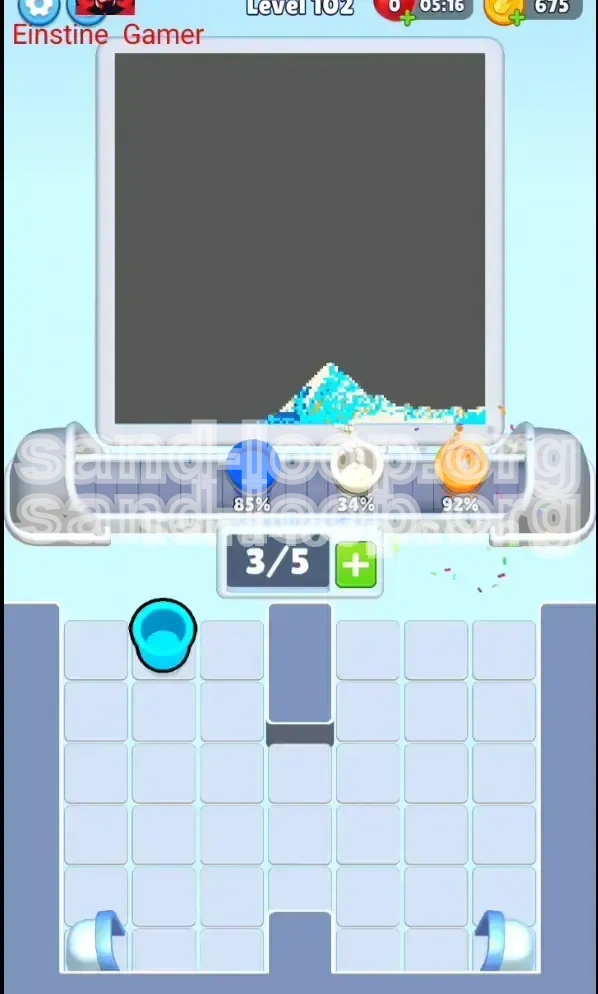
Post-unlock, the dispenser behavior often shifts. It will try to balance the remaining unpainted areas.
- Expect: A heavy influx of Yellow (Sun core) and White (Clouds).
- Expect: Intermittent bursts of Dark Blue (The trap).
If you see a long stream of Yellow, do not panic. This is the game giving you the tools to finish the hard part. Fill them quickly to clear space for the delicate Blue work coming up.
Phase 3: The "Sea Crescent" Color Puzzle
The "Danger Zone" Explained
The bottom-right section of the canvas is not just blue water. It contains a specific Dark Blue Crescent shape (representing a shadow or deep wave). This is the hardest part of the level.
The challenge is this: Dark Blue cups are rare. The dispenser will mostly give you Cyan (light blue) for the water. If you accidentally use your precious Dark Blue cups on the Cyan areas, you will soft-lock the level because you won't have enough Dark Blue left to fill the crescent.
The Color Hierarchy
To succeed, you must mentally categorize the colors by priority:
- Dark Blue (Highest Risk): Must be saved exclusively for the crescent shape. Never use it on the generic water.
- Yellow & Orange (High Volume): Needed for the large Sun areas. These are plentiful but easy to mess up placement-wise.
- White (High Precision): Used for small clouds and sea foam details.
- Cyan (Filler): The bulk of the ocean. Safe to use almost anywhere on the bottom half.
Timing the "Nozzle"
The sand nozzle moves automatically. To place the Dark Blue correctly, you must sync your cup release.
Technique: Hold the Dark Blue cup. Watch the nozzle. Wait until it passes over the specific crescent area in the water. Do not click while it is over the Cyan water. This requires patience. If the nozzle is moving away from the target, you can gently shift the cup in your tray to "stall" time, but do not merge it if you can avoid it.
Using "Spacers" to Slow Down
If the nozzle is moving too fast and you are about to miss the Dark Blue spot, use a White Cup as a spacer.
How to do it: Pick up a White cup and hold it, or move it back and forth between slots. This buys you 1-2 seconds of real-time, allowing the nozzle to complete its loop and come back to the target zone. This is an advanced technique but crucial for the 100% completion score.
Correcting Errors
What if you accidentally splash Dark Blue on Cyan? Don't panic. It looks ugly, but it's not a game-over. You can usually cover a misplaced Dark Blue pixel with a Cyan cup later. However, you cannot easily cover a misplaced Cyan pixel inside the tiny Dark Blue crescent. The hitbox is too small. Prioritize accuracy for the Dark Blue above all else.
Advanced Tactics & Speed Run Tips
Speed Running: The "Chaos Method"
If you are aiming for a speed record (under 60 seconds), ignore the "Spacer" technique.
The Speed Strat: During the "Ice Tax" phase, do not wait for perfect alignment. Slightly overlap colors. It is better to have a 90% complete picture that passes the threshold than a perfect picture that takes 3 minutes. Focus purely on clearing the 20-cup bottleneck as fast as humanly possible.
Zone Isolation Practice
Train your eyes to ignore the Sun while you are working on the Water, and vice versa.
- Sun Mode: Ignore the bottom of the screen. Only look for Yellow, Orange, and White.
- Water Mode: Ignore the top. Only process Cyan and Dark Blue.
Switching your visual focus helps prevent the "Brain Lag" caused by the split composition. Trying to watch the whole screen at once leads to decision paralysis.
Inventory Management Mathematics
There are roughly 60-80 total pixels in this level.
- Sun (Yellow/Orange): ~35% of pixels.
- Sky/Clouds (White): ~15% of pixels.
- Water (Cyan/Dark Blue): ~50% of pixels.
Because Water takes up half the board, Cyan cups will be the most common drop. Do not fight this. Let Cyan dominate your tray early. Save your limited tray space for the rarer Yellow and Dark Blues when they appear.
Stuck Solutions: What to Do When You Can't Win
If you find yourself stuck with a full tray and no moves:
- Check for merges: Can you combine two small cups of the same color to make space?
- Check the "Nozzle Cycle": If you are stuck for more than 5 seconds, you are likely out of sync. Wait for the nozzle to complete a full pass.
- The "Nuclear Option": If the level is genuinely unsolvable (e.g., you placed Cyan in the Dark Blue crescent and have no Dark Blue left), you must restart. Don't waste time hoping for a miracle drop that isn't coming.
Final Review Checklist
Before submitting your result, do a quick visual scan:
- Is the Sun Core solid Yellow? (No gaps)
- Is the Dark Blue Crescent visible inside the Cyan water?
- Are the clouds/foam White?
- Did you clear the Ice Pillar? (Obviously yes, or you wouldn't be at the end)
Level 102 is a test of rhythm and precision. Master the opening rush, and the rest is just painting by numbers. Good luck!