
Level 108
HARDHow to solve Sand Loop level 108? Get instant solution for Sand Loop 108 with our step by step solution & video walkthrough. Sand Loop 108 tips and guide.
Play Sand Loop Now
Experience the puzzle challenge firsthand
Game Screenshots

Sand Loop Level Guides
Level Overview: The Golden Hamster Challenge
Welcome to the endurance test of Sand Loop. Level 108, often referred to as "The Orange Hamster" level, presents a unique puzzle that prioritizes resource management over speed. Unlike previous stages where you might rely on horizontal swipes, this level forces a vertical playstyle due to a massive structural obstruction.
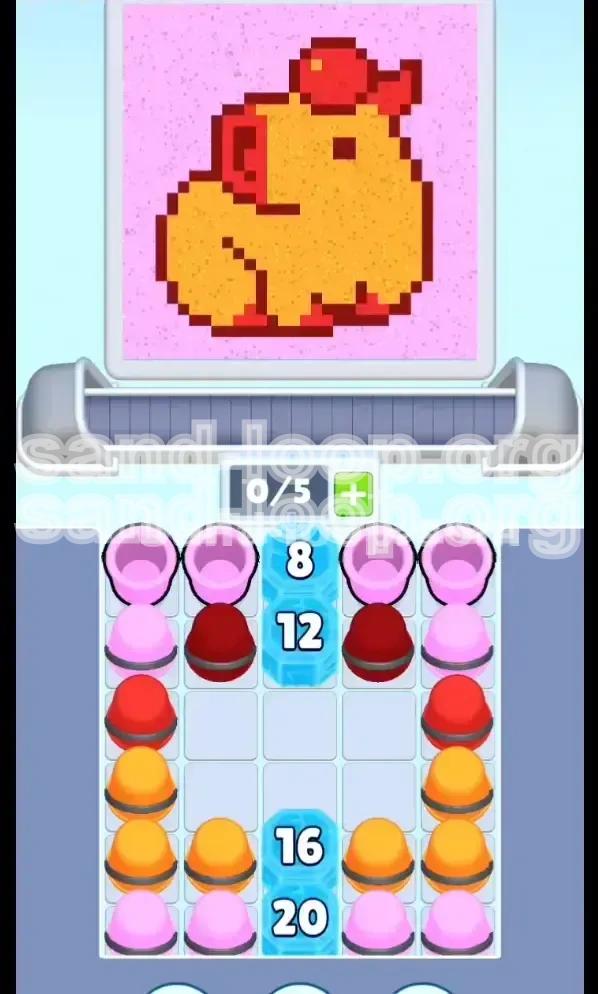
The objective is to paint a pixelated Golden Hamster (or Capybara) wearing a red beret against a vibrant pink sky. The visual challenge is high, requiring you to maintain distinct color separation between the orange body, pink background, and red accessories without letting them bleed into a muddy mess.
The defining feature of this level is the "Ice Pillar" located in columns 3 and 4. This vertical pillar of Countdown Ice Blocks acts as a dam, holding back the majority of your sand and forcing you to drain the outer edges of the supply tray before you can access the center. If you ignore the flow of the conveyor belt, you will find yourself with a full belt of unusable cups, leading to a game over.
Success in Level 108 requires a strict pour order, careful monitoring of your cup count (Capacity), and a disciplined approach to breaking the ice barriers. You are not just painting; you are excavating the supplies you need to finish the art.
Clear Objectives: What You Need to Achieve
Objective 1: Break the Central Ice Pillar
Your primary mechanical goal is to shatter the vertical column of ice blocking your supply tray. This pillar consists of four layers with countdowns: 8, 12, 16, and 20.
You must perform exactly 56 successful pours to clear the entire pillar. This means you cannot be picky with your color selection in the early game; you must process cups rapidly from the available outer columns to lower these counters. Focus on keeping the belt moving rather than finding the "perfect" color.
Objective 2: Establish the Background Layer
The image requires a solid foundation of Pink sand to form the sky and frame the creature. This sand must settle at the bottom and edges of the canvas.
You need to deposit approximately 30-40% of your total sand volume as Pink before the main Orange body covers it. If you pour Orange too early, the pink background will be obscured, and you will fail to achieve the coverage percentage required for the stars.
Objective 3: Precise Red Placement
Red sand is scarce in this level and is critical for the "Danger Zones": the feet and the beret. Because Red is buried in the middle rows of the tray, you must time your pours so that Red hits the canvas while there is still room at the bottom (for feet) or top (for the hat).
Misplacing the Red (pouring it too late) will result in the feet floating inside the Orange body or the hat blending into the background. You must prioritize unblocking and pouring these Red cups the moment they become accessible.
Objective 4: The Orange Monolith
The hamster's body is massive, requiring a dense pyramid of Orange sand in the center of the canvas. This is the "meat" of the level.
You must build this layer *after* the Pink background and Red feet are established. The challenge here is managing the sheer volume of Orange cups without clogging your belt, ensuring the sand piles high enough to meet the level's height requirements without spilling over the edges.
Step-by-Step Instructions: The Perfect 3-Star Walkthrough
Phase 1: The Rapid-Fire Pink Foundation (Turns 1-8)
As soon as the level starts, ignore the center columns. Your supply tray is loaded with Pink cups in the top corners (Columns 1 and 5).
Immediately load and pour these Pink cups. Do not wait. Your goal is to churn through the first 8 cups as fast as possible. This serves two purposes: it creates the necessary Pink base at the bottom of the canvas, and it triggers the shattering of the first Ice Block (Countdown 8).
Do not worry about precision here. Speed is key. Clearing these top rows is the only way to unblock the Red cups sitting in the second row.
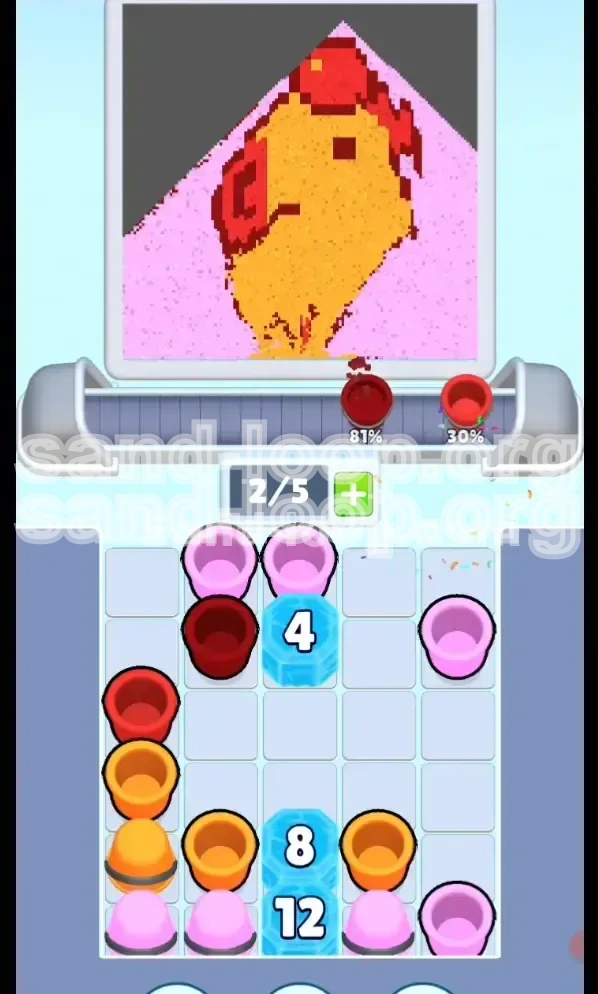
Phase 2: Sniping the Red Feet (Turns 9-15)
Once the first layer of ice shatters, you will gain access to the middle rows of the tray. Look immediately for the Red cups.
These Red cups must be poured *now*. If you delay and start pouring the Orange cups that appear next, the Orange sand will bury the bottom of the canvas, and when you finally pour the Red, it will land on top of the Orange body, ruining the "feet" detail.
Prioritize Red over Pink or Orange during this brief window. You want the Red sand to settle deep at the bottom corners to form the legs.
Phase 3: The Orange Avalanche (Turns 16-40)
With the Red feet secure, the "12" and "16" Ice Blocks should be crumbling. You will now see a massive influx of Orange cups.
This is the main building phase. Alternate between tapping Orange cups from the left side (Column 1) and the right side (Column 5) to keep the sand pile balanced on the canvas.
Critical Warning: Do not tap the center columns yet if they are still blocked by ice. Stick to the outside edges. Keep the belt moving. You need to build a tall, stable pyramid of Orange in the center. If you see a Pink cup, grab it to touch up the background edges, but focus 80% of your attention on flowing the Orange.
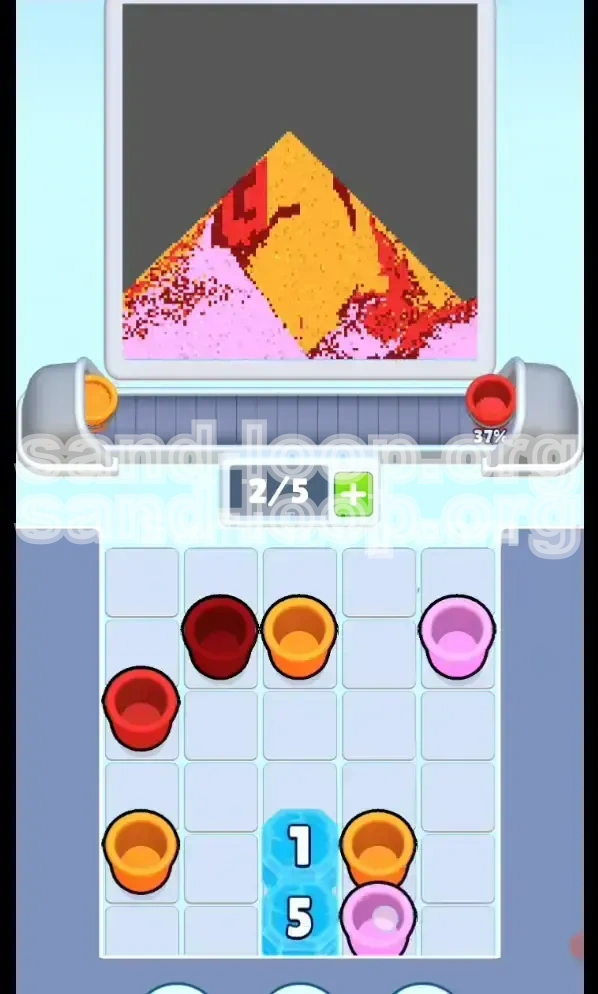
Phase 4: The Final Countdown (Turns 41-56)
By now, you should be approaching the bottom of the tray (the "20" Ice Block). The outer columns should be nearly empty.
The final cups will be a mix of the remaining Pink and Red (for the hat) and the last bits of Orange. Rule of Thumb: Finish your Orange pours before you start the final Red/Pink sequence.
If you pour the final Red (the hat) while there is still Orange falling, the hat will be buried. Ensure the Orange body is "done" visually, then use the final Red and Pink cups to cap off the top of the hamster's head and fill the upper corners of the sky.
Color Order Strategy: The Layering Logic
The "Base-Up" Approach
Sand physics dictates that the first sand you pour lands at the bottom of the pile, and subsequent layers land on top. Therefore, you must process colors in the reverse order of the image's visual layering.
1. Background (Pink): Although the sky is "behind" the hamster, in 2D sand art, the background often forms the base layer or the container for the image. We pour Pink first to secure the edges and the bottom "ground" of the image.
The "Feature-Specific" Insertion
2. Details (Red): The Red feet are an intrusion into the background but sit below the body. They must be poured after the initial Pink base but before the main Orange body begins to rise. This "sandwich" method locks the feet in the correct position.
The "Body" Filler
3. Foreground (Orange): This is the bulkiest material. It must be poured last (mostly) so it sits on top of the background and around the feet. The only exception is the very last Red pour (the hat), which goes on top of the Orange head.
Correct Order Summary: Pink (Base) -> Red (Feet) -> Orange (Body) -> Red/Pink (Hat/Touch-ups).
Key Tips for Level 108 Mastery
Monitor Your Capacity Meter
Your conveyor belt capacity is limited to 5 cups. In this level, because you are often working with deep stacks of single colors (like a column of 4 Oranges), it is very easy to accidentally tap a 5th cup and jam the belt.
Tip: Always keep 1 slot open on your belt. If you have 5 cups and you see a color you don't need immediately (like an extra Pink when you need Orange), let it pass or discard it if the mechanic allows, rather than picking it up and blocking the flow.
Balance the Left and Right
Since the center is blocked, you will be pulling heavily from the far left and far right columns.
Tip: Do not drain Column 1 completely before touching Column 5. If you empty one side entirely, the physics of the sand pile will become lopsided, potentially causing the sand to slide off the canvas or creating an unstable pyramid. Alternate taps: Left, Right, Left, Right.
Don't Fear the "Wrong" Color
Sometimes, you will be forced to pour a Pink cup when you really want to be pouring Orange, just to break the Ice Block.
Tip: Trust the process. A little extra Pink on the edges is better than a stuck belt. The "Pink Sky" in this level is very forgiving, so using Pink cups to keep your combo or break ice is a valid strategy.
Common Mistakes to Avoid
Mistake 1: Ignoring the Ice Countdown
Many players focus so much on the "Orange Hamster" that they ignore the Ice Pillar numbers. They see Pink cups and stop tapping, waiting for Orange.
Why this fails: If you stop tapping, the Ice doesn't break. The game stalls. You must treat the Ice Block numbers as a timer that you are racing against. Keep pouring, even if it means using "suboptimal" colors temporarily.
Mistake 2: Burying the Red Feet
This is the most common error. Players build up a massive Orange pile first, then try to add the Red feet later.
Result: The Red sand lands on top of the Orange belly. The hamster looks like it is bleeding or floating. The feet must touch the "ground" (the bottom of the canvas), which means they must be poured while the sand pile is still low.
Mistake 3: Clogging the Belt with Orange
In Phase 3, there are rows of 3-4 Orange cups in a row. Players often tap them all in rapid succession.
Result: The belt fills with 5 Orange cups. Suddenly, a crucial Red cup appears in the "Next" slot, but you can't pick it up because your belt is full. You are forced to pour the excess Orange, burying the Red opportunity you were waiting for.
Solutions for When You Are Stuck
Problem: The Ice Pillar Won't Break
If you are stuck at Ice Block "12" or "16" and the number isn't going down, you are likely overthinking your color choices.
Solution: Go into "panic mode." Tap everything. Stop looking at the canvas. Look at the *Supply Tray*. If a cup is accessible (not blocked by ice), tap it. You need to brute-force the counter down. Once the ice shatters, you can return to precision.
Problem: The Colors Are Mixing into Brown
If your Hamster looks muddy or brown instead of vibrant Orange, your layers are bleeding into each other.
Solution: You are likely pouring too slowly, allowing the sand to spread flat, or you are alternating colors too frequently (Pink-Orange-Pink-Orange). You need to segregate the phases. Do all your Pink, then do your Red, then do your Orange. Distinct layers prevent mixing.
Problem: Ran Out of a Specific Color
If you are missing the Red for the hat or the Pink for the sky.
Solution: It is likely trapped behind the final Ice Block (20). You must clear the remaining cups in the outer columns (1 and 5) to trigger the final shatter. The game won't give you the final "detail" colors until you have processed the bulk "body" colors.
Speed Run Tips & Shortcuts
Pre-Loading the Belt
Before you even pour the first cup, look at the layout. If the top row is all Pink, you can pre-load your belt with 2 Pink cups while the animation for the first pour is still settling. This micro-optimization saves seconds over the course of the level.
The "Double Tap" Rhythm
For the massive Orange section (Phase 3), don't tap gently. Develop a rhythm of "Left-Right" double taps. Since the colors are the same, you don't need to aim precisely. Just keep the flow constant. The faster you pour, the faster the pile builds, and the sooner you unlock the final Red hat.
Skip the Perfectionism
For a speed run, you only need 80% accuracy to pass. If the background has a few Orange spots, ignore it. Focus entirely on getting the Red feet and the Red hat in the right order. If a detail is slightly off, keep moving. Stopping to fix a pixel costs too much time.