
Level 112
EXPERTHow to solve Sand Loop level 112? Get instant solution for Sand Loop 112 with our step by step solution & video walkthrough. Sand Loop 112 tips and guide.
Play Sand Loop Now
Experience the puzzle challenge firsthand
Game Screenshots
Sand Loop Level Guides
Level 112: Country Cottage - Comprehensive Strategy Guide
Stage Overview and Core Mechanics
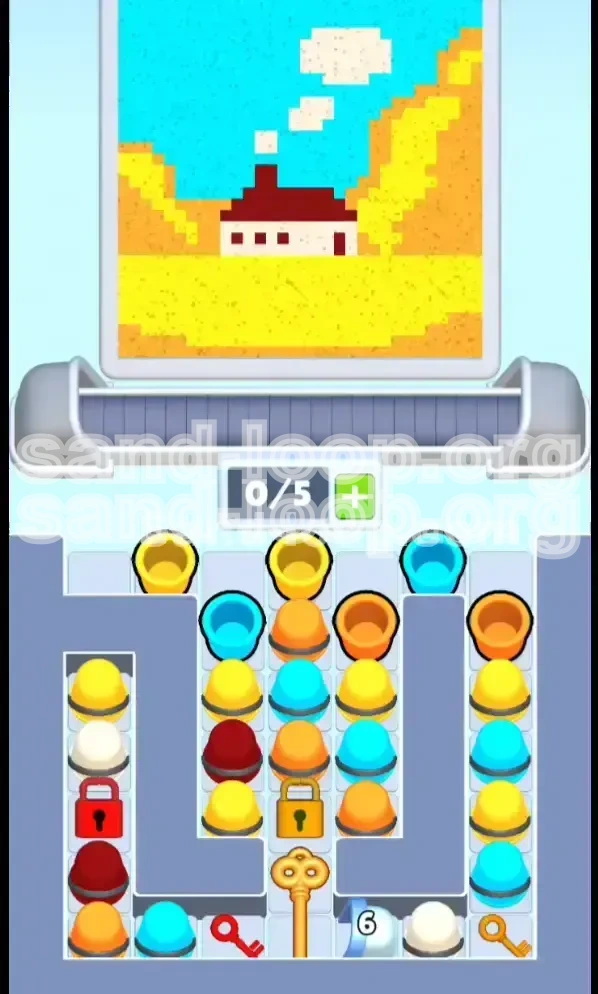
Welcome to Level 112, "The Country Cottage." This stage is a significant difficulty spike compared to previous levels, primarily due to a rigid logic-lock system that governs the center of the board. Visually, you are painting a serene landscape featuring a white house with a deep red roof situated on rolling yellow and orange hills, all set against a bright cyan sky.
Why This Level Is Difficult
The challenge here isn't just about matching colors; it's about resource management. The layout is "cramped," meaning the trays are tightly packed. You cannot rely on random luck. The "White" cups, essential for the house walls and smoke clouds, are the most scarce resource and are locked behind two separate barriers: a Red Lock and a Golden Lock. Wasting even a single White cup on the wrong pixel will result in a soft lock, forcing you to restart the level.
The Logic Chain Dependency
Understand that this level operates on a strict linear dependency chain. You cannot access the center (Yellow/Orange) until you clear the Right. You cannot access the Left (White/Red) until you clear the Center. Attempting to bypass this order will leave you stuck with empty trays and unpainted pixels.
Victory Conditions
To achieve a 3-star rating, you must clear the board without overflowing any single color tray. This requires precision, specifically when handling the "Sky" phase where Blue and White must be mixed in a specific ratio to avoid painting over the smoke clouds.
Essential Preparations: Understanding the Color Palette
The Cyan Sky (High Volume)
Cyan covers approximately 40% of the top canvas. It is abundant on the right side of the tray. While it feels good to clear these early, you must pace yourself. If you drain all your Cyan too early, you won't have the filler needed to manipulate the belt later in the level.
The Yellow and Orange Hills (Medium Volume)
These colors form the base of the image. They are located in the central column but are trapped behind the Golden Lock. Orange is specifically used for the edge shading of the hills, while Yellow is the primary filler. You will need to unlock the Golden Key to access these.
The Deep Red Roof (Low Volume)
Deep Red is a critical, low-count resource found on the left side. It is used exclusively for the roof and chimney. Because of its scarcity, you must ensure that no Red cups are wasted on the background or ground pixels.
The Critical White Cups (Scarce Resource)
White is the "bottleneck" resource. It is needed for the house walls (mid-layer) and the smoke clouds (top-layer). The game gates these behind the Red Lock. If you accidentally use a White cup intended for the smoke on the house wall, you will not have enough left to finish the sky.
The Key-Lock Topography
Visualize the tray as a map:
- Right Side: Unlocked. Contains the Bronze Key.
- Center: Locked by Gold. Contains the Bronze Lock and the bulk of Yellow/Orange.
- Left Side: Locked by Red. Contains the White cups and Red Key.
Phase 1: Breaking the Initial Bottleneck (The Right Side)
Identify the Entry Point
At the start, do not touch the center or left columns. They are frozen. Focus 100% of your attention on the Right Column. This is the only area where the physics engine is active.
The Bronze Key Strategy
Your immediate objective is to reach the Bronze Key located at the bottom right corner. To get there, you must systematically drain the stack of Orange, Yellow, and Blue cups sitting above it.
Execution: Controlled Burning
Tap the top cups of the right column. Do not worry if these colors don't match the very bottom of your art canvas perfectly yet. The priority is movement. By clearing these 3-4 cups, you lower the stack height, allowing gravity to slide the Bronze Key into a collectible position.
Unlocking the Center
Once the Bronze Key is exposed, tap it immediately. This will trigger the mechanism to open the Bronze/Gold Lock situated in the top-center of the tray. This is the turning point of the level.
Common Mistake: Premature Center Access
Some players try to tap the center column before unlocking the Gold Lock. This does nothing. You must wait for the metallic "clink" sound indicating the lock has disengaged before attempting to move the central cups.
Resetting the Belt
While clearing the right side, keep an eye on your conveyor belt. Try to keep it relatively empty (max 2 cups) so that when the center column unlocks and floods the belt with Yellow, you have space to organize them.
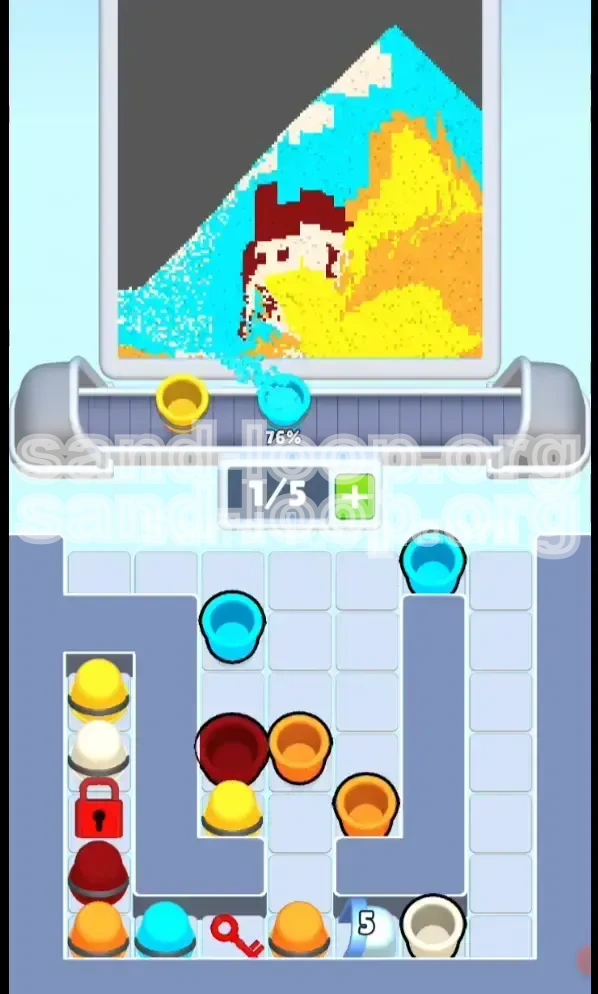
Phase 2: Dominating the Center and Ground
Managing the Flood
Once the Golden Lock is gone, the massive central stack of Yellow and Orange cups will become loose. This will likely flood your belt. Do not panic. This is the "Ground" phase of the painting.
Painting the Hills
Use the Yellow cups to fill the bottom 30% of the canvas. Use the Orange cups specifically for the curved edges of the hills to create depth. Since this area is large, you can process these cups quickly. This is the safest part of the level.
Exposing the Red Key
As you drain the central Yellow/Orange stack, the physical space in the tray shifts. This movement often causes the cups in the Left Column to slide or settle, revealing the Red Key at the bottom left. If the Red Key doesn't appear immediately, continue draining the center until the left column is no longer compressed by the center bulk.
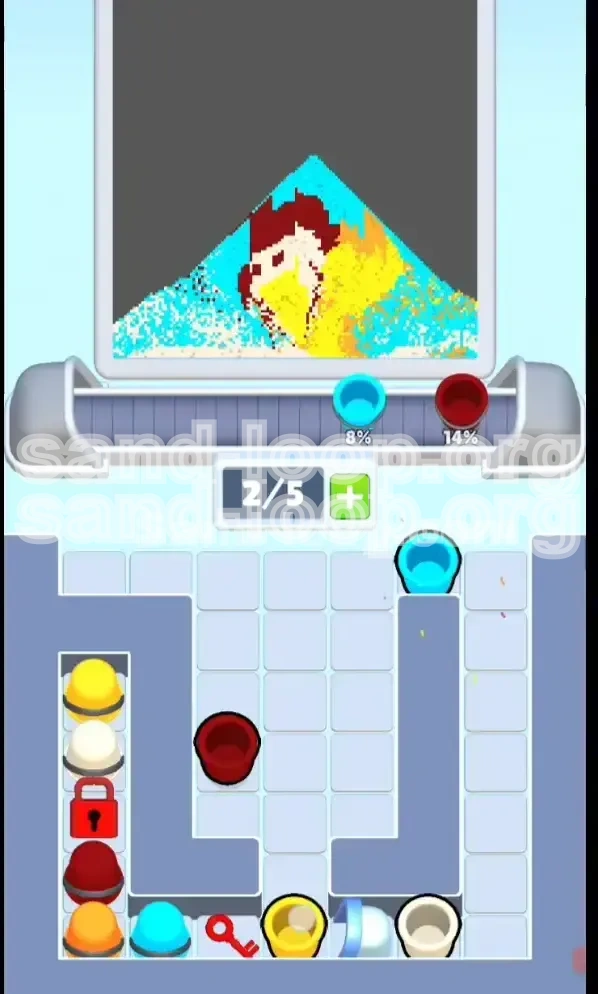
Triggering the Red Lock
Tap the Red Key the moment it is clickable. This unlocks the Left Column, granting you access to the most precious resources: the White cups and the Deep Red.
Preparation for Phase 3
Before you start grabbing from the left, ensure your Yellow and Orange trays are nearly empty. You want the belt cleared of ground colors so you can focus exclusively on the structure colors (Red and White) without distractions.
Phase 3: The Danger Zone (Sky, Smoke, and Structure)
The Structure Priority (Red and White)
With the left column open, you now have access to Deep Red and White.
- Grab the Deep Red: Immediately pour the Deep Red onto the roof. Do not use it anywhere else.
- Reserve White: You need to calculate your White usage. The house walls are large; the smoke clouds are small. Prioritize the walls first, but ensure you leave exactly 3-4 White cups for the final smoke phase.
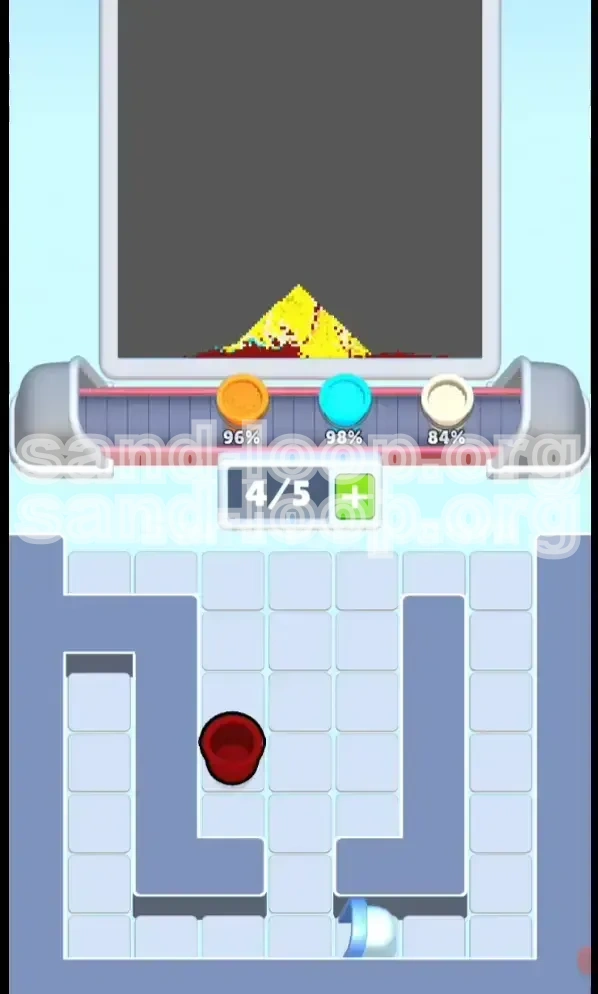
The Cyan Sky Base
Now, switch back to the Cyan cups from the right side or any remaining Blue/Orange. Fill the upper atmosphere. This creates the backdrop for the smoke. Stop pouring Cyan when you reach the vertical coordinate where the smoke clouds begin.
The Smoke Cloud Precision Maneuver
This is the hardest part of Level 112. The smoke clouds are white pixels floating in the blue sky.
- Timing: You must insert a White cup onto the belt exactly when the fill line is at the bottom of a smoke cloud.
- The Sandwich: The sequence should be Cyan (fill sky up to cloud) -> White (fill cloud) -> Cyan (resume sky).
Managing the Queue
During the sky phase, keep your queue short (1-2 cups max). If you have a queue of 5 Cyan cups and a White cup comes up, you might be forced to paint Cyan over the smoke area before you can get to the White cup. Short queues allow for instant reactions.
Visual Guide: Smoke Placement
Look at the preview screen. The smoke puffs are distinct circles. Do not try to "guess" where they are. Watch the canvas fill up. As soon as the blue color touches the bottom pixel of a smoke puff, pause and swap to White.
Speed Run Tips and Optimization
The "Side-First" Rule
Never waste a tap on the center or left in the first 5 seconds. Conditioning your muscle memory to go "Right -> Center -> Left" will save you seconds and prevent accidental mis-taps on locked columns.
Belt Management
Treat the conveyor belt like a FIFO (First In, First Out) queue, but with manual override. If a White cup appears early (before you need it), do not send it to the canvas unless you have a safe spot for it. If you can't use it yet, let it sit on the belt until the sky is ready, but be careful not to block the queue.
Key Prediction
You don't need to see the key to know it's there. Once you've cleared the top 3 cups of the right column, spam-tap the bottom right corner area where the Bronze Key spawns. This saves you the split-second it takes for the animation to finish and the key to become interactable.
Color Combining Efficiency
If you have a Yellow cup and an Orange cup on the belt, and the art requires a gradient, tap the Yellow first (background) then Orange (edge). Doing this in reverse might force you to over-paint the edge with the background color, wasting time.
Resetting the Level
If you make a mistake in the first 10 seconds (e.g., wrong color choice), it is faster to force-close the app or hit restart immediately than to try and recover. Recovery in logic levels like 112 usually takes longer than a fresh start.