
Level 115
HARDHow to solve Sand Loop level 115? Get instant solution for Sand Loop 115 with our step by step solution & video walkthrough. Sand Loop 115 tips and guide.
Play Sand Loop Now
Experience the puzzle challenge firsthand
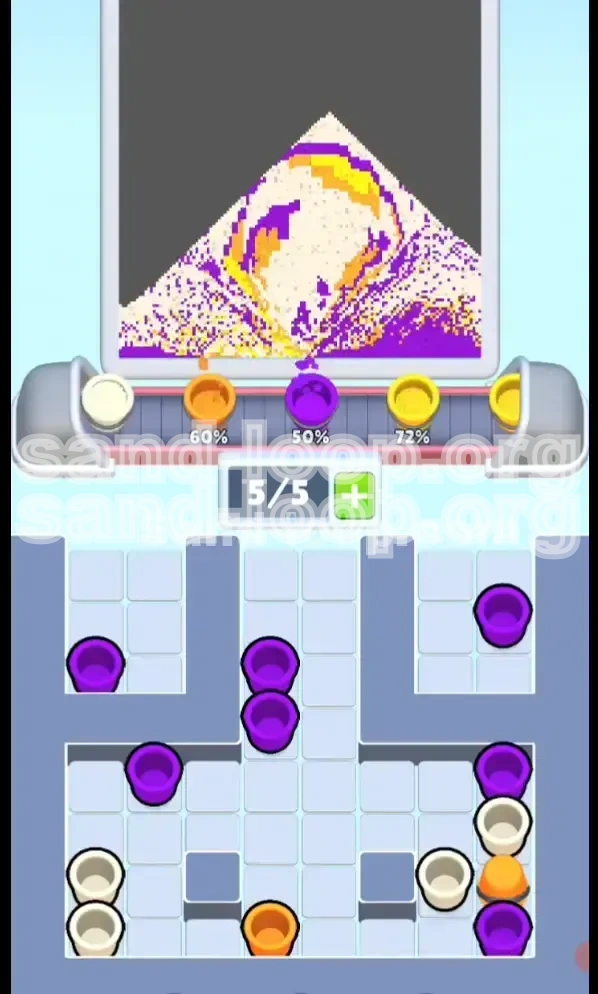
Game Screenshots


Sand Loop Level Guides
Level Overview: The Masked Girl Challenge
Welcome to Level 115 of Sand Loop, a stage that visually presents a serene portrait of a blonde girl in a white cat mask but mechanically functions as a high-stakes logistical puzzle. This level is notorious for causing "soft locks" where players run out of essential colors because they prioritized easy taps over strategic clearing.
The visual composition is dominated by four distinct colors: a deep Purple background, bright Yellow hair, White mask details, and Orange shading. The challenge is not the pixel art itself, but the delivery system. You are dealing with a heavily fortified supply tray where the most critical resources (White and Orange for the face) are locked behind high-health Ice Blocks in the center column, while the sides are flooded with easily accessible Purple and Yellow.
The Logic vs. Speed Dilemma
Do not be fooled by the timer. While this appears to be a speed level, treating it as one is the fastest way to fail. The central "Ice Column" mechanic throttles your input speed. If you play this like a standard level—clearing whatever is available first—you will clog your 5-slot conveyor belt with background Purple and hair Yellow. By the time the central blocks break, you will have no conveyor space left to collect the White and Orange needed for the face, leading to a contaminated canvas.
The Ice Block Mechanic
The defining feature of this stage is the "Health" system attached to the ice blocks. The two upper blocks have 8 HP, and the two massive lower blocks have 20 HP. These numbers do not represent taps; they represent the number of sand cups you must process from that specific column to shatter them. This creates a funnel: you are forced to process a specific amount of volume before the "floodgates" of the lower reservoir open.
The Mystery Block Variable
Adding a layer of RNG (Random Number Generation) to the level are the grey Mystery Blocks sitting directly atop the 8 HP ice. You cannot see the color inside these until you tap them. In a level that requires strict inventory management, gambling on a color that might clog your belt can be disastrous. You must maintain a "buffer slot" in your conveyor to mitigate bad luck from these blocks.
The Central Pyramid Theory
Understanding how sand fills the canvas is crucial here. Sand falls from the conveyor into a central pyramid shape. The center of your belt feeds the center of the portrait (the face), while the edges of the belt feed the sides (hair and background). If your belt is full of Purple when you are trying to paint the center of the face, the Purple will bleed into the Orange/White zones, creating a muddy, unfixable mess.
Why Supply Management Wins Games
In Level 115, the supply tray is split into "Easy Access" (Sides) and "Hard Access" (Center). The Easy Access sides contain 70% of the volume but only 40% of the critical colors. The Hard Access center contains 30% of the volume but 60% of the critical detail colors. Winning requires suppressing the urge to clear the sides and focusing entirely on drilling the center.
Clear Objectives: Your Mission Checklist
To achieve a 3-star clear on Level 115, you need to follow a strict set of goals that prioritize resource unlocking over simple clearing. Your primary objective is to breach the central defense before worrying about the background.
Objective 1: Breach the "8 HP" Gate Immediately
From the very first second, your target is the center column. You must clear the initial cups sitting on top of the 8 HP Ice Blocks. Your goal is to reduce the ice health to zero as fast as possible to unlock the Mystery Blocks and the path to the lower reservoir.
Objective 2: Manage the Mystery Block Risk
Once the top layer is clear, you will face the grey Mystery Blocks. Your objective here is not just to clear them, but to clear them while maintaining at least 2 empty slots in your conveyor belt. This ensures that if you pull a useless color, you can dump it immediately without blocking the flow of the next tap.
Objective 3: Isolate the Face Colors (Orange/White)
After the 8 HP blocks break, you will gain access to the 20 HP blocks. Your objective is to clear the cups resting on these blocks. These cups are predominantly White and Orange. You must aim these taps so they land in the center of your conveyor belt to ensure they hit the face/mask area of the canvas.
Objective 4: Crack the "20 HP" Reservoir
This is the grind phase. You must chip away at the 20 HP blocks. This requires processing roughly 20-25 cups from the center column. Do not switch to the sides yet. You need the massive volume of sand stored behind these blocks to finish the level.
Objective 5: The Final Background Sweep
Only after the face is 90% complete and the center reservoir is open should you look at the Left and Right columns. These columns are full of Purple (Background) and Yellow (Hair). By saving them for last, you use them to fill in the remaining empty space rapidly without risking contamination of the detailed face area.
Objective 6: Maintain Purity
Avoid "bleeding" colors. Purple is the enemy of White, and Yellow is the enemy of Orange. Keep your background colors separated from your detail colors throughout the run.
Step-by-Step Instructions: The Execution Guide
Follow this exact sequence of actions to navigate the level. Do not deviate from the order of operations, as the level is designed to punish side-clearing.
Phase 1: The Center Drill (Start - 15% Progress)
Ignore the left and right columns completely. Look directly at the top center of the supply tray. You will see a stack of Yellow and Purple cups sitting on top of the blue Ice Blocks. Tap these cups immediately.
- Action: Tap the top-center cups (Yellow/Purple).
- Result: These enter your conveyor and start filling the bottom corners of the canvas (Dress/Shoulders).
- Goal: Clear these until you expose the grey Mystery Blocks sitting on the Ice.
Phase 2: The Mystery Gamble (15% - 25% Progress)
With the top layer gone, you are now face-to-face with the grey Mystery Blocks and the 8 HP Ice.
- Prerequisite Check: Ensure your conveyor belt has 3 or fewer cups. You need empty space.
- Action: Tap the grey Mystery Blocks.
- Reaction: If they reveal White or Orange, great. If they reveal Purple, and you don't need Purple, tap them onto the canvas immediately to free up the slot.
- Outcome: Clearing these blocks reduces the Ice health. Once the "8" blocks shatter, the path to the lower "20" blocks is open.
Phase 3: The 20 HP Grind (25% - 60% Progress)
This is the most critical phase. You are now working on the cups sitting on the massive 20 HP blocks.
- Focus: The center column only.
- Action: Rapidly tap the cups revealed by the shattered "8" blocks. These are mostly White (Mask) and Orange (Shadow).
- Aiming: Watch where these cups land on the conveyor. Try to tap when the conveyor is centered so the sand falls on the girl's face. If they fall to the side, they will paint her hair instead of her skin.
- Persistence: Keep tapping until the "20" blocks shatter. This releases the bulk of your sand supply.
Phase 4: The Side Sweep (60% - 100% Progress)
At this point, the center of the canvas (Face and Mask) should be mostly complete. The center reservoir is open, but you may now start looking at the sides.
- Action: Begin aggressively tapping the Left and Right columns.
- Composition: Left is usually Orange/Purple mix. Right is usually Yellow/Purple mix.
- Usage: Use the Yellow to fill the remaining hair gaps. Use the Purple to fill the background corners.
- Final Polish: Alternate between the newly opened center reservoir and the sides to finish the final 10% of the details.
Phase 5: The Cleanup
Once all blocks are shattered and the conveyor is moving freely:
- Scan: Look for pixel errors on the canvas (e.g., a Purple pixel in the White mask).
- Fix: If you see a mistake, you need to "paint over" it. Collect the correct color from the tray and tap it to fix the error. This is why keeping the conveyor flowing is vital—you need access to all colors at the end for touch-ups.
Color Order: The Palette Priority System
Understanding the priority of colors is essential because you will often have multiple colors available on the tray. Knowing which one to pick first prevents gridlock.
Priority 1: White (The Mask & Highlights)
White is your most critical color. It is used for the cat mask and the eyes. White is also the most unforgiving; if you accidentally drop Purple or Orange on the white mask, the error is glaringly obvious.
- Strategy: If you see a White cup, tap it immediately.
- Placement: Ensure it lands in the center stream.
Priority 2: Orange (The Shadows & Depth)
Orange is used for the skin shadows and the depth of the hair. It acts as the bridge between the bright Yellow hair and the White skin.
- Strategy: Tap Orange cups immediately after White.
- Danger: Do not let Orange cups sit on the belt too long, or they might get pushed to the side and mix with the background.
Priority 3: Yellow (The Hair)
Yellow has a large area to cover (the hair), but it is very forgiving. If a few Purple pixels land in the Yellow hair, it's barely noticeable.
- Strategy: Process Yellow after White and Orange are secured.
- Tip: You can use Yellow to "buffer" your belt if you have empty slots and no White/Orange available.
Priority 4: Purple (The Background)
Purple is the "filler" color. It covers the largest area but requires the least precision. However, it is the most dangerous if mishandled because it will contaminate the lighter colors.
- Strategy: Only tap Purple when you have absolutely no other choice, or when the conveyor is empty and the face is already protected by existing layers of White/Orange.
- Late Game: Purple is your best friend in the last 10% of the level to plug background holes.
Processing Order Summary
The ideal processing flow is: White > Orange > Yellow > Purple.
Never reverse this order (e.g., Purple first). If you fill your belt with Purple, you will be forced to dump it on the canvas, likely on top of the delicate face areas you haven't painted yet.
Key Tips, Common Mistakes, and Speed Run Strategies
This section covers the finer details of optimization and error correction. Mastering these tips will help you transition from a struggling player to a speed runner.
Common Mistake: The "Side-First" Trap
The most common error in Level 115 is tapping the Left and Right columns first because they look easy.
- The Mistake: Clearing the side columns floods your belt with Purple and Yellow.
- The Consequence: When you finally break the center Ice, the White cups appear, but your belt is full of Purple. You either have to dump the Purple (wasting time/space) or force the White onto the canvas, which might land in the wrong spot because the belt is crowded.
- The Fix: Exercise patience. Leave the sides alone until the center is flowing.
Stuck Solutions: Dealing with a Clogged Belt
If you find yourself with a full belt of useless colors (e.g., you have 5 Purple cups but need White):
- Emergency Dump: Look for the largest area of "incorrect" color on your canvas (e.g., a corner that is supposed to be Purple but is empty). Tap your cups there to free up slots.
- The "Overpaint" Technique: If you have a Purple cup and the only empty spot is in the Yellow hair, tap it there anyway. You can fix it later by "overpainting" with Yellow. It's better to keep the belt moving than to get stuck waiting for a perfect color match.
Speed Run Tips: Advanced Techniques
For players aiming for top leaderboard times:
- Pre-loading: As the Mystery Blocks are cracking (animation delay), you can queue up a tap on the next block slightly before the animation finishes. This saves milliseconds.
- Belt Awareness: Don't stare at the canvas. Stare at the conveyor belt. Anticipate where the next cup will land. If the belt is moving left, and you need a cup to go right, wait a split second for the belt to center before tapping.
- Simultaneous Breaking: Sometimes, tapping a cup on the left immediately followed by a cup on the right can cause a physics glitch that sends sand to the center. Experiment with rapid alternating taps to "finesse" the landing zone.
Key Tips for the "20 HP" Block Grind
The middle section of the level feels slow. Here is how to speed it up:
- Don't Aim for Perfection: During the 20 HP grind, don't worry if every single pixel lands perfectly. You just need volume. Get the sand on the canvas.
- Use the "Stream": If you tap fast enough, the sand creates a continuous stream. Once the stream is established, it creates a "column" effect that protects the pixels underneath from contamination by side colors. Use this to your advantage to build a safe zone for the face.
Final Advice: Patience over Panic
Level 115 is a test of discipline. The game tempts you with easy taps on the sides. The timer pressures you to go fast. But the level rewards the player who slows down, focuses on the center, and manages their inventory like a pro. Stick to the center, ignore the sides until the end, and the Masked Girl will be yours to complete.