
Level 123
HARDHow to solve Sand Loop level 123? Get instant solution for Sand Loop 123 with our step by step solution & video walkthrough. Sand Loop 123 tips and guide.
Play Sand Loop Now
Experience the puzzle challenge firsthand
Game Screenshots
Sand Loop Level Guides
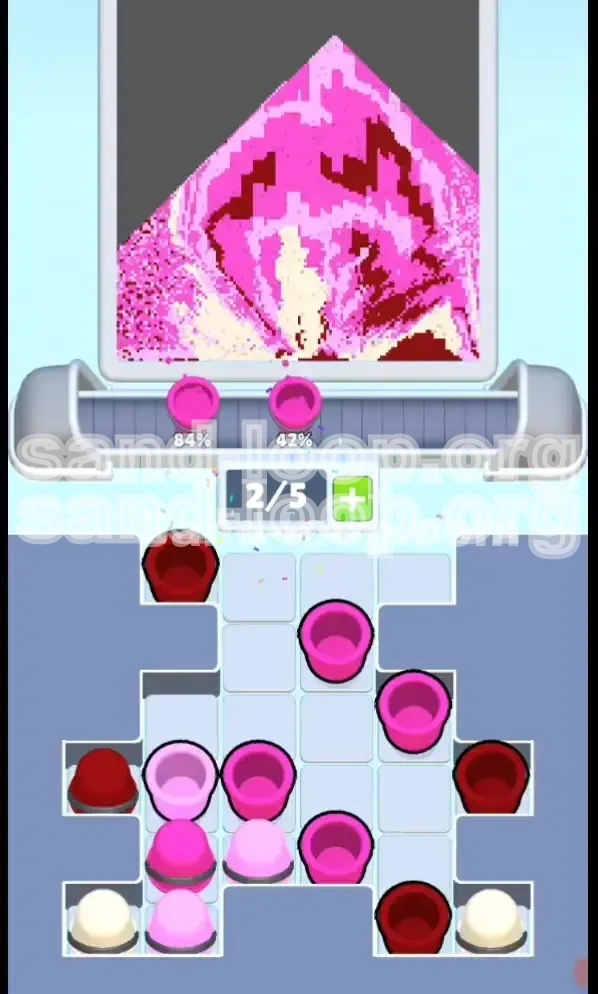
Level 123 Overview: The Pink Crystal Formation
Welcome to Level 123 of Sand Loop, officially known as "The Pink Crystal Formation." This stage marks a significant shift in gameplay dynamics, moving away from the frantic speed-based challenges of previous levels and into the realm of precise structural logic. The visual design presents a stunning, jagged crystalline structure that resembles a cross-section of abstract geological mineral, dominated by gradients of deep crimsons, vibrant magentas, soft pastels, and creamy whites.
The Core Challenge: Dependency Logic
The primary difficulty in Level 123 is not the speed of your reflexes, but the management of dependencies. The level is constructed as a vertical puzzle where specific layers of the artwork are mathematically locked behind others. You cannot simply pick any color you wish; the game forces a linear progression through the color spectrum. Failing to respect this order will result in a clogged conveyor belt and an impossible-to-complete puzzle.
Visual Analysis: Depth and Gradients
The target art is deceptive. While it appears to be a simple cartoonish crystal, it is actually a study in depth. The artwork requires four distinct shades to create a 3D effect under 2D constraints. The challenge is compounded by the game's lighting engine, which makes the lighter shades (Pastel Pink and Cream) appear almost identical when viewed on the conveyor belt. You will need to rely on their position in the supply tray rather than just visual inspection to distinguish them.
The "Buried Asset" Mechanic
Unlike earlier levels where cups are scattered, Level 123 utilizes a "Deep Stack" mechanic. In the supply tray, the cups you need last are buried physically underneath the cups you need first. This creates a physical blockade in the UI. You must clear the top layers of dark sand before the game will even allow you to tap or access the lighter cups underneath. This makes hoarding cups impossible and demands a strict flow management strategy.
Belt Management Constraints
Your conveyor belt capacity is limited to the standard 5 slots. However, given the strict pouring order required here, your effective capacity is closer to 3 active slots. You must always keep an eye on your queue. If you fill the belt with Dark Maroon cups while the dispenser is stuck on White, you have no choice but to restart the level. This stage punishes players who tap buttons without checking the active dispenser nozzle.
Lighting and Color Blindness Considerations
Be aware of the "Danger Zone" colors. The transition between the main body (Hot Magenta) and the highlights (Pastel Pink) involves hues that are very close in value. The game engine often requires a specific "mix" or sandwiching of these colors to fill the jagged edges of the crystal. Relying solely on peripheral vision can lead to grabbing a Pastel cup when you needed a Magenta one, instantly breaking your combo or filling the wrong section.
Clear Objectives: Winning Conditions
To successfully complete the Pink Crystal Formation and achieve a three-star rating, you must accomplish several specific goals within a single run. This level is less about raw speed and more about the efficiency of your color management.
Primary Goal: Complete the Crystal Structure
Your ultimate aim is to fill the canvas entirely, starting from the dark outer edges and finishing at the white center base. The crystal must look contiguous, meaning there should be no gaps between the Dark Maroon edges and the Hot Magenta body. Any unpixelated gaps will result in a failed level. The objective is to pour the four colors in the specific sequence required by the layering logic.
Secondary Goal: Maintain Pouring Continuity
You must avoid "dry spells" where the nozzle is active but no cup is underneath it. Letting the sand spill into the void wastes time and can mess up the synchronization of the puzzle. Ideally, you want a new cup to arrive at the pouring station just as the previous one is finishing, maintaining a 100% fill efficiency rating throughout the stage.
Tertiary Goal: Minimize Tray Juggling
A common mistake is overfilling the belt and having to frantically move cups back and forth between the belt and the tray. Your objective should be to tap a cup only when you are ready to pour it. Minimizing the movement of cups reduces the risk of accidentally placing a Pastel Pink cup in front of a Deep Maroon dispenser, which would force a restart.
Hidden Objective: The Perfect "No-Spill" Run
While not explicitly stated, the game rewards you for keeping the dispensing area clean. Avoid the scenario where a cup finishes pouring, and the dispenser continues to spew sand for a split second before the next cup arrives. This requires precise timing of your taps to ensure the next cup slides in exactly when the previous one hits 100% capacity.
Efficiency Metric: Color Transition Speed
The game tracks how quickly you adapt when the dispenser changes color. If the dispenser switches from Magenta to Pastel Pink, and you sit idle waiting for a cup to arrive, your efficiency score drops. The objective is to anticipate the color switch based on the fill percentage of the current cup and have the next cup queued up and ready before the nozzle even changes color.
Step-by-Step Walkthrough: The Crystal Protocol
This section provides the exact sequence of moves required to conquer Level 123. Follow these steps in order, and do not skip ahead. The logic here assumes a standard belt speed and standard dispenser timing.
Phase 1: The Deep Maroon Initialization
The level begins with the dispenser set to Dark Maroon (Color A). Your immediate goal is to establish the outline of the crystal.
- Action 1: Immediately tap the Deep Maroon cup located at the top-left corner of the tray. This is the starting point of the level.
- Action 2: Quickly tap the second Deep Maroon cup located in the middle-right column. Do not tap any other cups yet.
- Logic: These two cups act as the "lid" for the columns underneath. Pouring them first shifts the gravity of the tray, unlocking the Hot Magenta cups trapped beneath them. Pouring them early also establishes the dark borders of the crystal, which are necessary to define the shape before the fill colors are added.
- Note: Do not worry if the Maroon cup finishes pouring and the dispenser sits idle for a second. This is preferable to tapping a Magenta cup too early and clogging the belt with the wrong color.
Phase 2: The Hot Magenta Flood (Mid-Game)
Once the Maroon edges are set, the nozzle will switch to Hot Magenta (Color B). This is the main body of the crystal.
- Action 1: Identify the stack of Hot Magenta cups in the central column. They are now exposed because you removed the Maroon caps.
- Action 2: Tap two Magenta cups in rapid succession to get them onto the belt.
- The 50% Rule: Watch the first Magenta cup as it pours. Wait until the fill indicator hits 50%. Then tap the next Magenta cup. This spacing is crucial.
- Why? The Magenta section of the art is large. If you space the cups too close, the nozzle might switch to the next color before the Magenta section is fully filled. If you space them too far, you waste time. The 50% gap ensures a seamless fill.
- Correction: If you see a gap forming in the crystal body (where the sand didn't reach), you need to tap a third Magenta cup immediately to patch it before moving to the next phase.
Phase 3: Excavating the Pastel Pink Layer
After the Magenta body is formed, the dispenser will attempt to shift to Pastel Pink (Color C). This is the most dangerous part of the level.
- The Trap: The Pastel Pink cups are buried at the bottom of the tray. You physically cannot reach them yet if the tray hasn't shifted.
- Action 1: If there are any remaining Magenta or Maroon cups on the belt, you must clear them now. Ideally, you are already clean.
- Action 2: As the tray shifts (gravity drops items down), tap the Pastel Pink cup that becomes available in the bottom-left quadrant.
- Precision Pour: The Pastel Pink is used for jagged highlights. You need to be precise. If you pour this over the Magenta body, it blends. If you pour it over the empty space, it looks wrong. Target the inner edges of the crystal.
- Warning: Do not touch the Cream/White cups yet. They are the "bedrock" of the tray. Tapping them now will bring them to the front, blocking the Pastel Pink cups you still need to access.
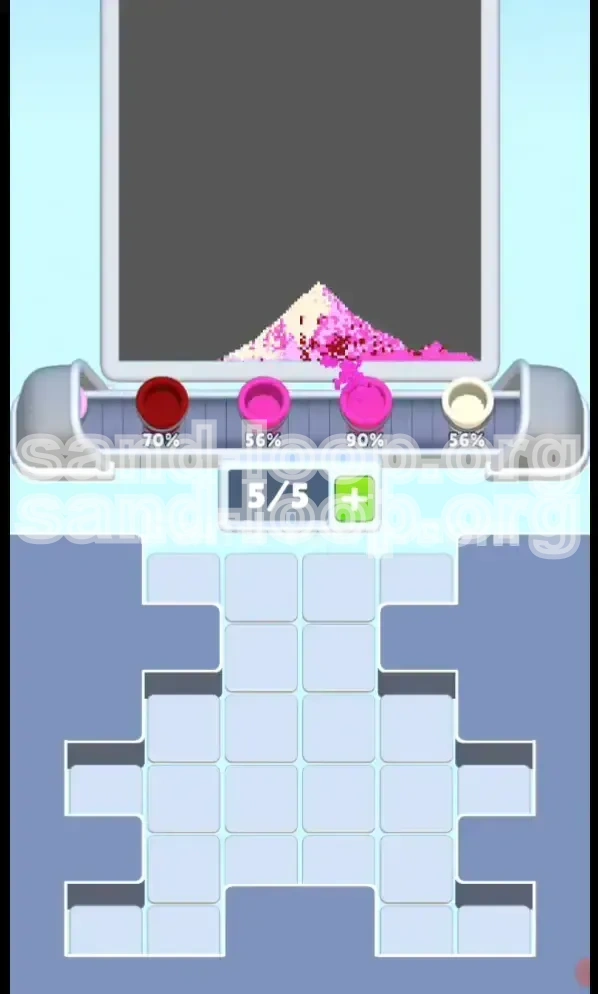
Phase 4: The Cream/White Finale
The final phase is the shortest but requires the most accuracy. The dispenser will turn to Cream/White (Color D).
- Action 1: Look at the bottom-center of the crystal art. This is the target.
- Action 2: Tap the final two Cream cups located in the bottom-right corner of the tray.
- Simultaneous Tap: Unlike the earlier phases, you can tap both of these at the same time.
- The Finish: Because the Cream section is small and these are the last cups needed, you don't need to worry about spacing or queue management. Just pour them out.
- Completion: Once the white tip is filled, the level will trigger the completion animation immediately.
Color Order Logic: Understanding the Spectrum
Level 123 is a lesson in color theory as it applies to gravity. The game enforces a specific processing order that mimics the physical layering of the art. Understanding this logic helps you react when the pressure is on.
1. Deep Maroon (The Shadow Layer)
Function: Depth and Definition.
Processing Rule: Always first.
Reasoning: This color defines the perimeter of the crystal. In the supply tray, these cups sit on top of the "stack" (or in the corners). They must be cleared to release the inner colors. If you try to save a Maroon cup for later, it will sit on your conveyor belt taking up a slot, preventing you from accessing the lighter colors needed for the middle of the level.
2. Hot Magenta (The Base Layer)
Function: Volume and Mass.
Processing Rule: The Heavy Flood.
Reasoning: This color makes up 60% of the image. It is the "meat" of the puzzle. The dispenser will stay on this color for the longest duration. Your strategy here changes from "tapping" to "managing flow." You are trying to keep the nozzle raining Magenta sand without interruption to cover the large surface area quickly.
3. Pastel Pink (The Highlight Layer)
Function: Texture and Edge.
Processing Rule: The Transition.
Reasoning: This is the trickiest color. It sits between the dark body and the white core. In the tray, it is buried under the Magenta. You cannot access it until the Magenta cups are gone. The difficulty here is visual; Pastel Pink is easily confused with the Cream color if you are rushing. Always double-check that the nozzle has switched to this lighter pink before tapping these cups.
4. Cream/White (The Core Layer)
Function: Brightness and Focus.
Processing Rule: Last only.
Reasoning: This represents the light source hitting the center of the crystal. It is the smallest area but the highest contrast. Because these cups are at the absolute bottom of the tray stack, they are the last ones you can physically reach. The game logic prevents you from pulling them out early. Accept this delay and focus on the earlier layers first.
The "Mixing" Danger Zones
Sometimes, two colors are required simultaneously. For example, where the Magenta body meets the Pink highlight, the game might demand a "blend." If you pour pure Magenta, it looks too flat. The trick is to let the Magenta cup finish, and immediately introduce the Pink cup while the Magenta sand is still settling. This creates a chemical blend in the art that looks smoother than blocky colors.
Dispenser Timing Analysis
The nozzle operates on a cycle. It is programmed to dispense a specific volume of sand before switching. If you are slow to tap the correct cup, the dispenser will switch to the next color, and you might miss your chance to finish the previous section. This is most critical during the transition from Magenta to Pink. If you are late tapping the Pink cup, the dispenser might turn White, and you'll be stuck with White sand trying to fill a Pink section.
Key Tips and Pro Strategies
To master Level 123, you need to move beyond the basic steps and understand the rhythm of the game. These tips are designed to help you manage the chaos and maintain control.
The "Emergency Buffer" Slot Strategy
Never fill your 5-slot belt completely. Always aim to keep 1 slot empty.
The Scenario: Imagine you have 5 cups on the belt. The dispenser is currently on Maroon, but your next 3 cups are Magenta. The nozzle is about to switch. You are stuck. You cannot pour the Magenta yet, and you can't fit the Pastel Pink cup on the belt to prepare for the next color.
The Fix: Keep slot 5 open. This gives you the flexibility to grab a "rescue cup" or trash a blocker if the color switches unexpectedly. It acts as a shock absorber for the rhythm of the level.
Visual Anchoring: Tray Positioning
Stop looking at the art; start looking at the supply tray.
In this level, the position of the cup tells you what color it is more reliably than the color itself (due to the lighting effects). Memorize the map: Top-Left is Dark, Center is Magenta, Bottom-Left is Pink, Bottom-Right is Cream. If you see a cup in the Bottom-Left, assume it is Pink and act accordingly, even if it looks slightly white under the glare.
The "Rhythm Check" Technique
Don't spam tap. Use the sound of the sand to time your inputs.
Listen to the "shhh" sound of the sand pouring. When the sound changes pitch (getting higher pitched as the cup fills up), you know it's almost done. Train yourself to tap the next cup exactly 1 second before the current cup finishes. This "beat" creates a hypnotic rhythm that prevents bottlenecks. If you break the rhythm, the level gets much harder.
Trash Can Usage: When to Cut Losses
Sometimes, you make a mistake and tap the wrong cup (e.g., tapping a Cream cup when you needed Pink).
Don't panic. You have two options:
1. Wait it out: Let the wrong cup pour onto the belt and waste the sand. (Safe, but slow).
2. Trash it: Drag the cup to the trash can immediately. (Fast, but risky).
Recommendation: In Level 123, trash it. The level is long enough that you can recover the time. Pouring the wrong color onto the art usually forces a restart anyway, so trashing the cup is the only viable save.
Understanding "Fill Percentage" Indicators
Pay attention to the small number percentage on the cup as it fills.
- 0-30%: Safe to queue up the next cup.
- 30-70%: The "Sweet Spot" for timing the next tap.
- 70-99%: Danger zone. Do not tap a new cup now, or you might mis-time the nozzle switch.
Use these metrics to automate your decision making. If you see a cup at 40%, you know you have a safe window of about 2 seconds to look at the tray and plan your next move.
Dealing with "Jammed" Pours
Sometimes the physics engine glitches, and a cup doesn't pour smoothly.
If you see the sand "piling up" instead of spreading out, it means the angle is wrong or there is a UI lag. Stop tapping immediately. Let the current cup finish. Adding another cup to a jammed belt only exacerbates the glitch and often leads to a game-over screen where the sand overflows the cup boundaries.
Common Mistakes to Avoid
Even experienced players fail Level 123 because of bad habits. Recognizing these common pitfalls is the first step to avoiding them.
Mistake 1: The "Color Hoarding" Trap
The Error: Trying to save a Deep Maroon cup for the end of the level to "touch up" the edges.
The Consequence: That Maroon cup sits on your belt for the entire game. It takes up space that is desperately needed for the Pink and White cups later. Eventually, you have to pour it, but by then, the nozzle has moved on to White. You end up pouring Dark Maroon onto a White section, ruining the art.
The Fix: Pour colors immediately when the dispenser matches. Never "save" a cup for later in this level.
Mistake 2: Ignoring the Vertical Stack
The Error: Trying to tap a Cream cup in the first 10 seconds because you see it peeking out from the corner of the tray.
The Consequence: The game physically prioritizes the top layers. Tapping the bottom cup usually fails, or worse, it drags the entire stack with it, clogging your belt with 4 cups you don't need yet.
The Fix: Trust the verticality. You cannot access the bottom layer (Cream) until the top layers (Maroon/Magenta) are cleared. Work top-down.
Mistake 3: The "Simultaneous Tap" Spam
The Error: Tapping 3 or 4 cups at once at the very start because the belt is empty.
The Consequence: You create a "traffic jam." The first cup pours, but the second and third are stuck behind it. If the color changes after the first cup, you are stuck with a belt full of useless cups. You can't trash them fast enough.
The Fix: Tap one cup. Wait for it to start pouring. Tap the next one. Maintain a linear flow.
Mistake 4: Misidentifying Pastel Pink and Cream
The Error: Grabbing a Cream cup thinking it was a Pastel Pink cup because of the stage's bright lighting.
The Consequence: You pour White into a section that is supposed to be Pink. The game considers this an error. Even worse, the White cup is now gone, so when you actually *need* the White for the finale, it's unavailable.
The Fix: Look for the "Pastel" label or check the tray position. Bottom-Left is Pink; Bottom-Right is usually White/Cream. Do not rely on color alone.
Mistake 5: Panic Tapping on "Gaps"
The Error: Seeing a small gap in the Magenta fill and frantically searching for a Magenta cup that isn't there anymore.
The Consequence: You waste valuable seconds scanning the tray, and the dispenser switches to Pink. Now you have a gap that can't be filled because the nozzle is Pink.
The Fix: If a gap appears, you must fill it immediately with the current cup. If the current cup is empty, you have to hope the next color blends well. If not, you must restart. Don't waste time searching; restart quickly if the fill is wrong.
Solutions for When You Are Stuck
So, you are 80% through the level, and you have messed up. The belt is jammed, or you poured the wrong color. What do you do? Here are the emergency protocols.
Scenario A: The "Wrong Cup" on the Belt
Situation: You have a Magenta cup on the belt, but the dispenser has turned Pink.
Solution: You have a split second to act. If the Magenta cup is not yet at the nozzle, drag it to the trash can immediately. This frees up the belt. Then, quickly tap the correct Pink cup from the tray (which should now be available) and get it onto the belt. The window for this is tight—about 2 seconds before the Pink sand starts flowing.
Scenario B: The "Missing Cream" Crisis
Situation: You are at the final phase, but you accidentally used one of the Cream cups earlier in the level. You are one cup short.
Solution: Unfortunately, Level 123 does not generate extra cups. If you are missing the final Cream cup, the level is mathematically impossible to finish. The solution is to restart immediately. Do not wait for the timer to run out. Recognizing the fail state early saves time and frustration.
Scenario C: The Clogged Conveyor
Situation: You have 5 cups on the belt, and none of them match the current dispenser color. The belt is stuck.
Solution: This is the "Gridlock" scenario. You cannot trash them fast enough one by one. The strategy: Focus on the cup at the very front (closest to the nozzle). Trash it. The belt will move. Look at the new cup at the front. Is it the right color? If yes, let it pour. If no, trash it. Repeat this until you clear the blockage. You will lose a lot of sand, but it's the only way to unsnarl the belt.
Scenario D: The "Incomplete Fill" Glitch
Situation: You poured the correct color, but the art section didn't fill up 100%. It's stuck at 95%.
Solution: This often happens with the Magenta layer. If you have no more Magenta cups, you might be able to use the Pastel Pink cup to finish it. The Pink is light enough that if you pour it over the 5% gap, it might register as "filled" due to color blending logic. It's a gamble, but it's worth trying before restarting. If the gap is dark (Maroon), Pink won't work, and you must restart.
Speed Run Tips and Shortcuts
Once you have mastered the level, you might want to aim for a faster time to earn stars or climb the leaderboards. These advanced techniques optimize your movement.
Advanced Input: "Pre-Tapping"
This is the pro technique for Level 123. Instead of waiting for the belt to move, you tap the next required cup while the current cup is still pouring.
The Logic: As soon as the current cup hits the 80% mark, tap the tray. The game queues the input. The moment the current cup finishes and slides off, the next cup slides on instantly. This eliminates the 1-second delay of human reaction time. Over the course of a 4-minute level, this saves 20-30 seconds.
Pattern Recognition: The Crystal Symmetry
The art is symmetrical. You don't need to check every single pixel.
The Shortcut: Once the left side of the crystal is filled with Magenta, you know the right side requires the exact same amount of sand. You can aggressively tap the remaining Magenta cups without worrying about over-filling, because you know the volume required is identical to what you just did. This allows you to clear the Magenta phase much faster.
Skipping the "Trash" Animation
Trashing a cup takes time (the animation of the bin opening and closing).
The Optimization: If you know you are going to make a mistake (e.g., you tapped the wrong cup), immediately tap the Restart button in the pause menu. In many versions of the game, restarting is faster than watching the trash animation for 2-3 cups and then trying to recover. Learn the "fail threshold"—if you make a mistake in the first 30 seconds, just restart. It's faster than fixing it.
Memorizing the Tray Layout
Stop looking at the colors on the tray. Look at the positions.
The Speedrun Map:
- Top-Left: Always Start (Maroon).
- Center-Right: Secondary (Magenta).
- Bottom-Left: Pre-Finale (Pink).
- Bottom-Right: Finale (Cream).
By memorizing this geometry, you can tap based on muscle memory. Your eyes can stay on the art/canvas to monitor the fill percentage, while your hand automatically goes to the correct corner of the tray for the next color. This separation of vision and input is key to speed running.
Optimizing the Final 10%
The end of the level often drags as players wait for the final few grains of sand to settle.
The Tip: In the final phase (Cream), you can tap the final two cups and then immediately start tapping the "Next Level" or "Finish" button (if enabled) before the sand even hits the bottom of the art. The game registers the "completion" the moment the cups are empty, not necessarily when the sand settles. Aggressively clicking the end screen can shave seconds off your time.