
Level 125
HARDHow to solve Sand Loop level 125? Get instant solution for Sand Loop 125 with our step by step solution & video walkthrough. Sand Loop 125 tips and guide.
Play Sand Loop Now
Experience the puzzle challenge firsthand
Game Screenshots
Sand Loop Level Guides
Sand Loop Level 125: The "Koi Pond" Master Guide
Welcome to the most comprehensive resource for conquering Sand Loop Level 125, the "Koi Pond" challenge. This stage is a significant difficulty spike for many players, primarily because it tests your ability to manage extreme resource scarcity rather than just your reflexes. In this level, you are presented with a beautiful scene of two red Koi fish swimming through water, but translating this image into sand requires a strict logical order. If you approach this by simply pouring cups as they appear, you will run out of moves before the gate opens. This guide will break down the logic, the color order, and the precise steps needed to clear the board with a three-star rating.
Level Overview: Logic Gates and Resource Scarcity
Level 125 is not a standard color-matching stage; it is a "Key Unlocking" puzzle. The board is divided into three distinct sections: the accessible starting columns, the frozen central keystone, and the locked reserve of resources. Understanding the geography of the tray is the first step to victory.
The 3-Stage Architecture
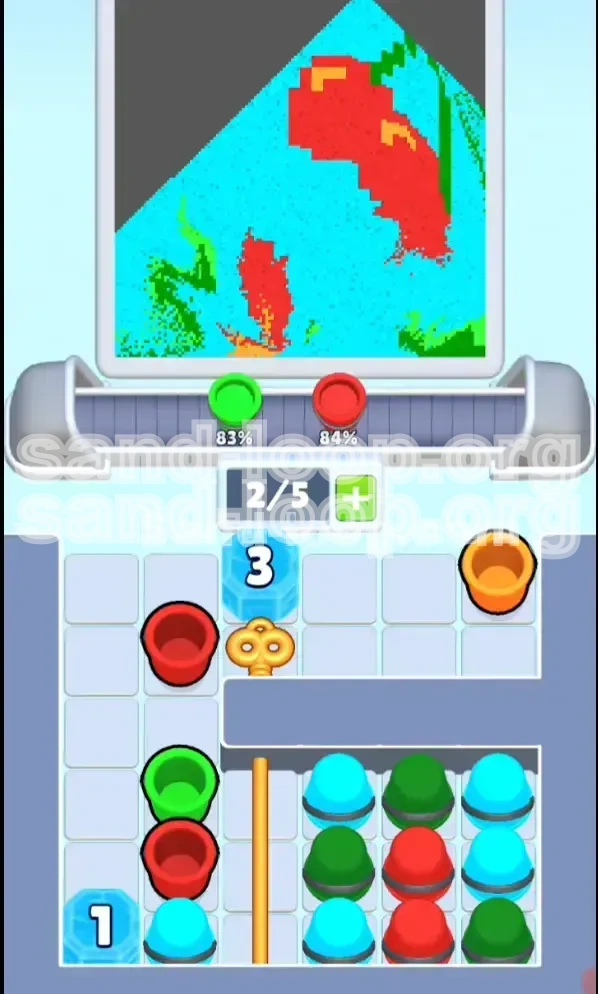
The tray is designed to restrict your movement artificially. Zone A (Left/Right Wings) contains your starting ammo: limited Red, Green, and single Orange cup. Zone B (The Core) contains the "Ice Block," a frozen barrier with a countdown value that blocks your progress. Zone C (The Bunker) is a 3x3 grid of cups locked behind a yellow gate, containing the bulk of the Cyan sand required to finish the level. You cannot access Zone C until you manually break the ice in Zone B and retrieve the key.
The Resource Starvation Mechanic
The defining feature of this level is the deliberate lack of Cyan sand. The image is approximately 60% water (Cyan), yet you start with almost zero Cyan access. This is a test of "Foreground First" discipline. If you panic and try to pour the water background before the fish are detailed, you will deadlock. The game forces you to focus on the Red fish and Green plants first because those are the only colors available to you at the start.
The "Ice Block" Explained
In the center of the tray sits a Blue Ice Block with the number "3" displayed on it. This acts as a logic gate. It prevents you from accessing the Gold Key. To shatter this block, you must clear specific cups in the left and right columns that are adjacent to it. Think of the cups as "chips" you spend to lower the block's health. You need to find three valid moves adjacent to the block to break it.
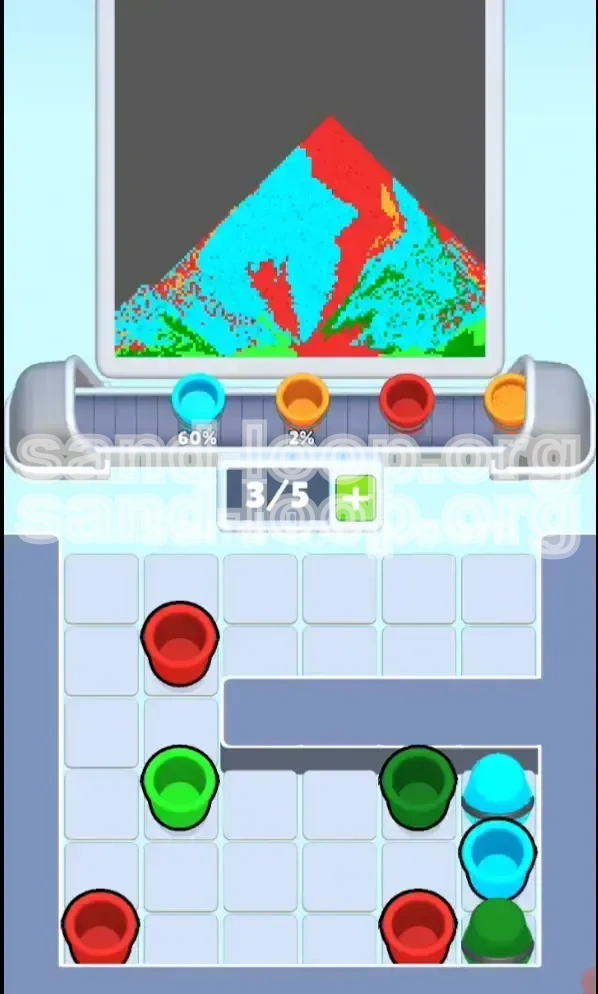
The Gate and The Bunker
Once the Ice Block is shattered, the Gold Key is exposed. Tapping this key retracts the yellow security gate at the bottom right. This reveals the "Bunker," a 3x3 grid holding the Cyan reserves. However, unlocking this is a double-edged sword; opening the gate floods your belt with new cups, which can clog your conveyor if you aren't ready to process them immediately.
Visual Analysis of the Art
The artwork consists of two Red Koi fish occupying the center-left and center-right, surrounded by Green aquatic plants and seaweed on the edges. The background is a vast expanse of Cyan water. The complexity lies in the Orange highlights on the fish scales. There are only a few pixels of Orange, but they are distinct. If you cover them with Red or Cyan, the level will not clear.
Primary Objectives and Strategic Goals
To beat Level 125, you must shift your mindset from "painting" to "unlocking." Your primary goal is not to fill the sand art immediately, but to engineer a board state where the Cyan sand becomes accessible.
Objective 1: Conserve Orange and Red
You have very limited Red and Orange ammunition at the start. Your first objective is to deploy these colors specifically onto the fish bodies without spilling over. Do not use these cups on the background. Every drop of Red sand must hit the fish silhouette. If you waste the single Orange cup on a non-target area, you may not get another one until the gate opens, risking a "partial fill" error.
Objective 2: The Ice Breaker Protocol
Priority number two is the destruction of the central Blue Ice Block. You must scan the left and right columns for cups that, when cleared, will impact the central block. This often means clearing Green cups in the seaweed areas that border the ice. You need to reduce the block's value from 3 to 0 to access the key.
Objective 3: Retrieve the Gold Key
This is a binary objective: once the ice is gone, the Gold Key appears. Tapping it is the only way to open the path to the Cyan reserves. Do not ignore this key; without it, the level is mathematically impossible to finish because the background water requires more liquid than your starting cups provide.
Objective 4: Belt Management
Before you open the gate, ensure your conveyor belt is relatively empty. The belt typically holds 5-6 cups. If your belt is full of trash when you unlock the Cyan grid, the new Cyan cups won't be able to load, causing a traffic jam. Objective 4 is to clear your queue before the "flood" of resources arrives.
Objective 5: The Background Flood
The final objective is the mass application of Cyan sand. This happens only after the Red fish, Green plants, and Orange scales are 100% complete. Once the details are set, you use the unlocked Cyan cups to fill the remaining negative space.
Step-by-Step Walkthrough: The Critical Path
This section provides the exact script for the first half of the level, which is the most punishing. Follow these steps in order to avoid the resource deadlock.
Phase 1: The Start (Left Column Focus)
Begin by examining the left column. You will see a stack of Green cups and a single Red cup. Do not touch the top right yet. Start pouring the Green cups into the nozzle to fill the seaweed patterns located on the left side of the canvas. Clearing these cups serves a dual purpose: it completes the greenery and chips away at the Ice Block counter because these cups are adjacent to the center.
Phase 2: The Red Fish Injection
Locate the first Red cup in the starting lineup. Pour this immediately onto the main body of the Koi fish. It is crucial to get the Red silhouette established early. Do not wait for the gate to open to start painting the fish. If you delay, you might find yourself with a belt full of Cyan water cups later, forcing you to pour water over an unpainted fish, ruining the layering.
Phase 3: The Orange Precision Drop
This is the most dangerous step. You have one Orange cup available at the start (usually top right). Wait until the nozzle is positioned directly over the decorative scales of the fish. If you pour this while the nozzle is drifting over the Red body or the Blue water, you will fail. Time the tap so the Orange sand hits the specific highlight pixels. Once poured, the cup is gone, so make it count.
Phase 4: Shattering the "3" Ice Block
Continue clearing cups from the left and right extremes. Focus on cups that are physically touching the central Blue Ice Block. As you clear valid Green and Red cups, you will see the number on the block decrease. 3... 2... 1... Once it hits zero, the block shatters, revealing the Gold Key underneath. The belt will move, presenting new opportunities.
Phase 5: Unlocking the Cyan Reserves
Tap the Gold Key immediately. Watch the yellow gate at the bottom right slide open. This reveals the 3x3 grid of cups. Do not tap them all at once. Look at your belt. If it is full, process the current cups first. Once the belt has space, tap the Cyan cups to load them onto the conveyor.
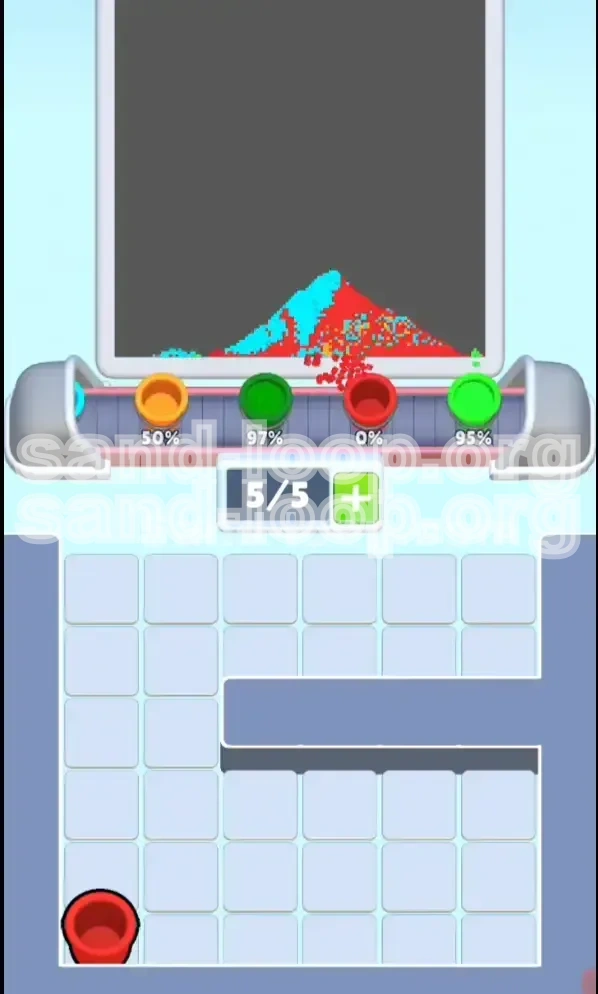
Phase 6: The Cleanup Sweep
With the gate open and Cyan cups loaded, finish any remaining Green or Red details if necessary (usually just a few pixels). Then, switch to "Flood Mode." Pour the Cyan cups continuously to fill the water background. Since the foreground details (Red/Orange/Green) are already dry, the Cyan will settle around them, completing the image.
Color Order and Processing Logic
The specific order of operations is what prevents the "Starvation Deadlock." Here is the optimal processing hierarchy for Level 125.
Priority 1: Green (The Seaweed)
Why Green first? Because the Green cups are located on the periphery of the starting columns, often touching the Ice Block. Pouring Green first allows you to safely chip away at the ice block's health without wasting your precious Red or Orange sand. Additionally, Green is a "middle layer" color—it doesn't bleed into the Red fish as badly as Blue would.
Priority 2: Red (The Koi Bodies)
Red is your primary foreground. It must be established before any water is added. If you add Cyan water first, you will have to overpaint it with Red, which uses twice as much sand and risks muddying the colors. Always secure the Red base layers while the belt is still relatively empty.
Priority 3: Orange (The Highlights)
Orange is the "volatile" color. It is high-risk, high-reward. It must be applied immediately after or during the Red phase, while the nozzle is still hovering over the fish zone. If you leave Orange until after you start pouring the Cyan background, the nozzle will likely be over the water area by the time the Orange cup reaches the front of the line, causing a miss.
Priority 4: Cyan (The Background)
Cyan is the "Filler." It constitutes roughly 65% of the canvas area. Because it is so dominant, it acts like a flood. If you release the flood too early, it washes over the unpainted areas of the fish and plants, trapping them under a layer of blue sand. You must wait until the gate is open and the foreground is solid before unleashing the Cyan reserve.
Layering Physics
Remember the physics of Sand Loop: Heavier/Darker colors usually sink, but in this game logic, newer colors cover old ones. If you put Red on top of Cyan, it looks clean. If you put Cyan on top of Red, it tints the red pink. Therefore, background colors must always be last to ensure vibrancy and contrast.
Key Tips and Pro Strategies
These tips are designed to help you manage the UI and the in-game physics to maximize your score and minimize frustration.
Tip 1: The "Belt Check" Habit
Before you tap the Gold Key, glance at the conveyor belt slots. If you have 5 cups already lined up, do not tap the key yet. Process one or two cups to create an empty slot at the back of the queue. When you unlock the 3x3 grid, you want the new Cyan cups to load immediately. If the belt is full, the game will stall, or the cups will bounce, breaking your rhythm.
Tip 2: Ignore the 100% Progress Trap
You might see the progress bar for "Green" hit 80% and feel tempted to switch to Red. Don't. If the game is giving you Green cups, clear them. Trust the algorithm. The game gives you cups in the order it wants you to use them. Fighting the RNG (Random Number Generator) by skipping cups usually leads to a clogged belt.
Tip 3: Precision vs. Speed
Level 125 is not a speedrun stage initially. The first 50% of the level requires surgical precision. Take your time with the Orange cup. Pause for a split second to ensure the nozzle is aligned. A missed Orange cup can result in a 95% completion score, forcing you to restart the whole level.
Tip 4: The "Nozzle Hover" Trick
Use the game's pause mechanics (if available) or the natural rhythm of the nozzle to your advantage. The nozzle moves back and forth. If you are waiting for the nozzle to reach the right side for the Red fish, use that travel time to clear away unrelated cups on the left side of the screen to keep the queue moving.
Tip 5: Visualizing the Invisible Grid
Imagine a 3x3 grid over the fish. The orange scales are usually at specific intersections. By visualizing the grid, you can predict exactly when the nozzle will pass over the target area, allowing you to tap the cup a fraction of a second early to account for the pour delay.
Common Mistakes to Avoid
90% of failures on Level 125 come from one of these three errors. Learn to recognize them and you will survive the loop.
Mistake 1: Premature Cyan Dumping
This is the #1 killer. You get anxious because the background is empty white. You see a Blue cup and you pour it. Stop! Unless that Blue cup is the specific one needed to clear the Ice Block (rare), pouring Cyan early is a death sentence. You will run out of sand for the fish and have no way to get more because the gate is still locked.
Mistake 2: Ignoring the Ice Block
Some players treat the Ice Block like background scenery and just focus on the left column. They clear all the Green cups on the left but ignore the ones touching the ice. The result? The Ice Block stays at "1" or "2," the key never drops, and the level becomes impossible. Always make moves that lower the Ice Block counter if possible.
Mistake 3: The Orange Spill
Players often mash the tap button when they see a rare color like Orange. They dump it on the nearest Red pixel, thinking it blends. It doesn't. The game detects Orange as a distinct separate color from Red. If you don't hit the specific "Orange Zone" on the fish scales, that sand is wasted, and you likely won't get another cup to fix that specific pixel.
Mistake 4: Gate Anxiety
Players panic when the gate opens. They see the 3x3 grid and start tapping wildly like a whack-a-mole game. This floods your belt with Cyan cups while you still have unpainted Red plants available. The result is a chaotic mix where you are forced to pour Blue over Red plants to save your combo. Breathe, sort the cups, and pick the Red/Green ones first.
Mistake 5: Running Out of Space
The belt is finite. If you load too many cups from the unlocked bunker without pouring them, the belt jams. While Sand Loop usually auto-pours, manual intervention is key here. Don't let the queue fill up; keep the flow moving steadily.
Solutions for When You Are Stuck
Hit a wall? Here are the emergency protocols for specific scenarios where you feel the game has locked up.
Stuck Scenario: "I have no cups left but the Ice Block is still at 1."
This is the most common sticky situation. You have cleared the left and right columns, but the central Ice Block remains intact with 1 HP. Solution: Look closer at the board. There is likely a "frozen" cup or a cup hidden under a debris pile that you missed. If you are truly out of cups and the block is still up, you have likely wasted a cup earlier on the wrong color patch. Restart and be more stingy with your pours.
Stuck Scenario: "I opened the gate but I don't have any Red left for the fish."
You unlocked the bunker, but now all you have are Cyan cups, and the fish are only half-painted. Solution: This is why we emphasize "Foreground First." If this happens, you are likely in a fail state. However, check if there are any Red cups remaining in the bunker grid. Sometimes the grid mixes colors. If you see a Red cup in the grid, you must prioritize loading that specific cup, even if it means skipping Cyan cups for a moment.
Stuck Scenario: "The Orange highlight won't fill."
You poured Orange, but the completion percentage for that area isn't moving. Solution: The Orange pixels are tiny and specific. You might be pouring over the edge. Ensure the nozzle is dead center. If the Orange pixel is actually *behind* a layer of Red (a layering error), you may need to restart. You cannot easily paint under an existing layer in this game engine.
Stuck Scenario: "The Key isn't appearing."
You broke the ice, but no key? Solution: This is a visual glitch or a lag issue. Wait 5 seconds. If it doesn't appear, you might have broken the wrong block. Ensure you broke the Blue Ice Block in the direct center, not a frozen cup on the side.
Speed Run and High Score Tips
Once you have mastered the logic, here is how you optimize your time for the leaderboards.
Speed Tip 1: The "Pre-Load" Maneuver
While the nozzle is moving from left to right, tap the next cup in line just before the nozzle reaches the target zone. This queues the pour slightly early, shaving milliseconds off every move. Over a 125-second level, this saves valuable seconds.
Speed Tip 2: Chain Reaction
Try to clear cups in batches. Don't pour, wait, pour, wait. Pour, pour, pour. As long as the colors match the zone, keep tapping. The game allows a bit of overlap. Clearing the left column Green cups in one continuous flow is faster than micromanaging each drop.
Speed Tip 3: Memorize the Ice Pattern
After your first few runs, you will memorize exactly which cups break the ice. Don't wait for the visual "crack" animation to finish before tapping the next cup. Queue up the three ice-breaking cups in rapid succession. The animation will play out, but your inputs will be registered, speeding up the unlock phase.
Speed Tip 4: Skip the Perfectionism
For a speed run, 95% fill is acceptable if it saves you 10 seconds. Don't obsess over getting every single pixel of the Red fish perfect if the remaining area is small. The Cyan flood will cover the edges. Only 100% perfectionism is needed if the "Star" requirement demands it. If you just want to clear the level fast, focus on the big color blocks.
Speed Tip 5: Optimize the Gate Opening
The moment the Ice Block shatters, the game enters a cutscene-like state where the gate opens. Use this animation time to scan the 3x3 grid that was revealed. Plan your path. "I need the Red at the top, then the Green at the bottom." As soon as control returns, tap those specific cups instantly. No thinking time during the active phase.