
Level 128
HARDHow to solve Sand Loop level 128? Get instant solution for Sand Loop 128 with our step by step solution & video walkthrough. Sand Loop 128 tips and guide.
Play Sand Loop Now
Experience the puzzle challenge firsthand
Game Screenshots
Sand Loop Level Guides
Level Overview: The Green Planet Challenge
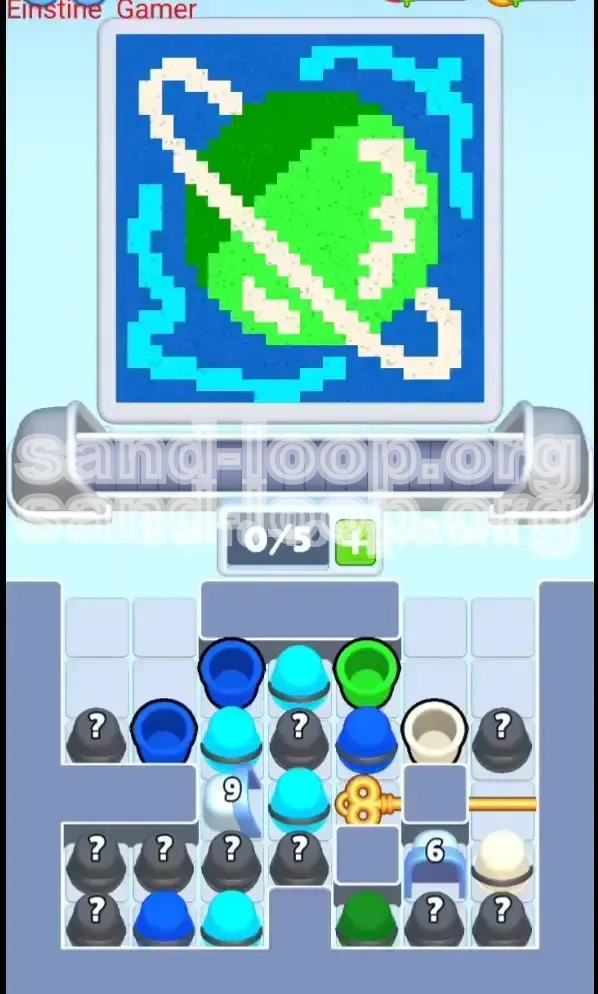
Level 128 in Sand Loop presents a unique visual puzzle that transports players into a stylized, pixel-art interpretation of a ringed planet, reminiscent of a neon-drenched Saturn. Unlike the pure speed-running levels you may have encountered previously, this stage is a calculated exercise in resource management and logic. The core challenge lies not just in the speed of your fingers, but in your ability to manage a tight "tray economy"—the limited slots available on your conveyor belt. You are constantly forced to prioritize unlocking sections of the tray to access crucial colors before you can even consider finishing the painting. The visual composition is dominated by a large central celestial body set against a deep void, intersected by a challenging diagonal ring. This structure demands that you think several moves ahead, as pouring the wrong color at the wrong time can trap essential items behind immovable barriers.
Visual Composition
The canvas is divided into distinct zones that require different filling strategies. The center is dominated by the Lime Green planet, which serves as the anchor for the image. Surrounding this is the expansive Dark Blue background of space, which consumes a large percentage of the total pixel count (approximately 40-45%). Cutting aggressively across the center is the White/Cream planetary ring, and weaving through the negative space are Cyan energy waves. Understanding this composition is vital because it dictates your color priorities; you cannot simply fill from top to bottom.
Core Mechanics
This level relies heavily on the "Key Unlocking" mechanic. You are not simply matching colors to fill a meter; you are clearing physical obstructions to access new parts of your cup tray. The most significant mechanic here is the Ice Block system. You will encounter specific blocks labeled "9" and "6". These function as gatekeepers. The "9" block on the left acts as a bottleneck for your reserve cups, while the "6" block on the right guards the final tier of background colors. You must clear specific columns to melt these blocks, adding a layer of spatial logic to the usual color-matching gameplay.
Difficulty Spike
Players often find Level 128 difficult due to the introduction of overlapping color zones. The White ring cuts through both the Dark Blue background and the Green planet. This means you cannot finish the planet or the background until the White ring is perfectly placed. If you pour Green or Blue over the ring area before the White is settled, you will create "holes" in the ring that are very difficult to fix later. This requires you to pause your filling of large areas to focus on a thin, diagonal line, which can feel counter-intuitive to the usual "fill big spaces first" strategy.
Resource Scarcity
One of the hidden challenges in this stage is the scarcity of Mystery Cups (Grey with ?). Unlike previous levels where mystery cups might provide a handy shortcut, here they are sparse and often positioned in dangerous locations near the Ice Blocks. Using them too early can leave you without a crucial color when the board gets crowded. You must learn to rely on the standard cup rotation and save mystery cups for emergency situations where you are stuck waiting for a specific color dispenser to align.
Winning Condition
To secure a three-star rating or simply pass the level, you must achieve 100% completion of the pixel art. This means no stray pixels in the corners of the deep space background, and no gaps in the Cyan swirls. The level timer is generous enough that you should not rush. Rushing leads to mis-timed pours on the White Ring, which is the primary cause of failure. A calm, methodical approach that prioritizes unlocking the Gold Key is the most consistent path to victory.
Clear Objectives: Your Mission Checklist
Before you even tap the start button, you need to have a clear mental checklist of what needs to be done. Approaching this level without a plan is a recipe for disaster. Your primary goal is to manage the tray lock-down while ensuring the canvas is filled in the correct order of operations.
Unlock the Tray
Your immediate, non-negotiable objective is to free up the conveyor belt. The game starts with several key columns blocked. Your primary focus in the first 30 seconds should be clearing the top-center cluster. Do not worry about filling the canvas perfectly yet. Your goal is to remove cups from the top to allow the stack to drop, revealing the Gold Key and the mechanism to melt the Ice Blocks. If you ignore this and focus on painting, you will run out of moves.
Acquire the Gold Key
Located on the right side of the tray, the Gold Key is the gateway to the mid-game. It is physically trapped behind a White cup and adjacent to a Green cup. You must clear these specific obstructing cups to grab the key. Turning this key is the trigger that unlocks the bottom-right quadrant of the tray, which is essential because it holds the bulk of the Dark Blue cups required for the background. Without this key, you will hit a dead wall where no useful cups are available.
Melt the Ice Blocks
You face two major frozen obstacles. The "9" Ice Block on the left requires 9 units of sand to clear. This is a high number and will take significant time. You must keep the left column active, constantly feeding cups into it, even if it means temporarily storing other colors. The "6" Ice Block on the right is slightly easier but is often hidden behind the locked gate. Prioritize the left block first to open up your reserve slots, then focus on the right once the key is obtained.
Execute the White Ring
This is the most critical objective in terms of painting. You must complete the diagonal White ring *before* you finish filling the Green Planet or the Dark Blue Background. Because the ring overlays these two zones, if you fill the background first, you won't be able to see the ring's path clearly, and you risk filling over it. You must pause the general filling process to ensure this thin, diagonal line is perfectly white.
Fill the Background
The final major objective is the Deep Space fill. This is the "mop-up" phase. Once the planet, the ring, and the swirls are done, you will be left with a tray mostly full of Dark Blue cups. At this stage, you can switch to a high-speed playstyle, rapidly tapping 4-5 cups at a time to flood the remaining empty space. This is only safe to do once the delicate details (Ring and Swirls) are already locked in.
Step-by-Step Instructions: The Exact Moves
Follow this sequence exactly to navigate the early and mid-game chaos. The first few moves are scripted to ensure you don't get boxed in.
Phase 1: The Initial Drop
As the level loads, do not touch anything for 1 second. Look at the dispenser. If it starts with Green or Cyan, you are in luck.
- Step 1: Tap the Green Cup and Cyan Cup at the top center immediately. Do not wait for the tray to fill up.
- Step 2: Ignore the Dark Blue cup for now. Focusing on Blue too early will clog your slots with color you can't use yet.
- Step 3: Watch the stack drop. As the top layer clears, you will see the Gold Key becoming accessible on the right flank.
Phase 2: Key Recovery
Once the stack settles after the first clear, focus entirely on the right side.
- Step 4: Identify the cup blocking the Gold Key. It is usually a White Cup or a Green Cup.
- Step 5: If the dispenser is not currently showing the color you need to clear the block, do not waste a move. Wait for the rotation.
- Step 6: Send the blocking cup up. As soon as the Gold Key is free, drag it to the lock mechanism immediately.
Phase 3: Breaking the Ice
With the right side unlocked, you must now tackle the bottlenecks to free up your hand.
- Step 7: Shift focus to the Left Side. You need to melt the "9" Ice Block.
- Step 8: Start sending Cyan and Dark Blue cups from the left column. Even if the canvas doesn't need much Cyan, you need to clear these cups physically to melt the ice.
- Step 9: Keep an eye on the "6" Ice Block on the right. It will likely start melting automatically as you clear the newly unlocked cups from the Key phase.
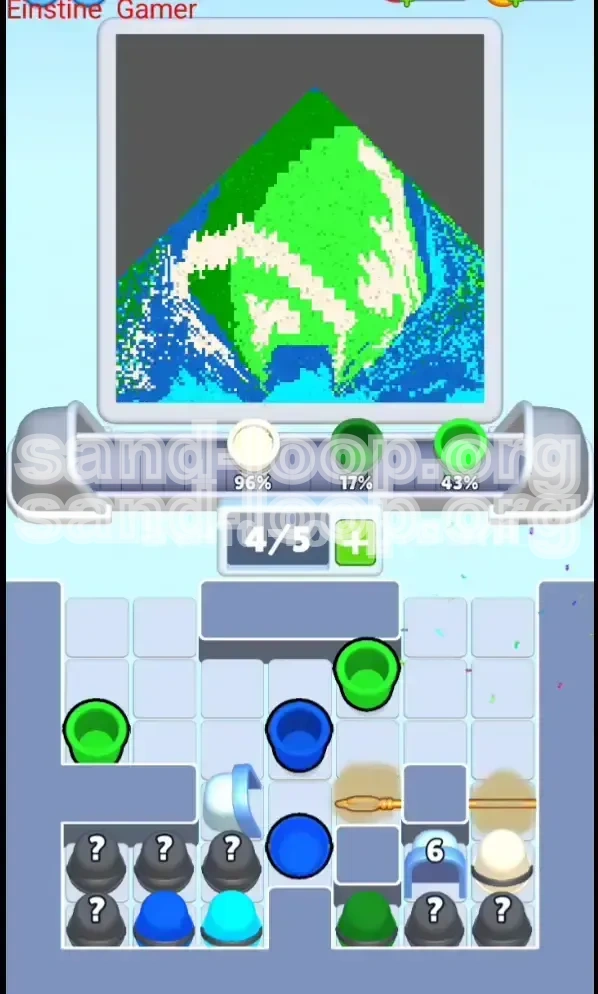
Phase 4: Precision Painting
Now that the tray is flowing and blocks are gone, switch to canvas accuracy.
- Step 10: Fill the Lime Green Planet body completely. Use the bulk of your green cups here.
- Step 11: Switch to Cyan. Trace the swirls. These are thin lines, so use short bursts of taps rather than holding the cup.
- Step 12: Wait for the White dispenser. When ready, fill the diagonal ring. Ensure you do not overshoot into the deep space background.
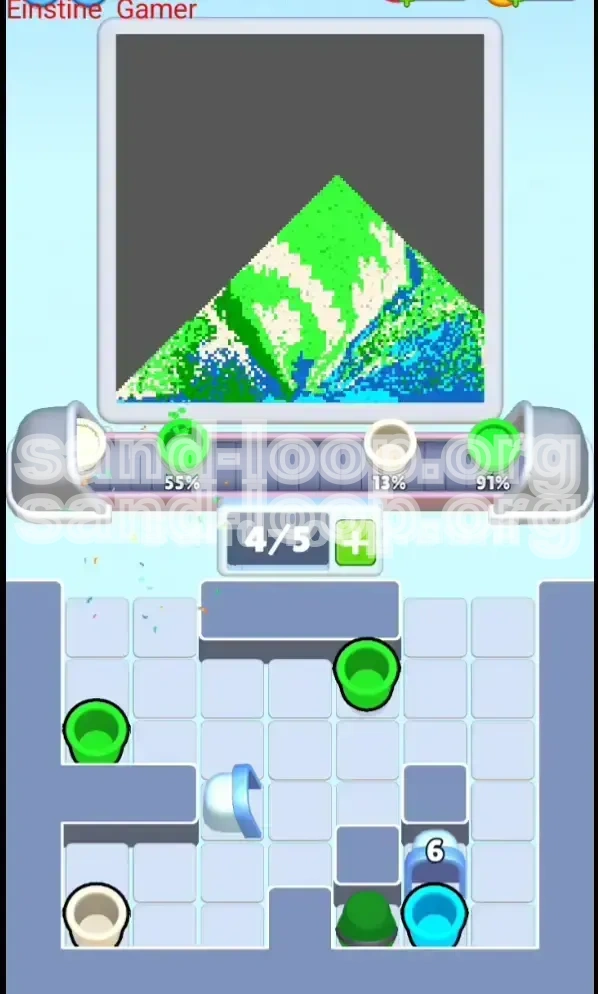
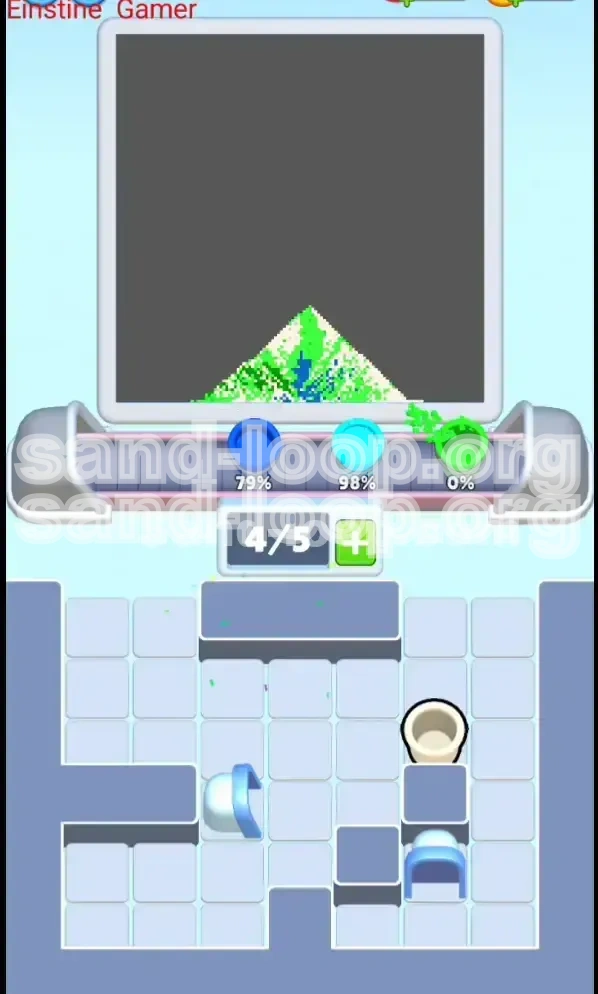
Phase 5: The Final Flood
The cleanup phase. All complex shapes are done.
- Step 13: Fill your tray with Dark Blue cups. You can run 4 or 5 cups at a time now.
- Step 14: Flood the remaining background. Since it is all one color, accuracy matters less than speed here.
- Step 15: Use any remaining Mystery Cups to patch missed pixels. They often default to Dark Blue in this stage.
Color Order Strategy: Optimization Logic
The order in which you process the four colors is the difference between a smooth clear and a headache. This isn't just about what looks good; it's about physics and layering.
1. Lime Green (Priority: High)
You process Green first not because it's the biggest area, but because it is the "safe" zone. It sits in the middle and doesn't border any other color except the White Ring and the Cyan swirls. By clearing the Green Planet body early, you reduce the number of variables you have to worry about. It also clears the Green cups from your tray, which are dangerous if they clog your slots while you are waiting for White.
2. Cyan (Priority: Medium)
The Cyan swirls are high-risk because they are thin. If you wait until the end to do them, the background (Dark Blue) might already be filled, making it hard to see the swirl patterns. Furthermore, the Cyan cups are often located in the columns that need to be cleared to melt the "9" Ice Block. Processing Cyan early serves the dual purpose of painting the canvas and managing your tray resources.
3. White (Priority: Critical)
White is the bottleneck color. You cannot do it first because the dispenser rotation is slow, and waiting for it wastes time you could be using to clear the tray. However, you *must* do it before the final background flood. The White Ring is the "cap" for the level. Once the White is down, the rest of the level is just filling in the blanks. Treat the White phase as the transition point from "Logic/Strategy" to "Speed/Execution."
4. Dark Blue (Priority: Low until the end)
Dark Blue is the "Filler." It constitutes roughly 45% of the screen. If you try to process this early, you will constantly run out of space in your tray because Blue cups are abundant. By saving Blue for last, you ensure that when the "Big Fill" comes, you have plenty of inventory to work with. It acts as the perfect cleanup crew to sweep up the remaining percentage after the details are handled.
The Mystery Cup Variable
Mystery Cups are your wild card. Ideally, you want them to turn into White or Cyan. If you pop a Mystery Cup and it turns into Dark Blue early in the level, treat it as a "dud." Send it to a holding slot if you have space, but do not pour it unless you have absolutely no other moves. Pouring early Blue increases the risk of accidentally filling the corners of the screen that you don't need to touch yet.
Key Tips and Common Mistakes
Even with a solid strategy, small errors can compound in Level 128. Here is how to play like a pro and avoid the pitfalls that trap casual players.
Mastering the "9" Block
The "9" Ice Block is the psychological trap of this level. Seeing a requirement of "9" can make players panic and pour useless cups just to chip away at it. The Tip: Ignore the number. Focus on the columns above it. Your goal is not to "melt" the block directly, but to clear the cups *above* it. As you clear the top cluster, gravity will do the work for you, dropping new cups into the block and clearing it naturally. Don't waste moves forcing it; let the board state clear it for you.
Timing the White Dispenser
Nothing is more frustrating than missing the White Ring because you were holding a Green cup when the dispenser switched to White. The Tip: Keep at least one slot in your tray open at all times once you reach the mid-game. When you see the White dispenser coming up in the rotation queue (usually 2-3 cups away), immediately clear your hand. Be ready to snatch that White cup the second it appears. If you miss the window, you have to wait a full rotation, which can take 10-15 seconds—a lifetime in this level.
Don't Overfill the Tray
It is tempting to keep 5 cups in your tray at all times to maximize efficiency. In Level 128, this is a mistake. The Tip: Keep your tray at 3/5 capacity during the "Key Unlocking" phase. You need the flexibility to grab a specific color (like White) the moment it drops to unblock the key. If your tray is full of Green and Blue when that blocking cup appears, you are stuck.
The "Corner" Trap
A common mistake is filling the center of the Dark Blue background but leaving the corners for last. The corners are hard to reach because the dispenser nozzle swings in an arc. The Tip: When doing the final Blue fill, start with the top corners while your nozzle is at the extreme left and right of its swing. If you fill the center first, you will struggle to align the nozzle for the corners later without overshooting.
Stuck Solutions: Troubleshooting
If you find yourself stuck with no moves and the Ice Blocks still present, you have likely mismanaged the left column. The Solution: Stop looking at the canvas. Look purely at the tray. You likely have a "checkerboard" pattern of colors preventing matches. You may need to deliberately waste a cup—pour it into an already-finished area—to force a new drop and break the deadlock. It is better to lose 1% accuracy than to sit frozen for 30 seconds.
Speed Run Tips: For the Time Attackers
If you are chasing the global leaderboard or just want to finish under 60 seconds, you need to break some of the safety rules established above. Speed running this level requires risk.
The "Green Rush" Opening
Forget about the Ice Blocks for the first 15 seconds. Immediately queue up three Green cups. Pour them aggressively into the planet center. The goal is to clear the Green cups from the tray as fast as possible to force the game to spawn new cups from the top columns. This aggressive clearing speeds up the exposure of the Gold Key significantly compared to the methodical approach.
Pre-Filling the Ring
This is an advanced technique. You can start filling the White Ring *before* the Gold Key is fully turned, provided the path is clear. If you see a gap in the diagonal ring that aligns with the current nozzle position, take the shot even if you are technically still "unlocking" the board. This saves you the distinct "White Phase" later. You merge the painting phase with the unlocking phase.
The Mystery Cup Gamble
In a speed run, Mystery Cups are not for emergencies; they are for momentum. If you have a Mystery Cup, pop it immediately. Don't wait to see what color you need. If it turns into Dark Blue (background color), pour it immediately into the background, even if it's early. Level 128 is large enough that accidental background progress doesn't hurt, and clearing the cup fast gives you more roll speed for the tray.
No Slot Left Behind
Keep your tray at 5/5 capacity constantly. In the standard guide, we advised keeping slots open. For speed, you want to minimize the time between picking up a cup and pouring it. Keep the conveyor belt moving. If a cup comes up that you don't need (like a spare Green), pour it into the nearest completed zone instantly to get rid of it and cycle to the next color.
Double Tap Technique
For the final Dark Blue fill, don't just tap. Use the "Double Tap" or rapid tapping method. Since the background is so large, precision is not required. Jam on the cup slot to keep the nozzle flowing continuously. Moving the nozzle while pouring (dragging rather than tapping) can help you cover the wide arcs of the planet background faster than waiting for the automatic swing.