
Level 166
HARDHow to solve Sand Loop level 166? Get instant solution for Sand Loop 166 with our step by step solution & video walkthrough. Sand Loop 166 tips and guide.
Play Sand Loop Now
Experience the puzzle challenge firsthand
Game Screenshots

Sand Loop Level Guides
Level Overview: The "UFO Abduction" Logic Puzzle
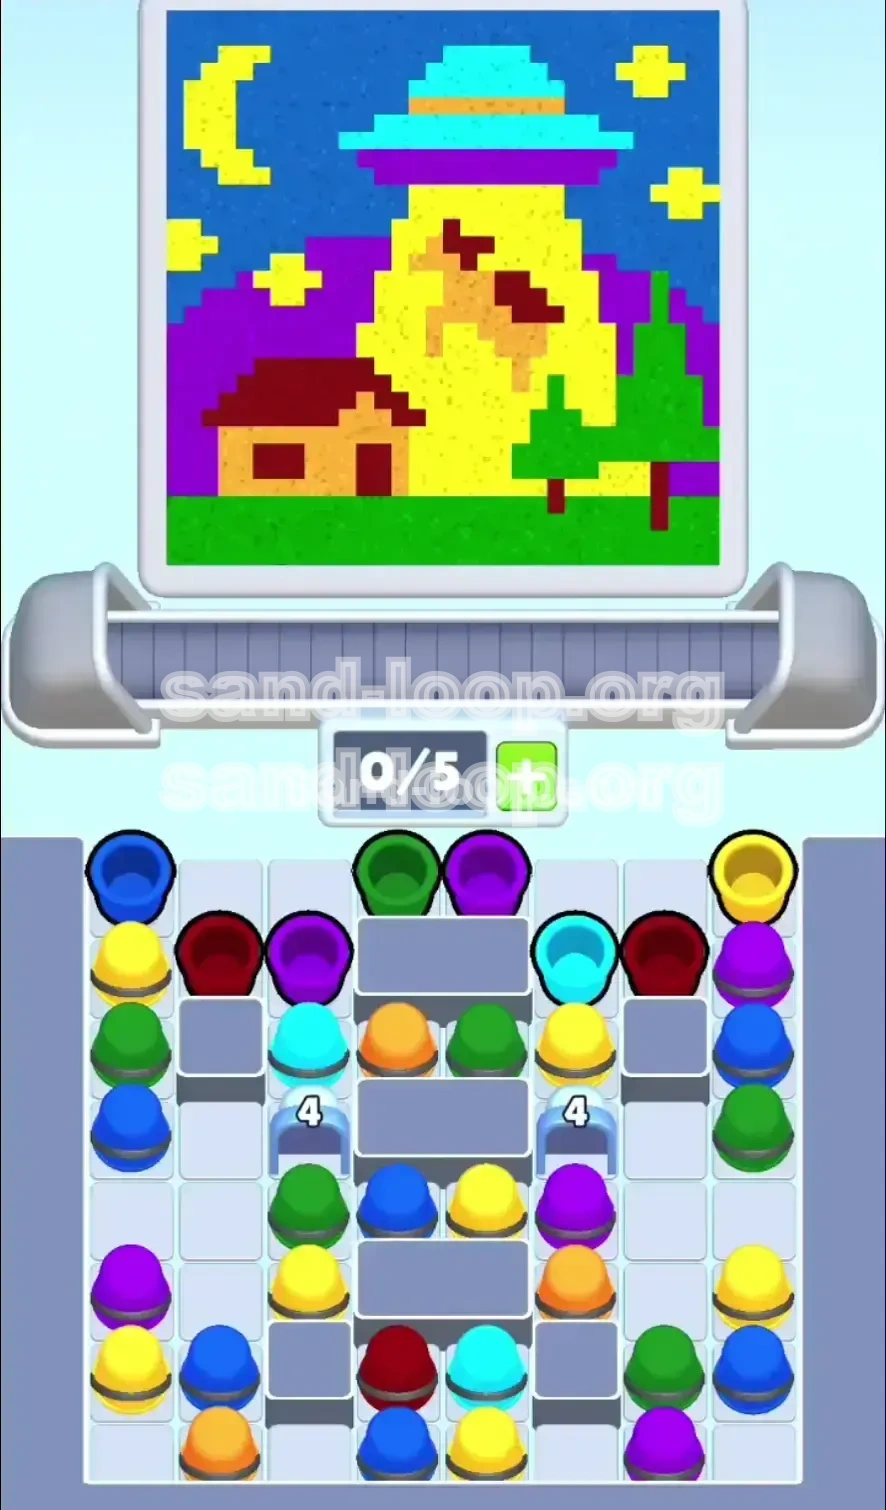
Level 166 in Sand Loop presents a unique challenge that blends visual aesthetics with complex logic mechanics. On the surface, you are creating a vibrant pixel art scene depicting a UFO beaming up a farm animal under a starry night sky. However, beneath the surface, this level is a rigorous test of resource management and vertical structuring.
The primary difficulty arises from the "Vertical Stripe" mechanic. Unlike standard levels where you can simply pour colors from left to right, here you must build a massive yellow beam in the center of the canvas while simultaneously filling the background sky. If you prioritize one over the other, the physics engine will cause the sand to collapse into the wrong areas, contaminating your colors. Additionally, the level is gated by "Countdown" Ice Locks that artificially restrict your color supply, forcing you to solve a specific order of operations to avoid a deadlock.
The Vertical Beam Challenge
The defining feature of this level is the yellow abduction beam. It is a vertical pillar that cuts the entire image in half. In Sand Loop physics, sand naturally forms pyramids. To build a straight vertical wall, you must alternate pouring the beam color (Yellow) and the background color (Blue) cup by cup. If you pour all your Yellow first, it will form a mound that the Blue sand cannot cover evenly. If you pour the Blue first, it will slide into the center and bury the beam area.
The Ice Lock Mechanics
Scattered across the tray are Ice Blocks marked with the number "4". These are not obstacles you can break with a hammer; they are countdown locks. They physically block access to your reserve of Deep Blue (Sky) and Orange (House) cups. These blocks will only shatter after you have successfully cleared exactly 4 cups from the stacks immediately touching them. This means you cannot rely on your "safe" colors early on; you must aggressively clear specific stacks to unlock the rest of your palette.
The Seven-Color Juggle
Managing seven distinct colors (Green, Cyan, Purple, Red, Orange, Blue, Yellow) is significantly harder than the standard 3 or 4-color levels. Each color represents a specific layer of depth. Green is the absolute foreground, while Cyan is the absolute background. With so many variables, your conveyor belt space (limited to 5 slots) becomes a precious resource. You cannot afford to queue colors that you don't need immediately.
The Supply Drought Risk
Because the Ice Locks cover the bottom reserves of Blue and Orange, you will likely run out of these colors halfway through the level if you haven't broken the locks yet. This creates a "supply drought" where you have moves available, but no usable colors to paint the next required layer. The solution is to identify the "Key Cups"—the ones touching the locks—and prioritize them over aesthetic perfection in the early game.
Strategic Color Order and Layer Analysis
To solve Level 166 without running out of moves, you must follow a strict topological order. Sand falls from top to bottom, so you generally build from the bottom of the screen up. However, because of the Ice Locks and the vertical beam, you have to interleave your strategy.
Priority 1: The Green Foundation (Grass)
The very first layer you must complete is the Green grass at the bottom of the screen. This is your safest starting point. The Green cups are usually located in the top-center of the tray. You should clear these first because they do not interfere with the Ice Locks and establishing the ground floor gives you a solid base for the house and hills to sit on. Do not start with Blue or Yellow; they are too high up on the vertical axis.
Priority 2: The Mid-Ground (Purple & Orange)
Once the grass is laid, you need to build the hills (Purple) and the house (Orange). This is where the strategy gets tricky. The Purple cups are often stacked against the Ice Locks. You should prioritize Purple to help break the locks, but you must be careful not to bury the house location. Ideally, you want to lay the Green, then immediately switch to Purple for the hills, and then Orange for the house before the hills get too high.
Priority 3: The Vertical Climb (Yellow & Blue)
This is the most critical phase. You must alternate between Yellow (Beam) and Blue (Sky). The ratio should be roughly 1:1 or 2:1. The logic here is structural: the Yellow sand creates the walls of the beam, and the Blue sand fills the void behind it. If you pour three Blue cups in a row, the sand will avalanche into the center of the beam, turning the sky yellow and the beam blue. This "contamination" is nearly impossible to fix once it happens.
Priority 4: The Cap (Cyan)
The Cyan glass dome of the UFO sits at the very top of the image. It is the final layer. If you pour Cyan too early, it will get buried by the sky or the beam. You must save the Cyan cups until the very end of the level. This is difficult because Cyan cups are often located in the middle of the tray, tempting you to click them early. You must exercise restraint and leave them in the tray until the Yellow beam is fully formed.
The "Key" Color for Locks
Analyzing the tray layout, the "Key" color for breaking the Ice Locks is usually Purple. The stacks touching the "4" locks are frequently Purple or Cyan. While Cyan is a final layer color, Purple is a mid-game layer. Therefore, your strategy for breaking the locks revolves around aggressively clearing the Purple cups. Even if the Purple hills aren't visually perfect yet, you need to clear those cups to shatter the ice and free up your Blue and Orange supplies.
Step-by-Step Walkthrough: Phase 1 (Foundation & Locks)
The first half of the level is about resource management. You are low on moves because your inventory is locked. Your goal here is not to make a pretty picture, but to break the Ice Blocks to access your real supplies.
Step 1: Scan and Ignore
When the level starts, take five seconds to scan the board. Ignore the Cyan cups completely. Ignore the Dark Red cups. Locate the Green cups in the top center and the Purple cups near the middle. Your opening move is almost always to tap a Green cup. Do not tap the Blue cups on the far left yet; they are blocked by ice and unreachable in terms of utility until the locks are gone.
Step 2: Establish the Green Belt
Tap all accessible Green cups immediately. Send them down the conveyor belt. The goal is to create a solid 2-inch layer of green pixel sand at the bottom of the canvas. This secures the bottom layer and clears the top of the tray, making it easier to see which cups are touching the Ice Locks.
Step 3: Target the "Touching" Cups
Look at the Ice Blocks labeled "4". Identify the cups that are physically touching them. These are your "Trigger Cups." These are likely to be Purple or Cyan. Even if you don't want to paint the hills yet, you must tap these cups. Loading them onto the belt counts as "clearing" them from the stack. Add 3 of these "Touching" cups to your queue. The fourth cup will come from the next step.
Step 4: The Strategic Purple Pour
Pour the Green first to finish the grass. Then, immediately pour the Purple "Trigger" cups you just queued. This does two things: it builds the hill layer, and more importantly, it drops the count on the Ice Locks. As you pour the last Purple cup, watch the Ice Blocks shatter. This is the turning point of the level.
Step 5: Unlock the House and Sky
The moment the ice shatters, new cups become available. Specifically, you will see Orange cups (House) and Deep Blue cups (Sky) drop down or become clickable. This is your reward. Now that the locks are gone, you have access to the full volume of paint you need to finish the level. Do not start painting the house yet; first, clear the queue so you are ready for the alternating rhythm.
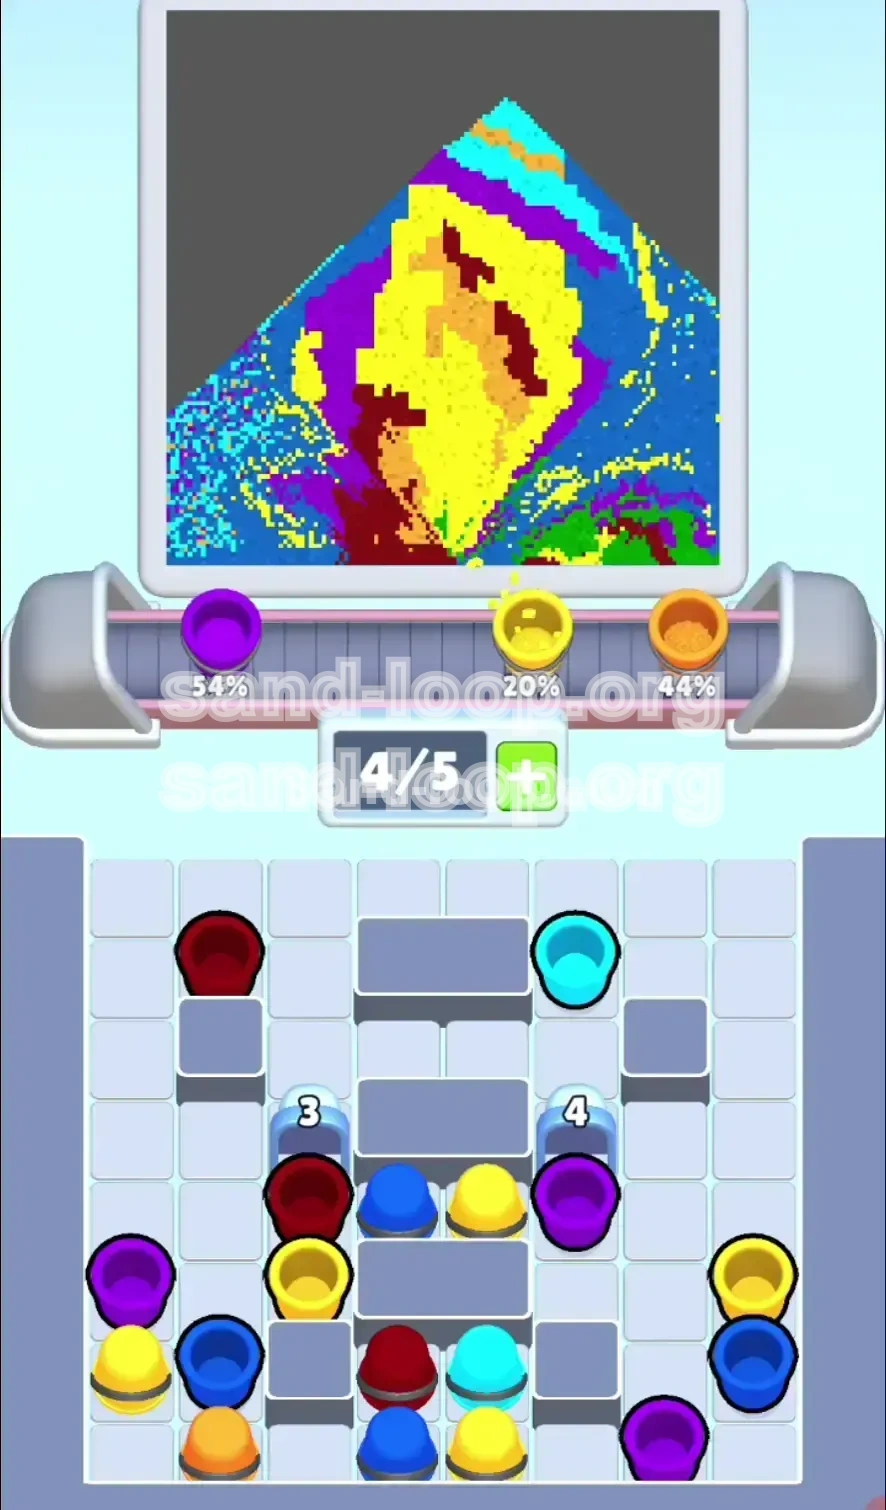
Step-by-Step Walkthrough: Phase 2 (The Vertical Build)
With the locks broken and your supplies restored, you can now focus on the artistic and structural challenge of the level. This phase requires precision.
Step 6: The Orange House Placement
Immediately queue and pour the Orange cups. The house is a small, distinct object on the left side. If you wait too long, the upcoming Blue sky sand will fill this spot. By pouring the Orange now, you "claim" that territory. The Orange sand will sit on top of the Green grass, creating a nice base layer. Once the house is built, you won't need Orange again.
Step 7: Initiate the Alternating Rhythm
Now, find your Yellow and Blue cups. The strategy is: Tap Yellow, Pour. Tap Blue, Pour. Tap Yellow, Pour. You are stitching the image together from the middle out. Do not queue two Blues in a row. Do not queue two Yellows in a row. Keep them strictly alternating on the belt. This 1:1 ratio ensures that the Yellow beam rises vertically while the Blue sand fills the background simultaneously.
Step 8: Monitoring the "Edges"
Watch the left and right edges of the yellow beam as you pour. The beam should look like a rectangle, not a triangle. If the bottom of the beam is wider than the top (a pyramid shape), you are using too much Yellow. If the beam is disappearing into the Blue, you are using too much Blue. Adjust your ratio: if it's too wide, add an extra Blue cup. If it's too narrow, add an extra Yellow cup.
Step 9: Filling the Corners
Once the main beam and sky are established, you will have some gaps in the corners of the canvas. This is where the last of your Blue and perhaps some Red or Purple cups come in. Use these colors to patch any holes in the background or to refine the edges of the hills. The goal is to create a solid block of color for the background so the UFO stands out.
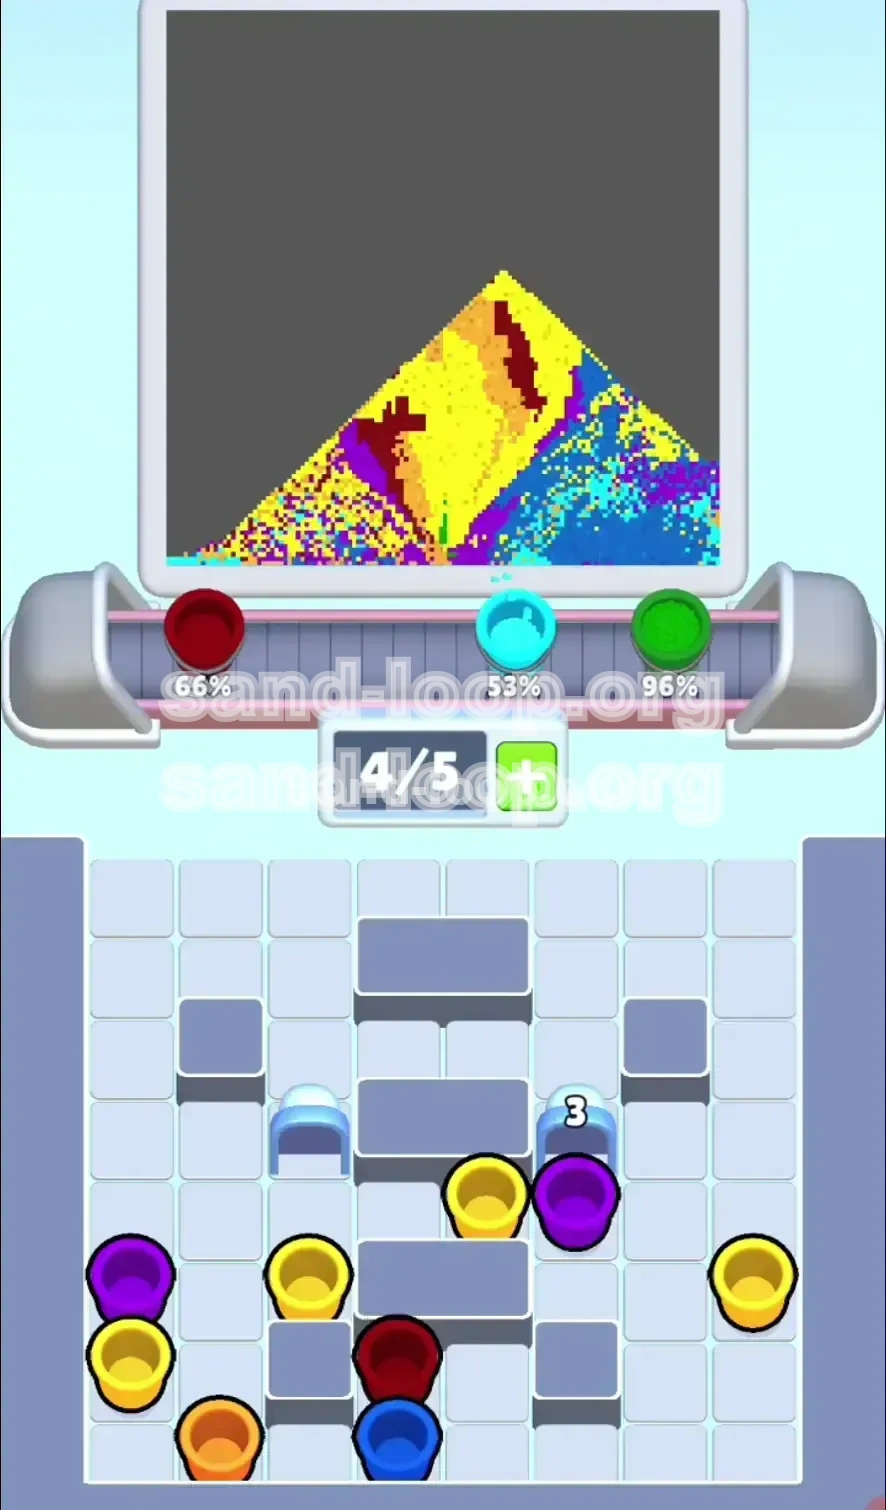
Step 10: The Final Cyan Cap
For the entire game, you have been ignoring the Cyan cups. Now is their time. Ensure your Yellow beam is tall enough and the Blue sky is high enough. Then, load the Cyan cups. Pour them last. They will form the glass dome on top of the UFO body (which is formed by the beam and the sky intersection). Because Cyan is the lightest color and on top, it will sit perfectly on the highest point of your sand pile.
Step 11: Starlight Cleanup
If you have any stray Yellow cups left, use them to add details to the sky. The "Stars" in this level are just small piles of yellow sand in the blue background. Tap any remaining Yellow, and if the game asks for "Star" details, tap the blue sky areas to place them. If not, just pour them out to complete the level.
Key Tips and Common Mistakes to Avoid
Even with a strategy, the physics of Sand Loop can be unpredictable. Here are specific tips to prevent failure and fix common errors.
Common Mistake: The "Pyramid" Beam
Mistake: Pouring all the Yellow cups first to "get the beam out of the way."
Why it fails: Sand piles up in a cone. If you finish the beam first, it becomes a giant yellow pyramid in the middle. When you pour the Blue sky later, it slides off the top of the pyramid and creates a flat blue roof over the beam, ruining the effect.
Solution: Never pour more than two Yellow cups without pouring a Blue cup in between.
Common Mistake: The Supply Deadlock
Mistake: Ignoring the Ice Locks and trying to paint the sky with the initial small amount of Blue.
Why it fails: You will run out of Blue paint while the locks are still closed. You will be left with a half-finished sky and no moves left to break the locks because you wasted them on the wrong colors.
Solution: Break the locks first. Use the "Touching Cup" method described in Step 3 before you touch any Blue or Orange.
Common Mistake: Burying the UFO
Mistake: Pouring the Cyan glass dome too early.
Why it fails: Cyan is the top layer. If you pour it while the beam is still short, the subsequent Yellow and Blue pours will cover the Cyan dome, effectively burying the UFO underground.
Solution: Treat Cyan as the "Finish Line." Do not click it until the main canvas is 90% full.
Stuck Solution: The Belt Jam
If your conveyor belt is full (5/5 slots) and you can't break the locks because the cup you need is buried behind other cups:
Fix: You have to waste a move. Pour a color that is "safe" (usually Green or Blue, depending on the stage) just to clear a slot on the belt. This is painful, but it's better than getting stuck. Once the slot is open, you can access the specific cup needed to lower the Ice Lock counter.
Stuck Solution: Avalanche Correction
If the Blue sand collapses into the Yellow beam, making it greenish or muddy:
Fix: You cannot "undo" a pour. However, you can mask the mistake. Pour a very thick line of Yellow on top of the affected area to restore the brightness. It might make the beam slightly wider, but it will hide the blue contamination. Alternatively, if you have moves to spare, you can pour surrounding colors to redefine the edge.
Speed Run Strategies and Shortcuts
For players looking to achieve a 3-star score or complete the level quickly for a daily challenge, efficiency is key.
The "Pre-Load" Technique
While the first cup of Green is pouring, immediately use that time to scan the tray for the Purple cups touching the locks. Don't wait for the Green to finish. Tap the Purple cups while the animation is playing. This queues them up instantly, saving 2-3 seconds per cup. In a speed run, every second of animation counts as thinking time.
The "Batch" Alternating Method
Instead of tapping Yellow-Wait-Pour, Blue-Wait-Pour, try to keep the belt full with the pattern: Yellow, Blue, Yellow, Blue. As long as the belt holds this alternating sequence, you can tap rapidly without fear of the "Pyramid" effect. The game queues the actions, ensuring the 1:1 ratio is maintained automatically. This prevents you from hesitating and accidentally tapping two Blues.
Lock Aggression
In a standard run, you might be tempted to optimize the background. In a speed run, ignore aesthetics. Focus 100% of your attention on the "4" locks. Tap whatever color touches the lock, regardless of whether it fits the picture. You can always patch a bad background later with Blue, but you cannot recover lost moves. Breaking the locks by turn 10 is the gold standard for this level.
Cyan Discipline
It is tempting to "clean up" the tray by clicking the Cyan cups when they are the only thing left in a cluster. Resist this urge. In a speed run, leaving Cyan cups on the tray is a good visual cue that you aren't ready for the final step. Treat them as "do not touch" buttons until the very last second.
Use the "Undo" Power-Up Wisely
If you have the Undo power-up equipped, save it for the Vertical Beam phase. This is where physics errors are most costly. If you accidentally pour a Blue cup when you meant to pour Yellow, Undo is essential. Do not waste Undo on the Green grass phase; that layer is forgiving and hard to mess up. Save the charge for the high-precision Yellow/Blue alternating phase.