
Level 174
HARDHow to solve Sand Loop level 174? Get instant solution for Sand Loop 174 with our step by step solution & video walkthrough. Sand Loop 174 tips and guide.
Play Sand Loop Now
Experience the puzzle challenge firsthand
Game Screenshots
Sand Loop Level Guides
Level 174 Comprehensive Walkthrough: Strategy and Execution Guide
Level Overview: The Mixed-Color Puzzle
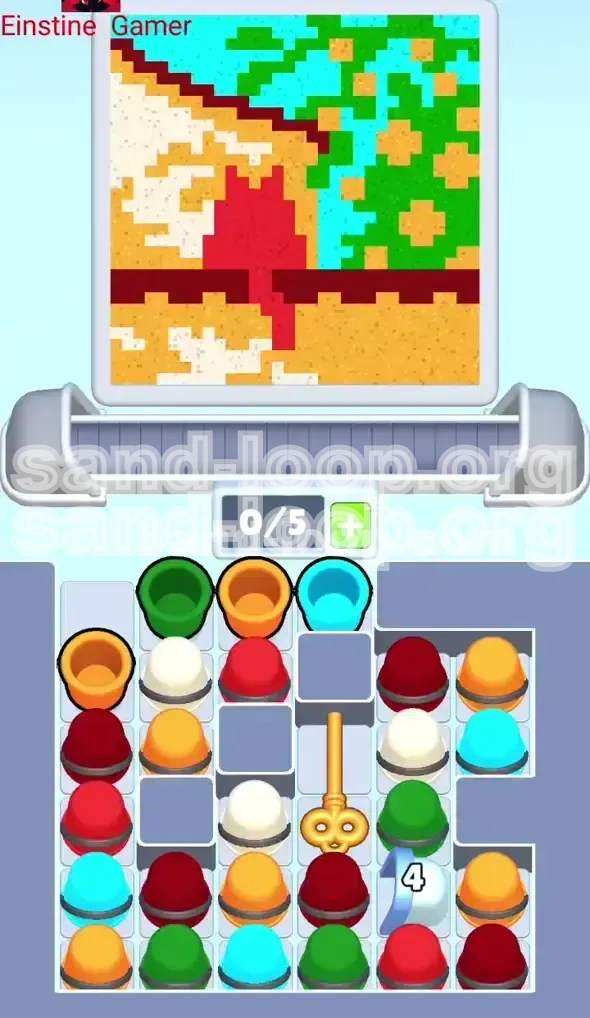
Sand Loop Level 174 is a complex logic puzzle disguised as a casual sorting game. While the canvas appears to be a simple pixel art landscape featuring a golden base, green zones, and a distinct dark red cross, the real challenge lies in inventory management. You are dealing with a highly congested supply tray where critical colors are buried deep under layers of unnecessary blockers. This level tests your ability to plan ahead, specifically requiring you to manage the "conveyor belt delay"—the time it takes for a cup to travel from the tray to the dispenser. It is not enough to simply match colors; you must sequence your loads to prevent a deadlock.
Core Mechanics and Setup
The stage begins with a standard 5-slot conveyor belt, initially empty (0/5 capacity). The supply tray is stacked vertically, often with 3 to 4 cups covering the ones you actually need. You will encounter a specific palette: Red, Orange, Cyan, Green, Yellow, and Cream. The "Cream" or white cups are particularly dangerous here; they often act as blockers for high-value colors like Cyan and Green. The dispenser moves at a fixed speed, meaning your inputs are delayed by roughly 3 to 4 seconds. Understanding this mechanical delay is the single most important factor in beating this level without using boosters.
Win Conditions Explained
To clear Level 174, you must fill specific color zones to 100% completion. The canvas is divided into distinct regions: a large golden area (approx. 30% of the board), a cyan horizontal band, green zones in the upper right, and a maroon cross in the center. The challenge is balancing your pours. You cannot simply finish all the red cups first, as this will overfill the red zone (wasting liquid) and leave you with no moves to clear the remaining green or cyan areas. You must maintain a "Color Balance," ensuring no single color progresses past 90% until the very end.
The Primary Bottleneck
The biggest obstacle in Level 174 is the "Locked Tray" syndrome. Because the belt holds 5 cups but the tray is deep, loading the wrong 5 cups at the start will freeze your options. If the belt is full of Red and Orange, but the only available pourable colors are Green, you are forced to waste moves pouring Red into areas that don't need it. The bottleneck is not the difficulty of the colors, but the physical space required to shuffle the tray and unblock the buried Green and Cyan cups.
Strategic Phase 1: The Opening Moves and Tray Unblocking
The "Three-Cup" Start Rule
Do not fill your belt to capacity (5/5) at the start. This is the most common mistake. Instead, load exactly three cups initially. Start by identifying the color that is most "on top" in the tray—usually Orange or Red. Load this first. Then, look for a color that is prominent on the canvas, such as Cyan or Green. Even if you have to dig slightly, prioritize getting a second color loaded. Stop at three cups. This leaves 2 empty slots, which is crucial for the next step.
Exploiting the Travel Delay
Once your first cup is loaded and traveling to the dispenser (a process that takes about 3-4 seconds), use that downtime to analyze the tray again. Do not just wait. As the belt moves, new cups in the tray will shift up, potentially revealing a needed color. By keeping 2 slots empty, you ensure that as soon as a useful cup becomes accessible, you can load it immediately without waiting for a cup to be poured and removed from the belt.
Prioritizing Unblock Sequences
You must accept that some cups are "garbage" blocking your path. If you see a Cyan cup buried under two Red cups, you must load and pour those Red cups first. Do not try to save them. In this level, Red and Orange are often used as "key" colors to unlock the tray. Pour these "blocker" colors into the largest available zones on the canvas (usually the Golden base) to clear them from your belt rapidly. This frees up your slots and exposes the buried high-value colors underneath.
Initial Rhythm Establishment
Establish a rhythm of: Load -> Wait -> Pour -> Load. Specifically, pour the cup at the dispenser the moment it aligns. Immediately after tapping to pour, scan the tray for the *next* color you need. If you loaded Red first, and your belt is now moving, look for Green or Cyan. If you see them, load one immediately. If not, load another "blocker" color to keep the belt moving. You never want the conveyor belt to stop moving; a stagnant belt is a losing belt.
Strategic Phase 2: Color Balance and Mid-Game Control
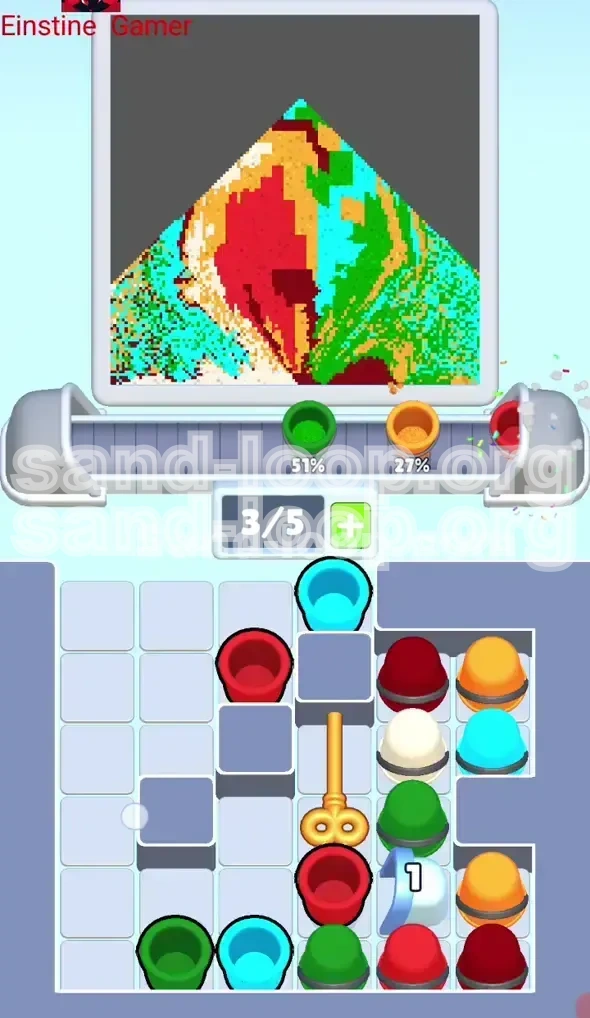
Monitoring Progress Bars
Keep a constant eye on the percentage bars at the top of the screen. A safe rule of thumb for the mid-game (40% to 70% completion) is to keep all active colors within a 20% range of each other. For example, if Red is at 50% and Cyan is at 20%, stop loading Red entirely. Even if Red cups are easily accessible, ignore them. Force yourself to load Cyan or Green to catch up. If you let one color get too far ahead, you will run out of canvas space for it later.
Managing "Neutral" Zones
The large Golden/Yellow base acts as a "neutral zone" or a buffer. When you are forced to pour a color that is already high (e.g., Red is at 80%), aim for the Golden areas if they overlap, or the darkest parts of that color's zone to minimize visual spread. However, be careful: the Golden zone often has its own target percentage. Use the Golden zone to dump small amounts of excess liquid from other colors only if necessary, but prioritize matching the correct pixel colors as much as possible.
The Danger of the "Full Belt"
As you progress, the temptation will be to fill the belt to 5/5 to "store" cups for later. Resist this. A full belt removes your flexibility. If you have an emergency—say, you suddenly realize you need Green urgently—but your belt is full of Red and Orange, you have to waste 3 pours just to clear the belt. Keeping the belt at 3/5 or 4/5 allows you to adapt to the random order in which the tray reveals new cups.
Handling the Cream/White Cups
In Level 174, Cream or White cups are often the "jokers" in the deck. They frequently block access to colors underneath. Treat them as free moves. If a Cream cup is on top of a Green cup you need, load the Cream cup and pour it immediately into a white or neutral area of the canvas. Do not hold onto it. Cream liquid is often used for fine detail, so pouring it usually clears a small percentage, allowing you to quickly move on to the color you actually wanted.
Strategic Phase 3: End-Game Precision and Stuck Solutions
The "One-Cup-At-A-Time" Rule
Once you reach the 80% completion threshold, shift your strategy to high-precision mode. Stop loading multiple cups in advance. Load one cup, watch it travel, pour it, and *then* assess. This prevents "over-pouring." Over-pouring happens when you load a cup thinking you need it, but while it was traveling, your previous pour finished that color zone, making the new cup useless. At this stage, patience is faster than speed.
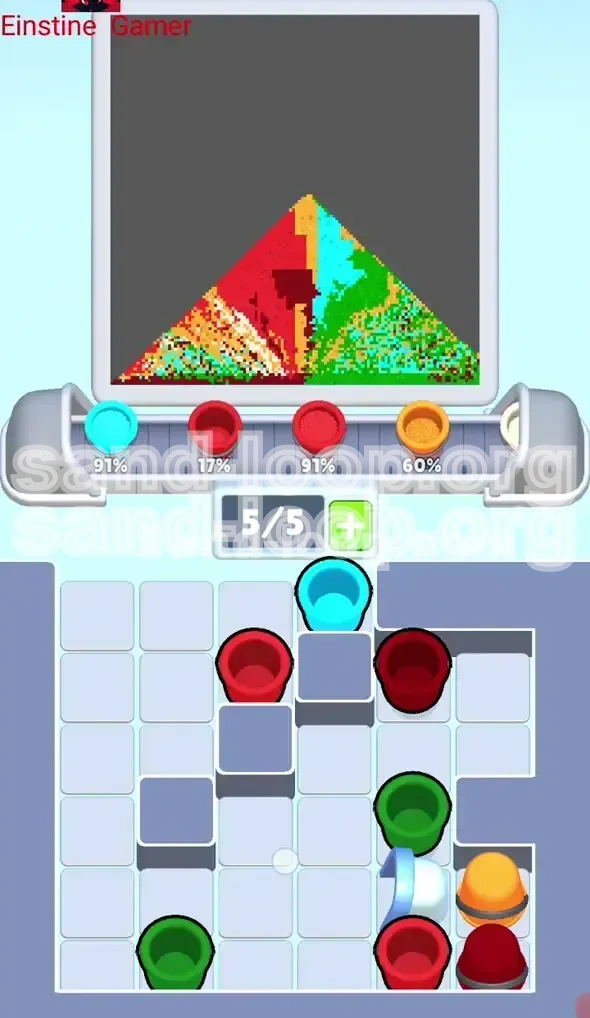
Dealing with the "Last 5%" Lock
You will likely encounter a situation where you are stuck at 95% on two colors, and the belt is full of cups you don't need. The solution is the "Sacrificial Pour." Pick a color that is *not* full (e.g., 90% full) and pour a cup of a different color into a corner of the zone where it overlaps slightly. This might waste a tiny bit of liquid, but it clears the cup from the belt, allowing a new cup to spawn from the tray. You are essentially "rolling the dice" on the tray generator to get the final color you need.
Recovering from a Jammed Belt
If you accidentally load 5 cups and realize none of them match the remaining color zones (a "Soft Lock"), do not panic. Look at the color with the *lowest* percentage. Pour a cup that matches that color, even if it feels inefficient. Alternatively, if you have a "Discard" or "Undo" booster, this is the time to use it. If not, you must manually pour cups into "safe" areas (areas already 100% filled) to simply remove them from the belt. Yes, this wastes liquid, but it frees up a slot so you can access the buried cups in the tray that you actually need.
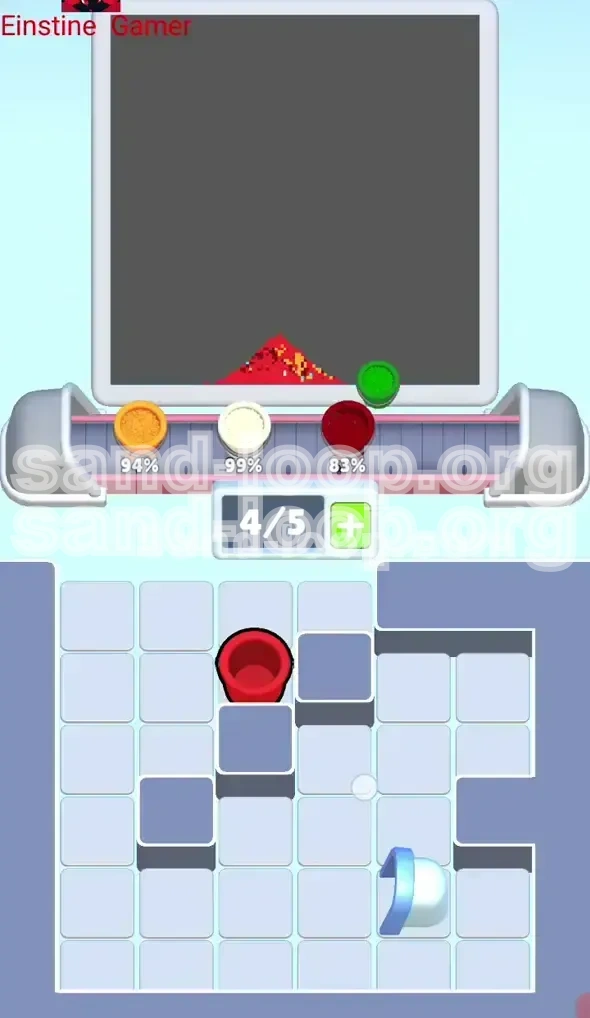
Finalizing the Dark Red Cross
The Dark Red/Maroon cross in the center is often the final hurdle. It is a small target area, meaning it requires precision. Do not dump large quantities of red liquid at once; pour short bursts. If you are at 95% on the Red zone, stop pouring Red. Clear your belt of other colors first, then come back to Red with a fresh cup. If you pour a full cup of Red at 95%, you will likely overfill the zone and fail the level.
Speed Run Tips and Efficiency Shortcuts
Input Buffering
For experienced players looking to optimize time, you can "buffer" your inputs. While a cup is traveling to the dispenser, you can tap the next cup in the tray to pick it up. The game will queue this action, and the moment the traveling cup is poured, the new cup will slide onto the belt instantly. This eliminates the delay between pouring and loading, significantly speeding up your cycle time.
Pre-Loading Strategy
During the "Unblocking Phase" (start of game), try to predict what you will need *after* your current two cups. If you are pouring Red and Orange to unblock Green, have your finger ready on the Green cup in the tray the moment the Orange cup leaves the belt. Anticipating the unlock rather than reacting to it can save 5-10 seconds per cycle.
Pattern Recognition
Level 174's tray generation is not fully random; it follows a pattern of "Blocker -> Needed Color." Learn to identify the stack formations. If you see a single cup sitting on top of a stack of two, it is highly likely a blocker. Prioritize loading singletons first before digging into double-stacks. This heuristic helps maintain a balanced belt.
Zone Prioritization Order
For the fastest clear, follow this specific color priority order: Cyan (hardest to keep balanced) -> Green (large area, medium priority) -> Yellow/Gold (buffer) -> Red/Orange (often blockers, finish last). By focusing on Cyan early, you avoid the late-game struggle of trying to find the last 5% of Cyan while your belt is clogged with Red.
Booster Usage for Speed
If you have the "Extra Slot" booster, use it at the very start to give yourself a 6-slot belt. This allows you to load more blockers early without fear of jamming, enabling you to unblock the deep tray stacks much faster. If you have the "Time Freeze" booster, save it for the final 10% when the precision required is highest and the time pressure is most intense.