
Level 183
HARDHow to solve Sand Loop level 183? Get instant solution for Sand Loop 183 with our step by step solution & video walkthrough. Sand Loop 183 tips and guide.
Play Sand Loop Now
Experience the puzzle challenge firsthand
Game Screenshots
Sand Loop Level Guides
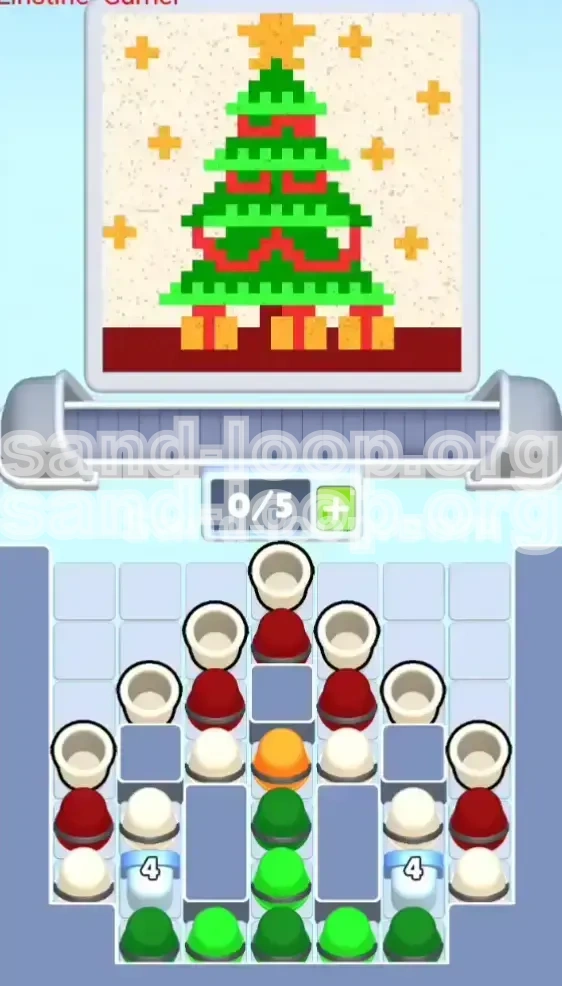
Level Overview: The Christmas Tree Logic Puzzle
Sand Loop Level 183, "The Christmas Tree challenge," is a deceptive stage that appears simple due to its lack of a tight timer but offers a significant logistical challenge. Unlike speed-based levels where reflexes rule, this stage is a pure logic puzzle that tests your ability to manage color queues and prioritize specific elements under mechanical constraints.
The core visual consists of a pixel-art festive tree with intricate details. However, the challenge lies not in the drawing itself, but in the specific "Ice Block 4" mechanic that guards your primary resource (Green sand). You are presented with a supply tray shaped like an inverted chevron, where your most needed colors are locked behind breakable obstacles.
This guide will break down exactly how to navigate the supply tray, ensuring you don't waste your early moves on the wrong colors. You will learn how to build the image from the bottom up, managing the delicate balance between the red garlands, the golden presents, and the massive volume of green required for the tree foliage.
The Ice Block Mechanism
The most critical feature of this level is the "Ice Block 4" system. You will see large ice blocks sitting directly on top of the main stack of Green cups. These blocks function as locks; they do not disappear immediately. Instead, they require you to clear specific adjacent cups a total of four times to shatter them.
Many new players make the mistake of trying to break these ice blocks immediately by using the few accessible green cups at the top. This is a trap. If you waste your early greens trying to break the ice, you will run out of sand for the tree body before the blocks actually break. The ice is designed to break naturally as you clear the upper layers of the tray for other colors.
Layering Strategy
This level forces you to understand the physical layering of the image. The Christmas tree is not a flat image; it is built in 3D space. The green foliage sits physically "on top" of the presents and the floor. If you attempt to pour the green foliage first, the sand will simply fall through the empty spaces where the presents should be, wasting precious resources.
You must adopt a "Bottom-Up" mentality. The red floor and gold presents act as the foundation. They fill the bottom-most voxels, creating a solid base. Only after this base is 100% complete can you safely pour the green sand to build the tree above it without losing volume to gaps.
The Supply Tray Layout
The supply tray in Level 183 is arranged in a specific hierarchy that conflicts slightly with the order you need to paint. The top of the tray (the easiest to access) contains White and Red, while the bottom (hardest to access) contains the bulk of the Green.
Understanding this layout is crucial for queue management. You will need to suppress the urge to clear the top-most cups immediately. Instead, you must cherry-pick specific cups (like the lone Gold cup) while strategically clearing others to trigger the ice block breakage exactly when you are ready for the "Green Flood."
Visual Complexity Analysis
While the pixel art looks festive, the "Danger Zone" is high complexity. The interface between the red floor and the gold presents is tight. A single mis-timed pour can cause red sand to bleed into the gold present area, turning your gifts into muddy brown blobs.
Furthermore, the tree features diagonal red garlands. This means you cannot simply hold the green button. You must alternate your pours rhythmically: Green for branches, Red for garlands, Green for branches. If you just spam green, you will bury the garland slots, forcing you to waste green sand later to dig them out.
Clear Objectives: What You Need to Accomplish
To achieve a 100% completion rate in Level 183, you must stop viewing the level as a single image and start treating it as a series of small, sequential construction phases. Your primary goal is to build the foundation before the decoration.
The objective is split into three distinct phases: The Foundation Phase (Floor and Presents), The Structural Phase (Tree Body), and The Decoration Phase (Star and Sky). Failing to complete one phase before moving to the next is the leading cause of failure.
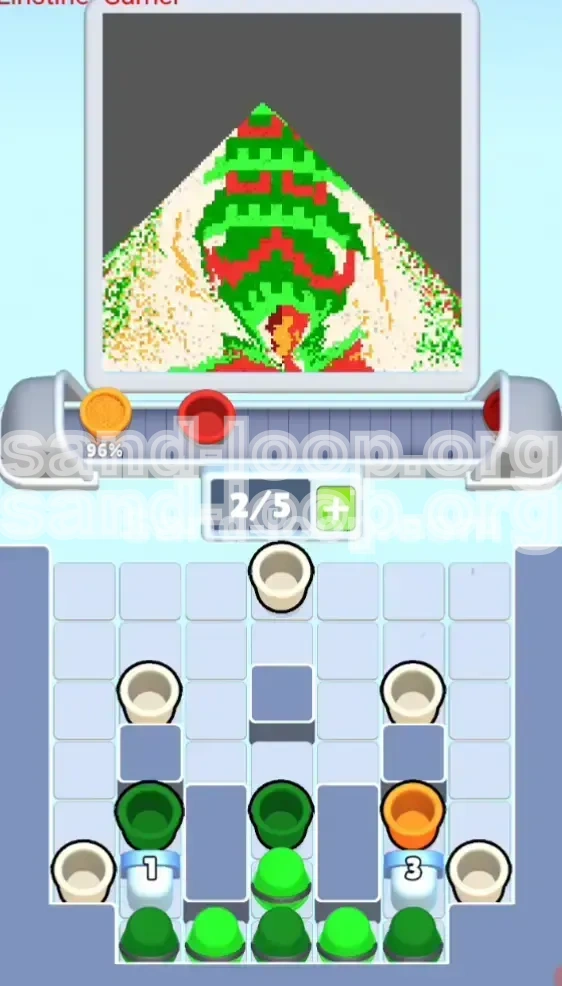
Objective 1: Secure the Foundation (Red & Gold)
Your immediate goal is to reach 15-20% completion by focusing exclusively on the bottom of the screen. You must fill the red floor area completely and place the gold presents perfectly within their designated slots.
Do not touch the green sand yet. Treat the green cups in your tray as if they are locked. If you accidentally pour green, it will fall through the empty present slots and be wasted. You must discipline yourself to only pour Red and Gold until the floor is solid.
Objective 2: Trigger the Ice Break
Your secondary objective is to manipulate the tray to shatter the Ice Blocks. This is not done by force, but by flow. As you clear the Red and White cups from the top rows to complete Objective 1, you are applying "pressure" to the ice blocks below.
Your goal is to have the ice blocks shatter exactly when the Foundation is finished. This timing ensures that as soon as you are done with the floor, your massive reserve of Green sand is unlocked and ready for the tree body.
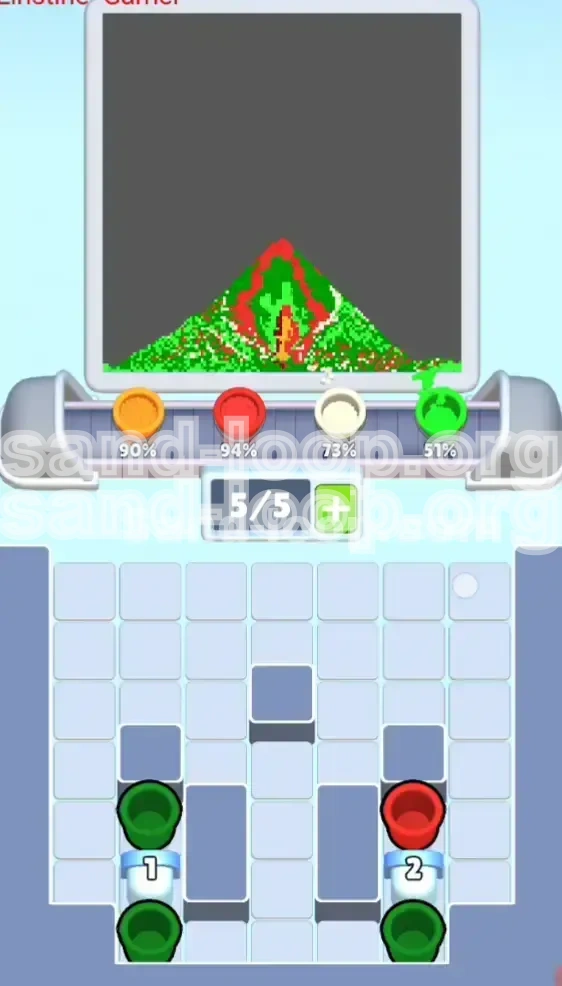
Objective 3: The Green Expansion
Once the ice breaks, the game changes from a precision puzzle to a management task. The tree body comprises about 60% of the total image area. Your objective here is to maintain a steady stream of green sand while intermittently pausing for the red garlands.
Do not let the green sand overflow into the white background sky areas. Keep your pours contained within the cone shape of the tree. You must stop pouring before the cup is empty to avoid spillage.
Objective 4: The Topper and Sky
The final 10% of the level is resource-critical. You must have saved exactly one Gold cup for the star and several White cups for the sky. If you used all your gold on the presents, you cannot finish the level.
Your objective is to clean up the edges, ensuring the snowy background is white, and place the final star on the very top peak of the tree without smudging the green branches below it.
Step-by-Step Instructions: The Action Plan
This section provides the exact sequence of moves required to beat Level 183. Follow these steps in order. Do not rush ahead. The logic of this level relies on this specific order of operations.
Step 1: The "Red Floor" Start
As the level begins, ignore the center of the tray. Look immediately to the top-left and top-right "wings" of the chevron shape. You will see stacks of Red cups.
- Action: Click and send the Red cups from the side stacks to the belt immediately.
- Target: Aim for the bottom rectangular floor area of the canvas.
- Note: Do not fill the floor to 100% yet. Leave the corners slightly empty so you can fit the presents in first without the red sand overlapping.
Step 2: The Lone Gold Cup Priority
As you clear the top rows, you will spot a single Gold/Orange cup nestled in the middle-upper section of the tray. It is usually surrounded by Green or White cups. This is the most critical cup in the game.
- Action: Clear whatever cups are necessary to access this Gold cup.
- Timing: Send this Gold cup to the belt immediately after the floor is partially red.
- Target: Fill the "Present" boxes at the base of the tree.
- Warning: If you miss this cup and it gets buried under falling debris later, you will likely fail the level. Prioritize it above all else.
Step 3: Clearing the Upper Wings (White & Red)
With the Gold cup secured, look at the far edges of the tray. You will see White cups. These are for the snowy sky background.
- Action: Send the White cups to the belt.
- Timing: Do this while you are waiting for other queues to clear. Use these as filler.
- Target: The sky area above the tree.
- Secondary Goal: While doing this, keep an eye out for more Red cups in the upper wings. You need these to finish the floor and start the lower garlands.
Step 4: The Natural Ice Break
By following Steps 1 through 3, you have been removing the cups resting *on top* of the Ice Blocks.
- Observation: Watch the Ice Blocks (labeled 4). They should now be cracking or close to breaking.
- Action: If they haven't broken yet, look for remaining cups in the rows directly above the ice. Clearing these usually delivers the final "hit" needed to shatter the ice.
- Result: The ice shatters, revealing a massive column of Green cups at the bottom of the tray.
Step 5: The Green Flood (Tree Body)
Now that the ice is gone, your tray will be dominated by Green. The Presents are done, the Floor is done. Now we build the tree.
- Action: Begin sending Green cups rapidly.
- Target: The main conical body of the tree.
- Technique: Pour until the tree widens, then stop. Wait for the sand to settle. Look for the Red Garlands weaving through the tree.
- Adjustment: You must switch back to Red briefly to fill these garlands, then switch back to Green. Do not bury the garland slots!
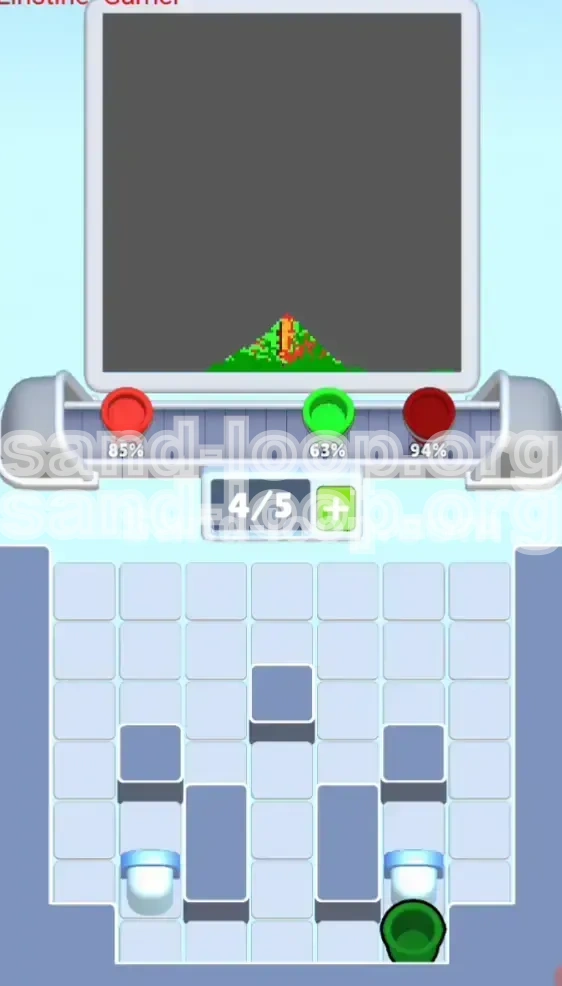
Step 6: The Star and Finish
As the tree fills up, you will run out of Green. You should have saved one specific cup from earlier or find the last one now.
- Action: Locate the final Gold cup (saved from the initial rush or found in the leftovers).
- Target: The very top tip of the tree.
- Final Polish: Use any remaining White cups to patch holes in the sky background.
- Completion: Once the percentage hits 100%, the level is complete.
Color Order: The Logical Sequence
Success in Level 183 is dictated by the order in which you process your colors. Processing them in the wrong order (e.g., Green first) will result in an impossible gridlock. Here is the mathematically optimal color sequence.
Phase 1: Red (The Floor)
Why Red First? The red floor is the absolute bottom layer. If you pour Green first, it falls through the floor. If you pour Gold first, it sits on the floor but Red poured later might cover the edges of the Gold presents.
The Strategy: Establish the Red floor immediately. This creates a "container" for the presents and gives the green sand something to land on later. Focus on getting the bottom 15% of the screen red before looking at any other color.
Phase 2: Gold (The Presents)
Why Gold Second? The presents sit *on* the red floor but *under* the tree. You must place them while the floor is accessible but before the tree foliage covers the area.
The Risk: If you wait too long, the Red floor will be fully covered by subsequent pours, making it hard to see where the presents go. If you go too early, the Red floor isn't there to support them.
The Strategy: Pour Gold immediately after the initial Red layer is laid down. This ensures the presents "pop" against the red floor and are perfectly positioned before the Green avalanche starts.
Phase 3: White (The Sky)
Why White Third? White is technically background, but it is also a "safe" color. It doesn't interact with the tree, floor, or presents. It floats above everything.
The Strategy: Process White cups whenever you have a bottleneck in the tray (e.g., when you are trying to dig down to a Gold cup or waiting for Ice to break). It keeps the production line moving without risking the main image.
Phase 4: Green (The Tree)
Why Green Last? This is the counter-intuitive part. Green is the most visible color, but it must be processed last because it is the "top" layer.
The Volume Problem: Green represents roughly 60-70% of the sand volume in this level. Because the Ice Blocks hide the main Green supply, you physically cannot access the bulk of the Green until you have processed the Red, Gold, and White cups sitting on top of the ice.
The Strategy: Accept that Green is late. Don't panic early on when you don't have Green. The game design forces you to do the details first.
Key Tips and Common Mistakes
To secure your victory, keep these specific pointers in mind. These tips address the specific pain points players encounter in Level 183.
Tip 1: The "Save the Star" Rule
It is incredibly easy to use every Gold cup you see on the presents at the bottom. However, the tree requires a star at the very top.
The Fix: Count your Gold cups. If you see three Gold cups, only use two on the presents. Save one for the finale. If you are unsure, save the Gold cup until the very end of the level—you can always pour the presents slightly imperfectly, but you cannot finish the level without the star.
Tip 2: Don't Force the Ice
Players often see the "Ice Block 4" and panic, trying to clear cups randomly to break it.
The Fix: Trust the layout. The cups you need to clear for the image (Red, White, Gold) are positioned exactly where they need to be to break the ice. Focus on painting the image correctly, and the ice will break as a side effect. If you break the ice too early, you might flood the belt with Green while you still need to do detail work with Red.
Common Mistake: The Green Spill
The most common error is over-pouring Green. The tree is triangular, meaning the top is narrow. Players often get into a rhythm and keep pouring Green even after the tree is full.
The Fix: Watch the edges of the tree. Once the green sand hits the white background, stop pouring. Overfilling the tree creates "runners" of green sand that streak across the snowy sky, which is very difficult to clean up later.
Common Mistake: Ignoring the Garlands
The tree has red stripes (garlands). If you pour 100% Green, you fail.
The Fix: Pause your Green pouring every 20% of the tree's height. Switch to Red for two seconds to paint the garland stripe, then switch back to Green. It feels slower, but it prevents you from having to "dig" the garland out later (which wastes huge amounts of sand).
Stuck Solutions and Speed Run Tips
If you are currently stuck at 80% or keep running out of a specific color, use these advanced troubleshooting steps. For the veterans, here is how to speed run this level.
Solution: "My Green is Locked!"
If you are staring at a screen full of Green cups that you can't click because of Ice Blocks, you missed a step.
The Fix: Look at the top rows of the center stack. There are likely 2-3 cups (usually Red or White) sitting directly on the ice hammer. You *must* clear these specific cups. The game will not let you break the ice until you remove the debris resting on the trigger. Use your limited moves to clear these specific blocker cups.
Solution: "Ran Out of Gold for the Star"
If the tree is done, the presents are done, and you have no Gold left for the star.
The Fix: You have to recycle. You need to delete a present. Use the "undo" or "shovel" function (if available/allowed in your game mode version) to remove sand from one of the bottom presents. Pour that recovered sand into the star slot. It's ugly, but it finishes the level. Alternatively, restart and be more stingy with the first two Gold cups.
Speed Run Strategy: The "Top-Down" Clear
For a fast time, you cannot afford to wait for animations.
The Move: As soon as the level loads, identify the 3 key Gold cups. Send the first Gold cup immediately, then send two Reds. Don't watch the sand fall. Immediately look for the next Gold cup. The goal is to queue the belt so that while the Presents are falling, you are already clearing the path to the Ice Block. Keeping the belt full is the key to speed.
Speed Run Strategy: Pre-Ice Loading
The bottleneck is always the Ice Block.
The Move: Before the Ice Block breaks, ensure your belt has 3-4 Green cups already queued (if you have access to edge greens) or that your next click is instantly on a Green cup the millisecond the ice shatters. Minimizing the downtime between Ice Break and Green Pour is what separates a good time from a great time.