
Level 218
HARDHow to solve Sand Loop level 218? Get instant solution for Sand Loop 218 with our step by step solution & video walkthrough. Sand Loop 218 tips and guide.
Play Sand Loop Now
Experience the puzzle challenge firsthand
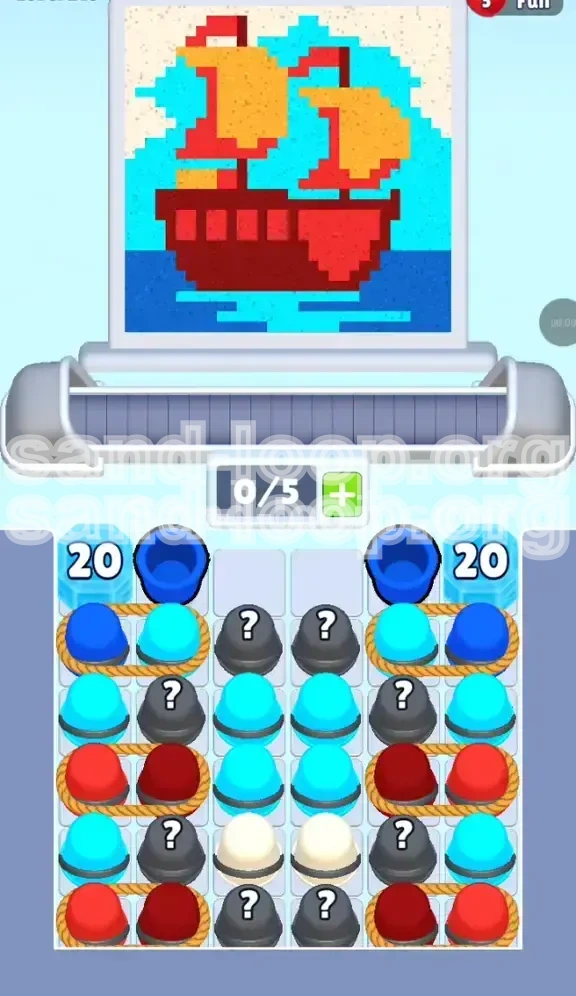
Game Screenshots
Sand Loop Level Guides
Sand Loop Level 218: The "Red Sailboat" Strategy Walkthrough
Stage Overview: The Frozen Logistics Puzzle
Sand Loop Level 218, titled "The Red Sailboat," is a deceptive logic stage that masquerades as a simple art restoration. The visual target—a pixel-art ship featuring a red hull, golden yellow sails, and a blue sea—is familiar and nostalgic. However, the game board layout is designed to punish impulsive players. The core difficulty lies not in the pixel art itself, but in the restrictive supply chain mechanics implemented through Ropes, Mystery Cups, and high-HP Ice Blocks.
Level Difficulty Analysis
- Logic Rating: 9/10. Prioritization is mandatory; speed is secondary.
- Grid Lock: High. 40% of initial blue resources are frozen behind "20 HP" barriers.
- Risk Factor: Severe. Tapping incorrect Roped pairs can soft-lock your conveyor belt.
Victory Conditions
To secure the 3-star rating and complete the level, you must manage your 5-slot conveyor belt inventory strictly. The win condition is not just "filling the canvas," but doing so without clogging your belt with unusable colors. You must treat your conveyor slots as a premium resource.
The Core Mechanic: Roped Pairs
In this level, Ropes bind a visible, needed cup to a hidden Mystery Cup. This is the trap. When you tap the Red cup you need, you are forced to accept the Mystery Cup onto your belt. If that Mystery Cup reveals a Blue color while the water section is still locked by ice, you have effectively wasted a slot. Wasting two slots creates a bottleneck; wasting three usually leads to a "Game Over."
Level Objectives and Priorities
Primary Objective: The Hull and Sails First
Your absolute first goal is to complete the Red Hull and Golden Sails. Do not touch the sky or the water until the ship is fully painted. The game logic is tiered: the background elements cannot be properly filled until the foreground elements are stabilized. Attempting to paint the Cyan sky early is a strategic error because the Cyan cups are scarce and trapped behind obstacles.
Secondary Objective: Conveyor Belt Management
You must maintain at least 2 open slots on your conveyor belt at all times. This buffer is essential for absorbing the "junk" cups that come from Roped pairs. If you have a full belt of 5 cups and the next pair includes a Mystery Cup that turns into a color you cannot use yet, your production line stops dead.
Tertiary Objective: The Ice Block Thaw
At the top of the screen, massive "20 HP" Ice Blocks encase the Dark Blue and Cyan cups needed for the water. You cannot break these efficiently by matching adjacent cups because the layout prevents easy matches. Instead, you must rely on the "cycle" mechanic—clearing other cups to force the board to shift and crack the ice naturally.
The Forbidden Zone: The Water
Visual psychology tricks you here. The bottom of the image is blue water, so your brain wants to fill it first. Resist this urge. The water area is adjacent to the hull. If you pour Blue paint while the Red Hull is incomplete, you risk "bleeding" the blue into the hull pixels if your aim is even slightly off, or simply clogging your belt with Blue cups you can't use yet.
Resource Scarcity Assessment
Red and Yellow cups are plentiful but roped. Blue and Cyan cups are plentiful but frozen. This imbalance dictates your strategy: you must play the "Roped Game" to get paint for the ship, while waiting for the board state to unlock the ocean.
Color Processing Order: The Critical Path
Phase 1: Dark Red (The Hull Shadow)
Start by identifying and tapping Roped pairs that contain Dark Red. This color is usually the most scarce. Use it to fill the bottom shadow of the ship's hull. Because it is a detail color, it requires precision. Ensure your first tap is a Roped Dark Red pair to get your belt moving immediately.
Phase 2: Bright Red (The Hull Body)
Once the shadows are placed, flood the main body of the hull with Bright Red. This is a large area, so you will need multiple cups. While the Red cups are pouring, keep an eye on the Mystery Cup that was roped to them. If it reveals Yellow, perfect! If it reveals Cyan, send it to the back of the line or use it immediately if the sky has unlocked (unlikely this early).
Phase 3: Golden Yellow (The Sails)
With the hull secure, move to the Golden Yellow sails. The sails are elevated in the picture, meaning they are easier to target without hitting the water area below. By this phase, you should have cycled enough cups to start seeing the Ice Blocks at the top crack slightly.
Phase 4: Cyan (The Sky)
Only after the ship is fully red and yellow should you touch the Cyan. The Sky is at the very top of the canvas. Filling it late prevents you from accidentally clicking it while trying to hit the ship.
Phase 5: Dark Blue (The Deep Water)
This is the final step. The Dark Blue is locked behind the "20 HP" Ice Blocks. By the time you reach Phase 5, the cycling of cups from the previous phases should have chipped away at the ice HP, or simply shifted the board enough to make these cups accessible.
Step-by-Step Walkthrough Instructions
Step 1: The Bottom Row Setup
Begin the level by pausing. Look at the bottom row of the cup tray. You will see Roped pairs. Do not tap randomly. Identify a pair where the visible cup is Red. Tap it. As the two cups enter your 5-slot belt, one is Red (useful) and one is Mystery (unknown). Pour the Red into the Hull immediately.
Step 2: The "Mystery Reveal" Decision Tree
Watch the Mystery Cup reveal its color.
- If it turns Yellow: Excellent. Pour it into the sail area.
- If it turns Cyan/Blue: Do not panic. Do not try to force it. If the water isn't ready, let this cup sit on the belt. Do not pour it. Let it occupy a slot (treat it as "inventory").
- If it turns Red: Pour it into the hull.
Step 3: Clearing the Central Column
The center of the tray is a stack of Mystery Cups. These act as the "key" to the level. You must clear them to lower the tray tiers. However, only tap the center stack when you have 3 or more open slots. This is a safety measure. If you tap the center stack with a full belt, and 3 Mystery Cups turn out to be Blue (unusable), you have no room to maneuver new Red cups onto the belt. You will be stuck.
Step 4: Triggering the Ice Break
As you fill the Red Hull and Yellow Sails, you will notice the "20 HP" Ice Blocks at the top corners losing HP or cracking. This is triggered by the number of cups you pour, not just matches. Keep the flow going. Focus purely on Red and Yellow. The game is programmed to release the Blue cups only after the Ship (foreground) is significantly complete.
Step 5: The "Blue Flood" Finale
Once the ship is 100% complete, the Ice Blocks will shatter or become accessible. Now, the strategy shifts from "Precision" to "Speed." Your belt should be clearing out. Rapidly tap the now-available Blue and Cyan cups. Since the ship is done, you can aim anywhere in the bottom half of the screen to fill the water without risking the artwork.
Key Tips and Common Mistakes
Tip #1: The "Slot Buffer" Rule
Always keep at least one slot empty on your conveyor belt. Think of this slot as your "breathing room." If you tap a Roped pair and the Mystery cup is a color you can't use (like early Blue), that empty slot allows you to continue receiving other cups while you wait for the canvas to unlock. If you play with 0 empty slots (a full belt), you are one bad tap away from failure.
Tip #2: Ignore the HP Number
Don't stress about the number "20" on the ice. It is not a timer. It is a health bar that dictates when that specific resource unlocks. You cannot speed it up by tapping the ice. You speed it up by playing the rest of the board correctly. Focus on the ship, and the ice will take care of itself.
Mistake #1: Painting the Sky First
Novice players often start with the Cyan Sky because it looks easy. This is a trap. The Sky cups are roped to Mystery cups that might be Red. If you fill your belt with Cyan trying to paint the sky, you won't have room for the Red cups needed for the hull, and the Roped pairs will clog your belt with mixed colors.
Mistake #2: The Mystery Cup Spam
Tapping a whole column of Mystery Cups at once feels satisfying, but in Level 218, it is suicide. If you reveal 5 Cyan cups in a row and the water isn't open, you have a belt full of useless inventory. You will have to waste time waiting for them to pour (which you can't) or cycle out. Only tap Mystery Cups when you desperately need to move the board.
Mistake #3: Breaking Ice with Matches
Don't try to make matches adjacent to the Ice Blocks to break them. The layout is designed to prevent you from forming a line of 3 or 4 next to the ice easily. You will waste moves. Trust the process: Paint the ship, and the ice breaks automatically.
Speed Run and Stuck Solutions
What To Do If You Get Stuck
If you are in the middle of the level and your belt is full of Blue cups, but you can't paint the water yet: Stop Tapping. Look at the canvas. Is there a single pixel of Red or Yellow left? Find it. If you absolutely cannot find any Red/Yellow pixels, you may need to waste a move. Pour a Blue cup into a "safe" area (like a corner of the water that might already be started) to free up a slot, then hunt for the last Ship pixels.
Speed Run Strategy: The "Red Rush"
For experienced players looking to fast-forward the level: Ignore the Mystery Cups in the center column entirely for the first 30 seconds. Focus exclusively on the bottom and side Roped pairs that are visibly Red or Yellow. Clear the ship's silhouette as fast as possible. Once the ship is a solid block of color, the game will trigger the Ice break event. This saves you the time of dealing with the Mystery Cup RNG (Random Number Generator) gamble.
Shortcut: The "Soft Lock" Release
If the ice isn't breaking fast enough, try over-filling the hull slightly. Sometimes the game's detection logic needs a few "overflow" pixels to register that the section is complete. Pouring slightly outside the lines on the hull can trick the game into thinking you are further along than you are, accelerating the release of the Blue cups.
Final Checklist Before You Start
- Identify the Red Hull pixels immediately.
- Accept that you will hold "useless" Blue cups on your belt for a while.
- Never fill all 5 belt slots.