
Level 35
HARDHow to solve Sand Loop level 35? Get instant solution for Sand Loop 35 with our step by step solution & video walkthrough. Sand Loop 35 tips and guide.
Play Sand Loop Now
Experience the puzzle challenge firsthand
Game Screenshots
Sand Loop Level Guides
Level 35 Strategy Overview: The Blue Apple Challenge
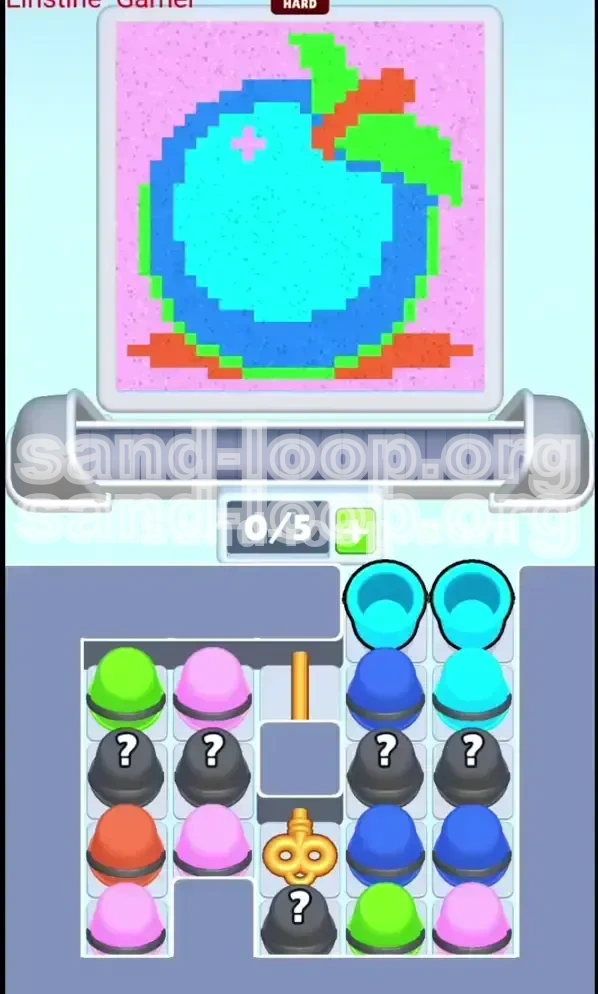
Welcome to the definitive walkthrough for Level 35 of Sand Loop, commonly known as the "Blue Apple" stage. This level marks a significant spike in difficulty, shifting the focus from simple color matching to spatial logic and resource management. The visual target—a neon blue apple or potion bottle on a branch—may seem artistic, but the underlying puzzle is a harsh test of your queue management skills.
The primary difficulty here stems from the "Golden Key" mechanic. You are not just filling a shape; you are unlocking a supply line that is initially blocked. Furthermore, the presence of multiple "Mystery Cups" (black cups with question marks) introduces a heavy element of RNG (Random Number Generation) risk. If you rely on luck, you will fail. You must rely on strict sequence control to ensure the conveyor belt never jams while you dig for the key.
In this guide, we will break down the exact sequence to clear the obstruction, the specific order to layer your colors to prevent bleeding, and how to manage the limited 5-slot tray capacity to secure that 100% completion rating.
Understanding the Golden Key Obstruction
The core mechanic of Level 35 is the physical blockade of your resources. Unlike previous levels where all paint is accessible from the start, here, roughly 40% of your required sand volume is locked behind a Golden Key located in the bottom-center of the tray.
The Mystery Cup Variables
Scattered among your guaranteed color cups are Mystery Cups. These are wildcards. They could contain the abundant Pink you need, or a single drop of Orange that overflows your container. Understanding probability is key here: treat every Mystery Cup as a potential hazard until its contents are revealed.
The Tight Tray Capacity
Your tray only holds 5 cups. This sounds like plenty, but when the key unlocks a new row of cups, the tray can fill up instantly. If your tray hits 5/5 before you unlock the key, you cannot tap the key, and you will be forced to waste paint or fail the level.
Color Bleeding Risks
The "Blue Apple" design features tight borders. The Orange stem connects directly to the Green leaf. If the Orange sand is poured while the Green is still wet, or if the flow rate is too high, the colors will mix into a muddy brown, ruining your precision score. We will cover how to time these pours.
The Importance of the "Outline First" Rule
Many players fail by filling the Cyan center too early. If you fill the center first, the subsequent Dark Blue outline has nowhere to go but outward, thinning the line or spilling into the background. You must always prioritize the container (the outline) before the contents.
Primary Objectives and Completion Goals
Before you tap a single cup, you need a clear roadmap. Your brain processes information faster than the sand pours, so planning your next three moves is essential. The objective is not just "finish the painting," but rather "unlocks the supply chain without stalling the belt."
Unlock the Golden Key Efficiently
Your first major milestone is revealing and tapping the Golden Key. This sits at the bottom of the stack. To reach it, you must clear the top layers of the tray to create physical space and access the lower rows.
Establish the Dark Blue Boundary
The Dark Blue sand forms the thick skin of the apple. This is your most critical structural element. If this fails, the level fails. Your priority is to pour Dark Blue as soon as it is safe to do so, creating a "dam" that will hold the lighter Cyan sand later.
Isolate the Orange Stem
The Orange stem is the smallest target in the level, comprising perhaps only 5% of the total surface area. It is extremely susceptible to overfilling. You must learn to pour Orange in short bursts or use single cups rather than stacking them.
Fill the Background Noise (Pink)
The Pink background is deceptive. It looks like empty space, but it requires a high volume of sand. Pink is your best friend for "stalling" or buying time. If you need to wait for a specific color to clear the belt, pour Pink.
Manage the Mystery Cups
You must reveal the contents of the Mystery Cups without letting them clog your tray. The goal is to convert these unknowns into knowns, sending them to the belt immediately only if you have the capacity to handle them.
Achieve 100% Capacity without Overflow
The ultimate goal is a perfect clear. This means keeping the tray count at roughly 3/5 or 4/5 at all times. Never let it sit at 5/5 for more than a second. A full tray is a game-over tray.
Phase 1: The Setup and Tray Clearance
The beginning of the level is a race to clear space. You start with a tray that is deceptively organized, but the bottom rows are blocked. We will start by clearing the right side to expose the Mystery layer.
Step 1: The Right-Side Cyan & Blue Drop
Look immediately to the right side of the tray. You will see a stack: Cyan on top of Dark Blue.
- Tap both Cyan cups first.
- Immediately tap the two Dark Blue cups beneath them.
Why this order? Cyan is the largest volume. Sending it first starts the long pour process. By following immediately with Dark Blue, you start building the outline while the Cyan is still settling. Crucially, this clears the entire right column of the top layer, exposing the "Mystery Row" underneath.
Step 2: Clearing the Left-Side Debris
Shift your focus to the left side. You likely have a Green cup and a Pink cup sitting atop more Mystery Cups.
- Tap the Green cup. This sends a moderate stream to the leaf. It’s a small area, so don’t panic if it looks full.
- Tap the Pink cup next. Start filling the vast background area.
The Warning: Do not tap the Mystery Cups yet. You need to ensure the conveyor belt (the pouring mechanism) has cleared the initial Cyan and Blue streams before you introduce unknown variables.
Step 3: Assessing the "Mystery Row"
With the top layer gone, you are now staring at a row of four black cups with question marks. This is the barrier between you and the Golden Key.
- Pause and check the belt. Is it moving freely?
- Identify the specific Mystery Cup directly above the Key. Usually, this is the second or third cup from the left.
Step 4: The Strategic Mystery Tap
This is the most dangerous moment in the level. You must tap the Mystery Cup blocking the Key.
- Tap the target Mystery Cup.
- Watch the reveal. If it turns into a color you need (like more Pink or Blue), great. If it turns into Orange, be very careful.
- Send it to the belt immediately. Do not let it sit in the tray.
Step 5: Activating the Golden Key
With the obstruction removed, the Golden Key is now exposed in the bottom-center slot.
- Tap the Golden Key.
Consequence: Tapping this will trigger a mechanism that shifts the remaining cups in the tray. Usually, this unlocks a new bottom row containing more Orange, Green, and perhaps more Mystery Cups. It physically changes the layout of your remaining resources.
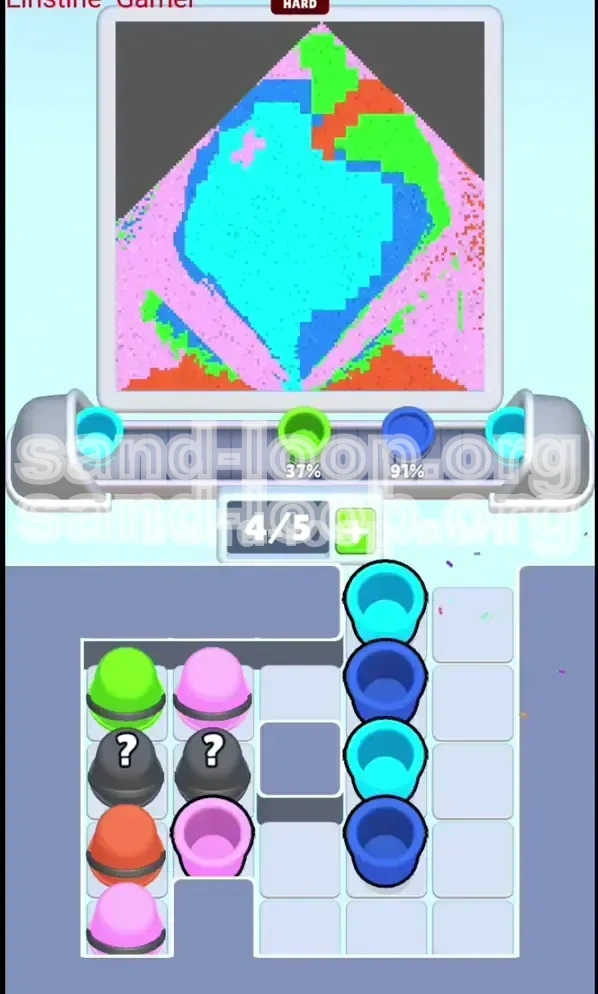
Phase 2: The Core Fill and Color Sequencing
The key is turned, and the board has shifted. Now we enter the precision phase. We have defined our outline (Dark Blue) and started the body (Cyan). Now we must refine the details without causing a color bleed disaster.
Understanding the "Wet on Wet" Physics
Sand Loop simulates fluid dynamics. If you pour a heavy color (Cyan) on top of a light, wet color (Pink), they will mix. If you pour Orange into a wet Green leaf, you get brown.
- Let layers dry. If you see the sand is still shifting/liquid, switch to a different part of the painting (like the opposite side background) to buy time.
Pouring the Cyan Center
You should have already sent the initial Cyan cups. Now, more may appear or be revealed.
- Target the center of the apple.
- Stop before the rim. Leave at least 10-15% pixel space near the Dark Blue outline. If you hit the outline with Cyan, the outline loses its sharpness. This gap will be filled later by "creep" or by outlining again.
Handling the Orange Stem (The Danger Zone)
This is where most players lose their 100% rating. The stem is tiny.
- Singletap only. Never, ever double-tap an Orange cup if the stem is already mostly full.
- Use the "Tap and Release" method. Tap the cup, watch the flow, and if the stem looks 90% full, tap the cup again to stop the flow (if the game allows) or switch immediately to another color to divert the flow.
- If you have extra Orange: You may need to use the Orange on the ground detail or "splatter" areas if the stem is full. Do not force it into the stem.
Refining the Green Leaf
The Green leaf usually connects to the stem.
- Pour Green before the stem is 100% finished. It’s easier to blend Green into Orange slightly than to fix an overflowing Orange stem.
- Top up the Green. Once the leaf is defined, a little extra Green on the edges creates a nice crisp contrast against the Pink background.
Background Filling with Pink
Pink is your filler. If the tray is clogged with colors you can't use right now (like two Orange cups), use Pink.
- Fill the corners. The Pink background is usually framed by the art. Pouring into the far corners of the canvas is safe and buys time for the main art to settle.
Advanced Strategy and Optimization
Now that you know the steps, let's talk about how to execute them perfectly. This section covers the nuances that separate a "Clear" from a "Perfect Clear."
The "Queue" Theory
Always think 2 cups ahead. If you have a Mystery Cup and a Dark Blue Cup in the queue, tap the Mystery Cup while the belt is processing a different color. This reveals the content while the belt is "busy," preventing a jam.
Handling the Worst-Case RNG
What if the Mystery Cup reveals Orange, but your stem is already full?
- Dump it. If you absolutely cannot use the color, you have to "sacrifice" it. Pour it into a corner of the background or an already completed area (like the filled Cyan center) to get it off the belt. It's better to take a slight percentage penalty in one area than to fail the whole level due to a jammed belt.
Speed Running Level 35
Want to clear this in under 60 seconds?
- The "Rapid Tap" Start: Tap all four top-layer cups (2 Cyan, 2 Blue) in the first 3 seconds.
- Pre-emptive Mystery Tap: Don't wait for the belt to clear fully to tap the Mystery Cup. Tap it the second the top layer disappears. Trust that the belt physics will handle the load.
- Ignore Perfection: For a speed run, you don't need 100% fill. You just need the game to register the shape. Pour faster, accept slight overflows, and keep the belt moving.
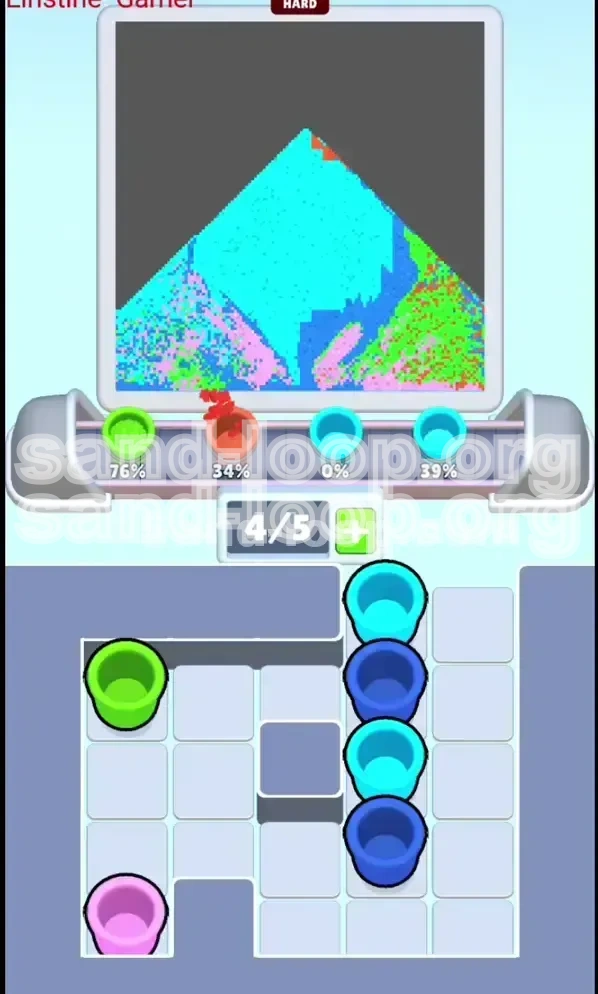
Common Mistake: The "Cyan Creep"
Players often pour Cyan too aggressively. Because Cyan is the center, it acts like a liquid pool. If you pour too fast, it rises up and "suffocates" the Dark Blue outline, making the apple look like a blob.
- Fix: Pour Cyan in a circular motion or focus on the absolute center pixel until the level forces you to expand.
Recovering from a Jam
If the belt stops moving because the tray is full (5/5):
- Don't panic tap.
- Look at the canvas. Find the color that is least full.
- Find the cup in the tray that matches that color.
- Tap it. You need to free up a slot. Even if the color is only 50% needed, getting the belt moving again is priority #1.
Final Polish Check
Before the level ends, do a quick scan:
- Is the stem connected?
- Is the background fully Pink? (Empty white pixels in the background look messy).
- Is the tray empty? Try to clear the tray as the final percentage ticks up. It feels better and ensures you didn't miss a drop of paint.