
Level 236
HARDHow to solve Sand Loop level 236? Get instant solution for Sand Loop 236 with our step by step solution & video walkthrough. Sand Loop 236 tips and guide.
Play Sand Loop Now
Experience the puzzle challenge firsthand
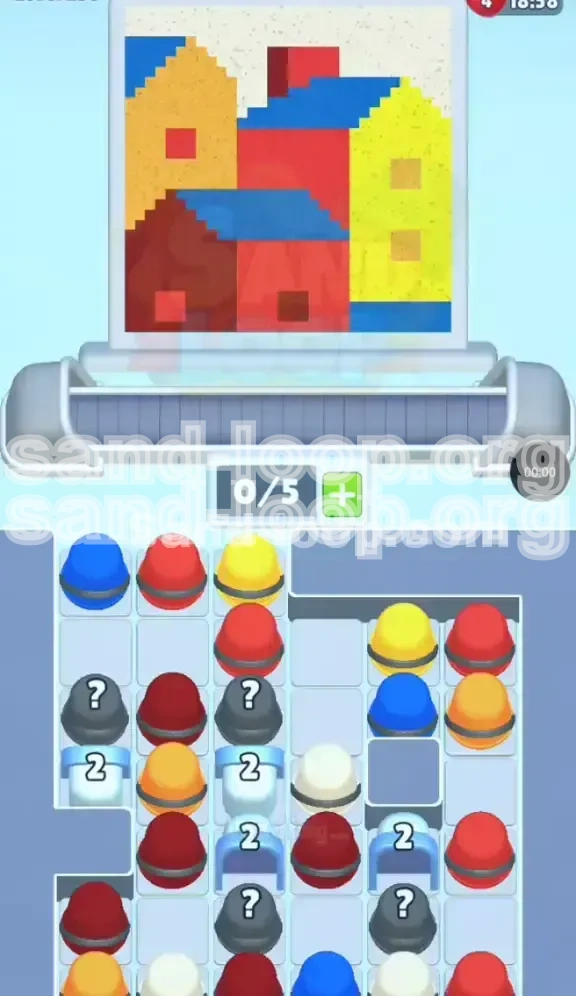
Game Screenshots
Sand Loop Level Guides
Level 236 Overview: The Tiny Neighborhood Challenge
Welcome to Level 236, a stage that deceives players with its cute aesthetic but delivers a punishing logistical puzzle. The target image, "The Tiny Neighborhood," features four distinct structures: a tall Yellow skyscraper on the right, a standard Bright Red house in the center, a Dark Red brick cottage on the bottom left, and Blue roofs connecting them all.
While the pixel art appears simple, this level is classified as a Logic/Management stage. The primary difficulty spike comes from the restrictive 5-slot conveyor belt limit combined with a supply tray heavily clogged by "Double-Hit" Ice Blocks and Mystery Cups. Unlike speed-based levels, you cannot tap rapidly here; every move must be calculated to prevent a board jam.
The supply tray is partitioned vertically by Ice Blocks marked with the number "2". These act as hard barriers that require two adjacent clearances to shatter. Until these are destroyed, roughly 40% of your potential color supply is inaccessible. This creates a high-risk scenario where you must prioritize "chipping" ice over filling pixels, often forcing you to use cups that don't match the current sand flow simply to progress the board state.
Clear Objectives: What You Need to Achieve
Primary Objective: Complete the Pixel Art
Your main goal is to fill the outlines of the four houses using the correct color palette. You must differentiate between two very similar shades of red and manage the large volume of yellow required for the skyscraper without running out of belt space.
Secondary Objective: Destroy the Double-Hit Ice Blocks
Success is impossible without shattering the four major "2" Ice Blocks. You must aim to break these early, as they unlock the bottom half of the tray which contains the bulk of your Blue and Dark Red cups.
Management Objective: Maintain Belt Flow
You must never exceed 4 occupied slots on your 5-slot belt. Keeping one slot open is a safety buffer. If you hit 5/5 with unfilled cups, it is an instant Game Over. You must manage the "junk" cups (colors not currently being poured) efficiently.
Strategic Objective: Mystery Cup Utilization
You must activate the Mystery Cups (?) strategically to clear paths, but only when you have the buffer space to handle the potential random color output.
Step-by-Step Instructions: The Phase Strategy
Phase 1: The Initial Assessment and Safety Clear
As the level loads, do not tap immediately. Look at the Sand Dispenser at the top. Identify the starting color. It will cycle Yellow, Blue, or Red.
- If Sand is Yellow: Look for exposed Yellow cups in the top row. If none are present, look for cups touching the Ice Blocks.
- If Sand is Blue: Prioritize clearing the top-center Blue cups. This helps prevent early clogging since Blue is needed for the roofs later.
- The "Top-Row Only" Rule: For the first 10-15 taps, only interact with the topmost row of cups. Do not dig deeper yet. You need to let the board gravity settle to see which Mystery Cups are accessible.
Phase 2: Targeting the "Double-Hit" Ice (The Grind)
This is the most critical phase. You will see white Ice Blocks with a "2". You need to clear cups adjacent to them twice.
- Identify the "Touching" Cups: Look for cups that physically touch the Ice Blocks. These are your "Keys".
- The Sacrifice Tap: If the Sand Dispenser is pouring Red, but the only cup touching the Ice is Yellow, you have a choice. Wait for the color change (slow) or tap the Yellow cup to fill your belt (risky). Recommendation: Only tap the non-matching color if you have 3 or fewer cups on your belt. This ensures you don't lock out the incoming Red sand.
- Focus on One Side: Do not try to break all ice blocks at once. Pick the Left side (Dark Red house area) or Right side (Yellow tower) and focus your taps there. Breaking one block completely opens up a gravity column that drops fresh cups into play.
Phase 3: Mystery Cup Management
As you clear the top rows, you will expose gray Mystery Cups (?) with question marks.
- The Buffer Rule: Check your conveyor belt count. If you have 4 cups waiting, do not tap a Mystery Cup. If it turns into a color you don't need immediately, you will hit 5/5 and lose.
- Best Time to Tap: Tap Mystery Cups when you have 2 or fewer cups on the belt. This gives you a 40% buffer for the cup to be "junk" without ending your run.
- Expectations: In Level 236, Mystery Cups often yield Blue or Dark Red. Assume they will be the color you currently don't need.
Phase 4: The "Roofing" Phase (Color Separation)
Once the Ice is broken, the board opens up. Now you must paint the specific sections.
- Blue Roofing: The roofs are the connectors. You will likely need to clear Blue cups in clusters. Do not switch colors until the roof segment is fully filled. Leaving 1-2 unfilled pixels on a roof can confuse your color rhythm later.
- Red vs. Dark Red: The center house takes Bright Red. The bottom-left cottage takes Dark Red (Maroon). Do not mix these up. If you pour Bright Red onto the Maroon cottage, you waste a cup slot. Wait for the specific shade change.
Phase 5: The Yellow Tower Finish
The Yellow Skyscraper is the final hurdle. It is a large block of color.
- Stockpiling: Once the roofs and red bodies are done, stop tapping Red or Blue cups entirely. Let them sit in the tray if necessary.
- Power Through: When the dispenser hits Yellow, tap every available Yellow cup rapidly. Since the other structures are done, your belt should be relatively empty, allowing you to process the large volume of Yellow sand required for the tower without jamming.
Color Order and Processing Logic
The Roof Priority (Blue)
Blue is the "Glue" of this level. It connects the houses visually. You should process Blue cups first whenever possible, even if it means pausing on the house bodies. Why? Because the roof lines are thin and long. If you leave them for last, you might find yourself trapped with a belt full of Red/Blue cups while the game demands Yellow, with no room to maneuver.
The Red Trap (Bright vs. Dark)
Level 236 features two reds. The game cycles through colors in a specific loop (e.g., Yellow -> Blue -> Bright Red -> Yellow -> Blue -> Dark Red).
- The Mistake: Seeing "Red" sand and tapping cups for the bottom house.
- The Fix: Watch the sand stream closely. Bright Red is vibrant. Dark Red is brownish. If you tap a Dark Red cup during a Bright Red pour, that cup goes to the belt and sits there. It clogs a slot for 3-4 full color cycles.
- Action: If the wrong Red is pouring, use that time to clear Ice Blocks or tap Blue cups for the roofs.
The Yellow Bulk
Yellow is the easiest color but requires the most volume. The Skyscraper accounts for about 35% of the total pixel count.
- Strategy: Do not panic if you run out of Yellow cups in the tray. Once the Ice is gone, Yellow cups are often buried at the bottom. Use the "Dig Down" method: clear vertical columns of other colors to let the buried Yellow cups fall into accessible rows.
Key Tips for Success
Tip #1: The 3-Slot Safety Zone
Always try to keep your conveyor belt at 3/5 capacity or lower. This 2-slot buffer is essential for dealing with the Mystery Cups. If you sit at 4/5, you are one bad tap away from a Game Over.
Tip #2: Ice Breaking Efficiency
Don't just tap random cups to break ice. Look for exposed cups. If a cup is buried under 2 other layers, tapping it does nothing to the ice immediately. Focus on the cups that are already touching the white squares.
Tip #3: Mystery Cup Prediction
In this specific level, Mystery Cups located near the top center tend to yield Blue. Those near the bottom corners tend to yield the Red variants. Use this probability to decide when to tap them.
Tip #4: Pause Before You Tap
This is not a speed level. The sand timer is generous. If the board state looks chaotic (lots of Ice, no matches), take your finger off the screen. Wait 2 seconds for the color cycle to shift. Often, waiting for the "Right" color is better than forcing the "Wrong" color into your belt.
Tip #5: Board Gravity Awareness
Remember that clearing a side column drops everything down. If you are stuck, look at the sides. Often, a single tap on a side cup will drop a crucial Mystery Cup or a usable color into the center "Kill Zone" where it can be easily utilized.
Common Mistakes to Avoid
Mistake #1: The "Full Belt" Panic
Players see their belt at 4/5 and panic-tap a cup to try to clear space. This usually results in tapping a cup that doesn't match the sand, filling the belt to 5/5, and ending the game. Correction: If you are at 4/5, stop tapping. Wait for the sand to match one of your 4 waiting cups. Clear one, then resume.
Mistake #2: Ignoring the Number "2"
New players often tap an ice-adjacent cup once and wonder why the block didn't break. They then tap random areas in confusion. Correction: Remind yourself constantly: "This is a Double-Hit stage." You must plan for two separate interactions on each block. Don't waste your taps elsewhere.
Mistake #3: Mixing the Reds
It is visually difficult to tell the Reds apart while focused on the conveyor belt. Correction: Use the house shapes as a guide. The tall tower is Yellow. The small house on the bottom left is Dark Red. The medium house in the middle is Bright Red. Associate the location with the color, not just the visual shade.
Mistake #4: Over-tapping Mystery Cups
Tapping a Mystery Cup is fun, but in Level 236, it's a gamble. Tapping three in a row is a recipe for disaster. Correction: Treat them as hazardous materials. Only approach them when you have a clear belt and a specific need to clear a path.
Stuck Solutions: Troubleshooting the Board
Scenario A: "I have no matches for the current sand color."
Solution: Look at the Ice Blocks. Is there a cup touching them? If yes, tap it. Even if it fills your belt, clearing the Ice is more important than short-term belt management. The ice is the only thing that will drop *new* colors into the board.
Scenario B: "My belt is full of Red cups, but the sand is pouring Blue."
Solution: You are in a "Lockout". Do not tap random Blue cups. Look at your target image. Are there any Blue pixels left? If yes, find them. If no, you must wait for the sand to cycle back to Red. Use the waiting time to inspect the tray for buried matches.
Scenario C: "I broke the ice, but I still can't find Yellow cups."
Solution: The Yellow cups are likely buried under the remaining columns of Red/Blue cups. You must perform "Surgery Taps". Find a column that is mostly Red or Blue, clear it out entirely, and the Yellow cups at the bottom will slide up into the active play area.
Speed Run Tips
Shortcut #1: Pre-Loading the Belt
At the very start of the level (first 3 seconds), you can tap faster than usual. If you know the first color is Yellow, tap 2 Yellow cups immediately. They will fill before the belt fills up, giving you a few seconds of head-start on the Yellow tower.
Shortcut #2: The Double Tap
If you see two identical cups next to each other and both are touching an Ice Block, tap them as fast as possible. This can sometimes shatter a "2" Ice Block in a single color cycle if the game's logic processes them simultaneously.
Shortcut #3: Ignore the Windows
The Yellow tower has small windows (often Blue or Black). In a speed run, skip the windows. Fill the main Yellow body first. You can come back for the windows at the very end when you have full control over the board and no more ice to worry about. This prevents constant color switching.