
Level 241
EXPERTHow to solve Sand Loop level 241? Get instant solution for Sand Loop 241 with our step by step solution & video walkthrough. Sand Loop 241 tips and guide.
Play Sand Loop Now
Experience the puzzle challenge firsthand
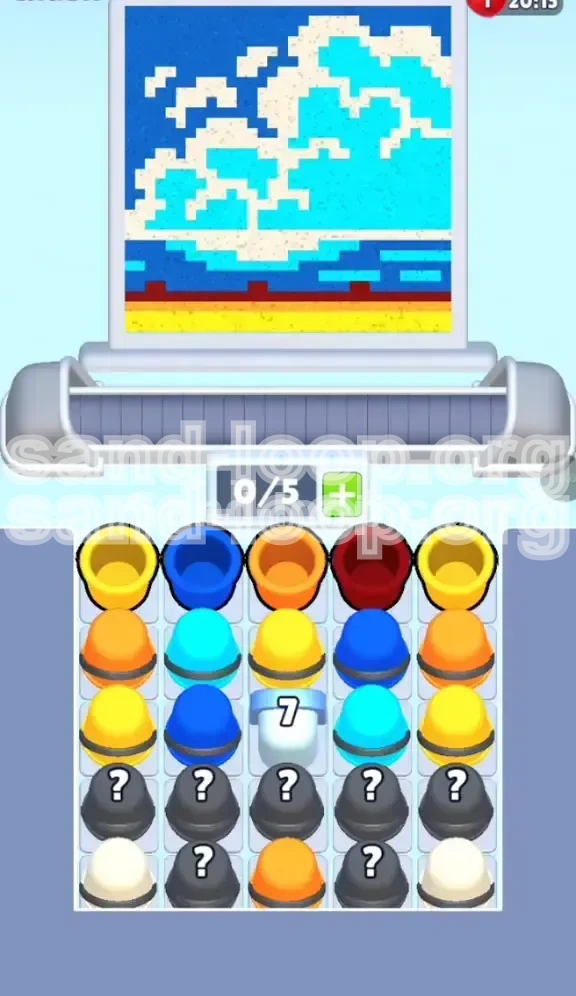
Game Screenshots
Sand Loop Level Guides
Sand Loop Level 241: The Pixel Wave Master Guide
Introduction: The Great Wave Challenge
Welcome to Level 241, famously known among players as the "Pixel Wave." This stage is a deceptive puzzle that blends artistic aesthetics with frustrating mechanical constraints. While the screen displays a serene, ukiyo-e style seascape reminiscent of Hokusai's "The Great Wave off Kanagawa," the gameplay is anything but calm.
This level is classified as a Blocker/Management Stage. Your primary obstacle is not just the complex color palette, but a massive, immovable Ice Block (7) situated in the center of the tray. This block acts as a physical barrier, splitting your available resources and forcing you to manage a severely limited conveyor belt capacity. The challenge lies in maintaining a rhythm of color application while strategically chipping away at the blocker without clogging your inventory.
Level Objectives
To achieve a perfect clear and maximize your score, you must accomplish the following goals:
- Destroy the Central Ice Block: You must reduce the counter on the number '7' block from 7 to 0 by clearing adjacent cups.
- Layer Colors Correctly: Paint the canvas in a specific order: Base (Sand) -> Mid-tone (Water) -> Highlights (Foam).
- Manage Inventory Space: Keep at least 2 slots open on your 5-slot conveyor belt to prevent deadlock.
- Minimize Mistakes: Avoid over-pouring colors, especially the White foam, which can easily bleed into the Cyan water.
Part 1: Strategic Analysis and Preparation
Understanding the Board Layout
The board is vertically divided into three distinct zones, each requiring a different approach. The Bottom Zone consists of 4-5 rows of Yellow and Dark Red pixels. This is the foundation of the painting. The Middle Zone is dominated by Cyan and Dark Blue, representing the body of the wave. The Top Zone is the most chaotic, featuring scattered White pixels that require precision.
The most critical structural element is the Column 3 Barrier. The '7' block sits in the middle of the tray's output row. This means cups falling into the center column are inaccessible until the block is destroyed. This effectively reduces your working cup count by 20% at the start of the game. You must prioritize clearing the Left and Right columns to generate damage against the center block.
Color Palette and Supply Distribution
Understanding the frequency of colors is crucial for inventory management.
- High Frequency (40%): Cyan and Dark Blue. These colors are abundant and act as your primary resource for clearing rows.
- Medium Frequency (30%): Yellow. Essential for the start, but drops off significantly in the later half of the game.
- Low Frequency (20%): Orange and Dark Red. These are "detail" colors used sparingly for accents.
- Variable/RNG (10%): White. This is the wildcard color, often locked inside Mystery Cups.
The 'Mystery Cup' Risk Factor
Approximately 30% of the board consists of grey Mystery Cups. In Level 241, these are dangerous. Opening a Mystery Cup reveals a random color, but it takes up a slot on your belt immediately. If you open three Mystery Cups in a row and get three White colors while you need Blue, your belt will clog, leading to a "Game Over."
Rule of Thumb: Only tap a Mystery Cup when you have at least 2 empty slots on your belt. Never fill your belt to capacity (5/5) with unknown colors. Treat Mystery Cups as a last resort when no direct matches are available on the board.
Why Speed Kills Efficiency
Unlike timed levels, Level 241 punishes rapid tapping. The White Foam pixels are isolated. If you rush and pour White too fast, the stream will bleed into the adjacent Cyan pixels. To correct a single pixel of bleed, you need a Cyan cup, which might be buried behind other cups. Patience is the key to victory here. Aim for accuracy over speed; a slow clear is better than a restart.
Ice Block Mechanics
The Ice Block (7) does not take damage from every move. It only takes damage when you clear a cup that is physically touching it in the tray. Usually, these are the cups in Column 2 and Column 4. Therefore, clearing the periphery (Column 1 and 5) does not help you destroy the block. You must focus your clearing efforts on the columns immediately adjacent to the center to unlock the rest of the board.
Part 2: Step-by-Step Walkthrough
Phase 1: The Foundation (Rows 1-4)
Start the level by pausing for 3 seconds to scan the top row. Do not tap immediately.
- Identify Yellow Targets: Look for Yellow cups in the top two rows. Since the bottom of the canvas is Yellow sand, these are your highest priority.
- Initial Pulls: Tap the Yellow cups first. Send them to the belt.
- Fill the Base: Pour the Yellow sand. Focus on completing the bottom-most rows first. This clears space in the tray for new cups to fall in.
- Dark Red Insertion: If you see a Dark Red cup, grab it only if there is an immediate Dark Red pixel on the sand. Do not store it.
- Ignore the Blues: Even if you see Cyan or Dark Blue immediately, resist the urge to tap them if your Yellow sand isn't 60% finished. You need the belt space for Yellow.
Phase 2: Breaking the Ice (Rows 5-8)
Once the Yellow base is established, the tray will start filling with Water colors (Cyan/Dark Blue).
- Target Adjacency: Look at the cups in Column 2 and Column 4. These are your "Battering Rams." Clearing these cups is the only way to damage the '7' block.
- The Orange Strategy: Orange cups often appear in this phase. They typically bridge the gap between the Sand and the Water. Use them to clear rows immediately adjacent to the Ice Block.
- Maintain Belt Flow: Keep the belt moving. If a cup doesn't match the current active row, let it cycle. Do not hoard cups.
- Monitor the Block HP: Watch the number on the '7' block. It usually drops in chunks of 2-3 points. You need to clear roughly 10-12 adjacent cups to break it fully.
Phase 3: The Water Body (Mid-Game)
At this stage, the '7' block should be gone or close to breaking. The board is now open.
- Dark Blue First: Switch your priority to Dark Blue. This color usually forms the "depth" of the wave and is often located in large, solid blocks which are safer to paint quickly.
- Cyan Integration: Apply Cyan to the wave body. Be careful around the edges where the White foam will eventually go. Leave a 1-pixel buffer if possible.
- Unlocking Mystery Cups: Now that the belt is managed, you can start tapping Mystery Cups. The hidden colors are usually Water tones to help you finish this section.
- Row Clearing: Focus on clearing entire rows from left to right. This maximizes the chance of new cups falling into playable positions.
Phase 4: The Frothy Finale (End-Game)
The hardest part. The board is mostly Blue, and you are hunting for the final White pixels.
- Tap-to-Pour Technique: Do not hold down the pour button for White. Tap it rhythmically: Tap... Wait... Tap... Wait. This ensures you stop pouring before the stream overflows into the wrong color.
- The Last Mystery Cups: If you are stuck, the remaining White pixels are likely hidden under the remaining Mystery Cups on the board.
- Conveyor Recycling: If you have useless colors (e.g., extra Dark Blue when only White is left), keep them on the belt. Use them as placeholders to cycle through the tray until the needed White cup appears.
- Final Polish: Scan the canvas for any "bleed" or pixels that look slightly off-color. Fixing these now saves your score.
Part 3: Color Order and Processing
The Layering Logic
Why does order matter? In Sand Loop, larger areas act as buffers. If you paint the small details (Foam) first, you will inevitably paint over them when you do the large areas (Water). You must always work Largest to Smallest.
Priority Sequence
- Priority 1: Yellow (The Sand). Coverage: ~30% of canvas. This is the safest color to paint because it sits at the very bottom with few complex edges.
- Priority 2: Dark Blue (The Depth). Coverage: ~25% of canvas. These are usually rectangular blocks, easy to pour rapidly.
- Priority 3: Cyan (The Wave). Coverage: ~30% of canvas. This requires more precision as it curves around the foam.
- Priority 4: Orange/Red (Accents). Coverage: ~5% of canvas. Sprinkle these in as they appear.
- Priority 5: White (The Foam). Coverage: ~10% of canvas. This is the highest risk color. Save it for last.
Managing Color "Bleed"
Bleed occurs when the pouring stream overlaps a pixel of a different color. To minimize this, always start your pour at the center of a color block and move outwards. If you start at the edge, your stream might drift into the neighbor pixel before you release.
The Conveyor Buffer System
Your 5-slot belt is a tool, not just a waiting room. You can use "Useless" cups to manipulate the queue.
- Scenario: You need Red. The belt has [Blue, Blue, Cyan, Mystery, Empty].
- Action: Send the first Blue to the canvas (even if you don't need it) or discard it if possible, to push the Mystery cup forward.
- Result: You cycle through the deck faster to find the Red.
Dealing with Supply Droughts
Sometimes, the game simply stops giving you the color you need (e.g., no White for 3 turns). Strategy: Do not panic-pour Mystery Cups. Instead, pour *any* matching color you have, even if it's just clearing a single pixel. Clearing *something* is always better than clearing *nothing* to cycle the board.
Part 4: Critical Mistakes to Avoid
The "Full Belt" Trap
This is the #1 cause of failure in Level 241. Players see 5 colors they "might need" and tap them all. The Fix: Never hold more than 3 active colors at once. If you have [Yellow, Blue, Cyan] and the belt is full, you must use one of them before you can tap a new cup. Having a full belt stops you from picking up the specific color you actually need when it finally appears.
Misinterpreting the Ice Block
Many players waste time clearing Column 1 and 5, thinking it helps the center. The Fix: Remember, only Adjacency counts. Focus your eyes on the columns immediately touching the '7'. If a cup in Column 1 doesn't match the canvas, leave it. Prioritize matching cups in Columns 2 and 4.
Rushing the White Foam
The final 10% of the level takes 50% of the time because of the White Foam. Trying to rush this results in "Pixel Bleed." The Fix: Slow down. Use the "Tap and Release" method. It is better to under-pour and catch the pixel on the next loop of the conveyor belt than to over-pour and turn a Cyan pixel into a whitish-blue mess that is hard to fix.
Ignoring the Preview Line
When you hover over a pixel, the game shows you exactly where the paint will go. The Fix: Do not look at the cup; look at the target crosshair. If the crosshair turns white (indicating a White pixel target) but is touching a Blue pixel, adjust your angle or wait. The crosshair is your only defense against bleed.
Wasting Mystery Cups Early
Opening a Mystery Cup in the first 10 moves is usually a mistake. The Fix: Early game, the board is full of visible colors. Use those. Mystery Cups are your emergency fund for the mid-game when the board is sparse and specific colors are hiding.
Part 5: Advanced Tips and Speed Run Strategies
Speed Run Shortcuts
If you are aiming for a time under 2:00, you need to bend the rules slightly.
- Chain Reaction Clears: Try to set up the board so that clearing a Yellow cup also reveals a Blue cup that matches the next row. This "Combo" efficiency saves seconds.
- Pre-loading: As soon as you start the level, identify where the first Dark Blue cup is. While you are pouring the initial Yellow, keep your eye on that Blue cup's position so you can tap it the instant the Yellow is done.
The "Ghost Cup" Glitch
Sometimes, a cup appears to be one color (e.g., looks Blue in the tray) but behaves differently. This is usually a visual lag. Tip: Always trust the icon on the cup, not the vague color tint if the game is lagging. If you are unsure, let the cup pass and pick it up on the next loop. Better safe than sorry.
Optimized Tray Management
Professional players treat the belt like a circular queue. Technique: If you have [A, B, C, D, Empty] and you need 'E', do not just wait. If 'A' matches a pixel, pour it. This shifts everything left: [B, C, D, Empty, Empty]. Now you have room to grab 'E'. Aggressively cycling the belt is faster than waiting for colors to align.
Restart Thresholds
Knowing when to cut your losses saves time in the long run. The Rule:
- If you make a mistake in the first 3 rows: Restart.
- If you bleed White paint in the last 10%: Finish. (The penalty for restarting is higher than the score deduction for a messy finish).
- If the '7' block is at 1 HP but your belt is full of junk: Restart. You are deadlocked.
Final Boss Pattern Recognition
The "Pixel Wave" has a fixed pattern. Once you have played it 3-4 times, you will memorize that the Dark Red accents are always in the bottom left, and the large foam clump is always top center. Use this muscle memory to pre-aim your cup, reducing the time you spend aiming.