
Level 248
HARDHow to solve Sand Loop level 248? Get instant solution for Sand Loop 248 with our step by step solution & video walkthrough. Sand Loop 248 tips and guide.
Play Sand Loop Now
Experience the puzzle challenge firsthand
Game Screenshots
Sand Loop Level Guides
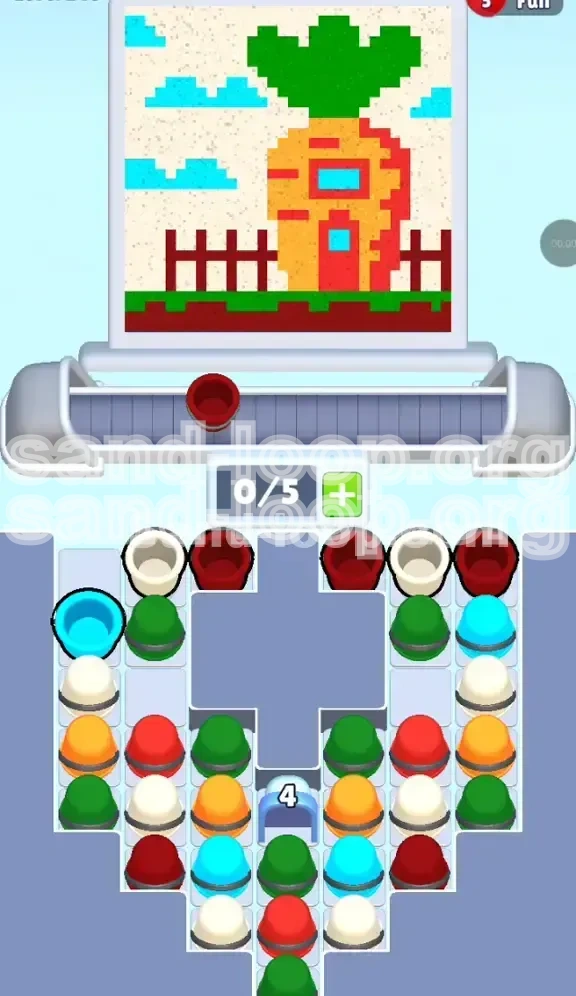
Level Overview: The Carrot House Logic Puzzle
Welcome to the definitive guide for Level 248, famously known as the "Carrot House" challenge. At first glance, this level appears to be a simple artistic task: painting a cute pixel-art house shaped like a giant orange carrot with a red door and a leafy green roof. However, beneath this charming exterior lies a severe logistical bottleneck that has caused many players to fail. This is not a test of your speed; it is a test of your inventory management and prioritization logic.
The core challenge of this level is the restrictive nature of your tray slots versus the sheer volume of specific colors required early on. You are fighting a battle against "supply jam." If you approach this level by simply picking whatever color is most abundant, you will fill your tray with the wrong hues and deadlock your progress before the painting is halfway done. The level forces you to make difficult choices about which colors to discard and which to hoard, all while managing a critical gate mechanism that controls the flow of materials.
In this guide, we will break down the visual layering of the image, explain the mathematical probability of the cup drops, and provide a step-by-step execution plan to ensure you clear the board without running out of space. Prepare to dive into a logic puzzle where patience is just as important as speed.
The Supply Bottleneck Mechanic
Unlike standard levels where the goal is often to clear the screen as fast as possible, Level 248 is defined by a specific mechanic: The Blue Gate (4). Located at the bottom of the supply structure, this gate physically blocks the majority of your cups from falling into the playable area. The only way to destroy this gate is to collect and pour four Cyan cups. The difficulty arises because the Cyan cups are buried deep within the pile, hidden behind layers of Green, Red, and White cups. You must strategically clear these "blocking" colors without filling your limited tray slots, creating a high-stakes balancing act between clearing space and hunting for keys.
The Visual Hierarchy
Understanding the painting order is crucial for success. The game fills from the bottom up, meaning the colors at the bottom of the screen must be cleared first to reveal the layers above. In Level 248, the bottom consists of Green grass and Red fence posts. Above this lies the massive Orange body of the carrot house, followed by the Beige/White sky, and finally, the Green leafy roof at the very top. If you attempt to paint the Orange body while the bottom layers are still incomplete, you will clog your tray with Orange cups that you cannot use yet, leading to a game over.
The "False Friend" Color: Orange
The biggest trap in this level is the Orange cup supply. The carrot body makes up approximately 50-60% of the total image area. Consequently, the supply pile is weighted heavily towards Orange cups. Your natural instinct might be to start collecting Orange immediately because they are plentiful. However, this is a fatal mistake. Collecting Orange too early will consume your tray slots (you typically only have 5) and leave you with no room to collect the Green and Red cups needed to clear the bottom layer. You must actively resist the urge to collect Orange until the specific moment in the walkthrough when it is safe to do so.
Tray Slot Management
Success in Level 248 relies on strict tray management. You have 5 slots, but you effectively need to keep 2 of them open at all times for "emergency" colors. This means you should never have more than 3 cups of a single color in your tray unless you are about to pour them immediately. Hoarding colors leads to a "soft lock" where you have the cups you need but no room to pick up the cups required to clear the path to the painting area. Think of your tray as a revolving door rather than a storage bin.
Primary Objectives and Strategy
To conquer the Carrot House, you need a clear set of goals that prioritize unblocking the board over painting the picture. Your strategy must shift from "paint what you see" to "paint what unblocks the flow." Below are the three pillars of victory for this level. Mastering these concepts is more important than quick reflexes.
Objective 1: Unearthing the Keys (Cyan)
Your first and most critical objective is to locate and consume four Cyan cups. These cups are the keys to removing the Blue Gate (4). Until this gate is destroyed, your supply of cups is choked, and refill rates will be dangerously slow. You must treat every non-Cyan cup you pick up as a temporary obstacle to be removed. Do not focus on painting the picture perfectly during this phase; focus on digging down through the supply pile to reach the Cyan cups hidden underneath.
Objective 2: The Bottom Layer Clear
The painting engine in Sand Loop requires you to clear the bottom pixels before you can access the middle or top sections. Therefore, your second objective is to completely clear the Green grass and Red fence posts at the bottom of the canvas. This creates a dual constraint: you need Green and Red cups to clear the bottom, but you also need to clear the bottom to access the bulk of the Orange paint for the house. Efficiency here is key. You must alternate between Green and Red rapidly, keeping the paint line moving upward without letting either color stagnate in your tray.
Objective 3: The Mid-Game Explosion
Once the Blue Gate is destroyed and the bottom layer is cleared, you enter the "Mid-Game Explosion." At this point, the supply lines are fully open, and the massive volume of Orange cups becomes accessible. Your objective here shifts to rapid consumption. You must pour Orange cups as fast as possible to fill the body of the carrot. This is the "safe" phase of the level, where you can be more aggressive about filling your tray slots because the danger of the gate is gone and the bottom layers are cleared.
Strategic Color Prioritization
The order of operations is strictly enforced by the game mechanics. Priority 1 is Cyan (Gate Key). Priority 2 is Red and Green (Bottom Layer). Priority 3 is Beige/White (Background/Sky). Priority 4 is Orange (Main Body). Priority 5 is Green again (Roof). If you find yourself with a tray full of Priority 4 items while Priority 1 items are still buried in the pile, you have made a strategic error. Always ask yourself: "Will picking this cup help me find a Cyan cup or clear the bottom row?" If the answer is no, leave it in the pile.
Calculating the "Safe" Capacity
A common question is how many cups of a specific color to hold. A safe rule of thumb for Level 248 is the "2/3rds Rule." Never fill your tray more than 2/3rds full with a single color type unless that color is the immediate next color you need to pour. For example, if you have 3 Orange cups, do not pick up a 4th unless you have an immediate slot open to pour one instantly. This reserved space (1/3rd of your tray) acts as a buffer, allowing you to snag rare Cyan or Red cups as they appear randomly in the pile without forcing a discard.
Step-by-Step Execution Guide
This section provides the actionable "script" for beating Level 248. Follow these phases in order. Do not rush ahead to the next phase until the current phase's conditions are met. This walkthrough assumes you understand the basic controls of Sand Loop and focuses purely on decision-making.
Phase 1: The Dig (Start to Gate Destruction)
The game begins with a closed gate and a cluttered supply pile. Your immediate actions are reactive. You will see Green, Red, White, and potentially Orange cups at the top of the pile. Action: Ignore the Orange cups entirely. Tap Green and Red cups exclusively. Your goal is to clear the bottom grass and fence lines to open up the board. Trigger Event: As you tap Green and Red, you will eventually expose Cyan cups. Critical Action: The moment a Cyan cup is visible, change your target priority to Cyan. You must collect and pour 4 Cyan cups to destroy the Blue Gate. Do not worry if the painting looks messy or unpainted during this phase; the only number that matters is the "4" counter on the gate.
Phase 2: The Clearing (Post-Gate)
Once the 4th Cyan cup is poured, the Blue Gate smashes open. This is a major turning point. A large number of cups, mostly Orange and Beige, will flood into the playable area. Action: Do not switch to Orange yet. Continue finishing the bottom layers. Use the newly available Beige/White cups to start painting the background sky above the fence. This helps clear the pile further. Goal: Ensure the Red fence and Green grass are 100% complete. You cannot effectively paint the Orange house body until the bottom pixels are filled, so stubbornly stick to Red and Green until the game forces you to stop or the tray is empty of those colors.
Phase 3: The Orange Rush
With the bottom cleared and the gate open, you are now ready for the main event. Action: Aggressively collect Orange cups. You can now fill 3-4 slots of your tray with Orange. Execution: Pour Orange into the center of the canvas to build the carrot body. Alternate with Beige/White to keep the sky painted if you run out of space or Orange cups. This is the fastest part of the level. You are simply converting the massive supply of Orange cups into painted pixels. There is very little strategy here other than "tap fast and keep the belt moving."
Phase 4: The Roof and Finishing Touches
The final section of the painting is the green leafy roof at the very top of the carrot house. Challenge: By this point, you may have used up most of the Green cups from the supply pile during Phase 1 (the grass). Action: Scan the remaining supply pile carefully. You need to find the remaining Green cups. If you see them, pick them up. If the supply is clogged with other colors, use the "painting to clear" technique—pour other colors onto the finished sections of the house (which won't change the color but will consume the cup) to force the game to spawn new Green cups from the bottom of the pile. Paint the roof leaves, and the level is complete.
Phase 5: Troubleshooting the Tray
If at any point during these steps your tray is full and you cannot pick up a required cup (like a Cyan in Phase 1 or a Green in Phase 4), you must perform an emergency purge. Action: Look at your current tray. Identify the color that is most abundant in the supply pile right now (usually Orange). Pour that color onto a section of the canvas that is already painted or can accept it. This is "wasted" paint, but it frees up a slot. Rule of Thumb: It is better to waste one Orange cup to free a slot for a Cyan cup than it is to hold onto 5 Orange cups and wait 30 seconds for a slot to open naturally.
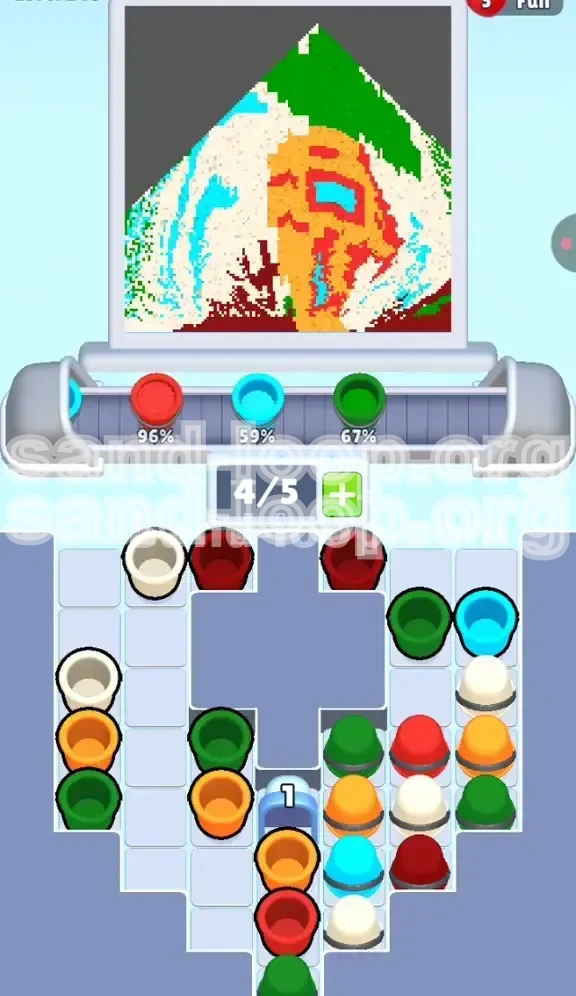
Color Order and Palette Analysis
A deep understanding of the color palette and its distribution is the secret weapon for advanced players. This section analyzes the probability and necessity of each color, explaining why the specific order outlined in this guide is mathematically the most efficient path to victory.
The Criticality of Cyan (Blue)
Cyan is the "Key Color." It represents roughly 5-10% of the total cup volume but controls 100% of the board's flow. The Cyan cups are used for the windows, the clouds, and—most importantly—the gate. Because they are buried, you must treat them as a high-value currency. Do not use Cyan cups on clouds or windows until the gate is open unless you have a surplus. The first 4 Cyan cups you see must be earmarked for the gate destruction. Failing to prioritize Cyan immediately adds a significant time penalty to your run, often causing a timeout failure.
The Blocking Colors: Red and Green
Red and Green are "Gatekeeper Colors." They are medium-abundance colors that appear frequently in the supply pile at the start. However, their utility is restricted to the bottom of the canvas. They occupy a "middle tier" of importance. You need them to progress, but they become useless junk (clogging your tray) as soon as the bottom layer is painted. The efficiency trick here is to stop picking them up the *second* the bottom layer is done. Do not finish "clearing" the pile of Red and Green; just discard them from your mental priority list the moment the grass and fence are done.
The Majority Color: Orange
Orange is the "Endgame Color." It is the most abundant resource in the level, likely making up over 50% of the total supply. This abundance is a double-edged sword. It provides the necessary volume to paint the large house body, but its frequency in the supply pile acts as "pollution," blocking access to rarer colors like Cyan or late-game Green. Your strategy should be to ignore Orange until the "pollution" clears itself via the destruction of the gate and the clearing of the bottom layer. Once the path is clear, Orange transitions from a nuisance to your primary fuel source.
The Background Color: Beige/White
Beige or White is the "Filler Color." It is used for the sky and negative space around the house. It is abundant but not as abundant as Orange. Its strategic value lies in its ability to be poured almost anywhere without consequence. If you have a full tray and need to cycle cups to find a specific color, pouring Beige is often the safest option. It paints the sky, clears your tray, and doesn't interfere with the complex logic of the foreground layers.
Visualizing the Stack
Imagine the supply pile as a vertical stack. At the very top, you see the "peaks" of Orange, Red, and Green. Digging down, you hit a layer of Beige. Below that, you find the Cyan "gems." Below the Cyan is the massive reservoir of Orange blocked by the gate. Your objective in the first 60 seconds of the level is simply to dig past the top three layers to reach the Cyan layer. Once you hit Cyan, the gate opens, and the bottom Orange reservoir becomes accessible, merging with the top layers. This visualization explains why you cannot simply pick from the top; you must dig for value.
The "Second Pass" Green Problem
A common oversight is the Green roof. Players often exhaust the Green supply on the grass at the bottom, only to find none left for the roof at the top. The game usually replenishes colors, but it is slow. To mitigate this, try to leave 2-3 Green cups in the supply pile (unpicked) if possible during Phase 1. Alternatively, ensure you have cleared enough of the Red fence that the supply pile has turned over significantly before you finish the Green grass. This "stockpiling" of Green demand ensures that when you finally reach the roof, the game has had time to spawn fresh Green cups from the bottom of the supply stack.
Advanced Tactics and Speed Run Tips
Once you have beaten Level 248 and understand the logic, you may want to improve your time or achieve a perfect 3-star rating. This section covers advanced techniques for speed runners and perfectionists. These tips require fast fingers and a deeper understanding of the game's internal cup-spawning logic.
Speed Run: The "Cyan Snipe"
For a speed run, efficiency is everything. The fastest runs do not clear the entire bottom layer before touching Cyan. Instead, they use a "Sniping" technique. If you see a Cyan cup partially exposed on the edge of the pile, ignore the Red/Green cups you are currently collecting and tap the Cyan immediately. Even if your painting line isn't perfectly ready for it, pour the Cyan into a window or cloud spot instantly. This destroys the gate faster, unlocking the main supply up to 30 seconds earlier than a standard playthrough. This is risky, as it can leave your tray disorganized, but it is the key to sub-60-second times.
Technique: The "Split Pour" for Large Areas
When painting the massive Orange body of the house, do not pour one cup, wait for the animation, and then pour the next. This is too slow. Instead, use the "Split Pour" technique. Queue up your pours by tapping the next cup in your tray *while* the previous cup is still pouring. This requires you to predict when the current cup is about 80% empty. By overlapping the animations, you can maintain a constant flow of paint onto the canvas, significantly reducing the time spent on the Orange phase.
Mental Macro: The "2-2-1" Tray Setup
Advanced players often maintain a specific tray configuration known as "2-2-1." This means keeping 2 slots for the primary color you are painting (e.g., Orange), 2 slots for the secondary color (e.g., Beige for the sky), and 1 empty "buffer" slot. This buffer slot is critical. It allows you to instantly snatch any rare color (like a stray Cyan or late-game Green) that pops up in the pile without forcing you to make a panic-pour. Maintaining this discipline prevents the "full tray" freeze that kills many speed runs.
Optimization: Background Pre-Painting
While the primary focus is the foreground elements, you can save time by pre-painting the Beige/White background during the Red/Green phase. If you have a moment where no Red or Green cups are accessible, but you have a Beige cup in your tray, pour it onto the sky area. This is "free" work because it doesn't interfere with your primary goal of clearing the bottom layer, but it reduces the amount of work left to do in the late game. Every Beige cup you pour early is one less cup you have to manage during the chaotic Orange phase.
Handling "Dry Spells"
Sometimes, the Random Number Generator (RNG) of the game will not give you the color you need for 5-10 seconds. This is a "Dry Spell." Poor players will tap random cups, clogging their tray. Advanced players use this time to "organize" the pile. If you need Red but only see Orange, do not pick up the Orange. Instead, use the time to observe the pile structure. Identify which cups are blocking the ones you need. Often, simply waiting 3-4 seconds for the pile to settle or for the game to spawn a new row from the bottom is faster than picking up a useless cup and then having to dump it later.
The 90% Completion Trap
A unique phenomenon in this level occurs at 90% completion. The house is painted, the sky is painted, and only the small details remain. At this point, the supply pile often becomes very "heavy" with a single color that you no longer need (usually excess Orange). The game slows down because it takes a long time to cycle through the heavy pile to find the few remaining Green or Red cups for the final touches. The solution is to stop caring about efficiency. Pour the excess Orange anywhere, even on finished parts of the painting, just to cycle the pile rapidly. Force the game to spawn new cups. This aggressive cycling is the only way to clear the final 10% without timing out.