
Level 250
HARDHow to solve Sand Loop level 250? Get instant solution for Sand Loop 250 with our step by step solution & video walkthrough. Sand Loop 250 tips and guide.
Play Sand Loop Now
Experience the puzzle challenge firsthand
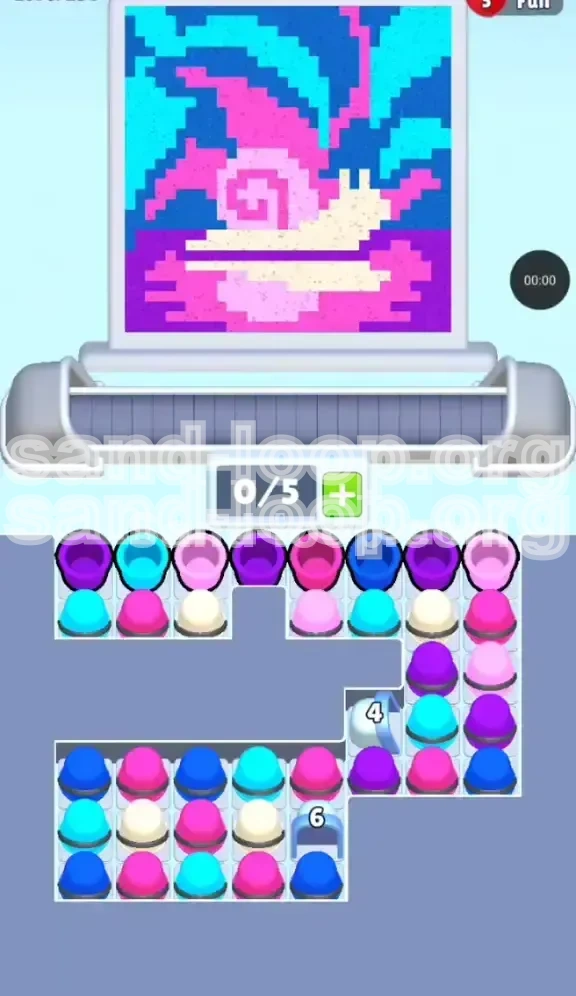
Game Screenshots
Sand Loop Level Guides
Sand Loop Level 250 Master Guide: The Neon Snail Breakdown
Introduction to the Neon Snail Challenge
Welcome to Level 250, a significant milestone in your Sand Loop journey. This level is famously known as the "Ice Breaker" stage. While the objective—painting a retro-wave style Neon Snail—seems artistic, the underlying mechanics are purely logistical. The primary challenge here is not the dexterity of your pouring, but your ability to manage a severe resource shortage. You are presented with a supply tray that appears abundant, yet 70% of your essential resources are locked behind Number Gates (Ice Blocks).
Why This Level Stalls Most Players
The failure rate on Level 250 is high because of a mechanic called "Soft Locking." New players instinctively match colors they see on the canvas (like the Cyan in the sky). However, doing this fills your 5-slot conveyor belt with colors that cannot pour yet because the bottom layers of the canvas are not ready. This creates a traffic jam where you cannot pick up new cups, leading to a deadlock. Understanding the vertical hierarchy of the image is the only way to avoid this.
The Vertical Layering Strategy
Sand Loop physics engine dictates that sand always settles at the lowest available point. You cannot paint the sky (top layer) before the ground (bottom layer) is settled. Attempting to force paint into upper layers while lower voids exist is the number one cause of failure. You must mentally slice the image into horizontal strips and solve them from bottom to top.
Resource Management 101
Your conveyor belt has a hard limit of 5 slots. This is your most valuable currency. Every slot occupied by a "waiting" color is a slot wasted. To succeed in Level 250, you must maintain a "Just-in-Time" inventory system. Only pick up a cup when you are 90% sure it will pour immediately. Keeping 1 or 2 slots open at all times allows you to grab emergency colors (like Dark Purple) as soon as they appear in the tray.
The Critical Number Gates
The level features two massive obstacles: a "4" Gate on the right and a "6" Gate on the bottom left. These are not just walls; they are timers. You must clear specific adjacent cups to shatter these blocks. The "4" Gate is the key to the level, as it hides the essential White/Cream sand needed for the snail's body. The "6" Gate is a trap early on; it contains the background colors which are useless until the endgame.
Visualizing the Neon Snail Palette
Before you tap a single cup, memorize the color hierarchy. The image consists of 5 distinct zones. At the very bottom are the Dark Purple corners. Rising slightly above this is the Cream/White body of the snail. The middle third is a complex mix of Magenta and Light Pink (the shell). The top is dominated by Cyan and Dark Blue. Confusing the Light Pink with Magenta or ignoring the Dark Purple foundation will result in a messy restart.
Level Objectives and Core Mechanics
Primary Objective: Clear the "4" Gate
Your first and most critical goal is to destroy the Number Gate marked "4" located on the right side of the tray. This gate is blocking the chute that delivers the White/Cream sand. Without this color, you cannot paint the snail's body, which sits in the center of the canvas. Since the body is a mid-to-low layer, you cannot proceed to the shell or background until this specific reservoir is unlocked. Approximately 60% of your initial moves should be dedicated to clearing the cups around this specific block.
Secondary Objective: Establish the Dark Purple Base
While focusing on the gate, you must simultaneously paint the bottom corners of the canvas. The Dark Purple sand is usually accessible immediately at the start. Pouring this serves two purposes: it completes the foundation of the image so gravity doesn't pull other colors down later, and it clears physical space in the supply tray, making it easier to manipulate the stack above the "4" gate.
Conveyor Belt Optimization
Do not treat the 5-slot belt as storage; treat it as a processing tunnel. A common mistake is filling the belt with 5 cups of Cyan (Blue) early on because they are available. This effectively freezes your game state. You must aim to keep your belt turnover rate high. Ideally, you want a cycle where you pick up a cup, it pours instantly, and the slot frees up within 1-2 seconds. If a cup sits on the belt for more than 5 seconds, you have made a strategic error.
Unlocking the Mid-Game Resources
Once the "4" gate is down and the White body is partially painted, the objective shifts to the "6" gate on the left. However, you should not actively break this until the White sand is roughly 80% finished. Breaking the "6" gate prematurely releases a flood of Cyan and Blue sand. If your belt isn't ready to handle these colors (meaning the top of the canvas isn't ready), this flood will bury any remaining White or Pink cups you need, effectively losing you the game.
Final Phase: The Background Flood
The last 20% of the level is a speed run. Once the snail's body and shell are complete, the canvas is essentially a solid block up to the top 20%. At this point, your goal is to tap every Cyan and Dark Blue cup you see as fast as possible. There is no more strategy here, only speed. The danger in this phase is accidentally leaving a single pixel of the shell unpainted, which can be hard to see under a flood of Blue sand.
Step-by-Step Walkthrough Instructions
Phase 1: The Setup (Moves 1-10)
Start the level and pause. Look at the supply tray. Identify the Dark Purple cups located on the far left and far right edges. Tap these first. Do not touch the Cyan cups at the top, and do not touch the cups directly on top of the "4" gate yet. Pouring the initial Dark Purple sand will settle at the bottom of the canvas and clear the debris surrounding the base of the "4" gate. This reduces the gate's counter from 4 to a lower number or clears the path to the cups needed to break it.
Phase 2: Breaking the Right-Side Lock
Once the initial Purple is poured, shift your focus entirely to the right side of the screen. You will see a stack of cups resting on or against the "4" block. These are typically Magenta or Light Pink. You need to tap these to load them onto your belt. Even if the canvas isn't 100% ready for them, loading them is necessary to clear the space. As you pour these, the "4" counter will hit zero. The block will shatter, revealing a stack of crucial White/Cream cups.
Phase 3: The Cream Rush (The Pivot Point)
This is the most volatile moment of the level. As soon as the "4" gate breaks, ignore everything else. Tap the newly revealed White/Cream cups immediately. Get them on the belt. Since the snail's body is a large contiguous area, these cups will pour very quickly. You want to empty this reservoir into the canvas as fast as possible. This clears the physical space in the tray AND locks in the central image element. Don't worry about perfect edges yet; just get the volume of white sand on the canvas.
Phase 4: Managing the Shell and the Left Gate
With the White cups depleted, look at the center of the tray. You should now see more Magenta and Light Pink cups becoming available. You may also see the "6" gate on the left becoming accessible. Start feeding the Magenta and Pink cups into the machine to complete the shell swirls. As you do this, you will inevitably clear cups sitting on top of the "6" gate. Allow the gate to break naturally as you clear the shell colors. Do not go out of your way to break it with useless colors.
Phase 5: The Cyan Finish
Once the "6" gate shatters, a massive cache of Cyan (and possibly Dark Blue) will be released on the bottom left. By this point, your snail (White), shell (Pink/Purple), and bottom corners (Dark Purple) should be 95% done. The canvas is now ready for the sky. Rapidly tap the Cyan cups. Since they make up the top layer, gravity will pull them down to fill the remaining voids. Finish the level by ensuring no stray pixels of Pink or White remain visible.
The Official Color Processing Order
Priority Tier 1: Dark Purple (The Foundation)
This is your "Do First" color. It occupies the lowest physical point on the canvas. If you try to paint the body or sky before the bottom corners are filled, the sand will simply roll over the target area and settle in the corners anyway, wasting your paint. Always ensure the bottom corners are solid Dark Purple before moving up the canvas.
Priority Tier 2: Cream/White (The Core)
This is the most critical resource because it is centrally located and locked behind the "4" gate. You cannot access this color until you manually clear the path. Once unlocked, it becomes your top priority because the snail's body blocks the background elements. If you delay painting the body, subsequent layers of sand will get trapped behind it or create awkward piles that are hard to fix later.
Priority Tier 3: Magenta and Light Pink (The Shell)
These colors form the middle layer of the image. There is often confusion between which pink goes where, but generally, they are interchangeable in terms of priority. You process these Tier 3 colors because they sit slightly "above" the White body but "below" the Cyan sky. Do not start pouring these until the White body is at least 50% visible, otherwise, the pink sand will bury the white cups you need to retrieve later.
Priority Tier 4: Cyan and Dark Blue (The Sky)
This is the "End Game" tier. These colors are often available immediately in the tray, which is the trap. They are the "poison chalice" of Level 250. If you load these onto your belt before the bottom three layers are done, they will occupy your slots and refuse to pour because gravity pulls them down to the bottom, which is already full of other colors. You must ignore these colors until the very end, regardless of how tempting they are.
Pro Tips and Common Mistakes to Avoid
Common Mistake: The "Belt Clogger"
The most frequent error players make is filling their 5-slot belt with Cyan or Dark Blue cups at the start. These colors look appealing because the top of the canvas is empty, but they are physically unable to settle until the bottom is full. If you have 3 Cyan cups sitting on your belt that won't pour, you have only 2 slots left to play the game. This effectively halves your processing power. Always leave Cyan for last.
Common Mistake: Ignoring the Gate Counters
Some players try to paint the snail's shell (Pink) without breaking the "4" gate first. While you might have a few Pink cups available at the start, they are not enough to finish the job. You must break the gates to get the volume of sand needed. Don't waste your initial Pink cups on the shell if using them helps break the "4" gate faster to release the White sand. Prioritize the *unlock* over the *paint* in the early game.
Pro Tip: The "Tap and Wait" Technique
When you are trying to break the "4" gate, don't just spam tap. Watch the conveyor belt. If you have a specific color that needs to pour to clear space for the next gate-breaking cup, wait for it to pour before loading the next one. Keeping your belt at 4/5 capacity allows for one "emergency pick-up" if a critical color spawns in the tray.
Pro Tip: Visualizing the "Funnel"
Think of the supply tray as a funnel. The cups at the bottom (near the gates) flow up to replace the cups you take from the top. If you want to reach the cups behind the "4" gate, you have to drain the cups directly above it. Don't focus on the cups at the far left of the screen initially; focus only on the vertical column directly above the "4" gate. That is your bottleneck. Drain that column specifically.
Pro Tip: Managing the "6" Gate Trap
The "6" gate on the left is larger and holds more sand, which makes it look like the priority. It is not. The sand behind it is mostly background (Cyan/Blue). Treat the left side of the screen as a "No Go Zone" for the first 60% of the level. Only clear the left side when the right side (where the "4" gate was) is completely empty and the snail's body is fully formed.
Stuck? Troubleshooting and Speed Run Strategies
Stuck Scenario: The "Frozen Belt"
If your belt is full and nothing is pouring, you have picked up colors that the canvas isn't ready for (usually Cyan or Dark Blue). You cannot simply delete them. You have to "churn" them. Look for any pixel on the canvas that matches that color. It might be a single pixel in the corner or a stray dot. If you can't find one, your only option is to force-pour into a nearly full area, which might waste some sand, but it frees up the slot. Free up slots, then immediately grab the correct color (Purple or White).
Stuck Scenario: Gate Won't Break
If you are clearing cups but the "4" or "6" number isn't going down, you are likely clearing cups that aren't actually touching the block or counted towards its specific mechanic. Ensure you are clearing cups *physically resting* on top of or adjacent to the numbered block. Sometimes you need to clear a "shielding" layer of other cups first before you can access the cups that count towards the gate. Zoom in (if possible) to see the contact points.
Speed Run Strategy: The Pre-Load
For experienced players looking to optimize time: As the last cup of the current color is pouring (sand animation falling), you can tap the next cup you need. This queues it up. You don't have to wait for the cup to disappear from the belt. If you time it right, you can have a fresh cup entering the pouring mechanism the millisecond the previous one leaves. This shaves seconds off your time, which is crucial for 3-star rankings.
Speed Run Strategy: Bulk Color Processing
Don't alternate colors if you can avoid it. If you have 3 White cups available and the canvas needs a lot of White, tap all 3 in rapid succession (if your belt permits). Loading 3 of the same color allows you to focus purely on the pour animation for that block of time, rather than switching mental focus between different parts of the canvas. Bulk processing is faster than micro-processing.
Speed Run Strategy: Ignoring Perfection
In a speed run, don't aim for 100% pixel perfection on the first pass. It is faster to flood the main areas (Body, Shell, Background) and then do a quick "cleanup pass" at the end. Trying to paint the snail's eye-stalks perfectly while you are still painting the main shell is inefficient. Get the volume down, then fix the details. The game's physics are forgiving; small gaps often fill themselves as you add layers on top.