
Level 299
HARDHow to solve Sand Loop level 299? Get instant solution for Sand Loop 299 with our step by step solution & video walkthrough. Sand Loop 299 tips and guide.
Play Sand Loop Now
Experience the puzzle challenge firsthand
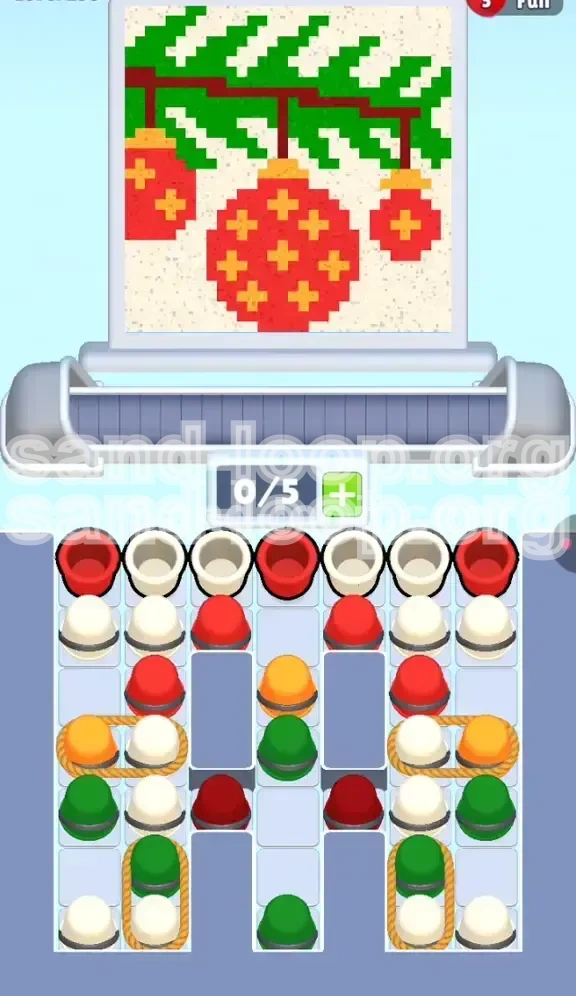
Game Screenshots
Sand Loop Level Guides
Level 299 Overview: The Festive Ornaments Challenge
Welcome to Level 299, a stage that perfectly blends festive aesthetics with ruthless logic. In this level, titled "The Festive Ornaments Challenge," you are tasked with recreating a pixelated image of three classic Christmas baubles hanging from a pine branch. While the visual result looks cozy and warm, the path to getting there is fraught with inventory traps and spatial puzzles.
Unlike previous levels where you could afford to be messy with your sand collection, Level 299 demands surgical precision. The level is classified as a "Rope & Capacity" challenge. This means your greatest enemy is not the timer or the complexity of the art, but the limit of your tray slots and the physics of the ropes binding your sand supplies. You are dealing with a 5-slot capacity limit, which is incredibly tight given the game's mechanics.
The primary difficulty spike here comes from the introduction of "Roped Pairs." You cannot simply pick up the color you want; you are forced to pick up pairs of cups tied together. This means that tapping a single supply icon effectively consumes two slots (40% of your total inventory space) in one go. If your timing is off, you will fill your tray with unusable colors, causing a deadlock that forces a restart. To succeed, you must suppress the urge to tap quickly and instead treat the game like a strategy puzzle.
The Core Visual Challenge
The target image is deceptively complex. It features three large red circular baubles positioned in the center, hanging from a horizontal pine branch at the top. The background is not a solid block but a "speckled off-white" texture, which requires frequent micro-management of your white sand supply. The branch itself requires a distinct green color that is buried deep in the supply tray, accessible only after you clear the upper layers.
Inventory Management Mechanics
This level forces you to understand the math of your tray. With a maximum of 5 slots, you can comfortably hold a maximum of two roped pairs (4 slots) and have exactly one slot open for a single loose cup. If you have 3 loose cups on the belt, you cannot pull a roped pair without overflowing. Understanding this math is critical to preventing the "Game Over" screen caused by a full tray.
The Rope Obstacle
The ropes in this level are not just visual fluff; they are hard mechanical locks. The middle row of the supply tray features Orange and White cups tied together, and the bottom row features Green and White pairs. You cannot separate these. When you pull for Green, you are forced to take White. This creates a "forced consumption" mechanic where you must have a plan for the secondary color, or it will clog your tray.
Strategic Patience
Speed is your enemy in Level 299. The game incentivizes you to clear the conveyor belt quickly, but doing so here will lead to picking up roped pairs before you have space for them. You must learn to pause and let the nozzle cycle. Unlike standard levels where you keep the tray full to maintain flow, here you must keep the tray relatively empty (2/5 or 3/5 full) to accommodate the bulky roped pairs.
Pixel Precision
The "Red" baubles are the easiest part, but the "Orange" detailing on the baubles and the "Green" branch require the nozzle to be in very specific positions. You cannot simply pour Green sand when the nozzle is hovering over the Red baubles; the game logic will prevent the pour, and the cups will loop around, wasting your time and slot space. You must synchronize your pickups with the nozzle's position.
The "Waste Sand" Risk
Because of the roped mechanics, you will often be forced to pick up White sand when you don't immediately need it, just to get the color you do need (like Green or Orange). This leads to a backlog of White cups. You must have a strategy to "dump" this White sand into the background texture efficiently without clogging your slots for the main colors.
Clear Objectives: How to Complete Stage 299
To beat Level 299, you need to move beyond simple color matching and think in terms of "layers." The level is designed to be painted from the visual center outwards, and from the bottom of the supply tray upwards. Your primary goal is to clear the "Loose" cups to expose the "Roped" cups, manage your slot capacity to avoid deadlock, and time your pulls to match the nozzle's position.
The completion of this level relies on three specific phases: The Foundation (Red/White), The Detailing (Orange/White), and The Finishing (Green/White). Failing to prioritize these layers in order will result in having the wrong colors in your tray when the critical painting moments arrive.
Establish the Red Foundation
Your first objective is to paint the three large red baubles. These are the focal point of the image and occupy the largest pixel area. You need to prioritize picking up the loose Red cups from the top of the tray immediately. Do not worry about the Green branch or the Orange details yet. If you try to paint the branch before the baubles, you will run out of slot space for the Red cups later.
Unlock the Roped Supplies
The middle and bottom sections of the supply tray are blocked by ropes. You cannot access the Green or Orange paints until you have physically cleared the cups sitting on top of them. Your secondary objective is to process the top layer of loose cups efficiently to trigger the game's spawning logic for the roped pairs.
Master the Slot Economy
You must maintain a strict inventory count. Your objective is to never let your tray fill up past 4 slots if possible. Ideally, you want to hover around 2-3 occupied slots. This "buffer zone" is essential because when you cut a rope, you instantly add two cups to your tray. If you are sitting at 4/5 slots and cut a rope, you overflow.
Synchronize Nozzle Movement
You must complete the level by mastering the nozzle's path. The objective is to only pull the Green/White ropes when the nozzle is physically located at the top of the canvas (the branch area). If you pull Green while the nozzle is over the baubles, you will waste the cups. You need to observe the nozzle's cycle and time your inputs to match its location.
Utilize the Background Texture
The background is your "dump" zone for excess White sand. Because the roped pairs often give you White when you want Green or Orange, you will accumulate White cups. Your objective is to use the textured background areas to dispose of this extra White sand fluidly, ensuring it doesn't block your ability to pick up new colors.
Achieve 100% Pixel Coverage
There are no "extra" cups in this level. The supply is tightly tuned to the pixel count. If you miss a single pixel on the Green branch or the Orange caps, you likely won't have a spare cup to fix it later. Your final objective is pixel perfection. Ensure every part of the branch is solid green and every ornament cap is bright orange before you run out of supplies.
Step-by-Step Instructions: The Winning Strategy
This section provides the exact sequence of moves required to beat Level 299. Do not deviate from this order unless you are an expert player. The logic here is designed to minimize slot clogs and ensure the nozzle is always where it needs to be.
Phase 1: The Red Start (Top Row)
Action: As soon as the level starts, locate the Red cups in the top row of the tray. These are "loose" (not tied to ropes).
Execution: Tap the Red cups immediately. The nozzle will likely start somewhere in the middle of the canvas.
Follow-up: Tap the loose White cups in the top row immediately after the Reds. Do not wait.
Why: Alternating Red and White prevents the Red sand from "pooling" in the nozzle. If you do all Reds first, the nozzle might hold the red sand waiting for a gap that isn't there. Mixing in White keeps the flow moving and starts filling the background texture.
Phase 2: Managing the Mid-Game Tray
Monitor: Watch your slot count at the bottom of the screen.
Wait: If you have 3 or 4 cups currently on the conveyor belt, STOP TAPPING.
Observe: Let the nozzle pour the current cups out. Wait until your slots drop to 1 or 0 occupied.
Preparation: You need to clear space because the next set of cups (Orange and White) are tied together. Pulling them will consume 2 slots instantly.
Phase 3: The Orange/White Rope Barrier
Trigger: Once the top loose cups are gone, you will see the Orange and White cups tied with a brown rope in the middle row.
The Rule: Only tap this roped pair when the nozzle is hovering over the "cap" area of the ornaments (the very top of the red circles) or the small cross details.
Strategy: Tap the pair. The game adds both the Orange and White cup to your tray.
Usage: The nozzle will likely pour the Orange first (for the caps) and then the White (for the background). If the nozzle doesn't pour the Orange immediately, don't panic. It means the nozzle isn't in the right spot yet. Do not tap more colors; just wait for it to loop around.
Phase 4: The Green Rush (Bottom Row)
The Critical Moment: Once the Orange detailing is done, you need the Green for the branch. The Green cups are at the bottom, tied to White cups.
The Risk: This is where most players fail. Do not tap the Green rope until the nozzle is at the very top of the screen (the Pine Branch area).
Action: Wait for the nozzle to finish a pass and move upwards. As it approaches the top branch area, tap the Green/White rope.
Result: The Green cup will fly onto the belt, followed by the White. The nozzle will instantly pour the Green onto the branch. If you time this right, you will clear the branch in one or two passes.
Phase 5: The Cleanup
Situation: You are now left with a few remaining White cups and perhaps a stray Green or Orange.
Action: Focus purely on the background. Use the remaining White cups to fill in any "speckled" gaps in the off-white background.
Tip: If you have a Green cup left but the branch is done, you might be in trouble. However, sometimes the branch has texture gaps. Look closely at the top of the screen. If the branch is solid, you must dump the Green sand onto a completed area (it won't paint) just to get rid of the cup, but this is a waste of time. Ideally, you timed it right in Phase 4.
Phase 6: Final Verification
Check: Look at the Pine Branch. Is it solid green with no gaps?
Check: Look at the Ornaments. Are the caps Orange?
Check: Look at the Background. Is the texture consistent?
Finish: Once the last cup is poured, the level ends. If you followed the steps, the "Festive Ornaments" image should be complete.
Color Order and Processing Logic
Understanding the hierarchy of colors is vital for Level 299. The game forces you to process colors in a specific order due to the layout of the tray and the ropes. If you try to process Green first, you physically cannot because the Red cups are blocking the Green cups. This section explains the logical flow of the level.
Priority 1: Red (The Base Layer)
Location: Top Row (Loose).
Reasoning: The Red baubles constitute the largest area of the image (approximately 50% of the pixel volume). Furthermore, the Red cups are the gateway to the rest of the tray. You must clear these first to access the ropes below. There is no penalty for painting Red early, as it sits in the center of the canvas and doesn't interfere with the top branch or the background texture.
Priority 2: Orange (The Detail Layer)
Location: Middle Row (Roped with White).
Reasoning: The Orange sand is used for the small caps and crosses on the baubles. These details are located "inside" or "adjacent to" the Red areas. Since the nozzle is already moving around the center of the screen painting the Red baubles, it is efficient to handle the Orange details immediately after the base red is down. Processing Orange while the nozzle is focused on the center saves travel time for the nozzle.
Priority 3: White (The Fill Layer)
Location: Top (Loose), Middle (Roped), Bottom (Roped).
Reasoning: White is the "filler" color. It fills the gaps between the Red baubles and provides the textured background. Because White is ubiquitous, you can process it at almost any time. However, because it is tied to Orange and Green via ropes, you will be forced to process White constantly throughout the level. Treat White as a "byproduct" of getting Orange and Green.
Priority 4: Green (The Top Layer)
Location: Bottom Row (Roped with White).
Reasoning: Green is the final layer. It sits at the very top of the image (the Pine Branch). If you try to paint the Green branch before the Red baubles are done, you risk "painting over" the branch later if the logic gets confused, or simply running out of tray space because the Green cups are locked behind the other rows. By saving Green for last, you ensure the nozzle is moving freely to the top of the screen without being blocked by the heavy Red processing in the center.
The "White" Buffer Strategy
Technique: Use White cups to control the nozzle's speed.
Explanation: If you have a lot of heavy colors (Red/Green) queued, the nozzle moves frantically. If you add White cups into the mix, the nozzle often slows down slightly to handle the background texturing. Use White cups to "pace" the level. If you feel the nozzle is moving too fast away from the area you need to paint, tap a White cup to buy yourself a second or two of breathing room while it fills the background texture.
Key Tips and Essential Notes
These tips are collected from high-level play strategies. They address the specific frustrations of Level 299, such as the ropes getting stuck or the nozzle refusing to pour. Keep these in mind while playing.
The "Slot 5" Rule
Never let your tray reach 5/5 slots. If you are at 4/5, do not tap anything unless you are 100% sure a cup is about to empty. Being at 5/5 means you have zero reaction time. If a new cup spawns or a rope is cut, you will have an overflow, and the game is over. Always strive to keep 1 slot open as an emergency buffer.
Identifying the Rope Pairs
Look closely at the icons in the tray. A small brown line connecting two cups indicates a rope. Do not confuse this with two cups sitting next to each other. If you tap a roped cup thinking it's a single cup, you will accidentally fill two slots and ruin your strategy. Train your eye to spot the "bind" before you tap.
Nozzle Patience
The nozzle in Sand Loop operates on a loop. If it misses a spot, it will come back to it. Do not panic and tap more cups if the nozzle flies past a green patch without painting it. It just means the nozzle was targeting a different color layer at that moment. Wait for the loop to complete. Adding more cups now will only clog the belt.
Background Texture is Forgiving
The speckled off-white background is very forgiving. You don't need to be perfect with every single grain of white sand. If you have a choice between pouring a Red cup perfectly or dumping a White cup slightly inaccurately to clear a slot, dump the White. The human eye notices gaps in the Red ornaments much more than it notices minor imperfections in the textured background.
Use the "Preview" to Plan
Before you make your first move, inspect the completed image at the top. Count how many Green segments there are. Realize that the Green supply is limited. This mental check prepares you for the reality that you cannot waste a single drop of Green sand. It reinforces the need to time the rope cut perfectly.
Don't Force the Pour
Sometimes the nozzle hovers over a finished area. It won't pour because the pixel is already the correct color. This is normal. Do not start tapping randomly trying to "fix" it. Just wait. The game logic will detect that the current color isn't needed and will move the nozzle to the next unpainted area automatically.
Common Mistakes to Avoid
Players often fail Level 299 not because they don't understand the game, but because they fall into specific traps set by the level design. Avoiding these common errors is the fastest way to improve your win rate.
The "Fast Tap" Trap
The Mistake: Tapping the supply tray as fast as possible, assuming that speed is the goal.
The Consequence: You will fill your 5 slots with 3 loose cups. When the roped pairs arrive, you have no room to cut the rope. The cups queue up, the logic breaks, and you lose.
The Fix: Slow down. Tap. Wait. Observe. Tap. Treat the level like a rhythm game, not a reaction game.
Ignoring the Nozzle's Location
The Mistake: Cutting the Green/White rope while the nozzle is painting the bottom of the canvas (the Red baubles).
The Consequence: The Green cup enters your tray, circles the belt, and leaves without ever being poured. You have wasted 2 slots of capacity and gained nothing. You will likely run out of Green paint before the branch is finished.
The Fix: Watch the nozzle. Only cut the Green rope when the nozzle is at the top.
The "Single Cup" Mismanagement
The Mistake: Having 3 single cups on the belt (e.g., Red, White, Orange) and then trying to cut a rope.
The Consequence: You need 2 slots for a rope. If you have 3 single cups, you only have 2 slots left. You can cut one rope. But if you misjudge and have 4 single cups, you can't cut any ropes. This "deadlock" is frustrating.
The Fix: Try to keep your singles to a minimum. Pour them out before engaging the ropes.
Over-Focusing on the Background
The Mistake: Using all your White cups early to perfect the background texture.
The Consequence: Later, when you cut the Green or Orange ropes, the game gives you a White cup as the pair. If you don't need white, this cup becomes dead weight in your tray, occupying a slot that could be used for something else.
The Fix: Leave some background work for the end. Use the forced White cups from the ropes to do the heavy lifting for the background.
Panicking at "Full Tray"
The Mistake: Seeing the tray full (4 or 5 items) and randomly tapping cups to remove them, even if they aren't ready to pour.
The Consequence: Disrupting the flow. Often, the cup you tap isn't the one the nozzle wants, and you just waste time.
The Fix: Trust the nozzle. If the tray is full, stop tapping. Let the nozzle empty the cups naturally. It will empty them. Interrupting the flow is worse than waiting.
Solutions for When You Are Stuck
Feeling stuck is a normal part of Sand Loop. Sometimes the RNG (Random Number Generation) of the cup spawns or the nozzle path seems unfair. This section provides "reset" strategies to get you out of a jam.
The "Soft Reset" Maneuver
If you feel like your tray is a mess and nothing is pouring correctly, stop tapping entirely. Take your hands off the screen. Watch the nozzle complete 2-3 full cycles. Often, the nozzle will clear out the "conflicting" colors during this time, and the tray will self-correct. If the tray doesn't clear after 3 cycles, you may need to restart the level, as the logic might be permanently deadlocked.
Dealing with Leftover Singles
Scenario: You have finished the Red and Orange layers, but you still have a single Red and single Orange cup on the belt. They are blocking you from picking up the final Green ropes.
Solution: You must wait for the nozzle to pass over the very last pixel of Red or Orange that needs painting. Once it pours that last drop, the cup disappears. You must have the patience to wait for that specific moment. Do not force the Green issue until the old colors are gone.
The "Impossible" Green Pour
Scenario: You have the Green cup, but the nozzle refuses to pour it on the branch.
Solution: Check if there is a single pixel of another color (like Red) overlapping the branch area. The nozzle might be targeting that pixel. You may need to wait for the nozzle to finish a tiny detail elsewhere before it commits to the Green pass. If the Green cup is about to expire (leave the belt), use a "free" tap if you have space, or accept that you might need to restart to get a better Green spawn timing.
Inventory Bottleneck
Scenario: You have 5 cups on the belt. None are pouring. The nozzle is hovering over a finished area.
Solution: This is a critical deadlock. Look at the cups. Is there a White cup? If so, find a spot in the background that isn't perfectly white and tap the White cup. Often, the nozzle won't pour white because the background is "good enough," but you can force it to find a pixel by tapping aggressively if you are sure there is a gap.
Restart Strategy
If you realize you have made a mistake in the first 10 seconds (e.g., you filled your tray too early), do not struggle for 5 minutes trying to fix it. It is mathematically impossible to recover from a bad start in Level 299 due to the tight slot limits. Hit "Retry" immediately. Preserving your time and mental energy for a fresh start is better than fighting a lost cause.
Speed Run Tips and Shortcuts
Once you have beaten Level 299 and understand the mechanics, you might want to achieve a faster time or a higher score. These tips are for players who are comfortable with the logic and want to optimize their play.
The "Top-Down" Rush
While the guide recommends a cautious approach, speedrunners actually use an aggressive top-down strategy. As soon as the level loads, tap the Red and White cups in the top row in rapid succession (Red, White, Red, White). Do not wait for the first pour to finish. By pre-loading the belt, you ensure the nozzle never stops moving. This requires confidence that the nozzle will handle the queue without clogging.
Pre-Cutting the Rope
You can cut the rope for the Orange/White pair just before the nozzle finishes the previous color. If you time it perfectly, the Orange cup hits the belt exactly as the nozzle becomes available, eliminating the "wait time" between layers. This is a high-risk, high-reward move that saves seconds.
Background Ignoring
For a speed run, ignore the "speckled" background texture almost entirely. Do not tap White cups unless they are roped to a color you need. Focus 95% of your attention on the Red, Orange, and Green solid blocks. The background texture is forgiving enough that you can leave it until the very last second, and the game often registers it as "complete" even if it's not perfectly filled.
Nozzle Tracking
Don't watch the cups; watch the nozzle. Anticipate where the nozzle is going next. If the nozzle is moving Right-to-Left across the Red baubles, you can already be tapping the White cup for the background on the Right side, predicting the nozzle's arrival. This "predictive tapping" keeps the flow constant and is the key to sub-30-second times.
The "Green" Snipe
The biggest time save is the Green branch. Instead of waiting for the nozzle to naturally come to the top, manipulate the queue. Finish your Red/Orange pours in such a way that the belt is empty. As the nozzle starts its ascent to the top, cut the Green rope immediately. Don't wait for it to center. If you cut it early, the cup will be waiting in the belt, ready to pour the millisecond the nozzle arrives.
Batch Processing
Try to trigger the ropes in batches. If you have the space, cut the Orange rope, let it pour, and then immediately cut the Green rope while the belt is still moving. Keeping the momentum going is better than the "Start-Stop" rhythm of a safe run. The game's physics engine handles continuous flow better than stuttered inputs in many cases.