
Level 350
HARDHow to solve Sand Loop level 350? Get instant solution for Sand Loop 350 with our step by step solution & video walkthrough. Sand Loop 350 tips and guide.
Play Sand Loop Now
Experience the puzzle challenge firsthand
Game Screenshots

Sand Loop Level Guides
Level 350 Overview: The Neon Cityscape Challenge
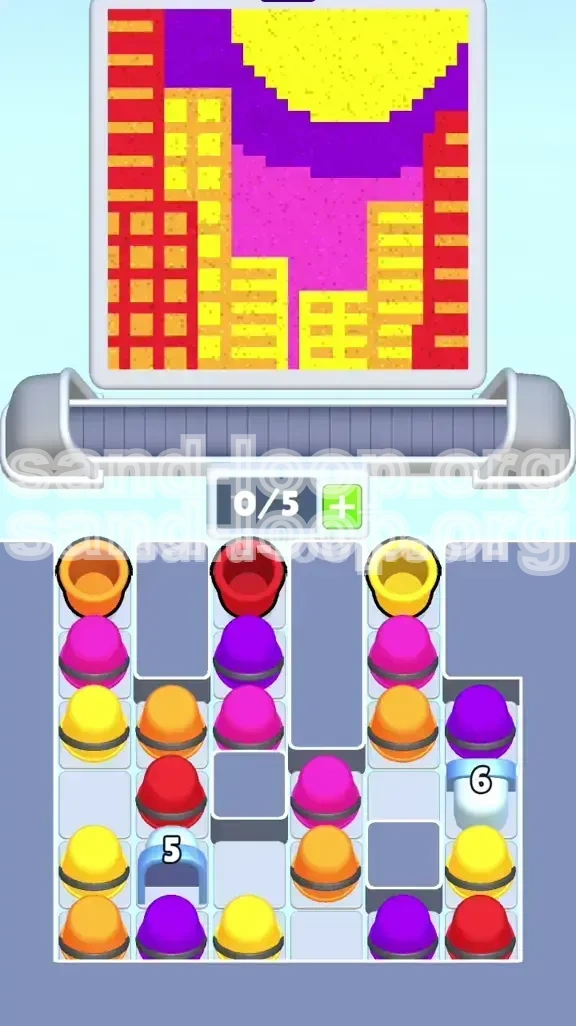
Level 350, "The Neon Cityscape," stands as a significant difficulty spike in Sand Loop, primarily due to its strict resource management requirements. Unlike previous levels where you could freely tap available colors, this stage introduces a "Key Unlocking" mechanic that forces you to solve puzzles in a specific sequence. You are tasked with painting a vibrant night scene dominated by towering skyscrapers, but the game prevents you from accessing the necessary colors until you fulfill specific global quotas.
The core challenge here lies in the "Countdown Gates" located at the bottom of the tray. These gates act as bottlenecks, hiding crucial Yellow and Red cups behind a countdown mechanic that requires 5 to 6 moves to trigger. This creates a delicate balance: you must clear enough cups to open the gates without clogging your limited 5-slot belt with unusable colors. It is a test of patience and forward-thinking rather than speed.
The "Key Unlocking" Mechanic Explained
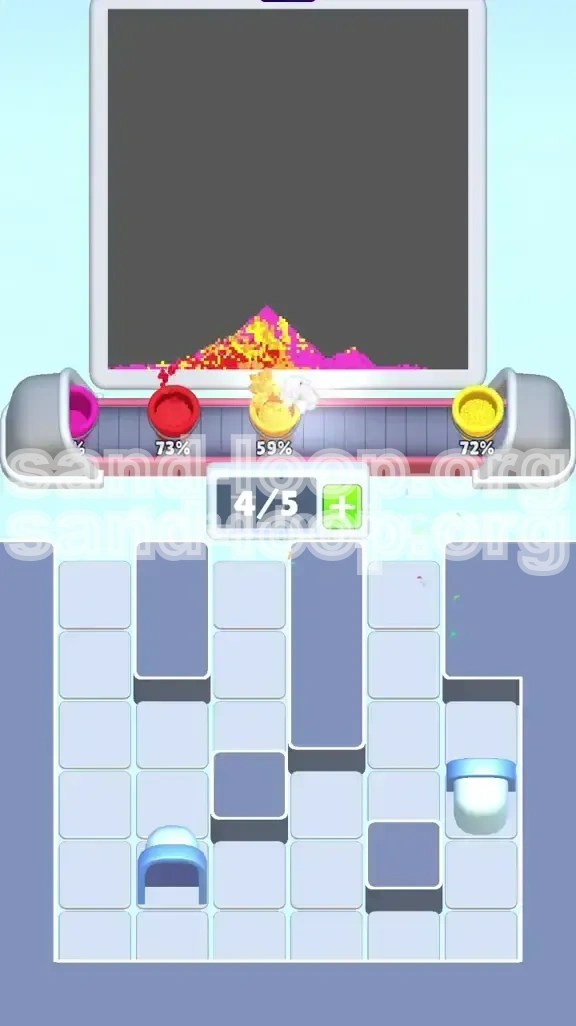
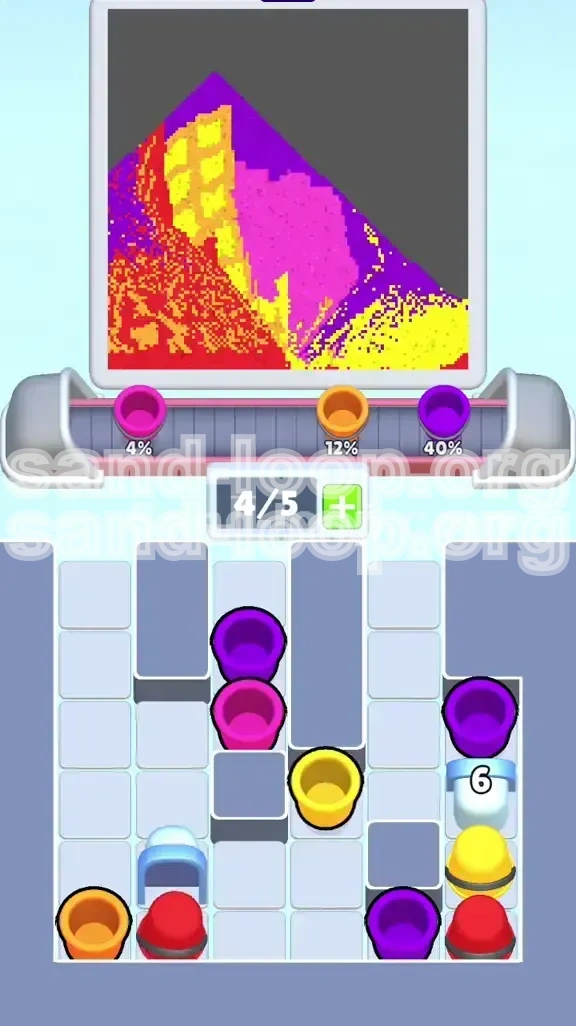
The central mechanic of Level 350 is the countdown block system. You will notice blue arches at the bottom of Columns 2 and 5 marked with "5" and "6". These are not timers; they are move counters. These blocks only shatter when you have successfully poured (cleared) a specific number of cups from the *entire* board.
Visual Analysis of the Canvas
The canvas is vertically oriented, representing a city skyline. The bottom 20% is the complex foundation of the buildings. The middle 50% consists of tall, narrow skyscrapers in brick red and orange. The top 30% is the expansive purple night sky framing a large yellow moon. Understanding this vertical layering is critical because you must paint from the bottom up to avoid trapping yourself.
The Constraint of Limited Belt Space
You only have 5 slots on your conveyor belt. In this level, "Belt Management" is the primary skill. Because the countdown gates block essential colors, you will often be forced to hold onto Purple cups (for the sky) while waiting for the gates to open and reveal the necessary Red or Yellow cups. If you fill your belt with Purple too early, you will have no room to grab the revealed colors, leading to a deadlock.
Color Distribution and Scarcity
Unlike levels with infinite resources, Level 350 has a fixed number of critical cups. Specifically, the "Construction Yellow" needed for the moon is extremely scarce and mostly trapped under the "6" gate. The "Brick Red" is more abundant but gated behind the initial layers. "Dominant Purple" is the most abundant color, acting as the filler you use to bridge the gaps between structural pours.
Why Speed-Tapping Fails Here
In standard levels, tapping rapidly to fill the belt works. Here, it is a trap. If you speed-tap the top layer, you will inevitably load 3 or 4 Purple cups onto your belt. When the countdown gates finally break and reveal the hidden Red and Yellow cups, you will have no empty slots to pick them up. You will be forced to pour the Purple into the sky prematurely, potentially ruining the sharp edges required for the building windows.
Clear Objectives: What You Need to Accomplish
To conquer Level 350, you must shift your mindset from "painting" to "unlocking." Your primary goal is not just to fill the canvas, but to manipulate the game state to reveal the hidden colors. You are essentially playing two different games simultaneously: the surface game of filling the sky, and the deep game of cracking the gates to release the structural colors.
Primary Goal: Crack the "6" Gate
Your most critical objective is to destroy the Countdown Gate marked "6" in the right-most column (Column 5). This gate holds the majority of the Yellow cups required for the moon and the upper window lights. Without accessing this stash, you cannot complete the top 15% of the image. This gate is stubborn and requires significant progress on the left side of the board to trigger.
Secondary Goal: Establish Structural Foundations
Before you touch the sky, you must pour the Red and Orange bases. This serves two purposes: it secures the bottom of the painting, and more importantly, it contributes to the global move count required to lower the numbers on the gates. Do not start on the purple sky until the red building bases are 80% complete.
Resource Management: The "2-Slot Rule"
Adopt a strict policy of never letting more than 2 cups sit on your belt unless they are immediately pourable. You must maintain at least 3 empty slots at all times. This buffer ensures that when a Countdown Gate shatters, you have the immediate capacity to drag the newly unlocked cups onto your belt before they are buried by shifting stacks.
Fill Order Priority: Bottom-Up Strategy
You must follow a strict filling order: Bottom (Structures) -> Middle (Windows) -> Top (Sky/Moon). If you fill the purple sky first, you will lose the contrast needed to see where the buildings go, and you will likely clog your belt with the abundant Purple cups, leaving no room for the rarer Red and Orange cups required for the buildings.
Completion Metric: The 100% Clear Condition
The level is only considered complete when the Yellow moon is fully rendered and the Purple sky has no gaps. This often requires a final "flush" maneuver where you use any remaining Purple cups to fill the negative space in the sky after the buildings are fully established.
Step-by-Step Walkthrough: The Opening Moves
The beginning of the level is the most dangerous phase. This is where most players fail by grabbing the wrong colors first. The key is to be surgical with your taps, ignoring the tempting Purple cups that are exposed right at the start.
Step 1: The Immediate Red/Orange Tap
As soon as the level loads, look at the top layer of Columns 1 and 2. You will see exposed Red and Orange buckets. Tap these *immediately*. Do not tap anything else. Drag these two cups onto your belt. Pour them into the foundation of the skyscrapers at the bottom of the canvas. This secures your first 15% completion.
Step 2: The "Soft" Purple Start
After clearing the initial Red/Orange, you will see a large swath of Purple balls. Do not tap them yet. The rule here is: Tap *one* Purple cup, pour it into the bottom corner of the sky to start the flow, and then stop. You need to keep your belt mostly empty to prepare for the gate mechanics.
Step 3: Monitoring the Countdown "5"
Focus your tapping on Column 2 and 3. You need to clear exactly 5 cups total to trigger the first gate. As you clear the initial layers of the building structures, you will see the number on the blue arch (Gate "5") decrease. Wait for the visual shatter effect. The moment it breaks, a stash of hidden Red balls will be revealed in the lower center.
Step 4: The Left Skyscraper Push
Once the "5" gate is open, immediately prioritize the newly revealed Red cups. Use them to fill the main body of the left skyscraper. Do not worry about the windows yet; focus on getting the bulk of the red paint onto the canvas. This large pour usually triggers the game mechanics to start lowering the second gate.
Step 5: Managing the Mid-Game Bottleneck
You will now hit a lull where the board seems slow. Columns 1-3 will be mostly empty, and Column 5 is still blocked. This is the "Dip." Use this time to carefully fill in the Purple sky around the buildings you have already painted. Keep your belt count low (2 cups max).
Step 6: Triggering the "6" Gate
Continue clearing any remaining Orange or Red cups from the top layers. You need to reach a global clear count of roughly 11-12 cups to crack the second gate. The "6" gate on the right will shatter, revealing the precious Yellow cups needed for the moon.
Color Order and Processing Strategy
The specific order in which you process colors determines your success rate. This level relies on a "Construction before Decoration" philosophy. If you decorate the sky before constructing the buildings, you will fail.
Phase 1: Structural Colors (Red/Orange)
Priority: Critical. Red and Orange are your structural colors. They have the lowest tolerance for error because they define the edges of the image. If you pour Purple over a Red edge, you cannot fix it easily. Always process Red and Orange the moment they touch your belt. Never queue them behind Purple.
Phase 2: The Negative Space (Purple)
Priority: Variable. Purple is for "negative space"—the sky behind the buildings. Because the Purple cups are abundant and accessible, you treat them as filler. You only process Purple when your belt is empty and you are waiting for the gates to crack. Think of Purple as the "resting" color.
Phase 3: The Highlight Color (Yellow)
Priority: Time-Sensitive. Yellow is your "Highlight" color. It is rare and trapped until the very end. Once the "6" gate opens, Yellow becomes your number one priority. You must drop everything else (even mid-sky Purple pours) to get the Yellow onto the canvas, as it completes the level's focal point (the moon).
The "Sandwich" Technique
When you have a mix of colors on your belt, arrange them in a "Sandwich": Structural (Red) -> Filler (Purple) -> Structural (Orange). This ensures you can pour the edges, fill the background, and then pour the next edge without constantly scrolling through your belt to find the right cup.
Visual Cues for Color Switching
Watch the canvas saturation. When the Red building reaches 80% opacity, switch immediately to Purple. When the Purple sky reaches 60% coverage, check the gates. If a gate is about to break (you see the number flickering), hold off on Purple and wait for the unlock.
Key Tips and Strategic Notes
These tips are derived from hundreds of test runs on Level 350. They address the specific friction points that cause players to restart.
Tip 1: The "Belt Capacity" Buffer
Never let your belt fill up past 3 cups unless you are in the final 10 seconds of a "Pour" combo. Having 4 or 5 cups sitting on your belt is the leading cause of death in this level. It robs you of the flexibility to grab newly unlocked colors. Keep it lean. Keep it moving.
Tip 2: Identifying "Safe" Purples
Not all Purple cups are equal. The Purple cups located in the top rows of Columns 1 and 2 are "safe" to tap early because they are close to the structural colors. The Purple cups in the deep stacks of Column 4 are "unsafe" or "heavy"—they take longer to pour and can clog your machine. Avoid the deep Purples until the end.
Tip 3: Gate Mechanics are Global
Remember that clearing a cup from Column 1 helps open a gate in Column 5. Do not fixate on the column with the gate. If you are stuck on Column 5, go clear the top layers of Columns 2 and 3. The game tracks total moves, not local moves.
Tip 4: The "Tap and Wait" Rhythm
Establish a rhythm of "Tap, Wait, Pour, Tap." Do not double-tap. In Level 350, a double-tap can accidentally load two cups of the wrong color, deadlocking your belt. Be deliberate. One tap, check the belt, one tap.
Tip 5: Use the Moon as a Timer
The large Yellow moon in the top right is your progress bar. If you start the game and immediately try to fill the moon, you will fail. The moon is the "End Game" content. If you have placed 50% of the moon but the buildings aren't finished, you have played the level too fast and will likely run out of belt space.
Common Mistakes and How to Avoid Them
Learning what *not* to do is just as important as learning the strategy. These are the errors that result in a "Game Over" screen.
Mistake 1: The "Purple Flood"
The Error: Tapping all available Purple cups in the first 10 seconds because they look like an easy combo.
The Consequence: Your belt becomes 80% Purple. When the gates break and reveal Red and Yellow, you have no slots to pick them up. By the time you pour the Purple, the shift mechanic might have buried the Red under other balls, making it inaccessible.
The Fix: Exercise restraint. Treat Purple as the background, not the foreground.
Mistake 2: Ignoring the "Foundation"
The Error: Starting the painting on the moon or the top of the buildings.
The Consequence: The bottom of the canvas remains empty. As you pour colors for the top, the sand flows down and piles up unevenly at the bottom, creating jagged, ugly foundations that are impossible to fix later without restarting.
The Fix: Always start your pouring motion at the very bottom of the canvas and work upwards.
Mistake 3: Premature Gate Panic
The Error: Seeing the "5" or "6" number on a gate and frantically tapping that specific column to try to break it.
The Consequence: You waste moves and fill your belt with junk colors from that column. The gates are global counters; tapping the specific column does not help it break faster.
The Fix: Ignore the gate location. Focus on clearing *any" cup on the board to lower the number.
Mistake 4: Misjudging the "Dip"
The Error: Panicking when Columns 1-3 are empty and thinking the level is bugged or empty.
The Consequence: Making random taps or restarting the level unnecessarily.
The Fix: Recognize that the "Dip" is an intentional part of the level design. It is the breathing room that allows you to clear your belt and prepare for the final Yellow unlock.
Solutions for When You Are Stuck
Even with a perfect strategy, the game's random generation can sometimes put you in a tight spot. Here is how to recover.
Solution 1: The "Soft Lock" Recovery
If your belt is full (5 cups) and none of them match the immediate needs of the canvas, you are in a "Soft Lock." Look at the far right or left edges of the canvas. Can you pour a "bad" color (like Purple) into the corner just to free up a slot? Yes. Sacrifice a small bit of canvas accuracy to free up a belt slot so you can grab the color you actually need.
Solution 2: Gate Refusal to Open
If you have cleared 10 cups and the "6" gate still hasn't opened, look for small, single-cup layers you might have missed in the corners. Sometimes a single Orange cup is hidden behind a stack in Column 3. Clearing that one cup is the trigger you need.
Solution 3: Running Out of Yellow
If you reach the end of the level and the moon is 90% complete but you are out of Yellow, check the "waste" tray (if your version has it) or check the very bottom of your building structures. Did you accidentally pour Yellow into a building window? If so, you have mismanaged your colors. You cannot recover this; you must restart. This highlights the importance of saving Yellow *only* for the moon.
Speed Run Tips and Shortcuts
Once you have mastered the survival strategy, you can optimize for speed. A fast run of Level 350 is a thing of beauty.
Shortcut 1: The "Gate Pre-load"
If you know the "5" gate is about to break (you have cleared 4 cups), you can hover your finger over the stash of Red balls that will be revealed. The moment the animation starts, tap. This shaves milliseconds off every cycle and keeps your momentum high.
Shortcut 2: Combining the "Flush"
At the very end of the level, you will have a belt full of leftover Purple. Instead of pouring them one by one into specific spots, perform a "Flush." Drag your first Purple to the top left, and immediately queue the second Purple to the top right. The game allows you to queue the next pour while the current one is animating. This lets you clear your belt in seconds rather than minutes.
Shortcut 3: Ignoring the "Perfect" Edges
For a speed run, you do not need 100% pixel-perfect edges on the buildings. Accept 90% accuracy. If a Purple pixel bleeds into a Red building, leave it. Correcting it takes too much time. Focus on clearing the belt and opening the gates; aesthetic perfection is the enemy of speed.