
Level 352
HARDHow to solve Sand Loop level 352? Get instant solution for Sand Loop 352 with our step by step solution & video walkthrough. Sand Loop 352 tips and guide.
Play Sand Loop Now
Experience the puzzle challenge firsthand
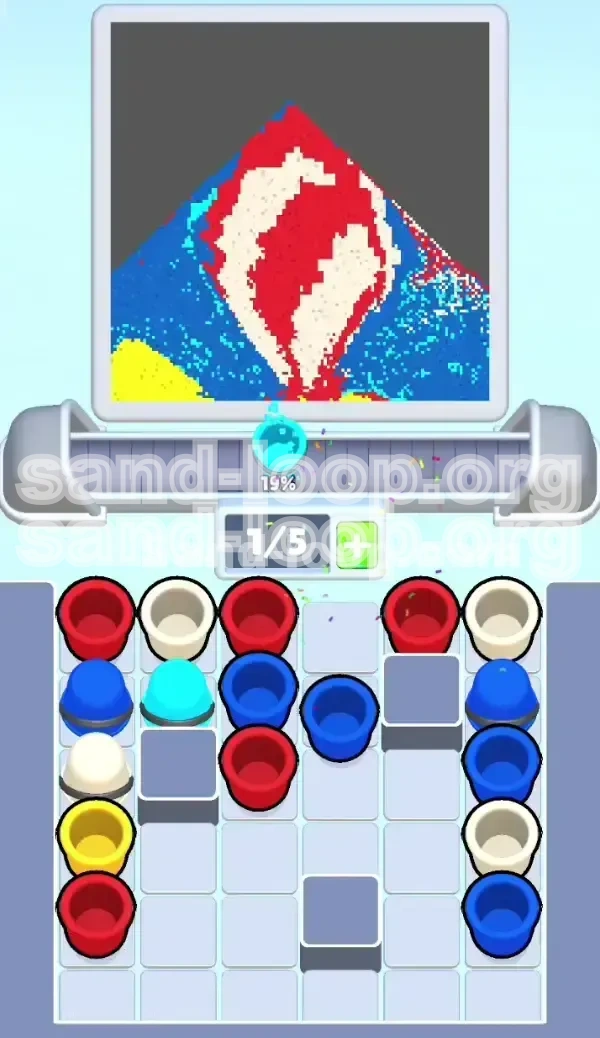
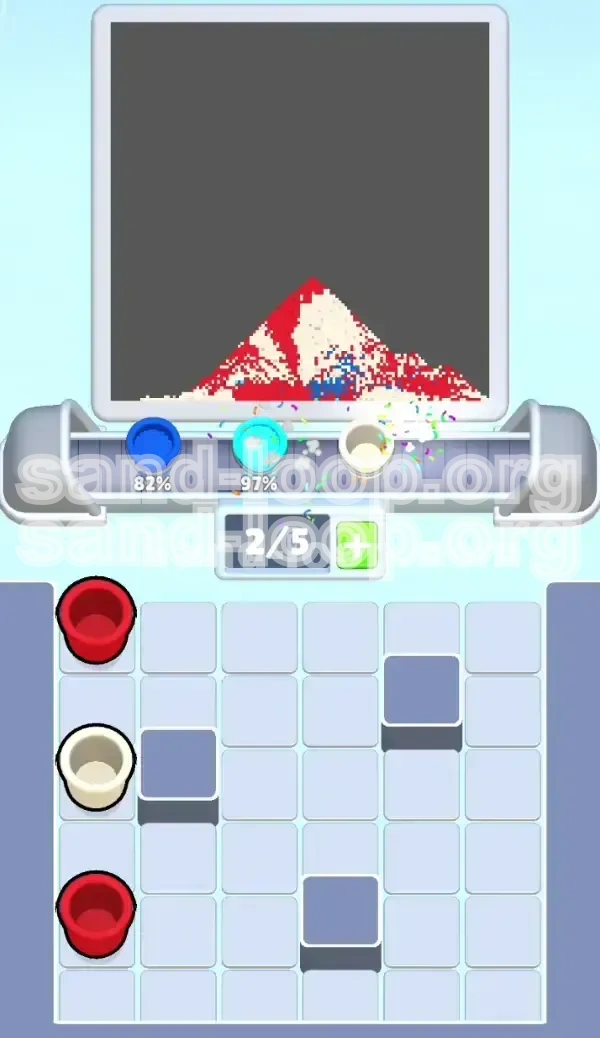
Game Screenshots

Sand Loop Level Guides
Level Overview: The Beach Ball Challenge
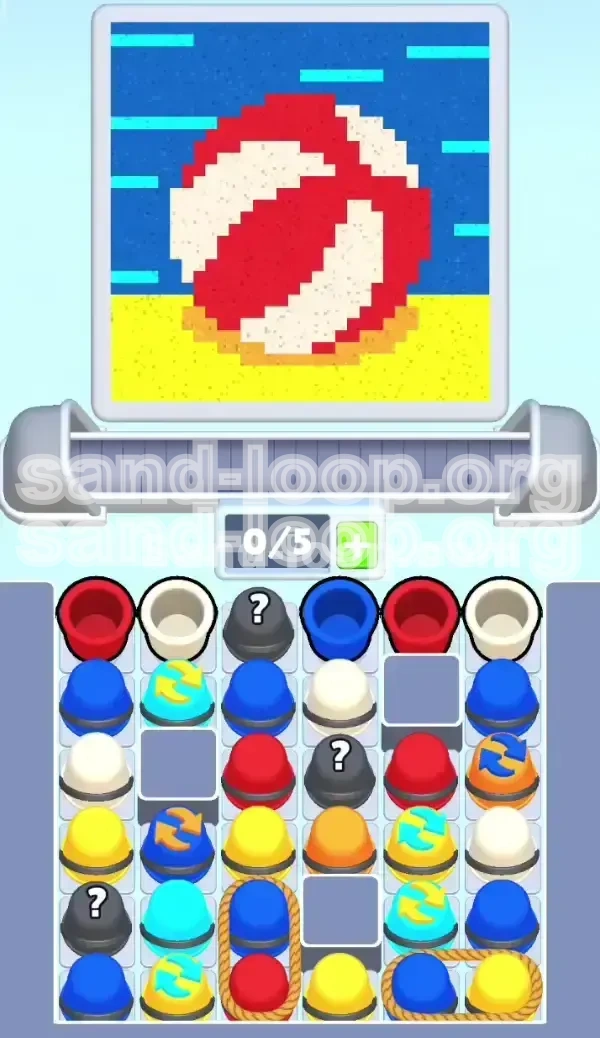
Welcome to the vibrant and tricky world of Level 352 in Sand Loop. On the surface, this level appears to be a simple, cheerful summer scene featuring a classic Red and White Beach Ball resting on yellow sand against a blue sky with cyan streaks. However, do not let the bright colors fool you. This level is a significant step up in difficulty, designed to test your logic and resource management skills rather than just your speed.
The core challenge of Level 352 lies in the "Color Swapping" mechanics and the restrictive nature of the tray. Unlike previous levels where you might rely on quick reflexes, this stage requires you to pause and plan your moves. You are dealing with a 5-slot conveyor belt, which initially seems spacious. However, the tray is cluttered with Obstacle Blocks (gray cubes), Rope-tied cups, and Mystery Boxes. The complexity arises from the need to manage five distinct colors while navigating these physical obstacles on the belt. The presence of Mystery Boxes adds a layer of unpredictability, meaning no two runs will feel exactly the same, but the underlying logic remains consistent.
The Canvas Layout
The painting area is divided into three distinct zones that require different strategies. The foreground is occupied by the Beach Ball, featuring large, solid blocks of Red and White. The middle ground consists of the Sand, a large block of Yellow that sits at the bottom of the canvas. The background is the Sky, which is primarily Dark Blue but is bisected by thin, horizontal Cyan lines. These lines are the "danger zones" of the level; they are visually small but require precise color matching. If you accidentally fill a Cyan line with Dark Blue, your completion percentage will stall, forcing you to undo moves or restart the sequence.
Conveyor Belt Limitations
While you have a 5-slot capacity, the effective space is much lower due to the Rope-tied cups. These mechanics link two cups together, effectively treating them as a single, large item that takes up two slots. If you try to pull a Roped Pair when you already have 3 or 4 cups on your belt, you will jam the machine. Understanding the spatial requirements of these tied cups is crucial for maintaining a steady flow of paint to the canvas.
Color Swapping Mechanics
Level 352 introduces Color Swap Cups, marked with recycling arrows. These are not just standard paint sources; they transform the color of the subsequent cup you tap. For example, you might encounter a cup that turns the next paint into Cyan. In this level, these are essential for creating the light blue streaks in the sky. Using these swap cups on the wrong section (like the main sky or the ball) is a waste of resources and will leave you without the necessary tools to finish the fine details later.
The Role of Mystery Boxes
Scattered throughout the tray are gray Mystery Boxes. These act as wildcards. They can contain Obstacle Blocks that further clog your tray, or they might hold vital colors like Cyan or Yellow that are scarce in the initial setup. A key part of the strategy is deciding when to open these. Opening a Mystery Box too early can flood your belt with a color you aren't ready to use, causing a traffic jam that stops you from clearing the foreground elements.
Difficulty Spike
Players should expect a difficulty spike here. Previous levels may have allowed for "panic tapping"—frantically clicking cups to clear space. In Level 352, panic tapping is the fastest route to failure. The combination of tied ropes, color swaps, and precise borders requires a methodical approach. You are managing a queue of actions, and if you disrupt the order, the entire system breaks down.
Clear Objectives: What You Need to Do
To successfully complete Level 352 and achieve that satisfying 100% completion rating, you need to move beyond random tapping and adopt a strategic workflow. Your primary goal is to clear the canvas in a specific order that prevents color contamination and manages belt space efficiently.
Establish the Foreground First
Your first major objective is to clear the Red and White sections of the Beach Ball. The ball sits on top of the sand and sky, meaning it acts as a layer that covers the background details. By filling the ball first, you secure large chunks of the canvas and reduce the number of active colors you need to worry about. Once the ball is complete, those slots on your conveyor belt are freed up for the more complex background colors.
Manage the Queue
You must constantly monitor the 5-slot limit. Your objective is to always keep at least 2 slots open if you know a Roped Pair is coming up the line. This often means you need to "dump" paint into safe zones (like the large Yellow sand area) even if you aren't perfectly finished with that section, just to free up space on the belt. Strategic dumping is better than a full belt jam.
Unlock Color Swaps
You need to actively hunt for the Color Swap cups. You cannot finish the level without generating Cyan paint for the sky details. Your objective here is to identify the Swap Cups (usually marked with yellow or orange arrows) and reserve them specifically for the moment the scanner hits the Cyan streaks. Do not use them for the main Dark Blue sky fill.
Handle the Obstacles
The gray Obstacle Blocks serve no purpose other than to block your progress. An important objective is to clear these blocks as quickly as possible to access the useful cups hidden behind them. Sometimes, this means using a "sacrificial" move—tapping a cup you don't strictly need just to clear a path to a cup you do need.
Precision on the Cyan Lines
The final and most difficult objective is the perfect fill of the Cyan streaks. This requires timing. You must have the swap cup activated and ready exactly when the scanner passes over the horizontal lines in the sky. This is the "checkmate" moment of the level; if you miss this timing, you will likely fail to reach 100% and have to restart the level.
Maintain Clean Borders
Unlike levels with forgiving borders, Level 352 penalizes messy painting. The bottom curve of the beach ball dips into the Yellow sand. Your objective is to stop pouring the Red or White paint the instant the scanner leaves the ball area. Any overpaint into the Yellow zone will contaminate the sand, making it impossible to get a "Perfect" rating on that section.
Step-by-Step Instructions: The Winning Formula
This walkthrough provides a sequential path to beating the level. While the exact position of cups in the tray varies slightly, the logical order of operations remains the same. Follow these steps to navigate the chaos.
Phase 1: The Ball Breakdown (Opening Moves)
Start the level by scanning the top row of the tray. You are looking for the primary Red and White cups. Do not worry about the Blue or Yellow cups yet.
- Action: Tap the Red cup located on the far left. This begins filling the left side of the beach ball.
- Action: Tap the White cup located on the far right. This begins filling the right side.
- Note: Ignore the Blue cup in the center for now. If you tap Blue while the scanner is on the ball, you waste the paint.
- Mystery Box: If there is a Gray Mystery Box in the top row, tap it immediately. You need to clear it to see what is behind it. Ideally, it reveals a color you can use soon, or at least clears a slot.
Phase 2: The Sand Strategy (Creating Space)
Once the ball is partially filled, the scanner will eventually dip down to the bottom of the canvas to start the Sand. This is your safety zone.
- Action: Look for Yellow cups in the tray. They are often buried in the middle or bottom rows.
- Tactic: As soon as the scanner hits the yellow sand, tap every Yellow cup you can see. The sand area is large and can absorb a lot of paint quickly.
- Benefit: Clearing the Yellow cups rapidly frees up 2-3 slots on your conveyor belt. This space is critical for the next phase where you deal with the Roped Pairs.
Phase 3: The Rope Trap (Mid-Game Management)
As you clear the top layers, you will encounter the Roped Pairs. These are usually combinations like Red/Blue or Blue/Yellow tied together.
- Check: Look at your conveyor belt. Do you have 2 or fewer cups currently loaded?
- If YES: Tap the Roped Pair. The game will load both cups. Wait for the scanner to move to the appropriate zone (e.g., wait for the sky to tap the Blue side of the pair).
- If NO: You must tap and use current cups first to create space. Never tap a Roped Pair with a full belt, or you will cause a jam that wastes precious seconds.
Phase 4: The Sky and Swaps (Late Game)
With the ball and sand mostly done, you are left with the Sky and the tricky Cyan lines.
- Preparation: Stop tapping standard Blue cups for a moment. Scan the tray for the Color Swap Cups (Cyan with arrows).
- Execution: Tap the Cyan Swap cup. This will transform the next cup you use into Cyan paint.
- Timing: Watch the scanner. Do not tap the next cup until the scanner is strictly over the thin horizontal Cyan lines in the sky.
- Action: Tap the following cup immediately as the scanner hits the line. This fills the detail perfectly.
Phase 5: The Final Cleanup
You are now in the endgame. The tray is likely emptying out, and only small patches of canvas remain.
- Scan: Look for any remaining Gray blocks or isolated pixels of color.
- Action: Use any remaining standard cups (usually Blue for the sky or White/Red for ball spots) to finish the job.
- Focus: Don't worry about the order anymore, just clear the remaining cups as fast as possible to secure the final percentage points.
Color Order: The Logic of Layers
Understanding the correct color processing order is the intellectual key to Level 352. If you process colors in the wrong sequence, you will create "impossible" situations where you have the wrong paint for the active scanner area.
Priority 1: Foreground Solids (Red & White)
Why start here? The Beach Ball is the top layer of the image. It sits visually "in front" of the sky and sand. If you fill the Blue sky first, you then have to carefully paint the Red and White ball over it without bleeding over the edges. It is much safer to define the boundaries of the ball first. By establishing the Red and White zones early, you create clean borders for the rest of the level.
Priority 2: The Bottom Foundation (Yellow)
Yellow comes second for two reasons. First, the sand is at the very bottom of the canvas, and the scanner moves in a pattern that often hits the bottom edges after the center. Second, the Yellow paint area is large and contiguous. It serves as a great "dumping ground" for excess Yellow cups that might be clogging your tray. Clearing Yellow early frees up the conveyor belt capacity needed to handle the complex Rope pairs later in the level.
Priority 3: The Background Base (Dark Blue)
The Dark Blue sky should be your third major focus. This is the "filler" color of the level. Once the ball (foreground) and sand (bottom) are established, the rest of the canvas is predominantly sky. You can use standard Blue cups to fill the large voids in the upper atmosphere. This is generally low-stress, provided you have saved your Swap cups.
Priority 4: The Detail Work (Cyan)
Cyan must be last. This is the golden rule of Level 352. The Cyan streaks are thin, precise lines cutting through the Blue sky. If you process Cyan early, you risk filling the large Blue sky areas with Cyan paint, which turns the sky a light, washed-out color. This makes it incredibly difficult to correct later because standard Blue cups won't cover Cyan properly without looking messy. By saving Cyan for last, you ensure that the main sky is already the correct Dark Blue, and you are just "drawing" the final lines on top.
The Danger of Mixing
Avoid mixing processing orders. For example, do not switch back and forth between Red and Yellow repeatedly. Try to "batch" your actions. Do all the Red you can, then all the Yellow, then all the Blue. Switching colors too often increases the chance of accidentally tapping the wrong cup when the scanner shifts zones unexpectedly.
Key Tips and Common Mistakes
To truly master Level 352, you need to internalize a few pro tips and avoid the pitfalls that trap 90% of players.
Key Tip: The "Pause" Technique
When a Mystery Box appears or a Roped Pair becomes available, take your finger off the screen. Pause for 2 seconds. Assess your belt capacity. Ask yourself: "If I tap this, do I have room for the consequence?" In Sand Loop, speed is less important than rhythm. A 2-second pause to think is better than a 10-second restart.
Key Tip: Tracking the Scanner
The game's scanner moves in a predictable pattern, but it can be deceptively fast. Don't watch the cups; watch the canvas. Keep your eyes on the scanner frame. By predicting where the scanner will be in 3 seconds, you can pre-load the correct color. If you see the scanner moving toward the sky, get your Blue or Cyan ready. If it's dropping to the bottom, get your Yellow ready.
Common Mistake: The Cyan Spill
The most common error in Level 352 is tapping the Cyan Swap cup while the scanner is in the middle of a large Blue sky block. This results in a huge patch of light blue paint that ruins the contrast of the image. Always wait for the line. If the scanner isn't on the line, don't tap the Cyan.
Common Mistake: Belt Jamming
New players often treat the 5-slot belt like a 5-slot inventory. They fill it up and then look for a match. This is wrong. You should try to keep the belt at 50% capacity (2-3 slots) whenever possible. This buffer allows you to handle the Roped Pairs without jamming. If your belt is full, you are no longer playing the puzzle; you are just reacting to the jam.
Common Mistake: Ignoring the Ball Curve
The bottom of the beach ball is curved. It is not a straight line. A common mistake is pouring the Red or White paint too long, letting it bleed into the Yellow sand. You must stop pouring the moment the scanner leaves the white/red boundary. Over-painting here creates a dirty, muddy border between the ball and the sand that prevents 100% completion.
Common Mistake: Wasting Swaps on Obstacles
Sometimes, a Color Swap Cup is sitting right next to a Gray Obstacle Block. A hasty player might tap the Swap Cup just to clear the space, accidentally transforming the next cup into a color they don't need. Only activate a Swap Cup if you are ready to use the transformed paint immediately.
Stuck Solutions and Speed Run Tips
If you find yourself retrying the level repeatedly, or if you are looking to optimize your time for a high score, this section covers advanced techniques.
Solution: The "Soft Lock" Recovery
Sometimes, you aren't technically "stuck" with a full belt, but you are in a "soft lock"—meaning you have a belt full of Blue cups, but the scanner is on the Yellow sand.
- The Fix: Look for a Roped Pair that might contain a useful color, or a Mystery Box. If there are no moves, you have to make a "sacrifice move." Tap a Blue cup to waste it on the sand (contaminating it slightly), just to free up one slot. Once you have a slot open, you can access the Yellow cups you need to fix the contamination. It’s a short-term loss for a long-term gain.
Solution: Mystery Box Roulette
If the board is clogged and you can't make a move, the Mystery Box is your wildcard.
- The Strategy: Tap the Mystery Box. If it’s a Gray Block, tap it again to clear it. This usually costs you 2 total taps but clears the space. If it’s a color, it might be exactly what you need to break the deadlock. In Level 352, clearing the obstacle is often worth the risk of the random color.
Speed Run Tip: Pre-Tapping
Advanced players can "pre-tap" cups while the animation for the previous pour is still finishing. You don't need to wait for the cup to fully empty before tapping the next one. As soon as you see the scanner hitting the correct zone, tap the next cup in your queue. This shaves milliseconds off every move, adding up to significant time savings.
Speed Run Tip: The Roped Pair Shortcut
Identify the location of the Roped Pairs before you even start clearing the main colors. If you know the Red/Blue pair is at the bottom of the tray, you can plan your early moves to clear the path to it. Don't just tap what is closest; tap what clears the path to the Roped Pair so you can deploy it the moment your belt has space.
Speed Run Tip: Color Memorization
After playing the level 3 or 4 times, you will start to memorize the color sequence of the tray. You know that behind that Gray block is a Cyan cup. Use this knowledge to skip the "scanning" phase. You can confidently tap the Gray block because you know the Cyan cup behind it is exactly what you need for the upcoming sky lines.