
Level 362
HARDHow to solve Sand Loop level 362? Get instant solution for Sand Loop 362 with our step by step solution & video walkthrough. Sand Loop 362 tips and guide.
Play Sand Loop Now
Experience the puzzle challenge firsthand
Game Screenshots

Sand Loop Level Guides
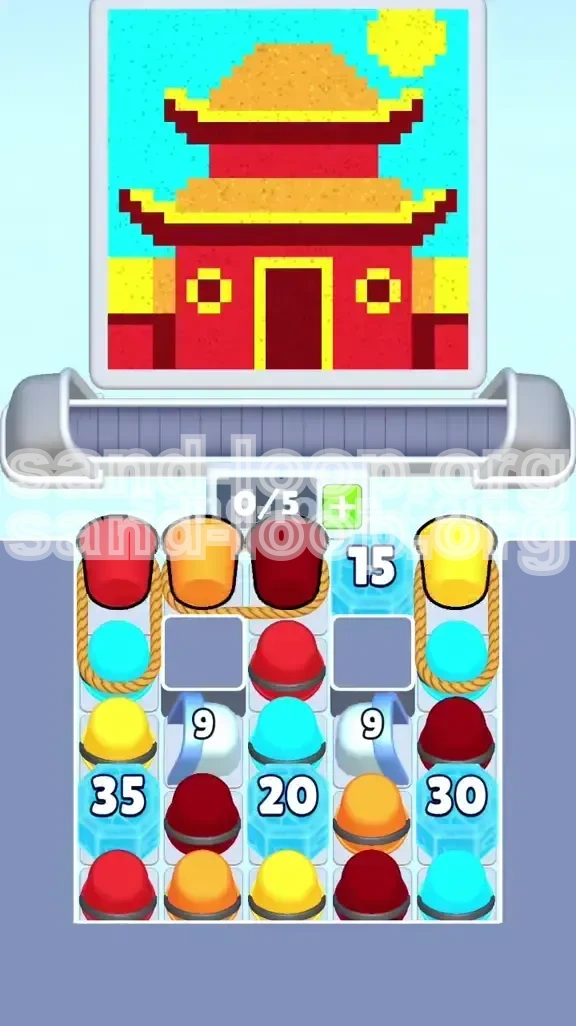
Level 362 Overview: The Pagoda Architecture Challenge
Level 362 in Sand Loop introduces a significant shift in gameplay mechanics, transitioning from reflex-based action to strict logical planning. This stage, titled "The Pagoda," requires players to construct a traditional Asian Temple scene pixel by pixel. Unlike previous levels where you could pour colors freely, this stage imposes a strict dependency on the order of operations.
The primary difficulty lies in the restricted tray size and the "Roped Dependencies." You cannot simply pick the color you want; you must drag the entire baggage of colors attached to it. With a conveyor belt limited to just 5 slots, managing this "dead weight" while keeping the flow alive is the core challenge. Furthermore, the presence of high-HP ice blocks and countdown gates means that inefficient movement will lead to a gridlock, forcing you to restart the level.
The Pagoda Structure
The visual target is a multi-layered architectural drawing. Understanding the layer depth is crucial. The background is the furthest layer, followed by the ground, the temple walls, and finally the roof details. Players must visualize this 3D structure projected onto a 2D grid to understand why pouring the "Sky" color too early destroys the ability to paint the "Roof" later.
The Tray Restriction
Your conveyor belt has a capacity of only 5 slots. This is your most critical resource. In this level, pulling a specific color often adds a "useless" color to your belt. If your belt is full, the machine jams. You must treat your belt slots like inventory space in a survival game; every slot occupied by a color you cannot use right now is a slot wasted.
Ice Block Mechanics
The level features three tiers of obstacles. The initial "15 HP" block acts as a soft gate, while the bottom row features massive blocks (20, 30, 35 HP) that serve as the final hurdle. These blocks do not just block colors; they dictate the pacing of the game. You must dedicate specific phases of the game to chipping away at these blocks while simultaneously painting the canvas.
Color Dependency
The game utilizes a "Rope System" where cups are paired. pulling a needed "Red" cup might drag a "Cyan" cup with it. Since the Cyan (Sky) is the final layer, having it on your belt early is a burden. Mastering the timing of when to pull these roped pairs—without clogging your machine—is the key to a smooth run.
Winning Condition
To achieve 3 stars and completion, you must fill 100% of the canvas pixels. This includes the tiny details like the shadowed door and the sun's rays. The "Game Over" state triggers primarily when the conveyor belt backs up completely, preventing you from accessing new colors, or when you run out of moves while ice blocks still obscure essential cups.
Primary Objectives and Strategy
Before you make your first move, you need a clear battle plan. The objective is not just to pour paint, but to manage the queue of incoming paints. Your strategy must prioritize the foreground elements (Walls and Roof) while deliberately delaying the background elements (Sky).
Objective 1: Establish the Foreground
Your immediate goal is to secure and pour the Red, Dark Red, Orange, and Yellow cups. These colors form the Pagoda, the door, and the sun. If you run out of these colors early, you cannot recover because the background colors will bury the foreground details. Prioritize pulling these even if it means temporarily ignoring available background colors.
Objective 2: Manage "Dead Weight" Colors
You will inevitably pull Cyan (Sky) cups early due to the rope mechanics. Your secondary objective is to minimize the space these take up. Ideally, you want to pull a roped pair, use the primary color immediately, and then allow the Cyan cup to ride the belt until it loops or is disposed of. Do not let Cyan cups accumulate in your 5 available slots.
Objective 3: The Ice Breaker
The "15 HP" Ice Block in the top right corner protects your Yellow supply. You must reach a break-even point where every pour you make also damages this block. If you focus only on painting without breaking ice, you will run out of Yellow paint, leaving the roof tips incomplete.
Objective 4: Triggering the Countdown
The grey numbered blocks (9 and 4) are passive obstacles that require 9 and 4 clear actions respectively to open. You do not need to waste moves targeting them specifically; standard gameplay will usually clear these. However, be aware that opening these gates releases a flood of new cups, which can easily clog your belt if you aren't ready.
Objective 5: The Sky Fill
The final 20% of the level is the "Cyan Dump." Once the Pagoda, Ground, and Sun are perfectly painted, the remaining obstacles (20, 30, 35 HP blocks) must be destroyed using the Cyan cups you previously avoided or are now receiving in bulk. This is the cleanup phase where you convert all your stored resources into sky pixels.
Step-by-Step Walkthrough: Phase One
The opening moves are the most critical. A mistake in the first 10 seconds can lead to an unrecoverable gridlock 30 seconds later. Follow these exact steps to establish a stable foundation.
Step 1: The Initial Assessment
Start the level and pause. Look at the top row. Identify the loose cups (unroped) and the roped cups. You will likely see Red cups roped to Cyan, and Yellow cups roped to Cyan. Identify the location of the "15 HP" ice block. Your first move depends entirely on where the loose Red or Dark Red cups are located.
Step 2: Pulling the First Pair
Locate the top-left Red cup. It is likely roped to a Cyan cup. Pull this pair. * Action: Pull the Red/Cyan pair. * Result: Red enters the tray; Cyan enters the tray. * Management: Immediately pour the Red onto the Pagoda walls. * Crucial: The Cyan cup is now "dead weight." It occupies 1 of your 5 slots. Do not pour it. Let it sit.
Step 3: Prioritizing the "15 HP" Block
Shift your focus to the right side of the top row. You need to break the ice to get Yellow. * Action: Look for loose Orange or Dark Red cups. Pour these into the Pagoda or Door areas. * Tip: Every pour you make should ideally be adjacent to the ice block to chip away at its HP. If you can, match colors near the ice to deal double damage (clearing the cup + breaking ice).
Step 4: Inventory Management
After 2-3 pulls, your tray will have 3-4 cups. * Scenario: You have [Red], [Cyan], [Dark Red], [Orange]. * Check: Is the belt full? If yes, you must pour something immediately. If you pour the Cyan now, you fail the layer order. You must pour the Red, Dark Red, or Orange. * Rule: Keep 1 slot open at all times to prevent new cups from spawning off-screen or getting stuck.
Step 5: The Door Detail
The center of the Pagoda features a Dark Red door. This is a high-priority target. * Action: Use any available Dark Red (Maroon) cups to fill this specific area. * Warning: Do not use standard Red here. The pixel art requires the specific Dark Red shade for the door shadow. Filling it with Red will prevent you from getting 100% completion later.
Step 6: Clearing the Top Row
Once the "15 HP" block breaks, Yellow cups will flow. * Action: You will likely see a Yellow/Cyan roped pair. * Decision: Do not pull this yet if your tray is full of Cyan. Clear existing foreground colors first. Only pull the Yellow when you have space to hold the accompanying Cyan cup without halting your production.
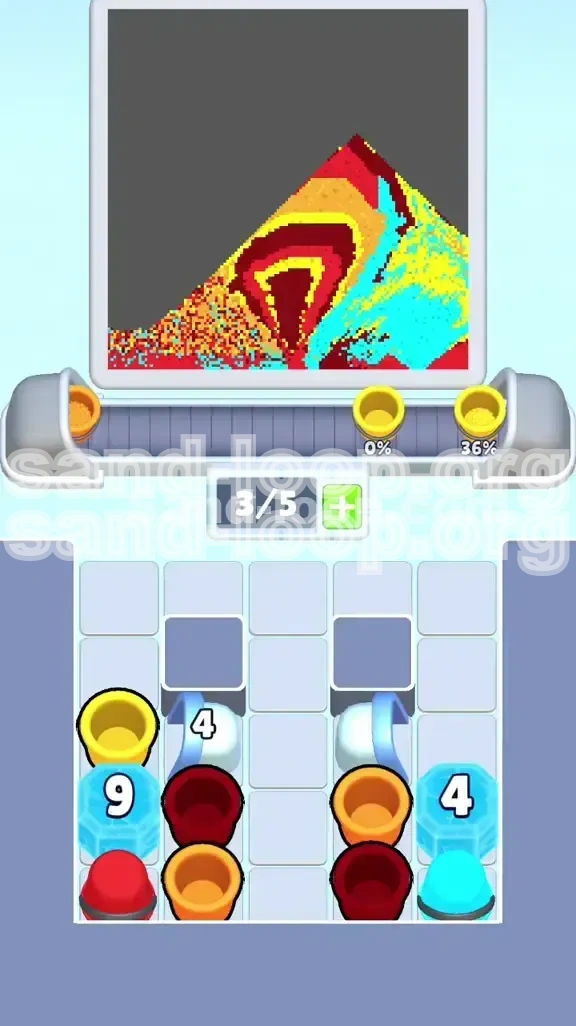
Step-by-Step Walkthrough: Phase Two
Once the top ice is broken and the initial flow is established, you enter the mid-game. This phase is defined by the "Countdown Gates" and managing the accumulation of background colors.
Step 7: Ignoring the Gates
You will see grey blocks marked "9" and "4". * Strategy: Do not try to break these directly. They act as a timer. * Action: Continue playing normally, filling the roof (Orange) and the ground (Yellow). As you clear cups from the board, the numbers will drop. Focus on the art, not the gates.
Step 8: Roof and Ground Construction
With Yellow and Orange flowing, construct the main body of the roof and the ground floor. * Color Order: Orange usually forms the main tiles, Yellow forms the ridges and tips. * Precision: Be careful not to stray into the "Sky" area (top corners) with your Orange or Yellow paint. If you paint the sky pixels now, the Cyan fill later will look patchy or won't register correctly.
Step 9: The Cyan Accumulation
By now, you likely have 2 Cyan cups on your tray. * Status: Tray has 2/5 slots occupied by unusable Cyan. * Problem: You only have 3 slots left for working colors (Red, Orange, Yellow). * Solution: You must pour faster. Be decisive. If a color matches a pixel, pour it instantly. Do not hold onto cups "for later" in this phase; you need the tray space.
Step 10: Breaking the Second Barrier
The "4" gate will open shortly, followed by the bottom row. * Preparation: Before the bottom row unlocks, try to have your tray as empty of "Dead Weight" as possible. However, since you can't pour Cyan, this is impossible. Instead, aim to have 2 Cyan cups and 3 empty slots ready for the new influx.
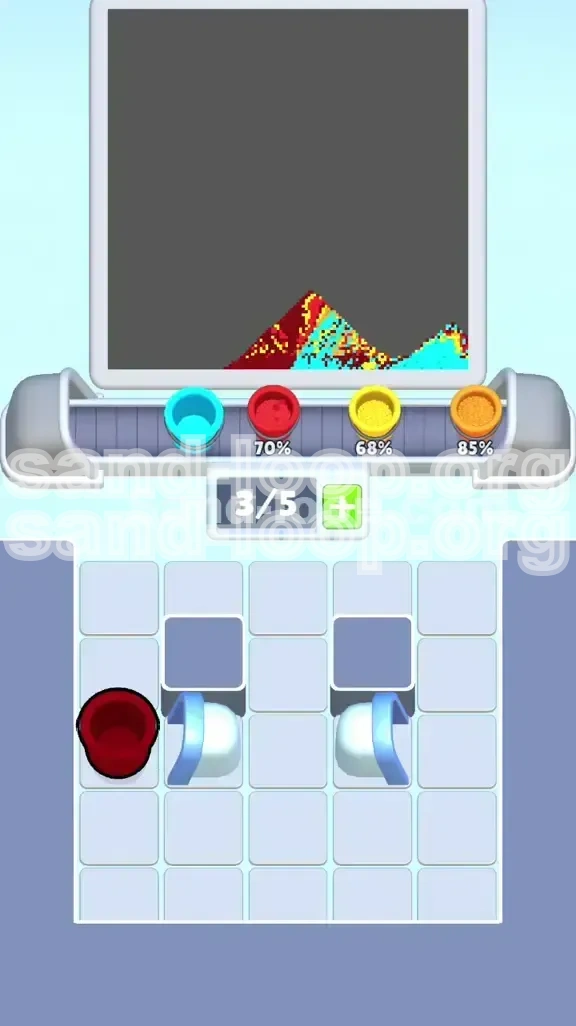
Step 11: The "Big Freeze" Approach
The bottom row reveals the massive ice blocks (35, 20, 30 HP). * Observation: These are too thick to break with normal matches. * Realization: You must transition to the "Cyan Phase." You are done saving foreground colors. The only way to break these is to pour the mass of Cyan you have been collecting.
Advanced Strategy and Color Order
This section details the exact logic required to solve the puzzle without getting stuck. The "Color Order" is not just about aesthetics; it is about mathematical necessity.
The Logic of Background vs. Foreground
In pixel art logic, the background is always painted first. However, in Sand Loop mechanics, the background cups (Cyan) are often the most abundant and are roped to the foreground (Red). This forces a reversal: you must extract the foreground colors while "borrowing" the background colors, holding them in limbo until the foreground is solid.
The Color Priority List
Follow this strict priority list when choosing which cup to pull or pour: 1. Dark Red (Door): Highest scarcity. Never miss a chance to pour this. 2. Red (Walls): High quantity needed, but essential. 3. Yellow (Roof Tips/Ground): Medium scarcity. Locked behind ice initially. 4. Orange (Roof Body): Usually abundant, save for clearing ice. 5. Cyan (Sky): Lowest priority. Only pour when no other option exists or the foreground is 100% done.
The "Rope" Economy
Every time you cut a rope, you are making a trade. * Trade: 1 Action (Pull) + 1 Inventory Slot = 2 Colors. * Analysis: If you pull a Red/Cyan pair, and you pour the Red immediately, you have gained 1 pixel of progress for the cost of 1 inventory slot occupied by Cyan. If you pull 3 pairs in a row, you have 3 Cyan slots. You are now effectively playing with a 2-slot tray. If you pull a 4th pair, you deadlock.
Speed Run Tip: The "Loose Cup" Hunter
For speed runners, ignore roped pairs unless necessary. Scan the tray for "Loose Cups" (cups without ropes attached). These give you 1 color for 1 inventory slot, which is 100% efficient. Only pull roped pairs when you have zero loose cups available. This maximizes your tray turnover rate.
Analysis of the "15 HP" Ice
This block is the bottleneck of the first half. * Math: It takes approximately 4-5 adjacent matches to break. * Tip: Don't just match colors randomly. If you see a cluster of Orange cups near the ice, prioritize pouring Orange, even if the Red walls are unfinished. The Yellow cups released from this ice are required to finish the level, so breaking the ice is higher priority than painting the walls.
Common Mistakes to Avoid
Players often fail Level 362 not because they are slow, but because they make irreversible errors in judgment. Avoid these pitfalls to ensure a victory.
Mistake 1: The Premature Sky Fill
This is the most common error. Players see a Cyan cup and pour it into the empty white space of the canvas early on to "get it out of the way." * Why it fails: Once the Cyan pixel is placed, you cannot pour a Red pixel on top of it. If you paint the sky where the roof is supposed to be, you can never build the roof. The game logic prevents layering foreground over background in most cases. You will be left with a floating door and no roof.
Mistake 2: Tray Hoarding
Players try to "save" a specific color for later, holding it on the tray while looking for a match. * Why it fails: Your tray is a FIFO (First In, First Out) buffer with limited size. Holding a cup for more than 5 seconds causes a backup. New cups can't enter, and you can't reach the cups you need. * Correction: If you can pour it, pour it. Do not save cups for a "better spot." The current spot is the best spot.
Mistake 3: Ignoring the Door Color
The "Dark Red" door looks very similar to the standard Red walls. * Why it fails: Using standard Red on the door leaves a 5% completion gap that is impossible to fix later. You will be stuck at 95% completion with no way to fix the door color because the Dark Red cups have stopped spawning. * Prevention: Zoom in on the center of the Pagoda. If the pixel outline is a darker shade, wait for the Maroon cup.
Mistake 4: Panic-Pouring Cyan
When the tray gets full and Cyan cups are piling up, players panic and pour them into the nearest empty space just to free up slots. * Why it fails: You are painting the Sky layer prematurely. You are trading temporary relief for long-term failure. * Correct Action: Pause. Assess. Pour the foreground colors faster. If you absolutely must clear a slot, check if there is a tiny corner of the canvas that is definitively "Sky" (top corners) and pour there, but never in the center.
Mistake 5: Neglecting the Sun
Amidst the chaos of the roof and walls, the small Yellow sun detail is often forgotten. * Why it fails: You enter the final phase with 99% completion, staring at a single unpixelated sun. You need a Yellow cup, but only Cyan and Red are spawning. * Tip: Paint the Sun as soon as you break the first Ice block and get Yellow. Do not leave it for the end.
Troubleshooting and Final Push
Sometimes, despite following the guide, you might end up in a tricky situation. This section provides solutions for specific "Stuck" scenarios and how to handle the end-game grind.
Scenario: The "Full Tray" Deadlock
Situation: Your tray is full: [Cyan, Cyan, Red, Orange, Yellow]. You need to pull a new cup, but you can't. You can't pour the Cyan. * Solution: You must pour the Red, Orange, or Yellow immediately. Even if the placement isn't perfect (e.g., pouring Orange on the ground instead of the roof), you must free up a slot. Prioritize the color that has the most available pixels left on the screen. Getting the flow moving again is more important than perfect placement.
Scenario: The "1 HP" Ice Block
Situation: You are down to the last ice block, and it has 1 HP left. You have no cups adjacent to it. * Solution: Look for a "Cyan Bomb" or special cup if available. If not, you may need to waste a move. Pour a cup into a "safe" zone (an already completed area) to trigger a match/clear effect nearby, or simply wait for the board to shuffle if there are no moves. Usually, clearing a different part of the board shifts the grid, bringing a new cup next to the ice.
The End-Game: Cyan Flood
Once the Pagoda is 100% complete, the game changes. * Action: Now, and only now, do you unleash the Cyan. * Tactic: Ignore all other colors. Let them loop off the belt. Pull every Cyan cup you see. * Targeting: Pour Cyan aggressively into the remaining white space and onto the massive Ice Blocks at the bottom. Since the art is done, you are just playing a block-breaking game now. Pouring Cyan on the ice damages it, clearing the path to finish the level.
Speed Run: Skipping the Rope
Can you beat the level without pulling the roped Cyan? * Strategy: If there are enough "Loose" Red and Yellow cups to complete 90% of the level, you can theoretically pull the roped pairs at the very last second. * Risk: High. If you run out of loose cups, you have no choice but to pull the ropes. * Verdict: Not recommended for casual play. Pulling early and managing the belt is safer than gambling on a lucky spawn of loose cups.
Final Check: The 100% Requirement
Before you finish, check the top corners and the edges of the roof. Often, a single pixel of "Sky" remains hidden under the UI or tucked behind a roof tile. Ensure every pixel is filled. The "Victory" screen will not appear if even one pixel is white. The massive HP blocks at the bottom usually hide the last few required cups, so keep pouring that Cyan until they shatter.