
Level 368
HARDHow to solve Sand Loop level 368? Get instant solution for Sand Loop 368 with our step by step solution & video walkthrough. Sand Loop 368 tips and guide.
Play Sand Loop Now
Experience the puzzle challenge firsthand
Game Screenshots
Sand Loop Level Guides
Level 368: The Red Demon - Complete Walkthrough & Strategy Guide
Welcome to the definitive guide for Sand Loop Level 368. This stage is widely considered a major difficulty spike due to its "Red Demon" boss art and restrictive board mechanics. Unlike previous levels where you could freely manage your inventory, this level forces you to adapt to a cramped supply chain and a dynamic "Countdown Ice" barrier in the center of the board.
This guide is designed to take you step-by-step through the logic required to conquer the Red Demon. We will break down the rope mechanics, the countdown ice strategy, and the precise timing required to handle the massive volume of red sand without clogging your belt.
The Core Challenge: Supply Line Management
The primary difficulty in Level 368 is not the art itself, but the restricted access to your sand generators. For the first 60% of the level, you are limited to two vertical columns on the far left and right. The center of the board is blocked by Ice Counters. This creates a "funnel effect" where mistakes in pulling cups cannot be easily rectified by simply pouring them away.
Understanding the Red Demon Art
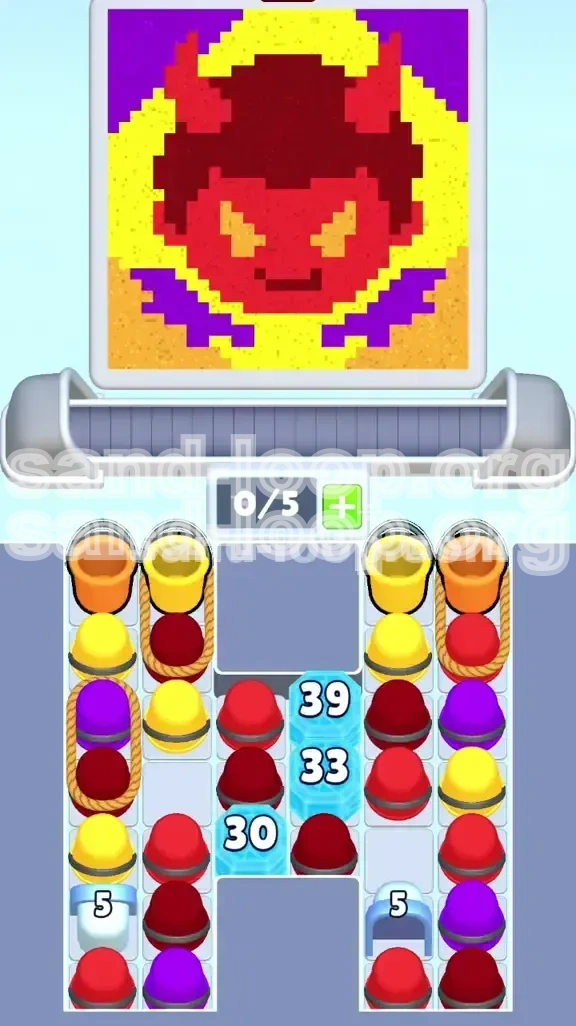
The target image is a pixel-art style Red Demon face. Understanding the color distribution is critical:
- Bright Red (Dominant): Covers the face, chin, and central upper body. This accounts for approximately 45-50% of the total canvas area.
- Yellow (Secondary): Forms the background aura and eyes. It is scattered but requires precision.
- Maroon (Accent): Used for the demon's hair and horns. This is a detail color that appears in narrow strips.
- Purple (Accent): Used for the wings and shading at the bottom.
The "Countdown Ice" Mechanic Explained
In the center column, you will see stacked Ice Blocks labeled with numbers (typically starting around 39, 33, and 30). These are Countdown Blocks.
Many players waste moves trying to match colors next to them to break them. This does not work. These blocks are linked to your overall completion percentage. They will only shatter when you have filled enough of the canvas correctly. Treat them as a timer and a space barrier, not an active puzzle element to solve immediately.
Why the "Rope" Mechanic Matters
At the top of your supply columns, you will notice cups tied together with ropes. Pulling one cup drags the connected one with it.
This is a inventory trap. If your belt has 4 cups (out of 5 max slots) and you pull a roped pair, you will instantly overflow your belt (6 cups), causing a deadlock or game over. You must manage your slot count rigorously before tapping these stacks.
Strategic Objectives for Victory
To beat Level 368, you need a clear roadmap. Your goal isn't just to pour colors; it is to survive the supply constraint until the mid-game ice break.
Objective 1: Survive the Opening Sequence
Your first goal is to clear the initial "Roped" cups without clogging your belt. You need to establish a flow where you are pulling cups, pouring them, and clearing slots just in time to receive the next batch. Do not focus on perfect coloring in the first 10 seconds; focus on keeping the belt moving.
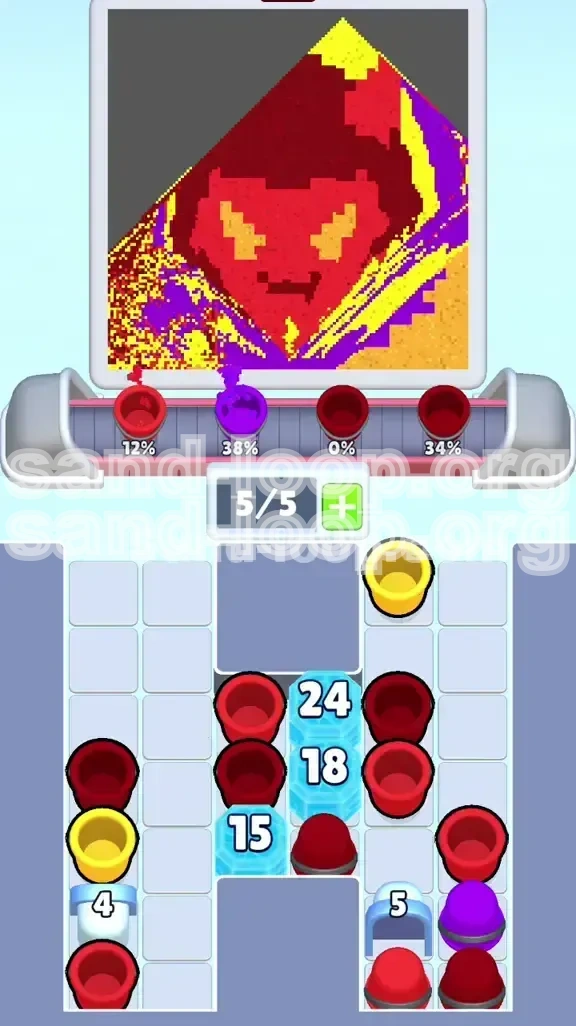
Objective 2: Trigger the Mid-Game Ice Shatter
You need to reach roughly 60-70% completion to trigger the destruction of the central Ice Counters. This is your "checkpoint." Once these blocks break, you gain access to the center generators (often marked with a '5'), which significantly eases the pressure by giving you more space to store trash cups.
Objective 3: Dominate the Red Flood
Once the board opens up, the game will flood you with Red cups. You must have a system to deposit these rapidly. The challenge here is ensuring the nozzle is actually over the red parts of the face when you have the cups ready.
Objective 4: Precision Cleanup
In the final 20%, the game stops giving you easy matches. You will need to hunt for specific colors (usually stray Yellow background pixels) while managing leftover cups.
Step-by-Step Early Game: Breaking the Constraints
The start of the level is the most dangerous phase. Follow these steps precisely to navigate the "Roped Columns."
Step 1: Assess Your Belt Capacity
Before you tap anything, look at your conveyor belt. It likely starts with 2 loose cups.
Rule of Thumb: Never pull a Roped Cup if your belt has more than 3 cups currently on it. Since a rope pulls 2 cups at once, going from 3 to 5 is safe. Going from 4 to 6 is a fail.
Step 2: Prioritize the "Top Loose" Cups
Look at the Left and Right columns. There are usually single cups (not roped) sitting on top of the roped pairs. Clear these first.
Action: Pour these initial colors into the canvas immediately. Even if they aren't perfect matches, getting them off the belt is priority #1 to free up slots for the inevitable rope pull.
Step 3: Executing the Rope Pull
Once the tops are clear, you are left with the roped pairs. - Left Side: Usually Purple + Maroon. - Right Side: Usually Orange + Red.
Action: Ensure you have 2 empty slots. Tap the column. Both cups will drop. Immediately look for the color that matches the current nozzle position. Pour that one instantly. The other cup is now "riding" the belt, waiting for its turn.
Step 4: Managing the Generators
At the bottom of the columns are the generators. As you clear cups, new ones bubble up. Don't just tap mindlessly. If the generator is producing a color you don't need (e.g., Green when you need Red), and the column is full, stop tapping that column. Shift your focus to the other column to give the bad color time to cycle or to prevent it from clogging your input.
Step 5: Ignore the Center Ice
For the first 2 minutes of gameplay, completely ignore the center ice blocks. Do not plan strategies around them. Pretend the board is only the left and right 2 columns. Pouring sand into the canvas is the only thing that lowers these numbers, so focus 100% on accuracy.
Step-by-Step Mid-Game: The Red Flood Strategy
Once you have cleared the initial ropes and settled into a rhythm, the "Red Phase" begins. The nozzle will spend a lot of time hovering over the demon's face.
Step 1: The "Red Stacking" Technique
The Demon's face is huge. You will need to pour Red sand repeatedly.
Action: When the nozzle is over the face, do not pour just one Red cup. If you have 2 or 3 Red cups on your belt, pour them all in quick succession. The face needs multiple layers of density to hit the color saturation target. Stacking reds prevents you from having to hunt for reds again later.
Step 2: The Yellow Trap Avoidance
This is the most common failure point. The nozzle moves from the Red Face (center) to the Yellow Aura (edges) and back.
Action: If you have Yellow cups on your belt, hold them when the nozzle is in the center. Pouring Yellow on Red creates a muddy brown/orange mess that is hard to fix. Only release the Yellow cups when the nozzle physically touches the background aura pixels.
Step 3: Utilizing the "Ride the Loop" Method
What if you have a Maroon cup (for the hair) but the nozzle is on the chin (Red)?
Action: Let the Maroon cup "ride the loop." Do not pour it in the wrong spot. Do not pull new cups if the belt is full. Just wait. Let the cup circle on the conveyor belt until the nozzle aligns with the hair area. Patience is better than a misplaced color.
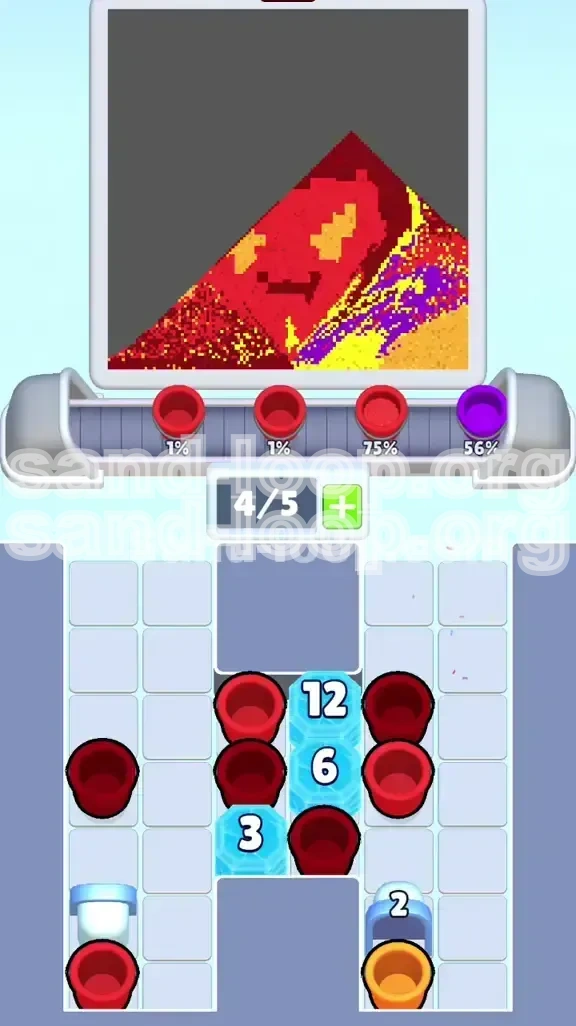
Step 4: Monitoring the Ice Countdown
Keep a peripheral eye on the center numbers (39, 33, 30). When you see them getting close to zero (around 10-15 remaining), prepare yourself. The board is about to change drastically.
Step 5: Preparing for the Break
When the Ice blocks are about to shatter, try to keep your belt as empty as possible. When they break, they might drop loot or free up space, but often the sudden shift in mechanics can cause visual clutter. Entering the "Ice Broken" phase with an empty belt gives you maximum flexibility.
Step-by-Step Late Game: Final Polish & Cleanup
The Ice Counters have shattered. You have access to the full board. Now it's a race to fix the minor details.
Step 1: Clearing the "Hair" (Maroon)
The Maroon cups for the hair are often the last to get cleared because the area is small and the nozzle moves over it quickly.
Action: If you are overflowing with Maroon cups, you may need to intentionally let other colors stack up. Focus entirely on the nozzle. The moment it touches the top of the head (hair), dump your Maroon stock immediately.
Step 2: The Final Purple Wings
The bottom wings are usually Purple. By this stage, you might be running low on Purple cups from the generators.
Action: Check the generators at the bottom. If they are empty, you need to rely on what is left on the belt. If you are missing Purple, look for "recycle" opportunities or ensure you didn't miss any Purple pixels in the chaos.
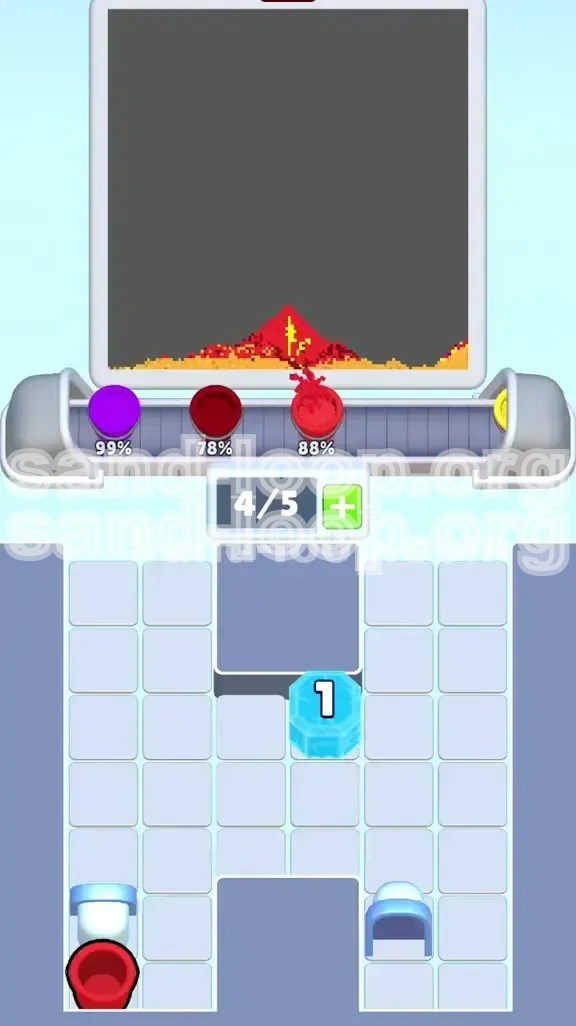
Step 3: Hunting Stray Pixels
The game will show you a percentage completion (e.g., 94%). You are missing a few pixels.
Action: Do not spam cups. Pause and watch the canvas. Look for the faint "outline" of a pixel that hasn't filled in. It is usually a lone Yellow pixel in the top corner or a missed spot on the wing edge. Wait for the nozzle to pass directly over it and tap the matching cup.
Step 4: Handling "Trash" Cups
With the ice gone, you have extra buffer space. If you have a cup you absolutely cannot use (e.g., an extra Orange cup when the painting is done), let it circle harmlessly on the belt. Do not pour it. The game will eventually end when the target percentage is reached, even if there are unused cups on the belt.
Color Processing Order Guide
While the nozzle moves automatically, knowing the priority order helps you decide which cups to keep and which to panic-pour.
Phase 1: The Bottom-Up Foundation
- Purple (Wings): Lowest priority on the belt, but the nozzle hits the bottom first. Clear these early if possible.
- Red (Face Base): The nozzle will hover here for long periods. Always keep Red ready.
Phase 2: The Center Focus
- Red (Chin/Cheeks): This requires the most volume. Do not pour Yellow here.
- Maroon (Hair): Only when the nozzle drifts high.
Phase 3: The Edges
- Yellow (Aura/Eyes): This is the "danger" color. Pour it only when the nozzle is on the periphery.
- Orange (Highlights): Usually mixed with Yellow. Treat with the same caution.
Key Tips & Mistakes to Avoid
Follow these pro-tips to ensure a 3-star victory.
The "4-Slot" Safety Rule
Never let your belt sit at 5/5 capacity. Always try to keep an empty slot.
Why? If a Roped Cup drops and you have no space, the game logic glitches or forces a pour. Keeping 1 slot open gives you the buffer needed to handle the mechanics.
Do Not Force the Nozzle
You cannot control the nozzle movement. Trying to "time" a pour a second too early results in a spill. Accept that you will have to wait 5-10 seconds for the nozzle to return to the correct zone. Patience prevents 90% of errors.
Ignoring the "Ice" Panic
Mistake: Players see the Ice numbers at "30" and think they need to speed up.
Reality: The numbers drop based on pixels filled, not time. Speeding up causes spills, which lowers your accuracy rating. Just play steadily.
Overusing the Generator Tap
Mistake: Tapping the generator column repeatedly to get a specific color.
Tip: If you tap a column and get a color you don't need, wait. Tapping again immediately just pushes the bad cup onto the belt, clogging it. Wait for the nozzle to move or pour what you currently have before tapping for more.
What to Do When You're Stuck
Feel like you've hit a wall? Here is the troubleshooting guide.
Issue: "My Belt is Full of Useless Colors"
Solution: You have "dead cups" on your belt (e.g., Yellow when you are in a Red zone). You must wait out the loop. Do not pour them. Let them circle. If you absolutely need a slot, look for the *least* bad color to pour into a "mostly full" area to sacrifice it, but ideally, just wait for the nozzle to align.
Issue: "The Ice Isn't Breaking"
Solution: This means your accuracy is low, or you aren't filling the large "Red" zones fast enough. Stop worrying about details (eyes/hair) and focus purely on dumping Red and Purple into the big open areas to drive that percentage up.
Issue: "I Can't Get the Hair Color (Maroon)"
Solution: The Maroon supply is often tied to the initial ropes. If you missed the initial Maroon drop, it might be cycling slowly in the generator. Stop pulling from other columns. Focus entirely on tapping the column that produces Maroon until it appears.
Speed Run & Shortcuts
For players looking to optimize their time.
The "Pre-Pull" Technique
As soon as the level starts, identify the roped cups. If you have fast fingers, you can tap the ropes immediately (while the nozzle is moving away from your target zones) to get them onto the belt. This saves 5-10 seconds of setup time, provided you have the management skills to handle the sudden belt influx.
Bulk Pouring Reds
In the Red Phase, don't tap individual cups one by one. If you have 3 Red cups, tap-tap-tap in rapid succession while the nozzle is centered. The game allows for a brief "pouring window" where you can stack sand before the color check happens. This maximizes the density of the red face much faster than waiting.
Ignoring the Background
Speed runners often leave the Yellow background aura until the very last second (below 90% completion). Why? Because Yellow is easy to miss-pour. By focusing 100% on Red and Purple (large blocks) first, you trigger the Ice Break faster, opening up the board and making the final Yellow cleanup significantly easier.