
Level 402
HARDHow to solve Sand Loop level 402? Get instant solution for Sand Loop 402 with our step by step solution & video walkthrough. Sand Loop 402 tips and guide.
Play Sand Loop Now
Experience the puzzle challenge firsthand
Game Screenshots
Sand Loop Level Guides
Level Overview: The Inventory Management Nightmare
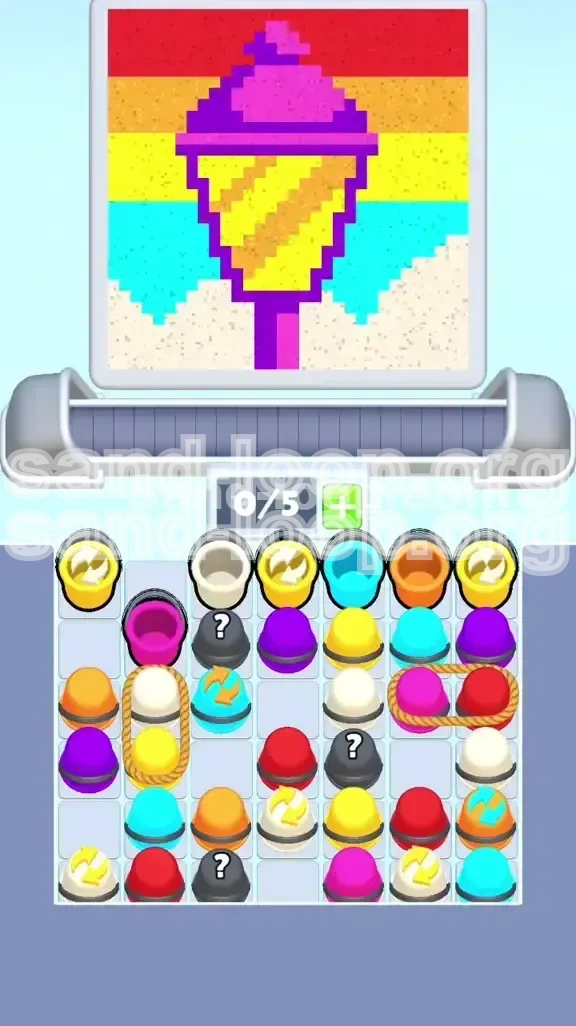
Level 402, "Sand Loop," represents a significant spike in difficulty that shifts the gameplay from fast-paced reaction to methodical puzzle solving. Visually disguised as a peaceful Beach Lantern scene against a pixelated sunset, this level is actually a rigorous test of conveyor belt logistics and spatial containment. The central challenge is not just matching colors, but preventing "cross-contamination" between the foreground lantern structure and the background environment.
Unlike previous levels where you could pour freely, Level 402 introduces a hard capacity constraint. The board is congested with "Roped Cup" pairs—items linked together that occupy two slots on your conveyor belt simultaneously. Since your belt only has 5 slots, fetching one of these pairs instantly consumes 40% of your inventory capacity. This creates a constant bottleneck where tapping the wrong cup at the wrong time leads to an immediate overflow and game over.
Furthermore, the physics engine in this level is unforgiving regarding "layering." The lantern acts as a container. If you attempt to fill the lantern's "light" (Yellow/Orange) before the "walls" (Purple/Pink) are fully established, your light will simply leak out, merging with the background sand (Cyan/Red) and ruining the pixel art. To succeed, you must suppress the urge to pour quickly and instead adhere to a strict architectural construction order.
The Dual-Item Hazard
The defining feature of this level is the prevalence of connected cup pairs. You will frequently encounter a White Cup tied to a Yellow Cup, or a Pink Cup tied to a Red Cup. These do not function as single units. When you tap them, they fly onto the belt together.
Impact: This effectively reduces your functional belt size from 5 slots to 3 slots (since you must keep 2 slots free in reserve to fetch these pairs). If you have 3 cups on the belt and tap a pair, the game jams.
The Color Bleeding Risk
This level relies on color density physics. The background (Cyan water and Red sky) is poured "behind" the lantern structure, but the game engine renders them on the same 2D plane.
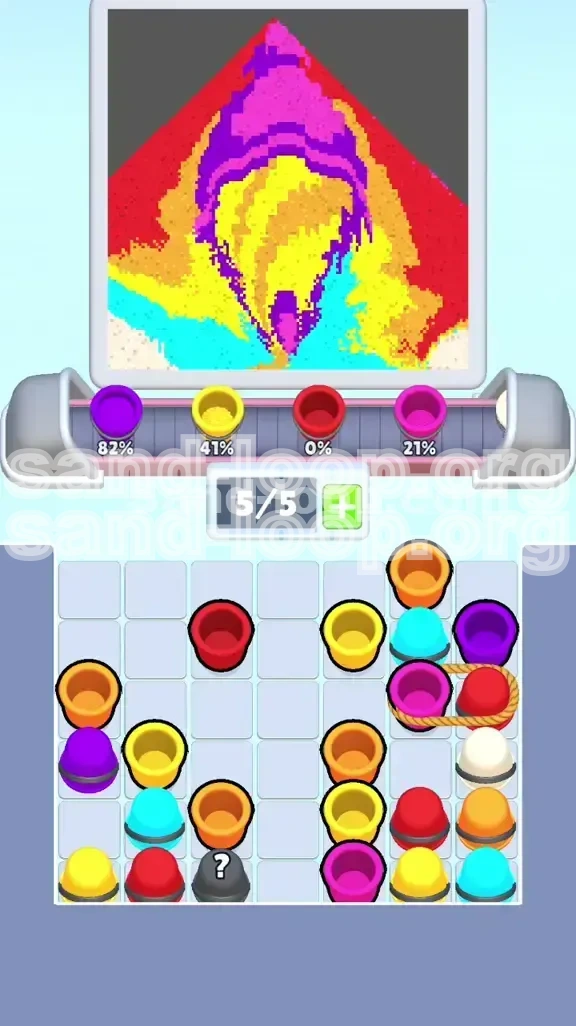
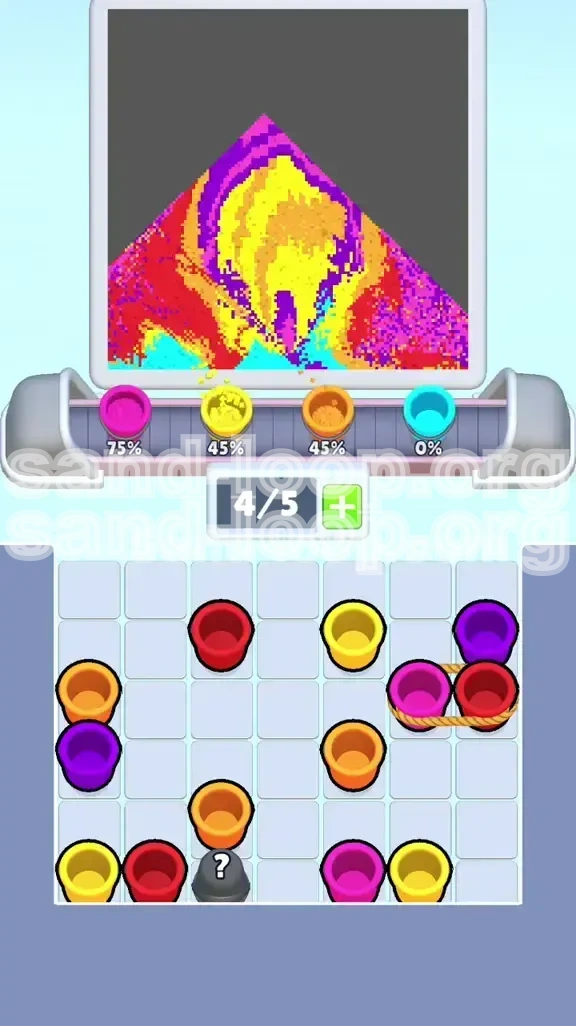
Impact: If the Purple sand, which forms the lantern's outline, is not poured to sufficient height (approximately 70-80% of the structure) before you introduce the background colors, the Cyan and Red sand will visually bleed into the lantern's interior, making it impossible to distinguish the boundaries.
The "Recycle" Mechanic
Several cups on the grid feature a small circular arrow icon, indicating they are "Recycle Cups." Tapping these sends the sand to the belt but eventually returns the empty cup to the grid for a refill.
Impact: This is a double-edged sword. While it provides infinite sand for complex structures, it adds to the grid clutter. You must use Recycle Cups to buy time when your belt is full, allowing you to cycle through existing sand without adding new cups to the queue.
The Spatial Architecture
The level is divided into three distinct zones that must be filled in a specific sequence: the Upper Rim (Top), the Outer Glow (Background), and the Inner Chamber (Lantern Core).
Impact: You cannot complete the level by filling zones linearly from top to bottom. You must build the "chimney" of the lantern first, seal the bottom with the "floor," and only then can you safely fill the background sky and water without contaminating the drawing.
Mystery Cup Variables
Scattered across the board are grey cups marked with a question mark. These function as wildcards, transforming into a random color once they hit the conveyor belt.
Impact: In Level 402, randomness is dangerous. Tapping a Mystery Cup when your belt is nearly full can spawn a color you don't need (like Red when you are building the frame), clogging your inventory with useless material.
Core Objectives: The Lantern Protocol
To clear Level 402, you must abandon the "match what you see" strategy and adopt a "Construction First" mindset. Your primary goal is to build a pixel-perfect Lantern by isolating specific colors and ignoring others until the time is right. Failing to prioritize the frame will always result in a restart.
Objective 1: Construct the Purple Dam
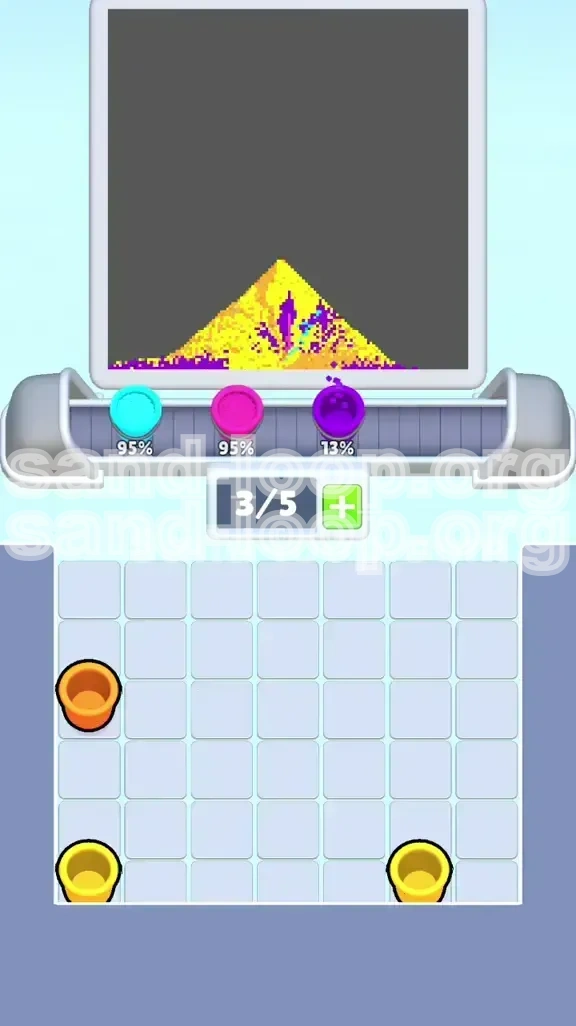
The absolute highest priority is the Purple Cup. Purple sand forms the rigid frame and glass walls of the lantern. You must pour Purple until it creates a complete, enclosed "U" shape or bucket.
Actionable Goal: Do not tap any Yellow, Orange, or Red cups until the Purple outline has connected at the top corners and sealed the bottom base. Treat Purple as a non-negotiable resource. If a Purple Cup is available on the grid and you have belt space, it is your only valid move.
Objective 2: Execute the Rope Maneuvers
You must successfully clear the Roped Cup pairs without causing a belt overflow. This is the primary "fail state" for new players.
Actionable Goal: Identify the locations of the White/Yellow (Vertical) and Pink/Red (Horizontal) pairs. Your goal is to create a buffer zone. Never attempt to tap a roped pair unless your conveyor belt has at least 2 empty slots. The moment you see a rope, stop pouring and wait for the belt to cycle until 2 slots are free.
Objective 3: Isolate the Core (Yellow/Orange)
Once the Purple frame is roughly 75% complete, your focus shifts to the light source. The Yellow and Orange cups represent the candle inside the lantern.
Actionable Goal: Fill the interior of the Purple "U" shape with Yellow. Pour until the Yellow sand hits the bottom of the Purple rim. Do not overfill. If Yellow sand spills over the Purple line, you have poured too much or the frame wasn't ready.
Objective 4: Layer the Environment (Cyan/Red)
Only after the lantern is fully lit (Yellow filled) and structurally sound (Purple frame complete) should you address the background. The Cyan (water) and Red (sunset) fill the negative space around the lantern.
Actionable Goal: Treat Cyan and Red as "cleanup" colors. Pour these only when the board is mostly clear or when you are forced to tap them to unlock other areas. Pouring these early is the most common cause of the "color bleed" glitch where the sky merges with the lantern.
Step-by-Step Walkthrough: The Build Order
This walkthrough prioritizes stability over speed. Follow these phases in order to ensure you never get stuck with a full inventory or a contaminated canvas.
Phase 1: The Top-Down Clearing
As the level loads, take 10 seconds to scan the top half of the grid. Do not touch anything on the bottom row yet.
- Locate the Recycle Cups: Look for the Yellow and Cyan Recycle Cups situated near the top-center.
- The Initiation Tap: Tap the Yellow Recycle Cup first. This puts Yellow sand on the belt. Since it's a Recycle cup, the cup returns to the board, but you've bought yourself some time.
- The Corner Setup: Look for the Cyan Recycle Cup. Tap it. This sends Cyan to the belt. Because the bottom of the screen is empty, this Cyan will settle into the far bottom corner, safely out of the way of the central lantern construction zone.
- Exposure: Clearing these top cups often reveals the first Mystery Cup or a Roped Pair underneath. Do not tap them yet.
Phase 2: The Vertical Rope Breach
On the left side of the screen, you will notice a vertical rope connecting a White Cup and a Yellow Cup. This is a critical bottleneck.
- Belt Audit: Pause all inputs. Watch your conveyor belt. Wait until it empties down to 0 or 1 cup. This is crucial.
- The Double Tap: Tap the Vertical Rope. Both White and Yellow cups will fly onto the belt simultaneously.
- Pour Management: Allow the White sand to pour first (if possible) to create a "beach" foundation at the bottom left. Follow with Yellow. Do not tap any other grid cups until these two have cleared the machine.
Phase 3: The Frame Construction
With the Vertical Rope cleared, you now have access to the core frame materials. Your belt should be empty or near empty.
- Hunt for Purple: Scan the grid for the Purple Cup. It is often hidden behind other debris.
- The Build: Tap the Purple Cup. Pour it into the dispenser.
- Verify Integrity: Look at the canvas. You should see the sides and the top curve of the lantern forming. If there are gaps in the Purple line, you need to find more Purple cups immediately. Do not proceed to Phase 4 until the Purple structure looks like a solid bucket.
Phase 4: The Horizontal Rope Crisis
On the right side, a Pink Cup and a Red Cup are tied horizontally. The Pink is vital for the frame; the Red is dangerous early-game filler.
- The 2-Slot Rule: Before tapping this pair, ensure you have exactly 2 empty slots on your belt. If you have 3 full cups, wait.
- Release: Tap the Horizontal Rope. Both Pink and Red enter the belt.
- Priority Pouring: The game usually queues them in the order they were added, but if you have control, pour the Pink first to reinforce the lantern frame. The Red sand (sky) can sit on the belt for a moment; it won't hurt anything as long as it doesn't pour over your fresh Purple frame.
Phase 5: The Core Ignition
At this stage, your Purple outline is roughly 70% complete. The "dam" is built. Now you fill the reservoir.
- Yellow/Orange Deployment: Locate the Yellow and Orange cups on the grid.
- The Fill: Tap them. Pour the sand into the center of the lantern.
- The Containment Check: Watch the sand level. It should pile up inside the Purple "U" shape. It should not spread out to the left or right edges. If it spreads, your Purple walls have a hole you missed. Stop and repair the wall with more Purple.
Phase 6: The Background Sweep
The lantern is built and lit. The board is likely cluttered with remaining Cyan, Red, and White cups. The hard part is over.
- Cleanup Mode: Rapidly tap the remaining background colors (Cyan for water, Red for sunset, White for beach).
- Top-Off: Use any remaining Mystery Cups now. If they give you a color you've already finished, great—it's extra points or clears space. If they give you a color you missed, pour it to complete the level.
Color Processing Order: The Hierarchy
To manage your inventory effectively, you must mentally categorize colors by importance. Do not treat all colors equally. When your belt is full and you must choose which cup to tap next, consult this hierarchy.
Tier 1: Structural (The Frame)
Colors: Purple, Pink.
Logic: These are your "load-bearing" colors. Purple is the primary structure; Pink is the secondary reinforcement. If you see a Purple cup, you tap it. Period. Even if you don't feel like you need it right this second, you must get it off the grid and into the belt to secure your build. If you have a choice between Purple and anything else, Purple wins every time.
Tier 2: Essential Features (The Light)
Colors: Yellow, Orange.
Logic: These are the "trapped" colors. They are useless without the Tier 1 frame. If you pour Tier 2 colors before Tier 1 is 75% done, you waste them. However, once the frame is up, these become your top priority. Queue them up on the belt while you are working on the frame so they are ready to deploy immediately once the "dam" is secure.
Tier 3: The Environment (Background)
Colors: Cyan, Red.
Logic: These are "filler" colors. They exist to pad your score and clear the grid, but they are dangerous. Cyan (Water) wants to settle at the bottom; Red (Sky) wants to settle at the top. If you pour these too early, they get in the way of the frame construction. Only process these when your belt is stagnant and you have no Tier 1 or Tier 2 cups available.
Tier 4: Utility (The Base)
Colors: White.
Logic: White sand creates the beach floor. It is the least critical color because it sits at the very bottom of the screen, physically separated from the main lantern construction happening in the center. You can usually ignore White cups until the very end of the level, then pour three or four in a row to finish the floor.
The "Roped" Exception
Rule: Any Roped Pair (e.g., White/Yellow) temporarily jumps to the top of the priority list, regardless of the colors involved. Why? Because they are a hazard. You must clear them to free up the grid. Even if a Roped Pair contains Tier 3 colors (like Red), you must deal with it immediately to prevent a gridlock, provided you have the belt space.
Pro Tips: Avoiding Disaster
Level 402 is unforgiving of small errors. These tips address the specific mechanics that cause the most "Game Over" screens.
The "2-Slot" Buffer Rule
This is the single most important rule for this level.
The Concept: The game allows you to tap a cup as long as there is at least one empty slot on the belt. However, if you tap a Roped Cup when you have only 1 empty slot, the game will attempt to add 2 cups to 1 slot, causing a freeze or a forced "Recycle" loop that wastes time.
The Fix: Visually count your belt slots. If you see 3 or more cups on the line, stop tapping. Wait for 2 slots to open up before you touch a Roped Pair. Patience is faster than a restart.
The Recycle Stall
Sometimes, you have no moves. The only cups available are colors you don't need, or the belt is clogged.
The Fix: Look for the Recycle symbol (circular arrows). These cups are your "pause button." If you need to buy 10 seconds for your belt to clear out, tap a Recycle Cup. It clears the grid space and sends a cup to the back of the line, effectively stalling the game state and letting your conveyor belt catch up.
Mystery Cup Discipline
Mystery Cups are tempting because they offer immediate points, but they are high-risk.
The Fix: Adopt a strict policy: Only tap Mystery Cups when your belt is 100% empty. If the Mystery Cup spawns a color you don't need (like Cyan when you are focusing on Purple), having an empty belt allows you to pour that useless Cyan immediately into the "disposal" zone (an empty corner of the canvas) without clogging your main workflow.
The 75% Height Check
How do you know when the frame is strong enough to pour the Yellow core?
The Fix: Look at the top curve of the lantern. Imagine a horizontal line cutting across the lantern at 3/4 height. The Purple sand must be touching this line on both the left and right sides. If there is a gap near the top "ears" of the lantern, do not pour Yellow yet. The Yellow will simply leak out the top corners.
Ignoring the "Noise"
The visual clutter of this level can be overwhelming.
The Fix: Tunnel vision. Physically cover the bottom half of your screen with your hand if you have to. Ignore the White, Cyan, and Red cups until the Purple/Pink/Yellow/Orange structure in the center is undeniable. Once the center is a solid block of color, you can relax and deal with the background noise.
Advanced Strategies: Speed and Recovery
Once you understand the mechanics, you can optimize your playstyle for faster completion times and recovery from mistakes.
Solution: Recovering from a "Soft Lock"
A "Soft Lock" happens when your belt is full, the grid is clogged with colors you don't need, and no valid moves are apparent.
- Step 1: Stop tapping the grid. The problem is on the belt.
- Step 2: Look at the cups on the belt. Is there any combination you can pour right now? Even if it's not the "perfect" color, pour it just to clear the slot.
- Step 3: Use the "Mystery Cup Gamble." If you are truly stuck, tap a Mystery Cup on the grid (if you have 1 belt slot). It might give you a color that saves you. If it doesn't, you were going to restart anyway.
- Step 4: If the belt is 100% full of useless colors and the grid has no helpful moves, the only valid solution is to restart the level immediately. Don't waste 2 minutes trying to force a solution.
Speed Run Strategy: Animation Cancelling
Advanced players know that the game logic allows for input during animations.
Technique: When you tap a cup to pour, there is a 2-3 second animation of the sand falling. During this falling animation, the conveyor belt is still moving.
Application: While sand is falling, immediately tap the next cup you need. The game queues it up. By the time the first cup finishes pouring, your next cup is already at the front of the line. This eliminates the "dead time" between pours and can reduce your total run time by 15-20%.
Speed Run Strategy: The "Ignore" Method
The fastest way to complete this level is to treat 40% of the board as invisible.
Technique: Completely ignore the White, Cyan, and Red cups for the first 50% of the level. Do not tap them. Do not look at them. Focus exclusively on Purple, Pink, Yellow, and Orange. By leaving the background cups untouched, you keep the belt clear for the complex Roped maneuvers. Once the lantern is 100% complete, you can sweep the background cups in a rapid-fire sequence to finish.
Optimization: Roped Pair Pre-Loading
This is a high-level micro-management tactic.
Technique: If you see a Roped Pair (White/Yellow) and you know you will need both colors soon, tap the pair while you are currently pouring a different color. The new pair enters the belt while the old sand is falling. This "stacks" your inventory efficiently, ensuring that as soon as the current pour is done, the next two are ready to go instantly.