
Level 404
EXPERTHow to solve Sand Loop level 404? Get instant solution for Sand Loop 404 with our step by step solution & video walkthrough. Sand Loop 404 tips and guide.
Play Sand Loop Now
Experience the puzzle challenge firsthand
Game Screenshots
Sand Loop Level Guides
Level Overview: The 3D Neon Cube Challenge
Welcome to Level 404, widely considered one of the most stringent logic tests in Sand Loop. This level shifts the gameplay focus from reflex-based clicking to strict resource management and spatial reasoning. You are tasked with assembling a retro, isometric 3D Neon Cube, but the catch lies in the extremely limited conveyor capacity and the aggressive penalty system for overflow.
Core Gameplay Mechanics
Unlike previous stages where you could spam taps to clear the board, Level 404 operates on a rigid "Slot Economy" system. Your conveyor belt has a hard maximum capacity of 5 slots. Every unit of sand you pull up occupies a slot until it is fully poured. If you fill these slots with the wrong colors, you create a deadlock that forces a restart. Understanding this bottleneck is the first step to victory.
The Visual Composition
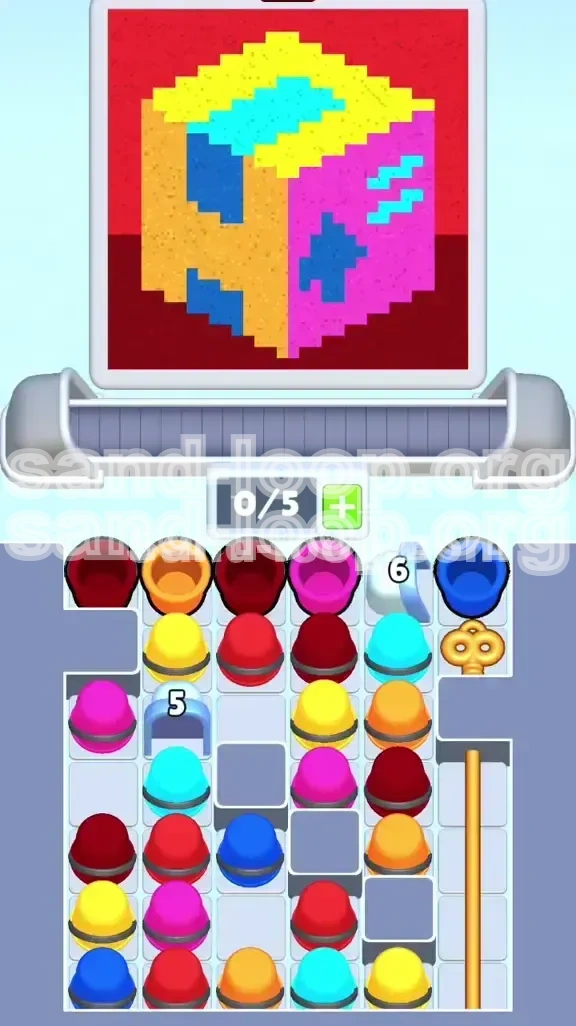
The target image is an isometric cube featuring three distinct visible faces and a ground plane. The color palette is vibrant but high-contrast. You are dealing with Bright Yellow (Top), Hot Pink (Right), Solid Orange (Left), and a Dark Red background. This segmentation means you cannot simply "flood fill" the canvas; you must address each geometric plane individually to avoid color bleeding.
The Ice Block Obstacles
Scattered across your supply tray are numbered Ice Blocks acting as anchors. Specifically, a '6' block in Column 5 and a '5' block in Column 2 lock essential Cyan cups underneath. You cannot access these accents until the adjacent blocks are moved and the numbers are chipped away. This creates a natural progression timer that dictates the order of your operations.
The Gold Key Bottleneck
Access to the right side of the supply tray is physically blocked by a vertical locking bar. To lower this barrier, you must retrieve the Gold Key located in Column 6. However, the key is buried under a Dark Blue cup. This creates a "dependency chain"—you must clear the top-right layer before you can even think about organizing the rest of your board.
The Danger Zone
The most challenging aspect of this level is the accent work. The cube features small, intricate details: cyan lightning squiggles on the pink face, dark blue cutouts on the orange face, and a cyan stripe on the yellow roof. These areas are incredibly unforgiving. If you pour the base colors (Pink/Orange) before the accents (Blue/Cyan), you will "paint over" the target zones, making it impossible to achieve 100% completion without a precise, microscopic pour which is nearly impossible with a full belt.
Clear Objectives: Your Mission Checklist
To beat Level 404, you cannot aim for general progress. You must adhere to a strict sequence of objectives. Missing a single step in this order will result in a frozen board or a corrupted canvas.
Objective 1: Unlock the Supply Tray
Your immediate priority is board liberation. The vertical locks on the right side prevent you from accessing necessary colors. You must clear the Column 6 blocker to drop the Gold Key. Until this key drops, roughly 30% of your potential resources are cut off, limiting your ability to swap tiles effectively.
Objective 2: Establish the Base Layer
The ground background of the image is a deep, dark red. This is the largest single area of color but also the lowest priority in terms of layering physics. However, clearing the Dark Red cups from the tray is essential to free up movement space for the Ice Blocks above. You need to move these reds to the belt early to create "air" in your supply tray.
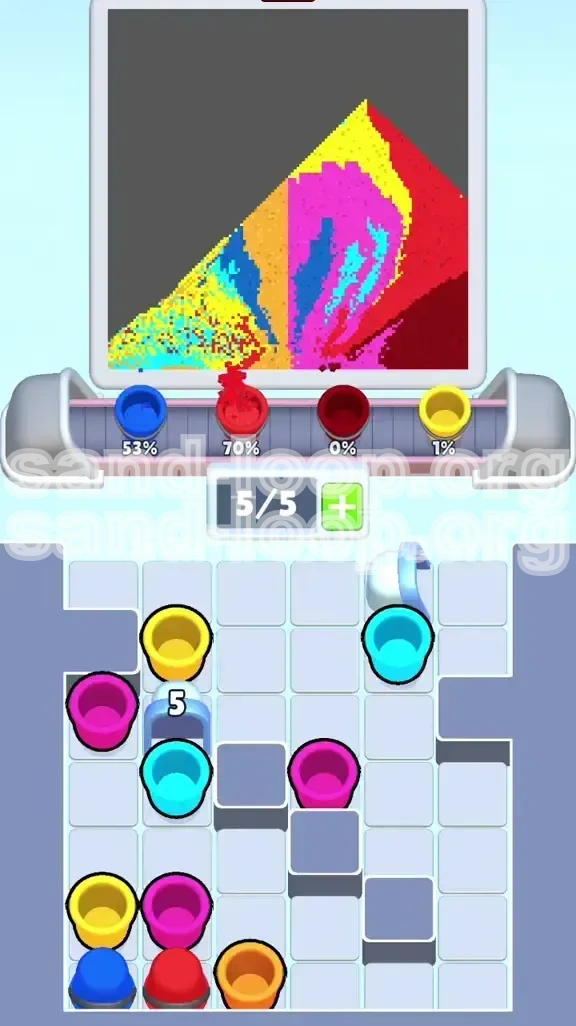
Objective 3: Construct the Primary Walls
Once the tray is fluid, you must tackle the bulk of the cube: the Orange Left Face and the Pink Right Face. These constitute approximately 60% of the visual mass. This phase requires the most discipline regarding slot management, as you will be tempted to queue up multiple colors. You must resist this urge.
Objective 4: Execute Accent Precision
This is the win condition. After the walls are up, you must deploy the Cyan and Dark Blue cups exclusively. The goal here is not to fill space, but to fill specific "holes" in the existing color layer. You must ensure the belt is empty before pulling these, as mixing them with previous colors will ruin the contrast required for the neon aesthetic.
Objective 5: Cap the Roof
The final step is the Bright Yellow top face. Because yellow is such a light color, any dark sand poured after it will cause visible staining. Therefore, the Yellow Roof is always your final closure. Once the yellow cap is on, the level ends.
Step-by-Step Instructions: The Winning Sequence
Follow this exact timeline to navigate the supply tray. Do not deviate from the queue unless you have completely emptied your conveyor belt.
Phase 1: The Initial Tap (Seconds 0-10)
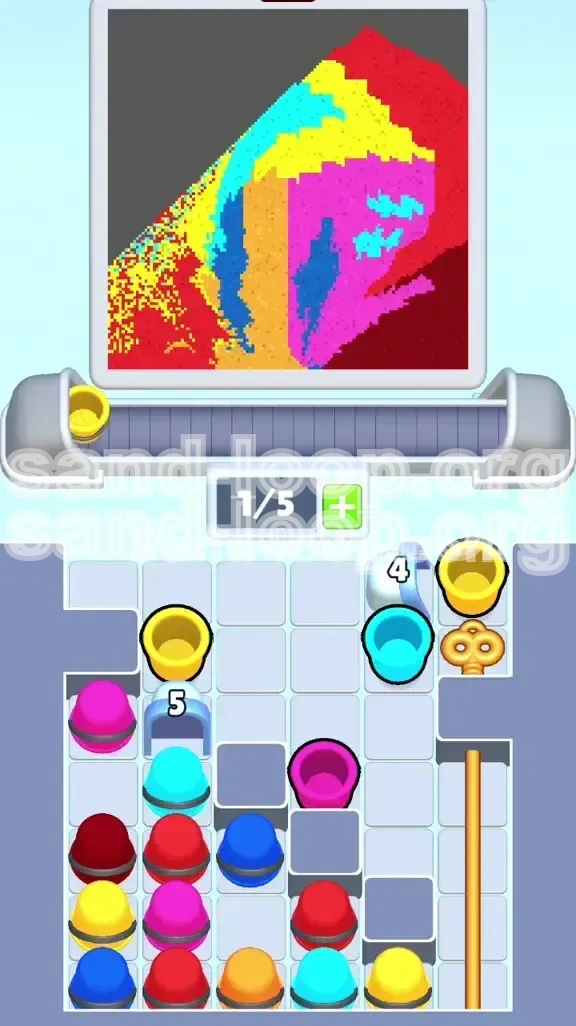
As the level loads, do not touch anything on the left. Your finger goes immediately to Column 6, top row. Tap the Dark Blue Cup. This is the trigger for the entire level. Moving this single block drops the Gold Key, unlocking the right side of the board. Watch the belt: as that dark blue pours, do not add anything else. Let that slot clear.
Phase 2: Clearing the Choke Points
With the key dropped, look to Columns 1 and 3. You will see Dark Red Cups. Tap these now. Why? Because they are sitting underneath the Ice Blocks in other columns. By moving the reds, you aren't just painting the floor; you are lowering the stack height in the tray, allowing the '5' and '6' Ice Blocks to slide into new positions where they can be destroyed by adjacent moves.
Phase 3: The Great Wall Construction
Now the tray is shifting. You will see a cluster of Orange and Pink cups. Do not mix them. Pick one color—Orange is usually safer to start on the left. Tap two Orange Cups. Watch them pour. As the last bit of sand falls, tap two Pink Cups. The rhythm here is "Tap, Wait, Tap, Wait." This ensures you always have 3 open slots on your belt, giving you the flexibility to react if an Ice Block shatters unexpectedly.
Phase 4: Shattering the Ice
By moving the Red/Orange/Pink clusters, you have been sliding cups around the '5' and '6' Ice Blocks. They are likely at low health now. Look for a move that pushes a cup *against* the ice block. This impact is what shatters them. Once the '5' and '6' break, the Cyan Cups trapped beneath them will float to the top of the tray. Do not tap them yet! Finish your current wall color first.
Phase 5: The Accent Isolation
Stop everything. Look at your belt. Is it empty? Good. Look at the canvas. Are the Orange and Pink walls 100% complete? If yes, proceed. Now, tap the Cyan Cups. You only need a few to finish the lightning squiggles and the roof stripe. Pour them carefully. If there are any leftover Dark Blue cups from the initial unlock phase, use them now to finish the square cutouts on the orange face.
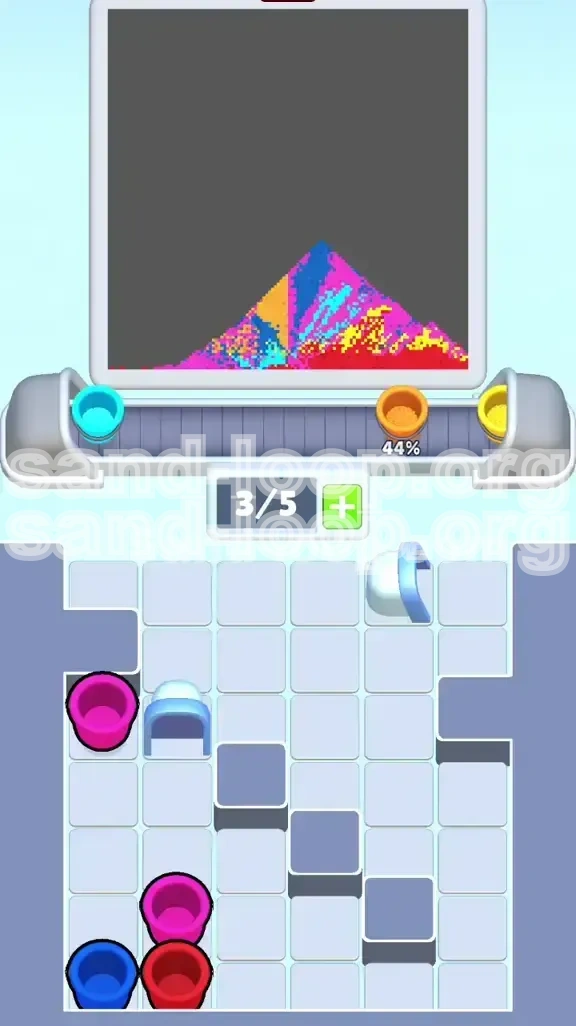
Phase 6: The Yellow Finale
With the intricate details done, the canvas looks mostly complete except for the roof. The tray should now be mostly Yellow. Tap all remaining Yellow cups rapidly. Since they are the final layer, slot management is less critical, but keep an eye on the flow to ensure the roof fills evenly without spilling over the edges.
Color Order Theory: Processing the Palette
Why does the order matter so much? In Sand Loop physics, "Wet" sand displaces "Dry" sand. If you pour a large volume (like a wall color) over a small target (like an accent), the physics engine fills the volume first, burying the target.
The Base Layer Priority
Dark Red is the foundation. It has the lowest "elevation" in the 3D perspective. Pouring it first establishes the boundary lines for the cube. If you save the ground for last, you risk splashing red sand onto the cube walls, creating jagged, pixelated edges that look messy and reduce your score percentage.
The Bulk Wall Strategy
Orange and Pink are your "volume" colors. They are structurally massive. We process them in the middle of the run because they require the most material throughput. Processing them early (but not first) allows us to use the "slot economy" to our advantage—while these large cups are pouring, we have time to plan the micro-movements needed to shatter the Ice Blocks.
The Accent Dilemma
Cyan and Dark Blue are "detail" colors. In traditional art, you paint details last. The same applies here. The game's collision detection for "100% Filled" is generous for large areas but strict for small details. If a detail zone is already covered by Pink sand, pouring Cyan on top might not register as "filled" by the game logic, or it might mix to create a muddy purple color, failing the level's purity check.
The Roof Cap Rule
Yellow is always last because of shading. The roof of the isometric cube catches the "light." Any color poured after the Yellow will visually contaminate the brightness. Furthermore, the roof has the smallest surface area relative to the pour volume, meaning it fills up incredibly fast. If you pour it too early, you risk overflow dripping down the sides of your completed Pink/Orange walls.
Key Tips & Notes for Mastery
Mastering Level 404 requires a shift in mindset from "playing" to "managing." Here are the pro-tips that separate a clear from a retry.
Visualize the Slot Economy
Always keep a mental counter of your 5 slots. If you have 3 cups pouring, you have room for 2 more. However, never queue up 5 cups of 5 different colors. That is chaos. Ideally, queue 3 cups of the *same* color. This uses the slots efficiently (batch processing) and leaves you 2 slots for emergency maneuvers orIce Block shuffling.
The "Pulse" Method
Don't stare at the canvas. Don't stare at the belt. Stare at the Supply Tray. Tap to the rhythm of the tray's movement. When you shift a cup and the tray reacts (blocks falling, ice cracking), wait for that animation to finish before tapping again. Tapping during a tray animation often leads to "double taps" or accidental misfires that pull the wrong color.
Identify "Wasted" Moves
A wasted move is tapping a Grey Block. Grey blocks are dead—they fill space and give you nothing. In Level 404, you generally don't need to touch the grey blocks at all. The level is designed so that the colored blocks push *around* the greys. If you find yourself tapping grey, you are likely off-strategy and clogging your belt with junk.
The Key Trigger Timing
Remember the Gold Key logic. The game only checks for key clearance when the specific blocking cup is moved. If you are tapping frantically and the key doesn't drop, it's because you didn't tap the *exact* cup pinning it down. Stop, zoom in (mentally), and identify the specific anchor cup in Column 6 before proceeding.
Patience vs. Speed
This level is a "Slow Loop." It tempts you with speed, but rewards patience. A fast run will take 2 minutes but result in a fail. A slow, methodical run will take 3 minutes and result in a win. The time penalty is nothing compared to the frustration of a deadlock. Take your hand off the mouse/screen after every major phase (Red, Walls, Accents) to reset your focus.
Common Mistakes to Avoid
90% of failed runs on Level 404 happen because of one of these three critical errors. Learn to recognize them before you make them.
The "Mixed Bag" Error
This is the most common killer. You tap a Pink cup, then immediately tap an Orange cup because "you need both." Now they are on the belt together. As they pour, the sand mixes on the canvas where the two colors meet (the corner of the cube). This creates a brownish-purple blur. The game detects this as "Impure Color." You will fail the accuracy check. Always finish one color completely before starting the next.
The Early Ice Melt Trap
You see the '6' Ice Block and panic. You start tapping every cup near it, trying to break it. This results in a random assortment of colors flooding your belt. You run out of slots while the Ice Block is still at half health. Now you are in "Gridlock"—you can't tap to break the ice because your belt is full, and your belt won't empty because the ice is blocking the flow of correct colors. This is a guaranteed restart.
The Cyan Flood
Cyan cups are usually trapped under the Ice Blocks. When they finally release, they often pop up in multiples. A novice player sees "Cyan is free!" and taps all of them. Don't. The cyan targets are tiny (lightning squiggles). Tapping 3 Cyan cups will release enough sand to fill the entire wall. You will drown the canvas in cyan, overfilling the small targets and spilling onto the roof. Only tap as many Cyan cups as there are target pixels (usually 2).
Ignoring the Pour Timer
Different cups have different pour speeds based on the "amount" of sand they contain (visually represented by how full the cup looks). Large cups take longer to empty. If you tap a large Pink cup (slow pour) followed by a small Dark Blue cup (fast pour), the Blue will finish instantly, clogging a slot while the Pink is still dripping. This stalls your cycle. Match your pour speeds: tap slow cups, wait, then tap fast cups.
Stuck Solutions: Debugging the Board
If you reach a point where nothing seems to be happening, or you are staring at a full belt and a frozen supply tray, use these diagnostic steps.
Solution 1: The Emergency Drain
If your conveyor belt is full (5/5) and nothing is moving, you are in a deadlock. Stop tapping immediately. Put the device down for 10 seconds. Let the current cups pour out. Once you have 1 or 2 slots open, assess the situation. Do not try to "force" a tap in the full state; it will only add to the jam. Patience is the only unlock for a full belt.
Solution 2: Hunting the Anchor Block
Sometimes the Ice Blocks refuse to break. You are tapping adjacent cups, but the number isn't going down. This means you aren't hitting the *primary* anchor. Look closely at the stack. There might be a Grey Block or a specific color cup that is physically supporting the Ice Block. You need to move *that* specific block to destabilize the stack. Clear the column directly beneath the Ice Block to make it drop.
Solution 3: The Color Reset
If you have accidentally painted over a target zone (e.g., you filled the Dark Blue hole with Orange), you cannot fix it by pouring Dark Blue on top immediately. The game physics will prioritize the overflowing Orange. You must wait for the level to auto-fail or, if you are lucky enough to have the belt empty, try to find a cup that has a very narrow, high-pressure stream to overwrite the mistake (though this is rare). Usually, overwriting a detail requires a restart.
Speed Run Tips: Optimizing the Flow
Once you have beaten the level and want to improve your time, you can condense the phases. However, you must never compromise the "Color Purity" rule.
The Pre-Load Buffer
During the "Loading" transition before the level starts, hover your finger over Column 6. As soon as the game engine allows input, tap the Dark Blue cup instantly. This saves 1-2 seconds of reaction time. While that Blue is pouring, scan the tray to locate exactly where the '5' and '6' Ice Blocks are so you don't have to hunt for them later.
Batch Tapping
During the "Wall Phase" (Pink/Orange), you can speed up by batch tapping. If you have 4 empty slots and the tray is stable, tap 3 Orange cups in rapid succession. As long as they are the *same* color, they will pour sequentially without contaminating each other. This keeps the belt moving at maximum velocity without risking color mixing.
Forecasting the Unlocks
Learn the sequence of the Ice Blocks. The '5' block usually breaks before the '6'. Anticipate this. As soon as the '5' breaks and the Cyan floats up, be ready to divert your attention from the Walls to the Accents immediately. Don't wait for the walls to be 100% perfect; if you have 95% of the wall done and the Cyan unlocks, switch targets. This "double tracking" saves significant time.
Skip the Perfection
For a speed run, you don't need 100% pixel-perfect filling on the base layers. The game's "Good" threshold is around 90%. If the Dark Red ground is mostly covered but has a few tiny pixel holes, leave it. Don't send a third Dark Red cup just to patch 2% of coverage. That cup takes 5 seconds to pour. Patching holes is for perfectionists; speed runners prioritize momentum.