
Level 427
HARDHow to solve Sand Loop level 427? Get instant solution for Sand Loop 427 with our step by step solution & video walkthrough. Sand Loop 427 tips and guide.
Play Sand Loop Now
Experience the puzzle challenge firsthand
Game Screenshots
Sand Loop Level Guides
Level Overview: The Slot Crisis and the Plant Boot
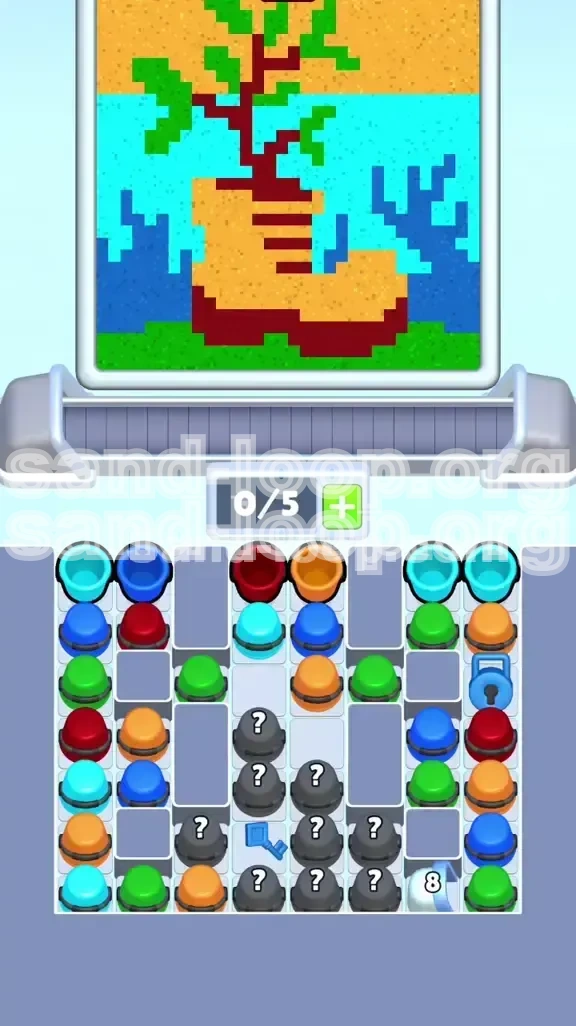
Level 427, often referred to as "The Plant Boot," is a deceptive stage that masquerades as a simple artistic puzzle but functions as a ruthless resource management simulator. The visual goal is straightforward: assemble a pixel-art masterpiece depicting a sturdy tan boot sprouting a vibrant green plant against a desert sky. However, the gameplay reality is defined by an extreme scarcity of resources. The defining feature of this level is the restricted conveyor belt capacity, limited to a mere five slots. This constraint turns the game into a high-stakes logistics exercise where every single tap must be calculated.
The level is divided into three distinct phases of difficulty: the Logic/Dig phase, the Speed/Ice phase, and the Precision/Pour phase. Players who attempt to play this level reactively—tapping cups simply because they are available—will inevitably hit a deadlock within seconds. The challenge is compounded by a complex dependency chain involving locks and ice blocks, which prevents players from accessing the full board until specific criteria are met. Furthermore, the physics engine in this level is particularly sensitive; the "sand" mechanics require rhythmic tapping rather than frantic smashing to avoid blurring the final image. Success in Level 427 requires discipline, foresight, and a strict adherence to processing order.
The Conveyor Belt Constraint
The most critical statistic in this level is the number 5. You only have five slots on your conveyor tray. This means you can only hold four unmatched cups at any given time before the fifth slot arrives and potentially blocks new inputs. If this fifth cup is a color you cannot immediately match, it creates a clog that is often impossible to clear without restarting. The "Slot Economy" forces you to ignore obvious matches on the board if they don't serve your immediate goal of freeing up space.
Visual Analysis of the Canvas
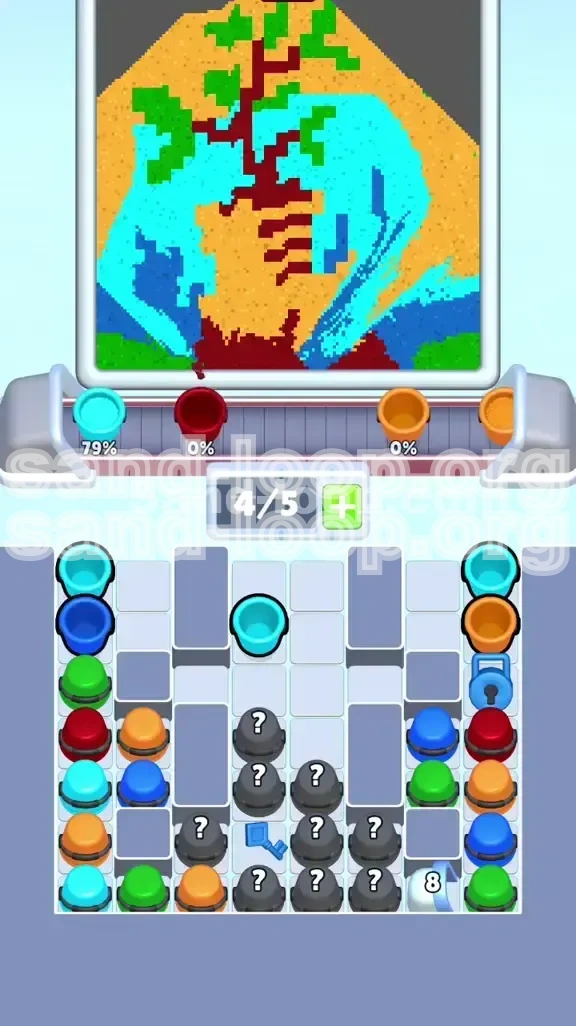
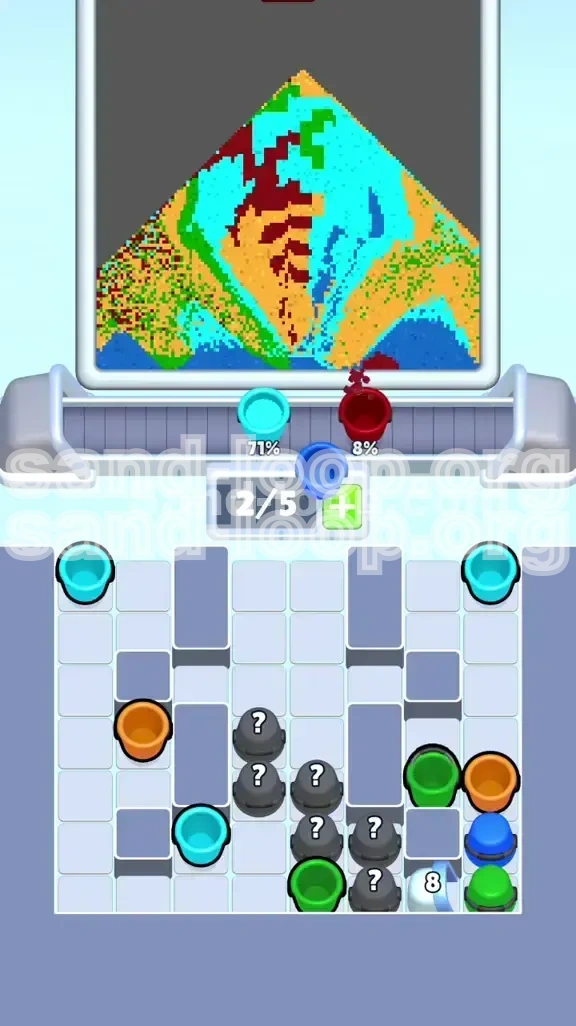
Understanding the target image is crucial for strategy. The canvas is stratified into four distinct color layers. The bottom layer is the Cyan water body, which acts as a fluid base. Above this sits the mid-layer of Dark Blue coral structures, which serve as anchors. The foreground is dominated by the massive Orange boot and Green plant foliage. The top layer is the Yellow sandy sky. If you fill the bottom Cyan layer before the Orange boot structure is established, the sand will bleed into the boot area, resulting in a muddy, failed image.
The Ice Block Time-Bomb
Located on the far right of the board is the '8' Ice Block. This acts as a hard barrier that locks away a significant portion of the level's color supply. To break it, you must perform eight matches adjacent to the block. The difficulty arises because the block is initially inaccessible, hidden behind a Blue Lock. This creates a time-pressure mechanic: you must clear the board efficiently to reach the lock, and then immediately switch gears to high-speed matching to shatter the ice before your tray overflows.
The Dependency Chain
Level 427 operates on a strict linear progression. You cannot access the right side of the board without the Blue Key. You cannot get the Blue Key without digging through the Question Mark cluster. You cannot break the Ice Block without the Key. You cannot fill the background without breaking the Ice Block. This chain means that getting stuck in the early "Excavation" phase means you will never even see the late game. It is a level where one mistake in the first 30 seconds dictates failure.
Physics and Bleeding Risks
Unlike standard grid puzzles, this level utilizes fluid dynamics for the sand pouring. If you pour light-colored sand (Yellow or Cyan) next to an unfinished dark area (Green or Dark Blue), the light sand will "bleed" over the boundary lines. This is particularly problematic for the Red stem of the plant, which is often only one pixel wide. If the background is poured before the stem is fully solidified, the stem will disappear into the background colors.
Primary Objectives and Strategic Goals
To conquer Level 427, you must move beyond simple color matching and execute a specific series of operational goals. The level is less about "clearing the board" and more about "managing the queue." Below are the four critical objectives you must accomplish to secure a victory.
Objective 1: Execute the Blue Key Protocol
Your immediate priority is the retrieval of the Blue Key. This item is buried within the central cluster of Question Mark cups. You cannot access the necessary columns to break the ice block without this key. The objective here is not just to find the key, but to find it while keeping your tray count below 4 cups. This requires selective digging; you must only tap Question Mark cups that lead you toward the key's location, ignoring peripheral distractions.
Objective 2: The Rapid Ice Break
Once the Blue Key is used, the board state changes instantly. The lock opens, revealing the Ice Block area. Your objective here is speed. You must generate eight matches adjacent to the Ice Block in the shortest possible time window. This is the only moment in the level where raw speed trumps slot management. You need to flood the board with matches, temporarily disregarding the "2-slot rule" if necessary, to shatter the block and free the trapped cup.
Objective 3: Establish Structural Perimeters
After the ice is broken, you must enter a construction phase. The objective is to build the "container" for the sand. This means completing the Green leaves, the Orange boot body, and the Dark Blue coral outlines 100% before touching any background colors. These elements act as levees. Without them, the background sand will have no boundaries and will spread uncontrollably across the canvas, ruining the resolution of the final image.
Objective 4: The Layered Pour
The final objective is to fill the background to 100% completion. This requires a specific pouring order: Cyan first, then Yellow. The challenge here is the "Pulsing" technique. You must pour the Cyan water background slowly enough that it settles into the gaps around the boot and coral without overflowing. You cannot simply tap all Cyan cups; you must tap, wait for settle, tap, wait for settle. This rhythmic objective is the final test of the level.
Phase 1 Walkthrough: The Excavation and Key Hunt
The first phase of Level 427 is the most treacherous. It is a logic puzzle that tests your ability to manage a limited inventory. One wrong move here fills your tray and ends the run. Here is the step-by-step execution guide for the opening sequence.
Step 1: The Board Scan and Tray Setup
When the level loads, do not tap immediately. Take a mental inventory of the conveyor belt. Identify where the Question Mark cluster is located (usually center-bottom). Locate the Blue Lock on the right side. Visualize a line from the lock to the question marks. Your strategy is to tunnel directly toward the key. If your first few cups from the conveyor are Green or Orange, and there are no matches on the board, you must hold them in the tray until a match appears. Do not waste them.
Step 2: The Left-Flank Tunnel Strategy
The Blue Key is statistically located on the left side of the Question Mark cluster. Do not tap the Question Marks randomly. Focus your taps on the left flank of the cluster. This is the "Tunnel Strategy." Every time you reveal a cup, you have a 50% chance of it being a color you need. If it reveals a Dark Blue cup, scan the board for an existing Dark Blue. If you find one, tap it immediately to clear your tray. If not, hold the cup and prepare for the next reveal.
Step 3: Adhering to the 2/5 Slot Rule
Throughout Phase 1, monitor your tray count religiously. Never let the number of cups in your tray exceed 4. Ideally, keep it at 2 or 3. If you have 4 cups and none of them match the available board colors, you are in a "Deadlock." To avoid this, if you reveal a cup that matches a board color but doesn't help the tunnel (e.g., a Green cup on the far left), tap it anyway just to cycle the conveyor. Keeping the belt moving is more important than perfect efficiency.
Step 4: The Key Extraction
As you tunnel, you will eventually reveal the Blue Key icon. It is usually buried under two layers of Question Marks. The moment the Key is revealed, your tunneling stops. Tap the Key immediately. Do not wait to clear other cups from your tray. The key activation triggers the lock mechanism on the right side of the board, which is the gateway to Phase 2. A delay here can cost you valuable seconds needed for the next phase.
Step 5: Post-Key Tray Reset
Immediately after tapping the key, the lock opens, and the board shifts. New cups will flow in. Take 2 seconds to clear any mismatches from your tray. You want to enter Phase 2 with as many empty slots as possible. If you enter the Ice Break phase with a full tray, you will likely fail to generate the speed required to break the block.
Phase 2 Walkthrough: The Ice Breaker Speed Run
Phase 2 is a high-octane sprint. The logic puzzle is over; now it is about Actions Per Minute (APM). You have one goal: destroy the '8' Ice Block. Here is the tactical breakdown of this speed segment.
Step 1: Target Locking
Ignore the rest of the board. Your eyes should be glued to the Ice Block on the right. Identify the cups immediately adjacent to the block. These are your targets. Ignore any Green or Orange matches on the left side of the screen. If a match doesn't chip away at the ice, it doesn't exist. You must enter a state of "tunnel vision" where the only valid moves are those touching the Ice Block.
Step 2: Match Routing
Look at the colors adjacent to the ice. Suppose you see a Red cup next to the ice. Look for a Red cup on the conveyor or the board adjacent to it. Tap it. You need 8 "points" of damage to break the block. Each match counts as 1 point. Some matches might clear 2 or 3 cups at once if the physics allow, but rely on 8 individual matches to be safe. Count them down mentally: 1, 2, 3...
Step 3: Emergency Slot Dumping
Because you are moving fast, you risk filling your tray. If you have 4 cups and the 5th is coming, and none match the ice area, you must perform an "Emergency Slot Dump." This means tapping a match somewhere else on the board—even if it's a useless color like Yellow—just to free up a slot. A clogged belt is a death sentence in Phase 2. Better to waste a move than to lose the ability to move at all.
Step 4: The Shatter Event
When you land the final hit on the Ice Block, it shatters. The trapped cup underneath is released. This often triggers a physics cascade. The board might settle, and cups might shift. Pause for exactly one second. Do not tap immediately. Let the physics engine finish the drop animations. You need to see the new state of the board to plan your final phase.
Step 5: Transition to Construction
With the ice gone, you now have access to the full board. However, your tray is likely messy. Before moving to Phase 3, clear out any remaining colors that don't fit the "Structure" rule (see Phase 3). You want a clean slate to start the detailed work of painting the boot and plant.
Color Order and Filling Strategy
The final phase is an art class. You have the canvas, and you have the sand, but if you mix the paints in the wrong order, you get a brown blob. This section details the exact processing order for the remaining colors to ensure a crisp image.
The Priority Sequence: Dense to Light
You must process colors in the order of their physical density and position. The rule is: Foreground Objects First, Background Last. If you pour the light background sand (Cyan/Yellow) before the dense foreground objects (Green/Orange), the light sand will flow underneath and obscure the details.
1. Process: Dark Blue and Green (The Skeleton)
Start by clearing all Dark Blue (coral) and Green (leaves/ground) cups. These are your heaviest colors. They form the detailed outlines of the image. By pouring these first, you build walls that will eventually hold back the background sand. Ensure the Green leaves are fully formed and connected to the boot. Ensure the Dark Blue coral is distinct.
2. Process: Orange and Red (The Mass)
Next, tackle the Orange boot and the Red accents (stem and sole). The Orange boot is a massive block of color. It acts as the central dam. Once the Orange is poured, the background is effectively cut into two sections: the area behind the boot and the area above it. Pour the Red stem carefully. It is thin and fragile. If you miss a single pixel of the Red stem, the plant will look detached.
3. Process: Cyan (The Fluid Background)
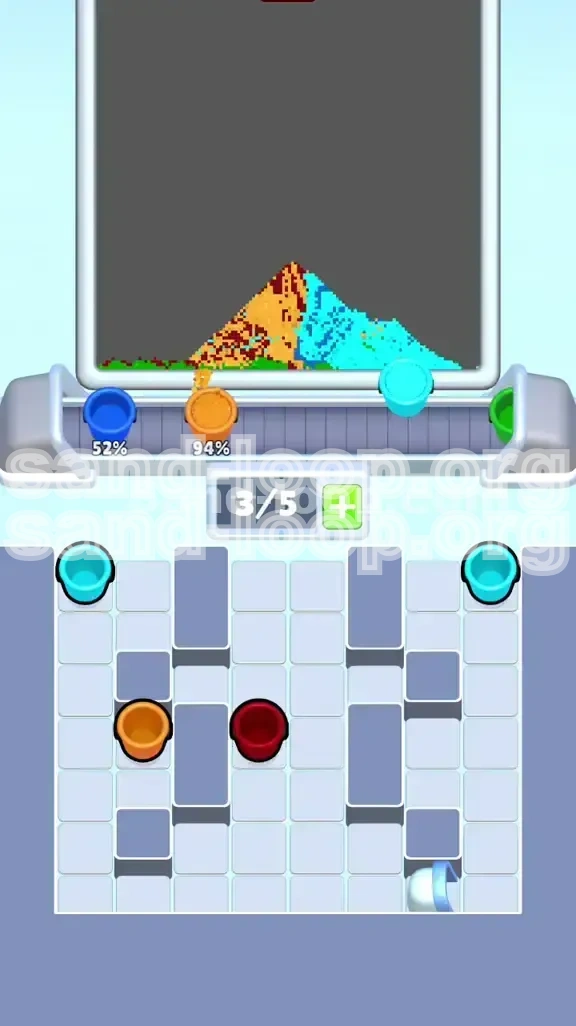
This is the most technically difficult part of the level. You are now ready to pour the Cyan water. Warning: Do not chain tap. Tapping 4 Cyan cups in a row creates a heavy stream that jumps the banks of the river. Instead, use the "Pulse Method." Tap one Cyan cup. Watch the sand pour. Watch it settle against the Orange boot and Dark Blue coral. Wait for the surface to flatten. Then tap the next one. Repeat this until the water background is 100% full.
4. Process: Yellow (The Sky)
Finally, pour the Yellow sandy sky. This is the safest color as it occupies the top of the canvas and has the highest boundaries. However, the same pulsing rule applies. Tap, pour, settle, tap. Do not rush the final 10%. It is easy to over-pour the Yellow and have it bleed into the top leaves of the Green plant.
Key Tips, Mistakes, and Stuck Solutions
Mastery of Level 427 comes from avoiding the subtle traps that the game sets for you. These tips and troubleshooting guides are designed to help you navigate the edge cases that cause most players to fail.
Key Tip: The 3-Move Lookahead
Never look at the cup you are currently tapping. Look at the cup that will come *next* on the conveyor. If the current cup clears a match but leaves you with a tray full of useless colors for the next move, you might want to wait. Always plan three moves ahead. If tapping a match now means you will be stuck in 5 seconds, find a different move, even if it scores fewer points.
Common Mistake: Premature Background Pouring
The most common error in Phase 3 is impatience. Players see a cluster of Cyan or Yellow cups in the tray and tap them immediately to clear space. This is fatal if the Orange boot or Red stem is not 100% complete. The Cyan sand will flow into the empty spaces meant for the boot, and you will not be able to fix it. Rule: No background colors until the foreground is solid.
Stuck Solution: The "Sacrificial Tap"
If you are stuck in Phase 1 with a full tray and no moves (e.g., your tray has 4 colors: G, G, O, R, and the board only has B and Y), you have no choice but to perform a Sacrificial Tap. Look for a cup on the board that, if tapped, adds a *new* color to your tray but clears space on the board. This makes your situation worse temporarily (5/5 slots) but might be the only way to cycle the conveyor to find a matching cup. It is a desperate move for a desperate situation.
Speed Run Tip: Pre-Memorization
For those aiming for a high score or fast time, the best tip is Pre-Memorization. The layout of Level 427 is static. The Question Mark cluster always hides the key in the same general spot. The colors of the Ice Block neighbors are often consistent. Play the level once slowly just to memorize *where* the key is and *what* colors are next to the ice. On your second run, you can dig straight to the key without thinking, saving precious seconds.
Technical Tip: The "Settle" Wait
During the Cyan pour, the game might look like it's ready for the next cup, but the sand physics are still calculating internally. If you tap too early, the game glitches and the sand stacks up. To avoid this, listen to the audio cues. Wait for the "soft thud" sound of the sand landing before tapping the next cup. This audio cue is more accurate than the visual animation.