
Level 437
HARDHow to solve Sand Loop level 437? Get instant solution for Sand Loop 437 with our step by step solution & video walkthrough. Sand Loop 437 tips and guide.
Play Sand Loop Now
Experience the puzzle challenge firsthand
Game Screenshots
Sand Loop Level Guides
Level 437: The Stained Glass Strategy Guide
Welcome to the ultimate walkthrough for Sand Loop Level 437. This level is a significant difficulty spike, designed to test your resource management skills rather than just your reflexes. The goal is to construct a majestic Stained Glass Window featuring a sunset motif, but the path is blocked by a unique mechanic known as the "Stage Curtain." In this guide, we will break down the logic behind the level, provide a step-by-step execution plan, and offer advanced tips for achieving a perfect score.
The Architecture of the Puzzle
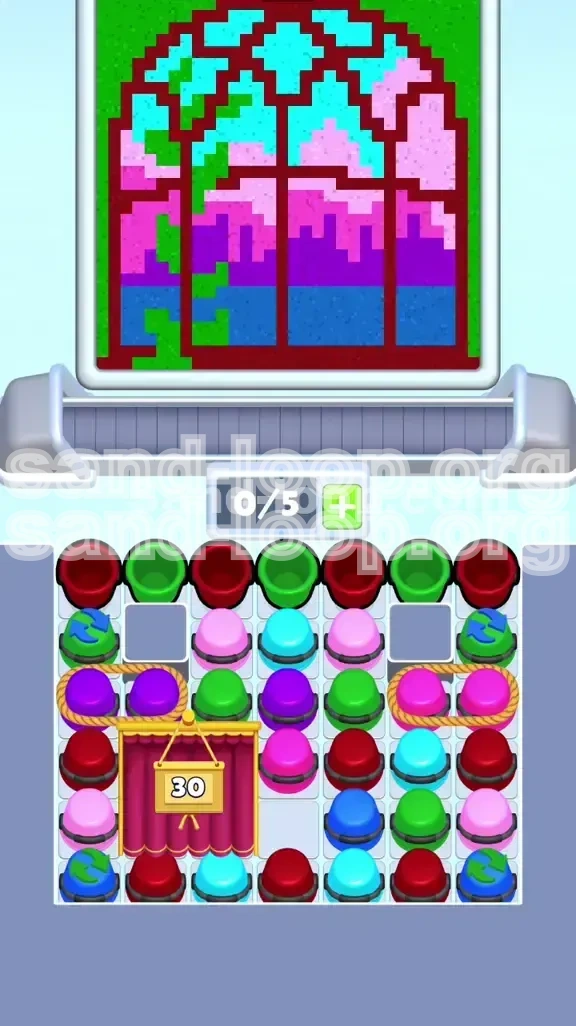
Unlike previous levels where you could simply paint pixels as they appear, Level 437 requires you to unlock your resources. The level features a Dark Red frame (the container), Cyan upper panes (the sky), a complex gradient of Light Pink and Magenta (the sunset), and deep Purple lower panes. A crucial detail is the Green vines on the left mullion. Understanding this layout is vital because the order in which you paint these sections determines your success.
The "Stage Curtain" Mechanic
The defining feature of this level is the "Stage Curtain" covering the bottom-left quadrant of your supply tray. This curtain acts as a gate, hiding essential stockpiles of Cyan and Dark Red. It is controlled by a counter set to 30. Every time you process a bucket from the bottom row of your tray, the counter decreases by 1. You cannot access the necessary colors to finish the level until this counter hits zero and the curtain lifts.
The Inventory Constraint
Your conveyor belt capacity is strictly limited to 5 slots. This limitation is the primary cause of failure for most players. You must constantly monitor your belt space. If your belt is full (5/5 slots), the game triggers a "No Moves" deadlock, resulting in an immediate game over. You need to maintain a "Buffer Zone" of at least 2 empty slots to accommodate the level's dynamic elements.
The Rope Binding Threat
Frequently, the game will spawn "Rope Bindings"—two buckets tied together (often Purple and Magenta). Clicking a binding forces both buckets onto your conveyor simultaneously. If you are not careful, this mechanic can instantly fill your belt and stall your progress. Managing these ropes is a core skill required to beat Level 437.
Winning Conditions
To achieve 100% completion, you must balance two tasks: lowering the Curtain Counter and painting the image accurately. The level provides a very tight margin of error; you have almost exactly the amount of sand needed, with perhaps only 3-4 buckets of leeway. Precision and efficiency are not optional; they are mandatory.
Clear Objectives and Goals
Before you make your first move, you must understand the strategic goals of this level. Approaching it randomly will lead to a deadlock within the first 30 moves.
Primary Objective: The Curtain Lift
Your immediate focus must be on the "Stage Curtain." Your primary goal for the first 40% of the level is to reduce the curtain counter from 30 to 0. Every move you make should be viewed through the lens of "Does this help lower the counter?" You must prioritize processing buckets to clear the tray, even if it means using Recycle buckets or "fodder" colors that you don't strictly need yet.
Secondary Objective: Frame First Protocol
Establish the Dark Red frame before filling in the interior colors. The frame acts as a barrier, preventing "spillage" into adjacent sections. If you paint the Cyan sky before the Red frame is complete, you risk over-pouring into the background area, which is difficult and costly to correct. By securing the borders early, you create a safe zone for the more volatile colors like Pink and Magenta.
Inventory Management Tactics
You must adopt a strict inventory management policy. Never let your conveyor belt exceed 4 items. Ideally, keep it at 3 or fewer to allow for the sudden appearance of Rope Bindings. If you see a Rope Binding, ensure you have the capacity to handle two buckets before you click it. Failing to do so is the most common way to lose the game.
The Rope Binding Dilemma
Rope Bindings force you to load two buckets at once. However, the dispenser at the top of the screen only cycles one color at a time. If you tap a Rope Binding containing Purple and Magenta, but the dispenser is currently on Cyan, you have wasted a valuable slot. You must wait until the dispenser matches at least one of the roped colors before activating the mechanism.
Zero-Waste Policy
This level operates on a razor-thin margin. There is almost no excess sand. If you accidentally pour a Cyan bucket onto a Purple section, you may not have enough Cyan left to finish the sky later. Every pour must be intentional. Avoid "tapping" just to see what happens; only tap when you are ready to pour.
Phase 1: The Setup and Curtain Clearing
The opening phase is the most dangerous. This is where the "Stage Curtain" blocks your view and resources. The following steps will guide you through safely lifting the curtain.
Step 1: The 10-Second Analysis
When the level loads, do not touch anything for 10 seconds. Use this time to analyze the Sand Dispenser at the top. Note the starting color and the sequence pattern. Check the bottom tray to see which buckets are available and where the Recycle buckets are located. Identify the location of the Rope Bindings on the right side.
Step 2: Process Recycle Buckets First
Recycle buckets (marked with circular green arrows) are your best friends in this phase. They count toward the "30 buckets processed" requirement for the curtain but don't represent a specific color you need to save. If you see a Recycle bucket in the tray and the dispenser color matches, tap it immediately. This is "free" progress toward lifting the curtain.
Step 3: Establish the Dark Red Frame
Whenever the Sand Dispenser shows Dark Red, tap the Dark Red buckets in your tray. Focus strictly on the outer arch and the horizontal bar of the window. Do not worry about the vertical mullions or the interior yet. Getting the main outline down early prevents "bleeding" of colors into the background later.
Step 4: Handle "Easy" Colors (Green and Pink)
You will likely see Green buckets (for the vines) and Light Pink buckets (for the upper clouds) early on. Tap these sparingly. Use them to keep the conveyor belt moving and to lower the curtain counter, but do not exhaust them. Treat them as tools to maintain flow rather than primary objectives.
Step 5: The Rope Trap Warning
You will see Purple and Magenta buckets tied together with ropes. Do not tap these yet. They consume 2 slots. If you tap them now, you risk filling your belt and preventing the pickup of single buckets needed to clear the Stage Curtain. Only touch ropes when you have 3 or more empty slots on your conveyor.
Step 6: The "20 Move" Grind
For the first 20 moves of the game, your only metric is the Curtain Counter. Ignore the artistic details. Just keep the belt moving. Match whatever color is in the dispenser to clear space. Once the counter drops below 10, you can start shifting your focus to artistic precision.
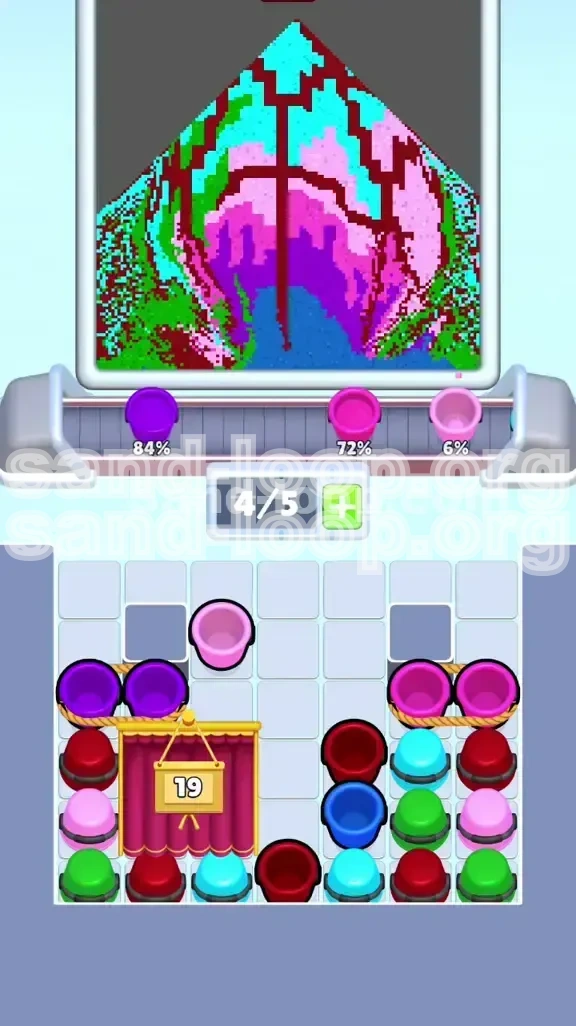
Phase 2: The Execution and Detailing
Once the Stage Curtain lifts (usually around the 20-30 move mark), the board opens up. You gain access to hidden stockpiles, and the real puzzle begins.
Step 7: Triggering Rope Bindings
With the Curtain gone, you have more visibility and space. Re-evaluate the Rope Bindings. Wait until the Sand Dispenser is cycling either Purple or Magenta. When it matches one of the roped colors, tap the rope. Both buckets will load. Use the matching one immediately on the stained glass panes. The non-matching one will sit on the belt until its color comes up.
Step 8: Filling the Cyan Sky
Now that the Curtain is open, you should have access to more Cyan buckets. The sky is the brightest part of the image, located in the top arch. Because it is surrounded by the Dark Red frame you built in Phase 1, you can pour aggressively without worrying about spilling into other sections. Fill the upper panes completely.
Step 9: The Gradient Transition
The middle section requires a careful transition from Light Pink to Magenta. Follow the visual cues in the background pixel art. The "clouds" are usually Light Pink, fading into a Magenta sunset. Take your time with these taps; they are smaller areas and are very easy to overflow. Be precise.
Step 10: Managing the Deep Purple
The bottom panes are deep Purple. These are often the largest blocks of color. If you have Purple buckets saved from the Rope Bindings, now is the time to deploy them. If the dispenser is stuck on Cyan, wait. Do not waste a Purple bucket slot just to clear space; let the Cyan cycle through or use a Recycle bucket if available.
Step 11: Detailing the Vines
The Green sand is for the vine details on the left. This is an "isolated" color—it rarely interacts with others. Treat Green as a "filler" color. If you are stuck waiting for the dispenser to cycle to Pink, use Green to keep your belt moving and add detail to the mullion.
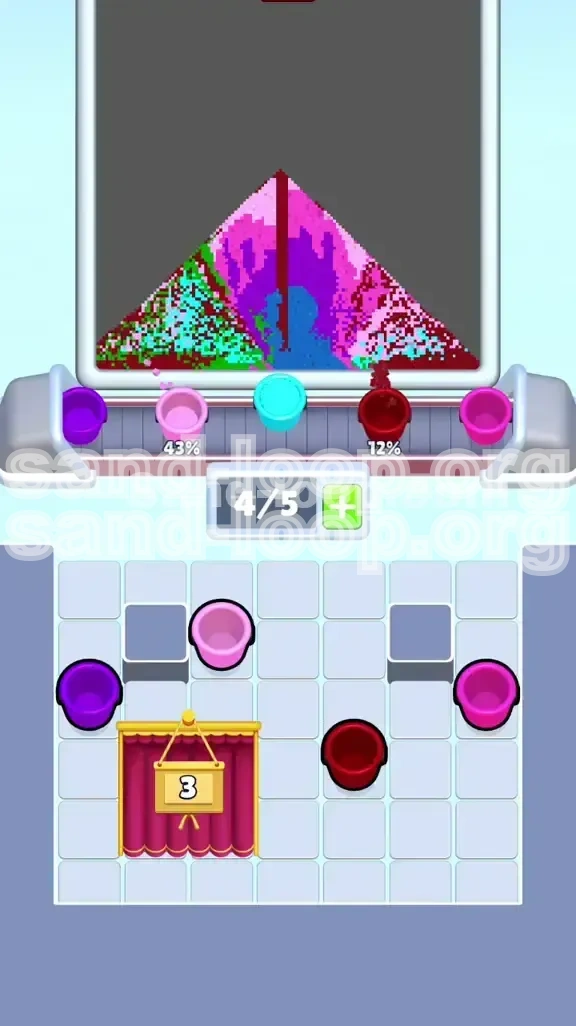
Step 12: The Final Polish
As you approach the end, you will likely be left with a scattered mix of single pixels missing—mostly Dark Red touch-ups on the frame or small corners of Cyan. The conveyor will feel slower now because you are hunting for specific colors. This is the final grind. Be patient and precise.
Color Order and Logic
Understanding the hierarchy of colors will save you from decision paralysis. Not all colors are equal in this level. Processing them in the wrong order can lead to a deadlock.
Priority 1: Dark Red (The Container)
Always process Dark Red first when the Dispenser allows. The frame defines the boundaries. If you have a Red bucket and the Dispenser is Red, use it. Do not save it for later. The earlier the frame is established, the safer your subsequent pours will be. It is the foundation of the image.
Priority 2: Cyan (The Background)
Cyan usually represents the "sky" or empty space. It is the second most important color because it covers the largest area. However, because it is a light color, accidental spills are very noticeable. Always ensure the Red frame borders the Cyan area before pouring to prevent "bleeding" into the background.
Priority 3: Green (The Isolated Variable)
Green is isolated to the vines. It does not border the Pink/Purple sunset zones. Treat Green as a "filler" color. If you are stuck waiting for the dispenser to cycle to Pink, use Green to keep your belt moving. It is a low-risk color that helps maintain momentum.
Priority 4: The Sunset Duo (Pink & Magenta)
These are "Transition Colors." They sit between the Cyan sky and the Purple base. They are the most dangerous because they border each other. Pouring Magenta into a Light Pink zone creates a muddy look that is hard to fix. Only pour these when you have a clear visual lock on the target area.
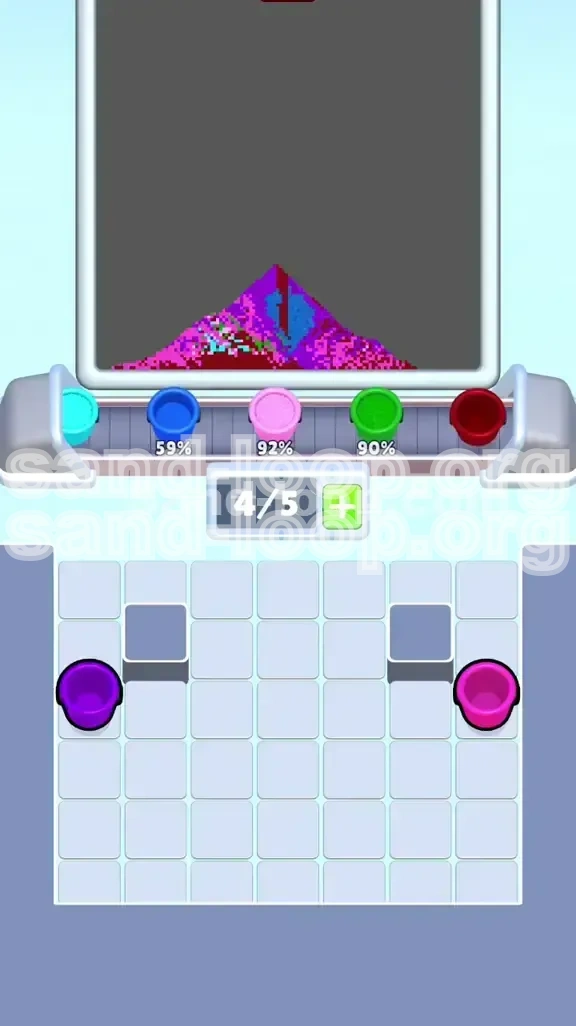
Priority 5: Deep Purple (The Foundation)
While at the bottom, Purple is often the last color to fully resolve because it depends on the Pink transition above it. Leave the Purple bottom panes for the final 20% of the game to ensure you don't trap yourself in a corner with no moves.
Understanding Dispenser Rhythm
The dispenser in Level 437 typically follows a loose pattern: Frame -> Sky -> Transition -> Base. It will often cycle Red -> Cyan -> Pink -> Purple. If you see the pattern resetting to Red, clear your belt of non-Red items immediately to prepare for the incoming wave of Red buckets.
Advanced Strategies and Common Pitfalls
Even with a plan, things can go wrong. Here is how to handle the specific pitfalls of Level 437 and optimize your gameplay.
Common Mistake: The "Full Belt" Panic
Many players see their belt reach 4/5 slots and panic-tap the first available bucket. This is how you jam the machine. If your belt is full, stop. Look at the dispenser. If it doesn't match your queued buckets, wait. Do not force a move that will clog the system. Patience is better than a Game Over.
Common Mistake: Ignoring "Lead Time"
The sand physics in this level have a slight delay. If you tap the exact millisecond the dispenser is under the nozzle, you might miss because the sand is still "falling" from the previous pour. Aim to tap when the dispenser is *approaching* the nozzle, not just when it is directly under it. This accounts for the travel time of the sand.
Stuck Solution: The Recycle Rescue
Are you stuck with 4 buckets on the belt, none of which match the current dispenser color, and the Curtain is still up? Look for a Recycle bucket in the tray. Even if it's not the perfect color, grabbing a Recycle bucket clears a slot from the tray and gives you a bucket that is guaranteed to match the dispenser *eventually*.
Stuck Solution: The "Rope Pop"
If the belt is stagnant and the Curtain is up, check if a Rope Binding is the key. Sometimes, tapping a Rope Binding is the only way to refresh the tray. Yes, it adds two items, but if those items are Purple and Magenta, and the dispenser is about to hit Purple, it's a calculated risk worth taking to break the deadlock.
Speed Run Tip: Batch Processing
If you are attempting a fast time, batch your pours. Don't tap one bucket, pour, tap another. Instead, load 3 matching buckets onto the belt (e.g., 3 Greens), then pour them in rapid succession while the dispenser is cycling. This minimizes the downtime spent waiting for the belt to move.
Speed Run Tip: Pre-Loading
If you know the dispenser is about to switch from Cyan to Pink (based on the visual loop), load your Pink buckets onto the belt *before* the dispenser switches. This way, the second the color changes, you are ready to pour, saving precious seconds. This requires anticipating the color cycle.