
Level 462
EXPERTHow to solve Sand Loop level 462? Get instant solution for Sand Loop 462 with our step by step solution & video walkthrough. Sand Loop 462 tips and guide.
Play Sand Loop Now
Experience the puzzle challenge firsthand
Game Screenshots

Sand Loop Level Guides
Sand Loop Level 462: The Ultimate "Dark Red Cat" Walkthrough
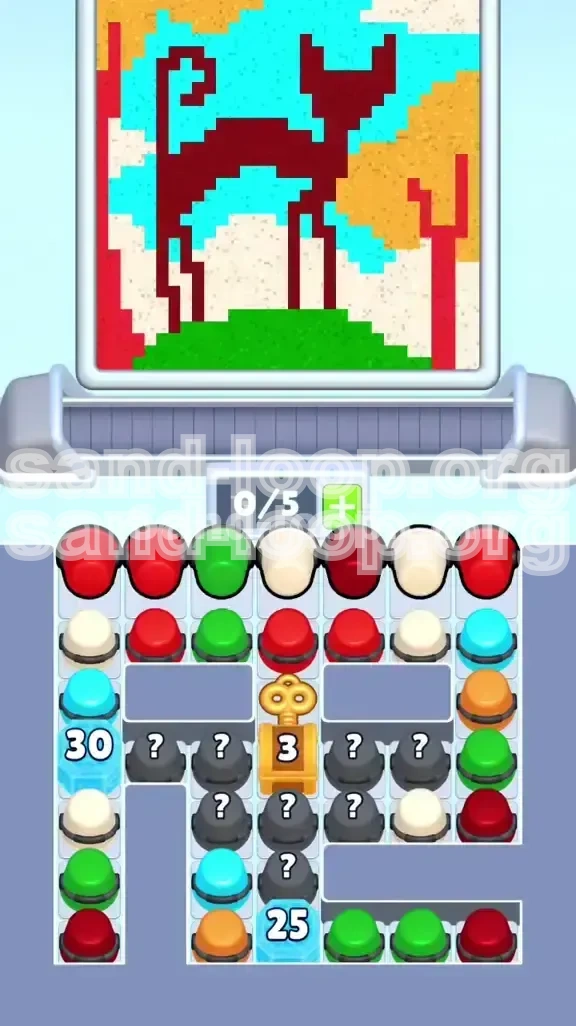
Level 462 in Sand Loop is notorious for its "Logic Bottleneck." Unlike levels that rely purely on reaction speed, this stage is a strict resource management puzzle featuring a "Dark Red Cat" silhouette on a hill. The challenge is compounded by a Golden Key lock, massive Ice Block obstacles, and a restrictive 5-slot cup capacity. If you pick up the wrong color too early, you will deadlock your tray and fail. This guide provides a mathematical, step-by-step breakdown to secure 100% completion efficiently.
The "Logic Bottleneck" Analysis
The board is split into two distinct zones: the Top/Foreground (Cat and Hill) and the Bottom/Background (Sky and Clouds). These zones are separated by a Golden Key mechanism. You cannot access the bottom 40% of the cups until you unlock this key. This creates a bottleneck; attempting to clear the top row randomly will deplete your slots, leaving you unable to process the specific colors needed to unlock the board. You must prioritize the central column above all else.
The Capacity Constraint (5-Slot Limit)
Your holding tray allows exactly 5 cups. The level features 5 distinct colors: Dark Red, Bright Green, Cyan, Cream, and Orange. Because the number of active colors equals your slot capacity, you have zero margin for error. Picking up a "decoy" cup (like a stray Cyan) before unlocking the key will clog your inventory, preventing you from picking up the necessary Red cups to finish the cat. We will solve this by processing colors in a strict hierarchy.
The Ice Block Mechanics
Two major Ice Blocks gatekeep your progress. The Left Block (30 hits) hides the bulk of the Cyan sky supply. The Bottom Block (25 hits) buries the Cream clouds. Breaking these requires you to tap adjacent cups. The danger here is "slot starvation"—if you tap too fast to break the ice, you fill your tray with rock-solid blocks or adjacent colors you don't need yet. We will use a "Rhythm Tap" technique to break these without jamming the conveyor belt.
Visual Precision Requirements
The target image is a pixel-art scene of a cat sitting on a hill under a tree. The difficulty lies in the thin single-pixel lines of the cat's tail and legs. If you flood the board with the Cyan sky color before defining the Dark Red cat, the lighter blue sand will bleed into the red zones, creating a muddy purple blur that fails the percentage check. The order of operations is not just strategic; it is mandatory for visual clarity.
Mission Briefing: Clear Objectives
To achieve a 3-star victory on Level 462, you must stop viewing the board as a whole and start treating it as a sequence of locked rooms. Your goal is not to "paint fast," but to "unlock efficiently." Below are the four critical mission phases you must execute in order.
Objective 1: The Center Key Unlock
Your immediate priority is the Golden Key located in the exact center of the board. It is guarded by a specific arrangement of cups. You must feed the correct colors to the dispensers to turn this key. Do not touch the left or right edges of the board yet. Focus 100% of your attention on lowering the key's counter to zero. This is the only action that opens the rest of the level.
Objective 2: Ice Removal and Color Liberation
Once the key turns, hidden cup clusters will flip over, revealing more resources. However, the massive Ice Blocks will still be blocking the background colors (Cyan and Cream). Your second objective is to shatter the Left Ice Block (30 HP) to free the Cyan sky cups, and the Bottom Ice Block (25 HP) to access the Cream clouds. This must be done methodically to avoid tray overflow.
Objective 3: Foreground Locking
Before you flood the screen with background colors, you must "lock in" the foreground. This means completing the Dark Red Cat and the Bright Green Hill first. By establishing these dark, solid shapes early, you create a border that prevents the lighter background colors from bleeding into the subject. If you mix the order, the cat will lose its definition.
Objective 4: The Background Flood
With the cat and hill solidified and the ice broken, you enter the cleanup phase. The final 40% of the level is a high-speed filling operation. You will rapidly process the liberated Cyan and Cream cups to fill the sky and clouds. This phase requires fast tapping but is low-risk because the difficult detailed work is already finished.
Step-by-Step Tactical Walkthrough
This is the exact sequence of moves required to beat the level. Do not deviate from this order. The board logic in Level 462 is rigid; trying to "wing it" usually results in a jammed conveyor belt and a failed timer.
Phase 1: The Center Column Drop
As the level begins, do not clear the top row immediately. Look directly at the center column. You will see a stack of cups positioned directly above the Golden Key.
- Action: Tap the top-most Dark Red cup in the center column. It drops to the conveyor.
- Next: Tap the Bright Green cup directly beneath the Red one.
- Execution: Feed these to the sand dispensers immediately.
- Warning: Ignore the cups on the far left and far right. They are decoys designed to fill your tray.
Phase 2: The 3-Second Pause
The moment the Golden Key unlocks, a grid of "?" Hidden Cups in the center will flip over, revealing more Red and Cream cups. The board layout shifts drastically.
- Stop Tapping: Lift your finger for 3 full seconds.
- Why? You need to let the conveyor belt clear the Red and Green sand you just poured. Your slots must be empty to handle the new revealed cups.
- Assess: Locate the newly revealed Dark Red cups. These are your next priority to finish the cat's body.
Phase 3: The "Rhythm Tap" Ice Breaker
Shift your focus to the Left Flank. You will see the large Ice Block (Count: 30) sitting on top of a stack of Cyan cups. This is the gate to the sky.
- The Trap: Do not spam tap the ice. You will fill your tray with unbreakable blocks or unwanted colors.
- The Technique: Identify the adjacent cups (usually Red or Green). Tap 2 cups, then wait for them to clear the belt. Tap 2 more.
- Pacing: Maintain a "Tap... Tap... Wait" rhythm. This drops the ice counter by 2-4 points every 3 seconds without clogging your slots.
Phase 4: The Bottom Center Cleanup
With the left side open, look at the bottom center. You will find the secondary Ice Block (Count: 25).
- Action: Use the Cyan cups you just freed from the left block. They are likely adjacent to the bottom ice now.
- Strategy: Tap the Cyan cups near the bottom ice to break it. This frees the final color batch needed for the clouds and finishes the corners of the hill.
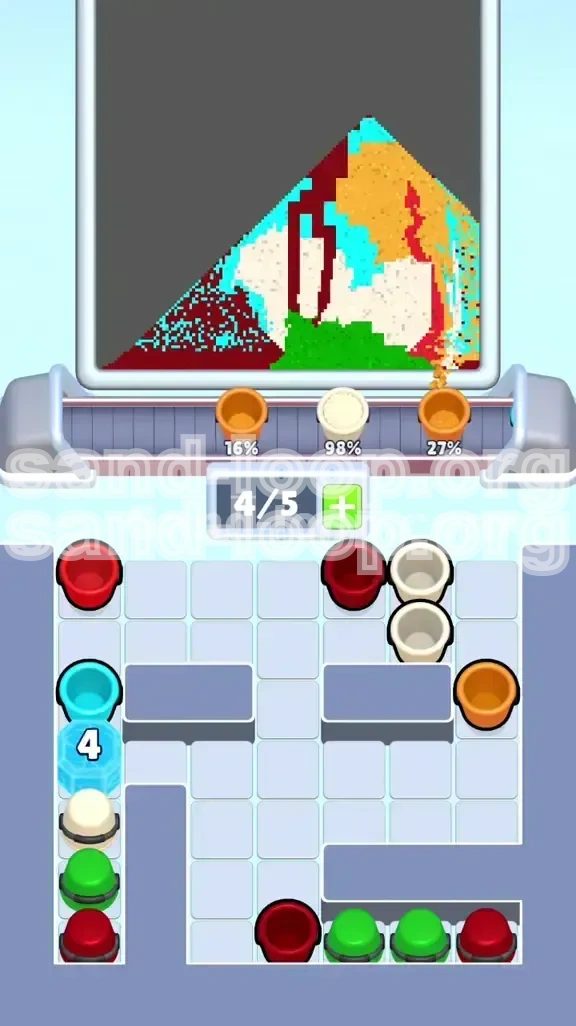
Phase 5: The Cyan Sky Flood
The ice is gone, and you now have a reservoir of Cyan cups on the left and Cream cups in the center.
- Priority: Switch to rapid tapping. Feed the Cyan cups into the dispenser aggressively.
- Focus: The sky takes up roughly 40% of the canvas. Since the cat (Red) and hill (Green) are already dry, you cannot mess up the details anymore. Just fill the blue space.
- Transition: Once the sky is 90% full, start tapping the Cream cups to top off the clouds.
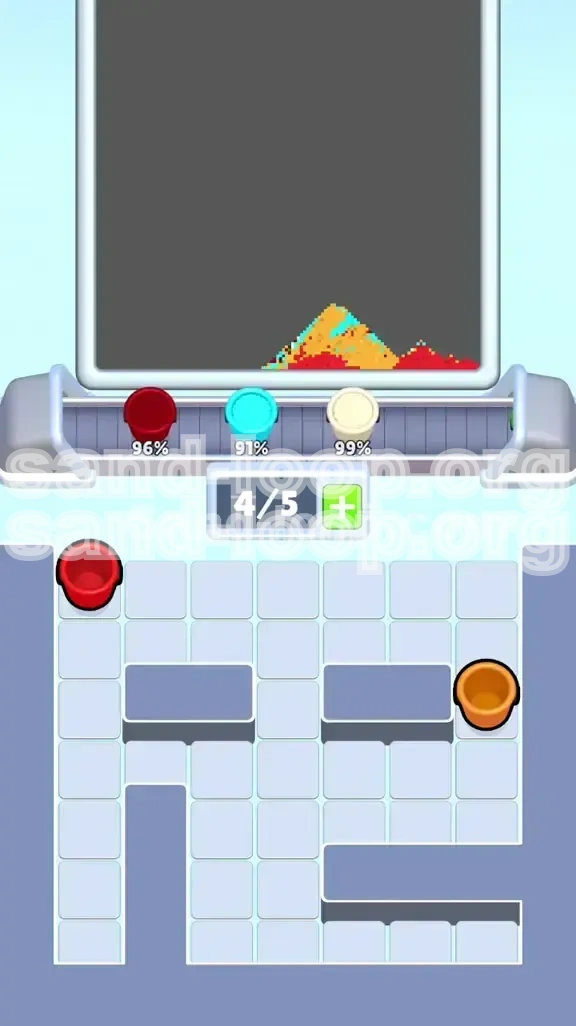
Phase 6: The Final Polish (Orange Tree)
The last remaining element is the Orange Tree on the right side, which you have been ignoring since the start.
- Action: Clear any remaining Green cups from the bottom right to finish the hill base.
- Finish: Tap the Orange cups rapidly. The tree canopy is large and fills quickly.
- Win Condition: The canvas should hit 100% coverage moments after the tree fills.
Strategic Color Processing Order
Why do most players fail Level 462? They process the wrong color at the wrong time. The "Color Order" is the hidden logic of this level. Mixing this up is the primary cause of "percentage stuck" errors. Here is the priority hierarchy you must follow.
Priority 1: Dark Red (The Skeleton)
Dark Red is the structural skeleton of the level. It forms the cat's body, tail, legs, and the tree branches.
- Why First? It is the darkest, highest-contrast color. If you paint the Cyan sky first, and then try to add Red details, the sand will mix and turn muddy purple. The Red lines will lose their sharpness against the light background.
- Strategy: You must pour the Red sand while the canvas is mostly blank. This ensures the edges are crisp and pixel-perfect.
Priority 2: Bright Green (The Foundation)
Bright Green represents the hill. It sits directly under the cat and interacts with the tree roots.
- Why Second? It creates a hard border with the Red. If you pour Green over wet Red, or vice-versa, they bleed into each other.
- Strategy: Establish the Green hill immediately after the Red cat. These two colors lock together to form the "Foreground Subject," creating a wall that the background colors cannot cross.
Priority 3: Cyan (The Background)
Cyan is the sky. It covers the largest surface area but has the lowest detail requirement.
- Why Third? You cannot pour the sky until the foreground objects are in place. If you pour the sky first, you have to "paint around" the cat, which is impossible on the thin 1-pixel tail lines.
- Strategy: Flood the sky only after the Ice Block is broken and the Cat/Hill are 100% solid.
Priority 4: Cream (The Accents)
Cream is used for the clouds and subtle highlights on the hill.
- Why Fourth? Cream is very light and acts almost like a contaminant. If spilled on the Dark Red cat, it ruins the contrast.
- Strategy: Use the Cream cups revealed by the Golden Key to top off the clouds after the sky is full. This is a cleanup color, not a primary filler.
Priority 5: Orange (The Buffer)
Orange is the tree foliage. It is physically isolated on the right side of the board.
- Why Last? It does not interact with the central bottleneck (the Key/Ice). It doesn't block anything, and it doesn't unlock anything.
- Strategy: Treat it as a "Free Space" or buffer zone. Only tap it when you have spare slots or when the rest of the board is cleared. It is your safety net if you need to dump a cup.
Pro Tips and Common Mistakes
Even with the correct order, small mechanical mistakes can compound into failure. Here is how to play like a pro and avoid the traps that catch 90% of players on Level 462.
The "Overflow" Trap
The Mistake: Trying to pour a massive volume of Cyan sand to fill the sky while the cat's tail is still unpainted. The heavy flow of Cyan spills over into the empty Red slots.
The Fix: Ensure the Dark Red tail is 100% filled before you start the Cyan flood. Check the canvas preview. If the tail looks transparent or pixelated, do not switch to Cyan yet.
The "Slot Starvation" Panic
The Mistake: Seeing the Ice Counter at "5" and panic-tapping 5 cups at once to finish it. You fill your tray, the conveyor jams, and you have to wait 10 seconds for it to clear while the timer ticks.
The Fix: Trust the math. If the ice counter is low, you can tap slower. One cup every 2 seconds is safer than five cups in one second. A jammed belt costs you more time than a slow tap.
The "Wrong Cup" Misconception
The Mistake: Thinking you have to clear *every* cup on the screen to win.
The Fix: You don't. Some cups are "decoys." Specifically, you can often ignore the outer edge columns if the center is filled correctly. Don't chase 100% cup clearance; chase 100% canvas coverage. If the picture is done, the level ends instantly.
Sand Thickness Mastery
Pro Tip: Sand physics in this game simulate pile-up. In the "Cat" section, the pixels are narrow. You need thin streams of sand. In the "Sky" section, you want wide, heavy streams. Adjust your tapping speed accordingly: slow, deliberate taps for the cat (to keep the flow precise), fast taps for the sky (to keep the flow heavy).
Using the Pause Button Strategically
Pro Tip: Don't forget you can look at the level while paused. If the board looks chaotic and you don't know which cup to tap, hit pause. Take a breath. Look for the "Red/Green" clusters needed for the key. Unpause and execute. Panic is the enemy; precision is the weapon.