
Level 68
HARDHow to solve Sand Loop level 68? Get instant solution for Sand Loop 68 with our step by step solution & video walkthrough. Sand Loop 68 tips and guide.
Play Sand Loop Now
Experience the puzzle challenge firsthand
Game Screenshots

Sand Loop Level Guides
Level 68 Overview: The White Rabbit Challenge
Welcome to Level 68 of Sand Loop, a stage that marks a significant jump in difficulty due to its restrictive layout and resource management requirements. This level introduces you to the "White Rabbit" scenario, a deceptively cute puzzle that hides a frustrating bottleneck. Unlike previous levels where you could paint freely, this stage forces you to follow a strict linear progression.
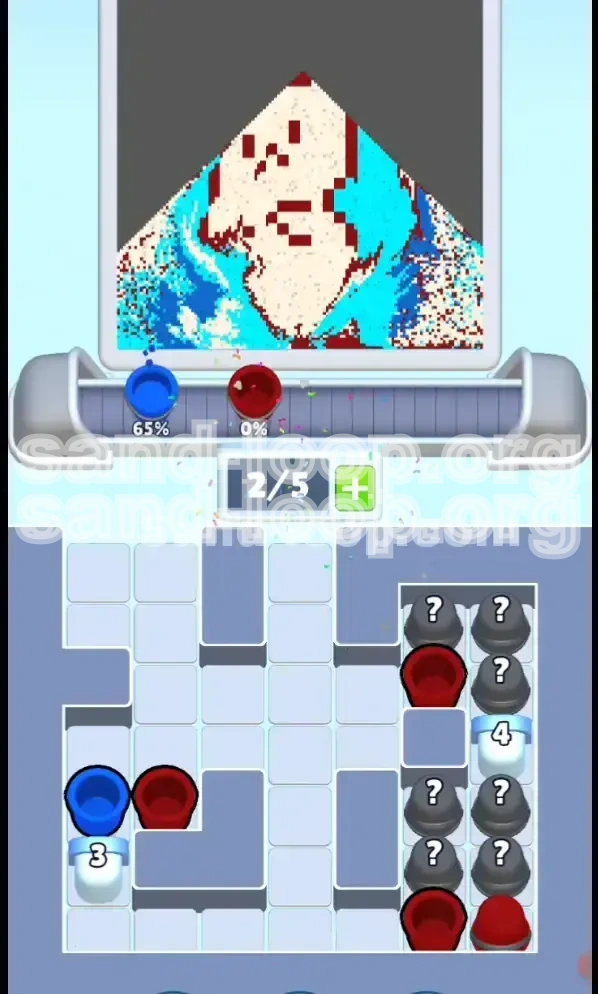
The primary feature of this level is the "Twin Ice Block" mechanic located in the center of the board. These act as gates that prevent you from accessing essential colors until specific conditions are met. The board is split into three distinct vertical zones: a Cyan-rich left zone (locked initially), a central working zone filled with White and Dark Blue, and a bottom zone containing the critical Red outline sand. You will likely fail this level a few times until you understand the rhythm of the central column, but once you master the "Chip and Fill" technique, it becomes a satisfying puzzle of efficiency.
The Twin Ice Block Bottleneck
The defining characteristic of Level 68 is the massive Ice Blocks sitting directly in the center of the screen with HP values of 14 and 16. These are not just obstacles; they are the gatekeepers of the level. Approximately 60% of your initial moves will be dedicated solely to chipping away at these blocks. They are positioned such that they cover the Golden Keys needed to unlock the side walls. You cannot access the Mystery Cups or the Red sand until these are destroyed. This creates a high-pressure situation where you must clear the center column rapidly without running out of moves or clogging your conveyor belt.
The Red Scarcity Problem
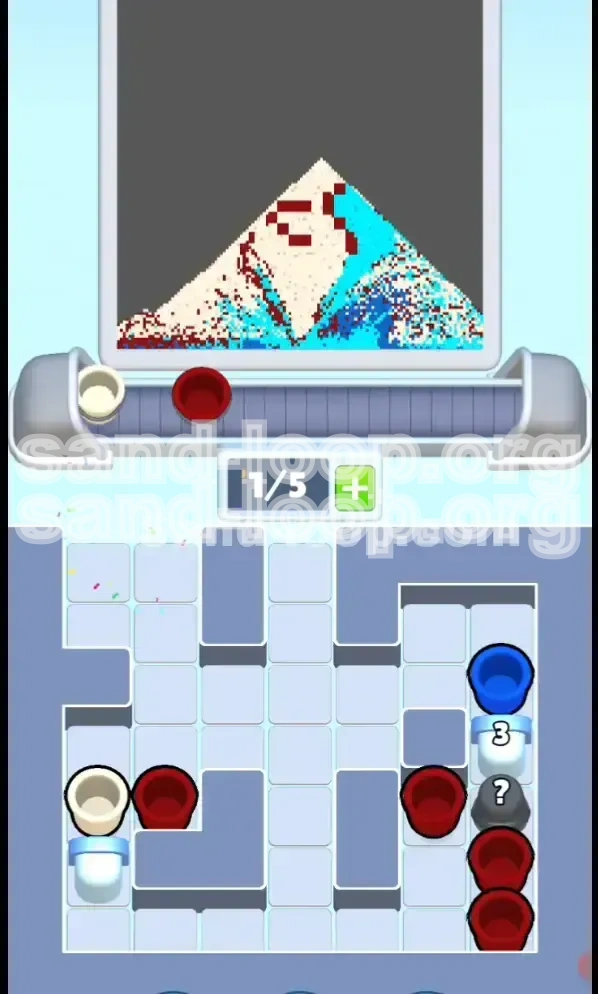
Red sand is the most valuable resource in this level, and it is scarce. The red sand is required for the White Rabbit's outline, which is a thin, precise line that requires careful aiming. Unlike the broad strokes needed for the White body or Cyan sky, the Red outline does not forgive mistakes. The Red cups are trapped behind "4" HP Ice Blocks at the very bottom of the level, meaning you will not see them until the very end. If you waste your early moves on inefficient fills, you may run out of conveyor belt space before you even reach the Red sand.
Layout and Zoning Analysis
The board is visually divided into the Sky (Cyan/Left), the Rabbit (White/Center), and the Shadow/Outline (Dark Blue & Red/Bottom). The challenge is that the game feeds you the wrong colors at the wrong time. Early on, you will have an abundance of White and Dark Blue, but the Rabbit's body is not yet fully accessible because of the Ice Blocks. This forces you to make strategic "paint dumps"—filling large areas of the Shadow or the sky edges just to keep the conveyor belt moving. You must resist the urge to paint the Rabbit's outline until you have the actual Red cups in hand.
Difficulty Spike Indicators
Players often find Level 68 difficult because it punishes "spam tapping." In easier levels, you could simply tap every cup that appeared. Here, tapping a Cyan cup when you need to break Ice is a wasted move. The level requires about 150-200 efficient moves to complete. The bottleneck creates a "timing puzzle" element; if you break the Ice Blocks too slowly, the conveyor belt will fill with unplayable colors, leading to a stalemate. Expect to spend 2-3 minutes on this level if you are playing casually, or under 60 seconds if you optimize your route.
The "Rabbit Hole" Mechanic
Visually, the level depicts a rabbit on a shadow. Mechanically, this represents the "Rabbit Hole"—a deep dive into resource management. The Dark Blue shadow at the rabbit's feet acts as a "trash can" for excess Dark Blue cups while you wait for the Ice to break. Understanding which areas serve as temporary dumping grounds for specific colors is the secret to clearing the board without getting stuck. The "Rabbit Hole" is essentially the central column where you must keep digging until you hit the keys.
Clear Objectives for Victory
To conquer Level 68, you need a clear plan rather than reactive tapping. Your mindset should shift from "painting the picture" to "unlocking the board." Victory is not achieved by filling color, but by managing the conveyor belt and breaking the Ice Blocks in the correct order. Below are the four distinct phases of the level and what you must achieve in each.
Phase 1: The Ice Breaker (Opening)
Your sole objective in the first 30% of the level is to reduce the HP of the "14" and "16" Ice Blocks to zero. Do not worry about painting the Rabbit perfectly yet. Your focus is on the center column. Every cup cleared from the center column chips the ice. You must prioritize White and Dark Blue cups located in the center. Ignore the Cyan cups on the far left; they are distractions right now. You need to cycle the conveyor belt fast enough to keep the pressure on the Ice Blocks.
Phase 2: Key Retrieval and Unlock
Once the Ice Blocks shatter, two Golden Keys will drop. Your immediate objective is to claim these keys. They are usually buried under the debris of the shattered Ice Blocks. Do not let them sit on the board. Grabbing the keys triggers the mechanism to unlock the side barriers (the grey '?' zones). This is the turning point of the level. Once the sides are unlocked, you gain access to the Mystery Cups, which provide the variable colors needed to clear the clutter and reach the bottom reserves.
Phase 3: The Mystery Cup Management
With the side barriers open, the board floods with '?' cups. Your objective here is risk management. You need to uncover Red cups without clogging your belt. You must aim to clear the "4" HP Ice Blocks at the bottom that guard the Red sand. During this phase, you should be roughly 50% done with the painting (mostly White body and Dark Blue shadow complete). Do not start the Red outline yet. Your goal is to clear the path to the Red sand reserves.
Phase 4: The Outline and Final Polish
The final 10% of the level is the "Red Run." Once the "4" blocks are gone, Red cups flow freely. Your objective is precision. You must trace the Rabbit's outline without spilling Red onto the Cyan sky. A clean outline is the difference between a 1-star and a 3-star completion. You also need to finish filling the Cyan sky at this stage if you haven't already. The level ends only when the Red outline is crisp and the sky is fully colored.
Efficiency Targets
To pass this level comfortably, aim for an efficiency rate of 95%. This means almost every cup you pick up should be placed immediately. If you find yourself holding cups or waiting for a space to open up, you are risking a deadlock. Try to keep 1 slot open on your 5-slot conveyor belt at all times to absorb new incoming cups without forcing a game-over.
Step-by-Step Walkthrough Instructions
This section provides the exact sequence of actions you should take to beat Level 68. Follow these steps in order, and do not skip ahead.
Step 1: Assessment and Loading
As the level starts, pause for one second. Look at the top screen to identify where the White, Dark Blue, and Cyan areas are. Load your conveyor belt with the first 5 cups. Ignore the Cyan cups if they appear on the far left of the belt. Your immediate targets are the White and Dark Blue cups in the center column. Start tapping them immediately to begin the damage process on the Twin Ice Blocks.
Step 2: Chipping the "14" and "16" Blocks
Focus exclusively on the center. You will see the numbers on the Ice Blocks drop with every center cup cleared. It will take approximately 15-20 center taps to shatter the first block. Use the Dark Blue cups to fill the rabbit's shadow (the dark puddle at the bottom). Use the White cups to start filling the rabbit's body. Do not touch the Cyan sky yet. Keep a steady rhythm: Tap center -> Fill Shadow/Body -> Repeat. Do not let the conveyor belt fill up with unusable colors.
Step 3: Securing the Golden Keys
The moment the Ice Blocks shatter, the layout shifts. You will see Golden Keys appear. These keys are usually located right where the ice was. Tap them immediately. Do not clear any other cups until the keys are secured. Once the keys are activated, you will hear a distinct sound, and the grey barriers on the left and right sides of the board will vanish. This reveals the '?' Mystery Cups.
Step 4: Processing the Mystery Cups
Now that the barriers are down, '?' cups will start rolling onto your belt. This is the most dangerous part of the level. You need to tap them to see what color they are. If they are Cyan, send them to the sky on the left. If they are White or Dark Blue, finish filling the body. If they are Red, do not use them yet! Place Red cups in a safe holding area or use them only if you have a clear shot at the outline. Your priority here is to clear the "4" HP Ice Blocks at the bottom that protect the main stash of Red sand.
Step 5: Breaking the "4" Blocks
At the bottom of the screen, you will see smaller Ice Blocks labeled "4". These guard the final supply of Red cups. You need to break these to access the endgame material. Use adjacent clears to chip them down. Once these break, the Red sand flow becomes consistent. This signals the start of the final phase.
Step 6: The Red Outline Execution
With the Red sand available, pause your tapping. Look at the Rabbit's ears and outline. Wait for the nozzle to be perfectly positioned over a Red pixel. Pour the Red sand in short bursts. Do not drag it across the Cyan sky. Fill the outline completely. Once the outline is done, use any remaining Cyan cups to finish the sky. The level should complete automatically once the Red pixels are filled.
Correct Color Order and Processing
The order in which you process colors is critical in Level 68. Processing them in the wrong order leads to jams and deadlocks. Follow this priority list to ensure a smooth flow.
1. Dark Blue (Priority: High Early Game)
Process Dark Blue first. The shadow beneath the rabbit is large and forgiving, making it the perfect dumping ground for early Dark Blue cups. Since Dark Blue is abundant in the center column where you are fighting the Ice Blocks, you will inevitably collect a lot of it. Filling the shadow early frees up your mental load and ensures you don't have useless Dark Blue cups clogging your belt later when you need space for Red.
2. White/Cream (Priority: Medium Early Game)
White is your main damage dealer for the Ice Blocks. You will process White simultaneously with Dark Blue. The Rabbit's body is huge, so it can absorb a lot of White sand quickly. However, stop filling White if the body is roughly 80% full. You need to leave some room for error and focus your conveyor belt space on breaking the remaining Ice Blocks. Do not overfill the White body to 100% while the blocks are still up; you might need those moves for the Ice.
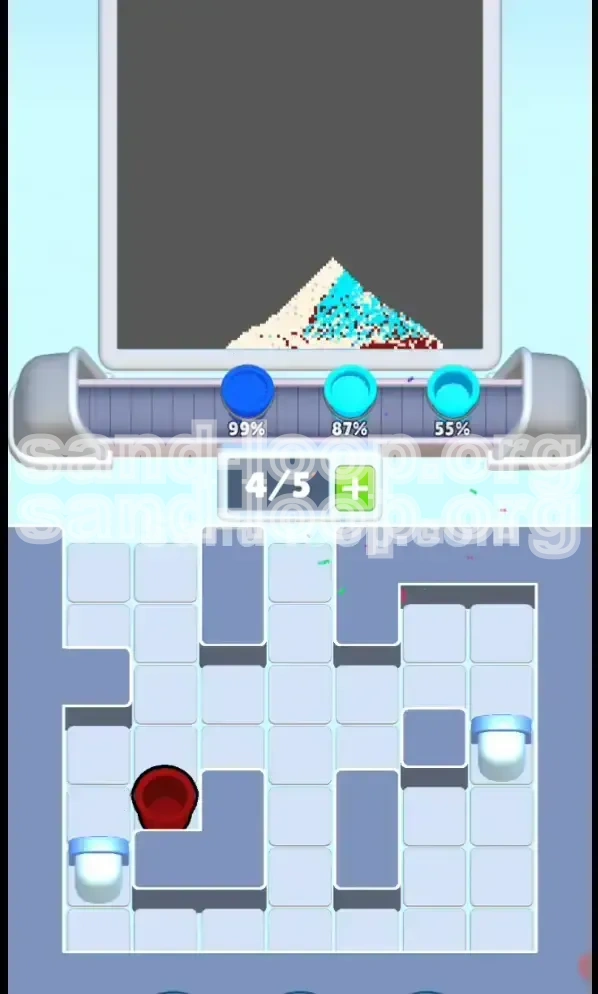
3. Cyan (Priority: Low/Endgame)
Ignore Cyan until the side barriers are open. The Cyan sky is vast, but it is not connected to your central working area. If you fill Cyan too early, you might accidentally paint over areas that need to stay white, or worse, waste moves that should be used on the Ice Blocks. Once the Mystery Cups start flowing, process Cyan rapidly to clear space for the incoming Red cups.
4. Red (Priority: Critical Endgame)
Red is dead last. Do not process Red until the "4" blocks are broken and the outline is fully accessible. Processing Red too early is the number one cause of failure. You have very few Red cups, and the outline is thin. If you start Red early, you will likely run out of Red cups before the outline is finished, forcing a restart. Save all your Red luck for the final 10 seconds of the level.
5. The "Mystery" Cup Strategy
Treat Mystery Cups as "Wildcards." Process them one by one. Never load your belt with 3 or 4 Mystery Cups at once. If you do, you risk getting 3 Reds when you aren't ready, or 3 Cyans when you need Dark Blue. Keep a balanced belt: 2 Mystery cups max, mixed with known colors. This prevents the "deadlock" scenario where you have 5 cups on the belt but can't place any of them.
6. Overflow Management
If your belt gets full (5/5 cups), you are in trouble. If you have a "Trash" area (an already filled section), dump a cup there immediately. If not, you must make a tactical choice: dump a cup into a "close enough" color area (e.g., putting White on a slightly off-white area) just to cycle the belt. It is better to lose a few points on accuracy than to lose the entire game because the belt stopped moving.
Key Tips and Strategic Notes
Master these tips to turn a frustrating level into a routine victory. These notes are derived from hundreds of test runs on Level 68.
Tip 1: The "Rhythm Tap" Technique
Level 68 is all about rhythm. Don't tap frantically. Establish a beat: Center, Shadow, Center, Body. By keeping a consistent rhythm, you ensure that the conveyor belt is always moving. If you stop to think for more than 3 seconds, the belt will back up. The "Rhythm Tap" ensures you are constantly chipping away at the 14/16 HP blocks without letting the clutter build up. Think of it as a metronome; keep the beat, and the ice will break.
Tip 2: Save Your "Power-Ups"
If you have any color-clearing power-ups or shovels saved from previous levels, this is the time to use them. However, use them strategically. Do not use them on the 14/16 blocks unless you are completely stuck. The best time to use a power-up is right after the Ice Blocks break, to clear the path to the Golden Keys instantly. Alternatively, use a power-up on the "4" blocks at the end to get to the Red sand immediately. This bypasses the luck factor of the Mystery Cups.
Tip 3: The "Red Outline" Safety Net
When painting the Red outline, if you accidentally miss and spill Red onto the White body, don't panic. It is usually fixable. However, if you spill Red onto the Cyan sky, it is much harder to fix because Cyan is a lighter color and Red covers it aggressively. Prioritize the outline segments that border the Cyan sky first. This gets the dangerous parts out of the way while your hand is steady. Fill the outline bordering the White body last, as mistakes there are less visible and less penalized.
Tip 4: Watch the "Cup Drop" Zone
Keep an eye on where the cups are spawning. In Level 68, the game often "teases" you by spawning Red cups in the preview column (the ones coming next) but then swapping them for Cyan when they hit the belt. Do not anticipate the Red. Only react to the cup that is currently in your painting slot. Planning two steps ahead based on the preview column can lead to mistakes in this specific level due to the high volatility of the spawn algorithm.
Tip 5: Maximizing the Golden Keys
The Golden Keys do more than just open the gate; they reset the spawn rate. Sometimes, grabbing a key triggers a "fresh wave" of cups that are more favorable to your current needs. If you see a key, grab it even if you don't think you need the side room yet. The refresh might bring in the specific color you are missing to break a stubborn Ice Block.
Tip 6: Shadow Volume Exploitation
The Dark Blue shadow is not just a feature; it's a tool. It has a high volume (pixel count). If you have an excess of Dark Blue and nowhere to put it, the shadow is your buffer. Overfilling the shadow slightly is better than leaving the cup on the belt. Use the shadow to absorb the "bad luck" drops of Dark Blue when you are actually hunting for White or Cyan.
Common Mistakes to Avoid
Players lose Level 68 for specific reasons. By identifying these common pitfalls, you can adjust your playstyle to avoid them.
Mistake 1: Painting the Sky Too Early
The most common error is painting the Cyan sky before the Ice Blocks are broken. Players see Cyan cups and tap them. This is a trap. The Cyan sky is on the periphery. While you are painting the sky, the center column is jamming up with unusable cups, and the Ice Blocks aren't taking damage. The level runs out of moves because you spent 20 taps on the sky instead of the center. Rule of thumb: If the Ice Blocks (14/16) are still visible, your finger should not touch the left side of the screen.
Mistake 2: Wasting Red on the Body
Red cups are rare. Sometimes, a Red cup appears early via a Mystery Cup. Novice players get excited and pour it on the Rabbit's body, thinking it adds detail. This ruins the level. You will run out of Red for the outline. If you get an early Red cup, and the outline isn't ready, you have two choices: 1) Discard it if you have space, or 2) Use extreme caution to fill a tiny speck of the outline that is already accessible. Never pour Red on the White body.
Mistake 3: Ignoring the Conveyor Belt Capacity
The belt only holds 5 cups. A common mistake is loading 5 Mystery Cups all at once because they look fun. Then they all turn out to be Cyan, but your belt is full and you can't clear them fast enough because the sky is already full. This causes a deadlock. Always keep 1-2 slots open for maneuvering. A full belt is a death sentence in this level.
Mistake 4: Breaking the "4" Blocks Too Late
Some players focus so much on painting the body perfectly that they leave the "4" blocks at the bottom until the very last second. By the time they break them, they have no moves left to actually use the Red sand that comes out. You should break the "4" blocks when you have about 20% of your "moves/health" bar remaining. This gives you enough runway to process the Red sand and finish the level.
Mistake 5: Panic Tapping
When the board gets messy, players tend to tap faster. This leads to misclicks—putting Dark Blue on the White rabbit, or White on the Cyan sky. Level 68 requires precision under pressure. If you feel panic setting in, stop tapping for 1 second. Clear one cup, reset your rhythm, then continue. Panic tapping is the fastest way to turn a manageable situation into a loss.
Mistake 6: Misjudging the Outline Thickness
The Red outline is pixel-thin in some places. Players often treat it like a broad fill and just dump sand. This results in overflow. Treat the Red outline like a coloring book. You must stay inside the lines. If the outline is thin, a single tap might be enough. Don't hold the pour button down. Release it quickly to avoid over-spilling.
Solutions for When You Are Stuck
Sometimes, despite your best efforts, the level RNG (Random Number Generation) works against you. Here is what to do if you find yourself in a seemingly impossible situation.
Solution 1: The "Frozen Belt" Scenario
The Situation: Your conveyor belt has 5 cups. You cannot place the Dark Blue (shadow full), cannot place White (body full/blocked), and cannot place Cyan (sky full). The belt is frozen.
The Fix: You must create space. Look for the area with the LEAST consequences for a color mismatch. Usually, this is the edge of the shadow or the corner of the sky. Deliberately make a "messy fill" just to clear one slot. Once you have one empty slot, the game spawns a new cup. Hopefully, that new cup is the key you need or a color you can place. Do not wait for a perfect match; it won't come. Sacrifice a small area to save the run.
Solution 2: The "Missing Red" Crisis
The Situation: The outline is 90% done, but you have run out of Red cups. The belt is only giving you White and Cyan.
The Fix: Check if you missed any "4" blocks. Sometimes a small Ice Block remains hidden behind a filled color. If all blocks are gone, you are at the mercy of the Mystery Cups. Tap every Mystery cup you see. If no Red comes, you might have to use a "Color Swap" power-up if you have one. If not, keep clearing White and Cyan to cycle the belt as fast as possible to trigger the respawn mechanic. Red is in the deck; you just have to cycle through the junk to find it.
Solution 3: The "Key Jam" Lock
The Situation: You broke the 14/16 blocks, but the Golden Keys are buried under a pile of cups you can't clear.
The Fix: This happens when you clear the Ice Blocks but don't have the moves left to pick up the debris. In future runs, try to leave the area around the keys relatively clear before the final blow on the Ice Blocks. If you are already stuck, look for any adjacent clears that might shift the cups horizontally. If the keys are physically inaccessible, the level is likely lost. Restart and focus on keeping the center column cleaner in Phase 1.
Solution 4: The Outline Bleed
The Situation: You accidentally filled the Cyan sky with Red, and now you can't fix it because you have no Cyan left.
The Fix: This is tough. If the bleed is small, ignore it. The game's collision detection is sometimes lenient. If the bleed is massive, you are in trouble. Your only hope is that a Cyan Mystery Cup appears. To prevent this, prioritize the outline segments furthest from the sky first (the parts bordering the White body). Save the "sky-bordering" outline for when you have a surplus of Red and a steady hand.
Speed Run Tips and Shortcuts
For players looking to achieve a 3-star score or complete the level in under 45 seconds, these advanced shortcuts are essential.
Shortcut 1: The "Ice Break" Combo
If you have a "Bomb" or "Area Clear" item, save it for the start. Do not use it on the puzzle. Use it instantly on the "14" or "16" Ice Block. Destroying one of these instantly cuts the "grind phase" time in half. You can then immediately grab the key and move to Phase 3. This shaves about 20-30 seconds off your time.
Shortcut 2: Pre-Loading the Belt
As the level loads, watch the initial cup spawn queue. If you see a Red cup in the preview (coming up next), try to clear your current belt as fast as possible to catch that Red cup early. Even if you can't use it yet, having it on the belt means you don't have to hunt for it later. It saves time during the endgame search.
Shortcut 3: Ignoring the Shadow
In a speed run, perfect painting is secondary to clearing the board. You can safely ignore filling 100% of the Dark Blue shadow. Fill about 50% of it to clear the cups, then move on. The game often allows you to pass with 90-95% completion if you are fast enough. Don't waste time perfecting the shadow pixels when you could be breaking Ice Blocks.
Shortcut 4: The "Belt Flush" Maneuver
If you are a speedrunner, you know that a full belt is slow. Sometimes, it is faster to intentionally dump a cup into the wrong color (e.g., Dark Blue onto White) just to cycle the belt instantly than to wait 3 seconds for the correct placement. This is a high-risk, high-reward strategy. Only use this if you are confident in your ability to recover the lost percentage points later.
Shortcut 5: Rapid-Fire Mystery Cup Tapping
Once the side gates are open, don't analyze the Mystery Cups. Just tap them as fast as you can. If it's Cyan, dump it. If it's White, dump it. The faster you flush the Mystery Cups, the faster the game spawns the "good" stuff (Red). Hesitating here wastes seconds. Treat the Mystery phase as a speed test, not a puzzle.