
Level 1
HARDHow to solve Sand Loop level 1? Get instant solution for Sand Loop 1 with our step by step solution & video walkthrough. Sand Loop 1 tips and guide.
Play Sand Loop Now
Experience the puzzle challenge firsthand
Game Screenshots
Sand Loop Level Guides
Level Overview: Mechanics and Objectives
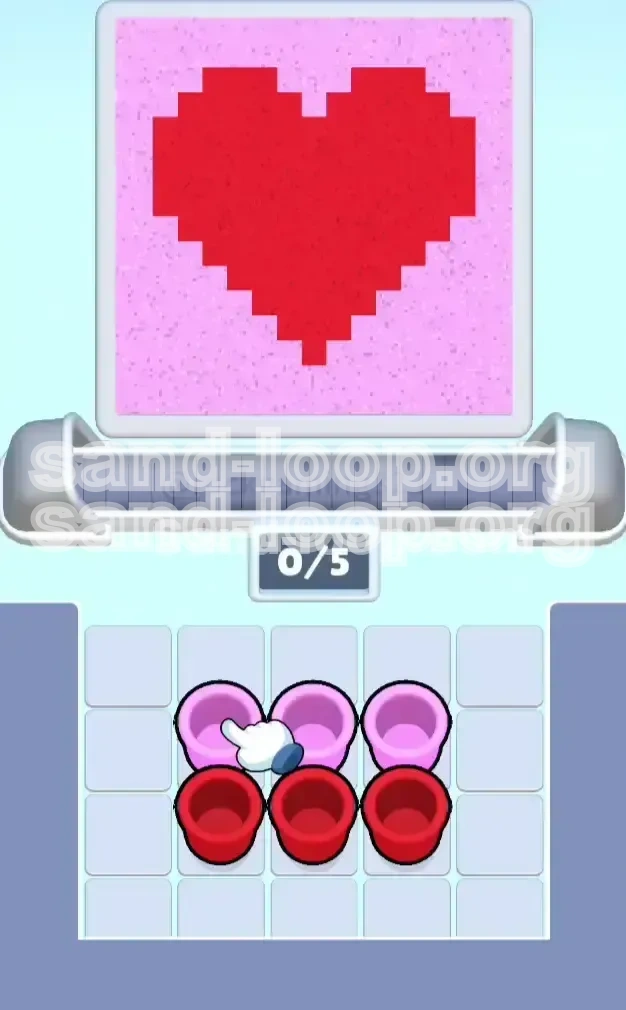
Welcome to Level 1: The Pixel Heart. This stage serves as the foundational crucible for mastering Sand Loop's unique mechanics. While the image appears simple—a classic 8-bit heart—the challenge lies in the game's fluid physics engine and the strict constraints of your machinery. Unlike static coloring games, here you must manage momentum, gravity, and queue capacity simultaneously.
The Visual Target: A Study in Contrast
Your objective is to replicate a pixel-art heart consisting of two distinct color zones. The primary subject is a Red Heart anchored in the absolute center of the canvas. This is surrounded by a Pink Background that fills the top, bottom, and side corners. The difficulty arises from the sharp, jagged "stair-case" edges typical of pixel art; you must fill these areas cleanly without allowing the Red sand to bleed into the Pink corners, or vice versa.
The Dispenser Movement
You cannot control the dispenser head manually; it follows a pre-programmed algorithm. In Level 1, the head performs a rhythmic Sweep and Circle pattern. It starts near the center, spirals outward to cover the mid-section, and then performs wide sweeps to catch the corners. Understanding this rhythm is critical. You must feed the correct color cups into the machine so that the sand arrives at the exact moment the dispenser passes over the corresponding zone.
The 2x3 Cup Grid
Your resources are strictly limited to a 2x3 grid at the bottom of the screen.
- Top Row: 3 Cups of Pink Sand.
- Bottom Row: 3 Cups of Red Sand.
The Conveyor Belt Constraint (5 Slots)
This is the most critical mechanic in Level 1. Your conveyor belt has a maximum capacity of 5 active cups. Since you possess 6 cups total, you cannot queue everything at once. If you fill the belt with the wrong colors, you will create a "traffic jam," preventing necessary colors from entering the queue and causing the dispenser to spray sand into the wrong areas. Mastering the timing of adding and removing cups is the key to a three-star rating.
Completion Criteria
To achieve a Perfect Clear, you must reach a 100% Fill Rate for both color zones. The game calculates completion based on pixel density. The Pink background covers approximately 62% of the surface area, while the Red Heart covers the remaining 38%. Because of this disparity, you will consume significantly more Pink sand than Red sand. A common failure point is running out of Pink capacity early because players over-commit to the Heart.
Why This Level Matters
Do not treat Level 1 as a throwaway tutorial. It is the best environment to learn the game's "flow lag." The delay between tapping a cup and the sand hitting the canvas is roughly 1.2 seconds. Mastering this delay here allows you to predict the necessary inputs for complex levels later. Use this run to calibrate your reflexes: observe how the sand piles up and how the physics engine distributes grains across the pixel grid.
Strategic Color Order: The "Red First" Protocol
Randomly tapping colors will result in a muddy, failed image. To succeed, you must adhere to a strict processing order. The logic of Sand Loop dictates that we prioritize the smaller, more complex shape before flooding the background. This section explains why the "Red First" strategy is mathematically superior for this level.
Anchor the Focal Point
We begin with the Red Heart because it defines the composition. The dispenser always initiates its cycle near the center. If you start with Pink, you will fill the center and the corners simultaneously, making it incredibly difficult to define the sharp edges of the heart later. By prioritizing Red, you establish a strong "anchor" in the middle of the board, ensuring that the most recognizable part of the image is locked in early.
Preventing Color Bleeding
Sand physics in this game are fluid. If you fill the Pink background first, the sand will settle into the crevices where the Red heart should eventually go. When you eventually pour Red, it will mix with the settled Pink, creating a diluted, purple-ish border that ruins the pixel-art aesthetic. Pouring Red first ensures the "High Precision" zone is pure and uncontaminated by the "Bulk Fill" material.
Volume Efficiency
Analyzing the volume requirements reveals why we switch to Pink later. The Red Heart is a compact shape (approx. 35-40% of the board). It can be filled rapidly with just 2 to 2.5 cups of Red sand. The Pink Background, however, is vast and requires almost 3 full cups to reach the deep corners. If you focus on Pink first, you will likely exhaust your time trying to fill the corners, leaving the Heart under-filled. By securing the Heart quickly (80% in the first 15 seconds), you free up your mental bandwidth to manage the tedious background filling.
Transition Timing
The switch from Red to Pink is not an on/off toggle; it is a gradual transition. The optimal strategy is to maintain a flow of Red until the heart is visually solid, then introduce Pink to "wash" over the remaining empty space. We aim to switch when the dispenser is moving away from the center. If you switch while the dispenser is hovering over the heart, you waste Pink sand on a zone that is already Red.
Queue Management Logic
Your queue should generally follow a 2-3 Split. Ideally, you want 2 Red cups and 3 Pink cups in your total rotation. Since the belt holds 5, you should aim for a belt configuration of [Red][Red][Pink][Pink][Pink] at maximum efficiency. This ensures that as the initial Red cups finish, the machine is immediately flooded with Pink to handle the background cleanup without requiring you to frantically tap the top row later.
Step-by-Step Walkthrough: Action Phase
This section provides the exact sequence of inputs required to clear the level. We have broken the gameplay down into four distinct phases based on time and percentage completion. Follow these timestamps and actions for a consistent result.
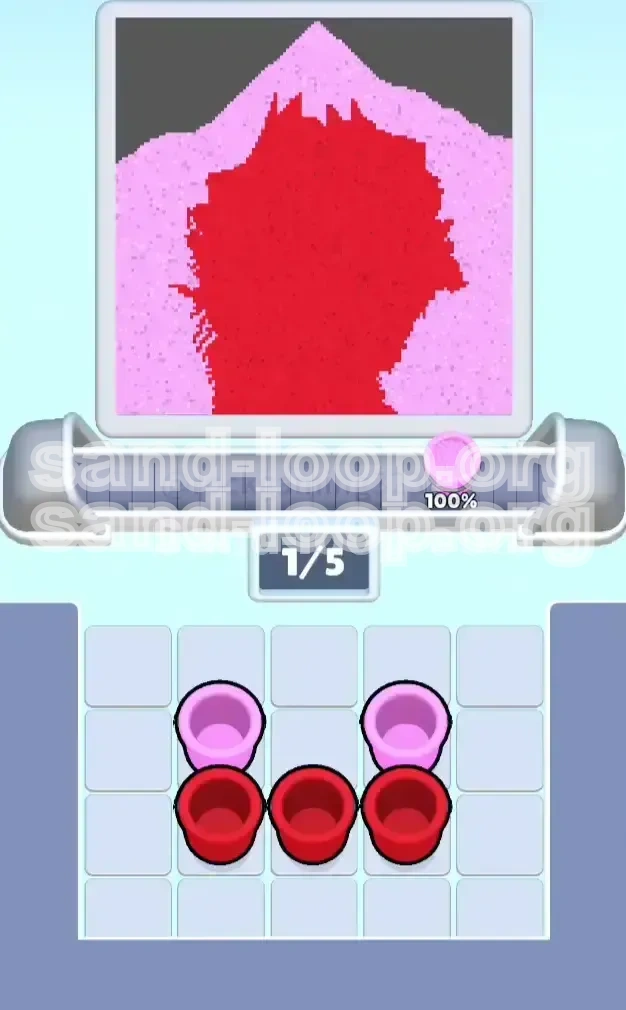
Phase 1: The Core Construction (0:00 - 0:15)
At the start, the dispenser is winding up in the center. Do not touch the top row.
- Step 1: Immediately tap the Bottom-Left Red Cup.
- Step 2: Immediately tap the Bottom-Center Red Cup.
- Status: Your belt now has 2/5 slots filled. The dispenser is actively pouring Red into the center.
- Visual Check: Watch the heart form. You should see the two lower lobes of the heart darken to a solid red quickly.
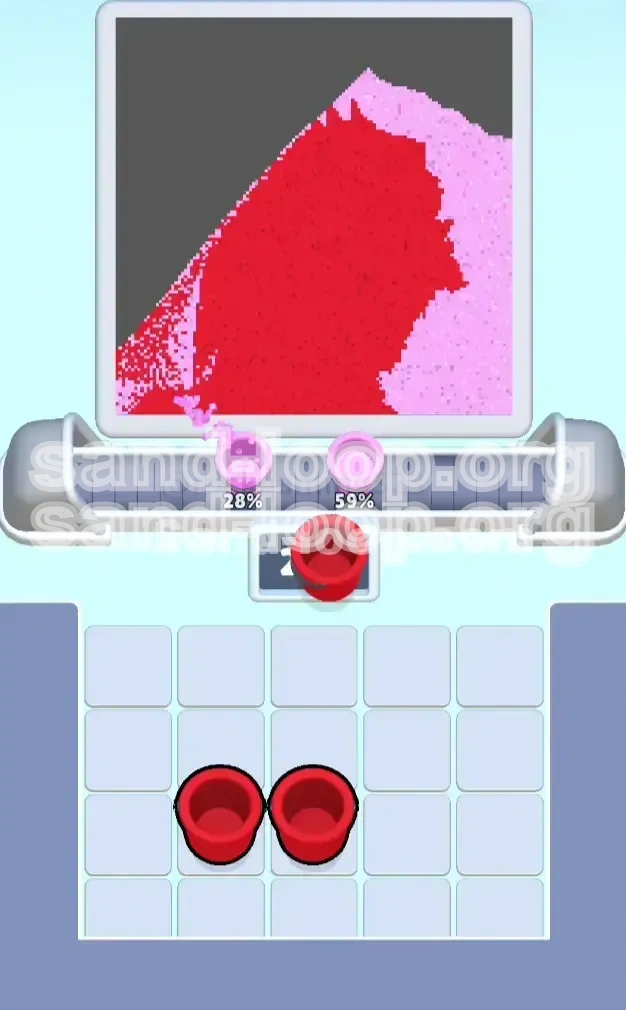
Phase 2: The Introduction of Pink (0:15 - 0:25)
Once the first two Red cups are secured, the dispenser will begin its first wide sweep towards the edges. This is the trigger to introduce the background color.
- Step 3: Tap the Top-Left Pink Cup.
- Step 4: Tap the Top-Center Pink Cup.
- Status: Belt is now 4/5 full [Red][Red][Pink][Pink].
- Result: As the Red cups deplete, the Pink cups will automatically engage. The dispenser will likely be finishing the heart and starting to hit the top corners.
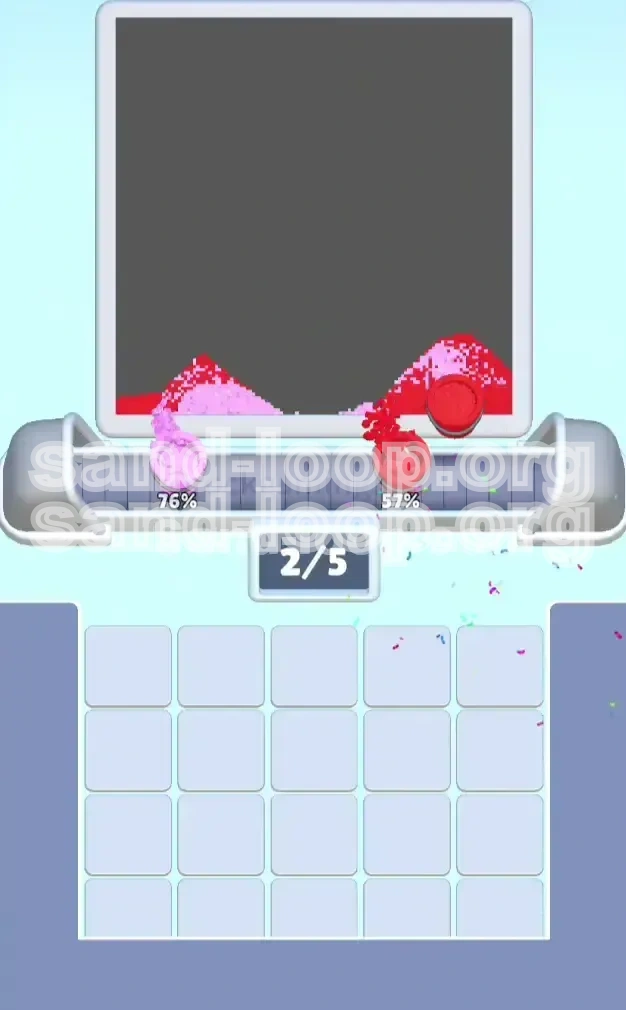
Phase 3: The Flood and Balance (0:25 - 0:40)
At this point, the Heart is likely 70-80% complete. The background is probably 40% complete. You need to flood the belt with Pink to secure the corners.
- Step 5: Tap the Top-Right Pink Cup.
- Status: Belt is now 5/5 full. [Red][Pink][Pink][Pink].
- Note: Do not tap the final Red cup yet. Adding it now would block your ability to manage the Pink flow.
- Visual Check: The canvas should look like a mostly pink field with a bright red heart in the middle. There may be a thin red outline still needing definition.
Phase 4: The Polish and Final Percent (0:40+)
The final stretch is about waiting for the belt to clear and making micro-adjustments.
- Step 6: Wait for one of the cups to exit the belt (creating an empty slot).
- Step 7: Assess the Heart. If the red looks "patchy" or "washed out," tap the Bottom-Right Red Cup now.
- Step 8: If the heart is solid, do nothing. Let the Pink cups finish the job.
- Result: The final Red cup (if used) will provide the "top coat" to the heart, ensuring the pixel edges are crisp against the pink background.
Key Tips and Notes for Precision
Mastery of Level 1 requires attention to detail. These tips focus on the hidden mechanics that separate a 99% completion from a perfect 100%. Pay close attention to timing and visual cues to ensure a flawless run.
Understanding Input Lag
There is a roughly 1.5-second delay between tapping a cup and that color being under the dispenser. Never wait for a cup to hit 0% before tapping the next one. You should tap the next cup in the sequence when the current cup is around 20% full. This "pre-loading" ensures that the sand stream remains continuous. A gap in the stream can cause the pixel fill to look uneven or "streaky."
The "Staircase" Edge Risk
The pixel heart features jagged, stair-step edges. These are the hardest parts to fill because the dispenser moves in a smooth arc. If the dispenser is moving horizontally across the top of the heart while you are pouring Pink, you risk "flattening" the top bumps of the heart. Try to time your heavy Red pours when the dispenser is moving vertically, as this helps define the vertical sides of the heart better.
Visual vs. Numerical Progress
Do not trust the percentage indicator at the top of the screen blindly. It often lags behind the actual graphics. Rely on your eyes. If the heart looks solid red and the pink looks solid pink, you are done. Conversely, if you see a "pixelated" noise in the corners, ignore the "99%" UI and keep the Pink sand flowing until that noise smooths out into a solid block of color.
Resource Conservation
Efficiency is rewarded. While you have 6 cups, a pro player can finish Level 1 using only 5 cups (2 Red, 3 Pink). Leaving one Red cup unused is a sign of a master run. It means you placed your initial Red cups with such precision that you didn't need the "crutch" of the third cup to fix mistakes. Aim to leave the Bottom-Right cup on the tray.
Conveyor Belt Juggling
Keep the belt moving. If the belt is full of Pink, but the dispenser is stuck over the Red Heart, you are wasting precious Pink sand into the center. If you see this happening, you have no choice but to wait it out. In future levels, you might plan differently, but here, the lesson is to ensure your Next Up queue matches the dispenser's destination.
The "Dry Pour" Trap
Avoid letting a cup run completely dry while the dispenser is over a critical area. When a cup runs dry, the dispenser sputters for a moment before switching to the next color. This sputter can leave a "dry spot" (an unfilled pixel line) in the middle of your shape. Always preempt this sputter by having the next cup queued before the previous one empties.
Common Mistakes and Stuck Solutions
Even with a plan, things can go wrong. The physics engine can be unpredictable, or a mistimed tap can cascade into a failed level. Here are solutions to the most common problems players encounter in Level 1.
Mistake: The "Full Belt" Traffic Jam
The Problem: You tapped 3 Reds and 2 Pinks immediately. Your belt is full (5/5). The Heart is now overfilled and spilling into the background, but you can't add the necessary 3rd Pink cup because the belt is clogged with unneeded Red.
The Solution: You must wait. Do not panic tap. Let the Red cups finish and fall off the belt. This takes about 5-8 seconds. Once the first Red drops, immediately tap the missing Pink cup. To prevent this, always ensure your belt has a majority of Pink cups (3) since the background is the larger area.
Mistake: Premature Color Switching
The Problem: You switched to Pink too early because you were worried about the timer. Now the Heart is a pale, faded red (60% opacity) and looks like a generic blob rather than a pixel heart.
The Solution: You must brute-force the Red back. Even if it wastes sand, tap your remaining Red cups immediately. You need to overpower the Pink that bled into the center. Queue two Red cups back-to-back to force the dispenser to paint over the center again.
Stuck: The "Stray Pixel" Syndrome
The Problem: You are sitting at 99% completion. The level looks perfect to the naked eye, but the timer won't stop. There is likely one single pixel in a far corner (usually top-right or bottom-left) that isn't filled.
The Solution: Look for the "sparkle" or empty spot. If you have a cup on the belt, let it finish its cycle. Do not add more. The dispenser sweeps in a loop; it will hit that corner eventually. Adding a new cup resets the flow timing sometimes, so patience is the fastest fix here.
Stuck: Dispenser Misalignment
The Problem: It feels like the sand is consistently landing to the left or right of where you intend, making the heart look lopsided.
The Solution: This is usually a visual illusion caused by the perspective of the pixel grid. The heart is mathematically centered. If the sand seems to veer left, it might be because you are tapping the cups in a specific order that shifts the game's logic. Stop tapping for 3 seconds. Let the current cup finish. This often "resets" the alignment logic for the next cup.
Speed Run Tips for the Perfect Score
If you are chasing the leaderboard or simply want to clear the level with time to spare, standard caution is too slow. You need to exploit the game's mechanics for maximum velocity. Here is how the pros clear Level 1 in under 45 seconds.
The "Double Tap" Start
As the level loads, the dispenser takes a moment to spin up. You can exploit this. As soon as the "Go" signal appears, tap the Bottom-Left Red and Bottom-Center Red cups in rapid succession (within 0.5 seconds of each other). This queues both instantly, ensuring that by the time the dispenser reaches the center, it is already operating at maximum sand flow rate.
Predictive Switching
Do not react to the fill percentage; predict it. You know the Heart takes less volume. Therefore, start tapping your Third Pink Cup while the dispenser is still working on the Heart (around the 70% mark). By the time that Pink cup travels down the belt and activates, the Heart will be finished, and the dispenser will have naturally moved to the background corners. This saves you the 2-3 seconds it takes to realize the Heart is done and then tap the Pink cup.
The 5-Cup Challenge
The ultimate efficiency test is finishing the level with 1 cup remaining on the tray. To do this, you must be precise with your first two Red taps. If they land perfectly, you will not need the 3rd Red cup. Avoiding the 3rd Red cup saves you the time it takes for that cup to process through the machine. If you can leave the Bottom-Right cup untouched, you are guaranteed a top-tier time score.
Ignore the "Perfect" Polish
For a speed run, 99% is often sufficient if the game allows a tiny margin of error (usually 1-2 pixels). If the heart shape is distinct and the corners are covered, start mashing the "Next Level" button (if available) or simply stop tapping and let the timer run. Don't wait for every single pixel to vibrate into place if the shape is already recognizable.
Input Buffering
The game allows you to "buffer" inputs. If you know you need 3 Pinks eventually, don't wait for the first Pink to finish before tapping the second. Tap the second Pink while the first is still on the belt but hasn't started pouring yet. This keeps the queue moving at maximum speed and prevents the "belt empty" downtime that kills high scores.