
Level 178
HARDHow to solve Sand Loop level 178? Get instant solution for Sand Loop 178 with our step by step solution & video walkthrough. Sand Loop 178 tips and guide.
Play Sand Loop Now
Experience the puzzle challenge firsthand
Game Screenshots

Sand Loop Level Guides
Level 178 Overview: A Test of Logistics and Precision
The Core Visual Challenge
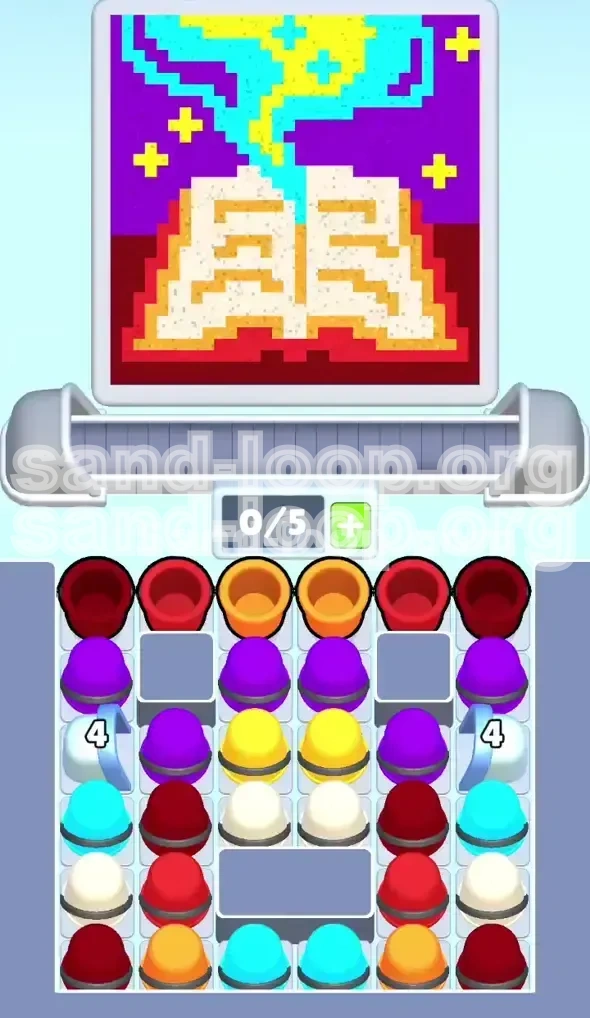
Sand Loop Level 178 is not just about filling colors; it is a masterclass in spatial management and prioritization. Visually, the level presents a highly segmented canvas dominated by a cool, vibrant palette in the upper regions—specifically cyan and deep purple—that contrasts sharply with the warmer, glowing center comprised of cream, gold, and orange tones. The base of the image anchors the composition with a heavy, dark maroon. This division dictates your strategy: the upper "cool" colors are abundant but visually distracting, while the central "warm" colors are critical but harder to access due to the level's architecture.
Understanding the Supply Tray Blockade
The defining feature of Level 178 is the restrictive supply tray setup. Unlike previous levels where resources were readily available, this level starts with significant bottlenecks. You will notice several gray "4" placeholder slots effectively locking away crucial cups—specifically your initial sources of orange and cyan. This means you cannot simply rely on a steady stream of resources; you must actively "unlock" your inventory by managing the conveyor belt flow efficiently. Ignoring these blockades is the primary reason for failure.
The Tight Economy
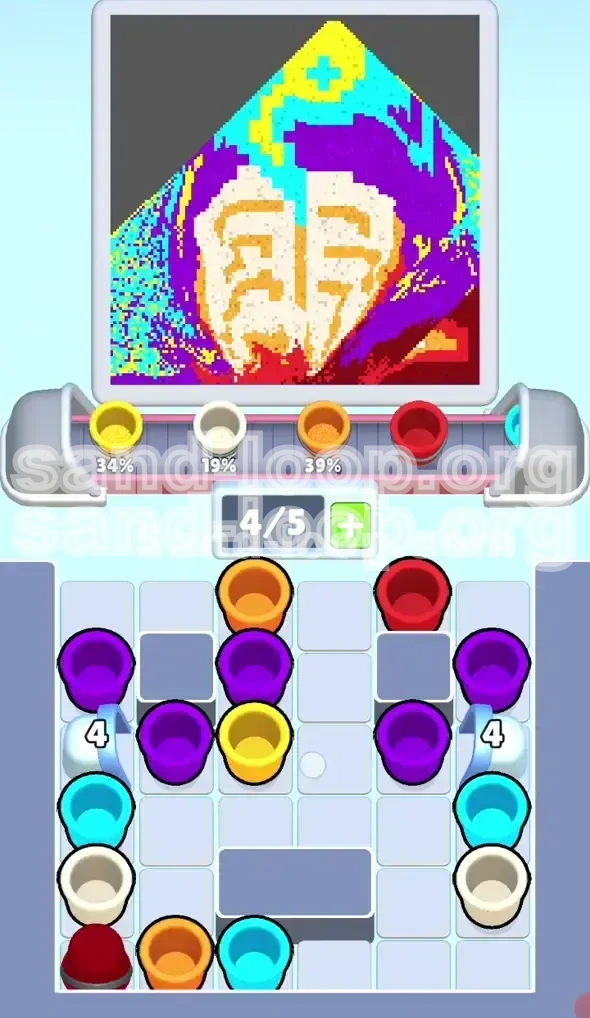
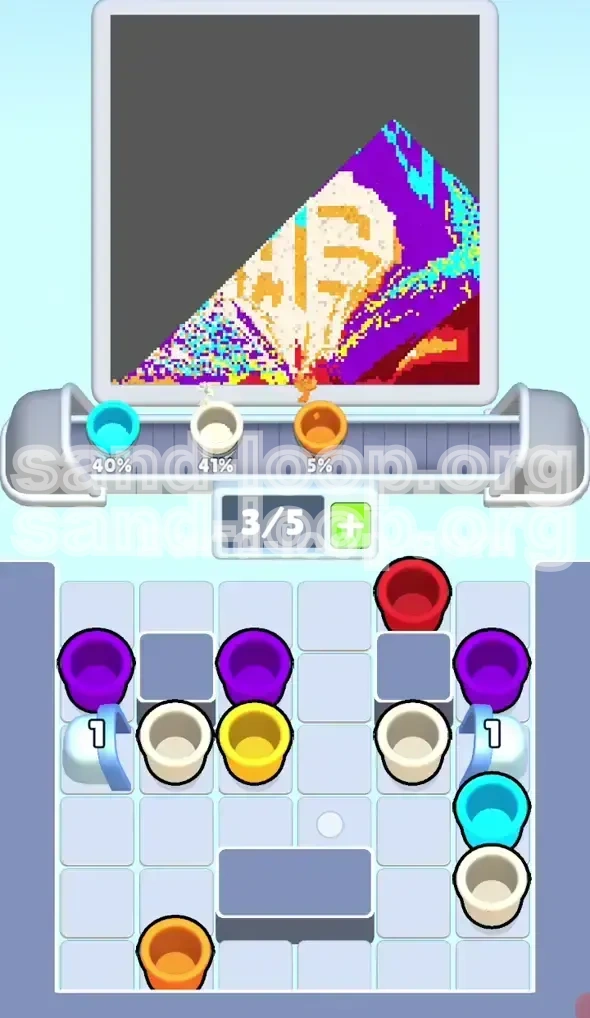
This level operates on a razor-thin margin of error. The resource economy is incredibly tight; you have almost exactly the number of cups required to fill the meters to 100%, with perhaps one or two spare cups if you manage perfectly. There is no room for "waste" pours—pouring a color that is already at 95% is a luxury you cannot afford. Every action must be deliberate, contributing to the specific percentage goals of the seven active color meters (Purple, Cyan, Yellow, Cream, Gold, Orange, Red).
Conveyor Belt Constraints
Your work platform—the conveyor belt—is limited to 5 slots. While this might seem like standard capacity, the complexity of Level 178 turns this into a strategic puzzle. If you fill all 5 slots prematurely with easily accessible colors (like the initial reds and purples), you will create a deadlock. You will be unable to load the unblocked oranges and cyans when they become available, forcing you to waste pours or stall the level. Mastery of this level requires treating empty slots as a valuable resource, keeping at least one slot open for emergency unblocking.
Why Players Fail
Most players fail Level 178 because they prioritize speed over sequence. The instinct is to keep the conveyor full and active. However, in this specific level, a full conveyor leads to a "logistical jam" where you are forced to pour the wrong colors just to clear space. The trap is thinking the game is about reflexes; it is actually about queue management. If you find yourself constantly overshooting the Purple meter while lagging behind on Cyan, you are falling victim to this opening trap.
Success Metrics
To guarantee victory, you need to maintain a balance where no single color meter exceeds 65% until all other colors have reached at least the 40% threshold. This "balancing act" ensures you don't lock yourself out of the game early. Victory is achieved not by rapid clicking, but by rhythmic, pulsing loading that mirrors the conveyor's movement. You are aiming for a synchronized finish where multiple meters hit 100% simultaneously, rather than a staggered finish that leaves you starved for a specific color.
Strategic Objectives: What You Need to Accomplish
Objective 1: The "Soft Open" Strategy
Your primary goal in the first 20 seconds is not to fill the canvas, but to clear the physical blockades in the tray. You must achieve a "Soft Open" by loading only the minimum number of cups required to start the belt moving. Focus on accessing the corners and sides where the "4" blocks hide the essential Orange and Cyan cups. If you successfully unblock the tray within the first minute, the rest of the level becomes a standard management exercise.
Objective 2: Meter Synchronization
You must prevent any single color from reaching 100% before the others hit at least 80%. The specific danger is the Purple and Red meters, which are fed by easily accessible stacks. Your objective is to deliberately starve these easy colors of attention, forcing the meters to stay in the 40-50% range while you aggressively load and pour the harder-to-access Cyan and Orange cups. Think of this as "reverse hoarding"—you are saving the easy work for last.
Objective 3: Slot Maintenance
Throughout the mid-game, your objective is to maintain a "4/5" belt occupancy. Never let the belt hit 5/5 capacity unless you are 100% certain of the next three pours. Keeping one slot open provides the flexibility to immediately grab a newly unblocked cup (like a surprise Cyan that pops up from under a stack) without having to waste a cycle dumping a different color. This "breathing room" is the difference between a controlled win and a chaotic loss.
Objective 4: The 85% Transition
Once the majority of your color meters hit the 85% mark, your objective shifts from "Unblocking" to "Sniping." At this stage, you must stop loading cups in advance. Your goal is to load exactly one cup, pour it, verify the meter, and then load the next. You are no longer managing a flow; you are performing precision surgery. Any deviation from this single-cup discipline in the final stretch will result in an overflow.
Objective 5: Zero-Waste Completion
The ultimate objective is to finish with 0% waste on any meter. Overshooting a color to 105% or 110% is sometimes recoverable in other levels, but in 178, it often depletes the limited cups you needed for a different color. Your goal is to finish the level with the conveyor belt empty or containing only unnecessary colors, having used every precious drop of the primary resources.
Step-by-Step Walkthrough: The Controlled Load Method
Phase 1: The Initial Extraction (0-30 Seconds)
Start the level by scanning the tray. Ignore the big stacks of Red and Purple in the center for a moment. Look for the Cyan cups in the corners and the Orange cups flanked by the "4" blocks. Action: Load only two cups to start. Pick one Cyan and one Orange if they are unblocked. If they are blocked, load just one Purple to get the belt moving, then wait. Do not fill the belt. Let those first cups travel to the pour point. As they pour, the tray will shift. The moment a gray "4" block moves, grab the cup it was hiding. This is the most critical moment of the level.
Phase 2: Establishing the Rhythm (30-60 Seconds)
Once you have successfully freed two or three of the blocked cups (specifically the Oranges and Cyans), you can begin filling the conveyor. Action: Alternate your loading. Load a Cyan, then an Orange, then a Yellow. Avoid loading Purples or Reds unless the belt is completely empty. You want to build up your "low percentage" colors (Cyan/Orange) to match the "high percentage" colors (Purple/Red). By the end of this phase, all your meters should be hovering between 30% and 45%. If Purple hits 50% while Cyan is still at 20%, you are loading too much Purple.
Phase 3: The Balancing Act (60-90 Seconds)
You are now in the mid-game. The belt should be moving steadily. Action: Look at the meters. Identify the color with the lowest percentage (let's say it's Gold at 35%). Load two Gold cups in a row. Then, look at the highest color (let's say Red at 60%). Skip loading any Red cups for the next full cycle. This active "gap management" allows the lower colors to catch up. Keep the belt at 4/5 capacity. Use the travel time (the 2-3 seconds it takes for a cup to reach the pour point) to scan the tray for the next low-percentage color.
Phase 4: The Clearout (90-110 Seconds)
At this stage, you should have most colors in the 70-85% range. The tray is likely looking messy, with fewer cups available. Action: Stop "batch loading." Do not fill the belt with 4 cups at once. Switch to a 1-by-1 rhythm. Load a cup, watch it pour, check the meter. If the meter is close to full (90%+), skip the next cup of that color and switch to something else. If you are worried about running out of time, don't—the belt is fast enough. Focus on accuracy.
Phase 5: The Final Stretch (Last 10%)
This is the slow-motion phase. You likely have 3-4 colors sitting at 92-98%. Action: Treat every pour as a potential game-ender. If you pour a cup and the meter hits 100%, immediately look for a different color. Do not queue up a second cup of the same color. If you accidentally overshoot a color to 102%, don't panic. Just immediately stop loading that color and focus entirely on the remaining colors. You can usually absorb one small mistake, but two will cost you the game.
Phase 6: Cleanup and Victory
In the final seconds, you might have one color lingering at 98% with no cups of that color visible on the tray. Action: Load other colors and pour them to force the tray to cycle or refresh. Often, the last cup you need is hiding behind a "blocked" slot or a stack of other cups you haven't moved. Keep the belt moving with "filler" colors just to shake the tray loose and reveal that final winning cup.
Color Order and Priority Guide
Priority Tier 1: Cyan and Orange (The Bottlenecks)
These are your most critical resources. Cyan is often tucked in the corners, and Orange is frequently blocked by the "4" gray slots. If you ignore these until the end, you will run out of time or conveyor space. Strategy: You should aim to have these colors at 50% completion before your "easy" colors (Purple/Red) hit 60%. If you see a Cyan cup, load it immediately, even if you have a Purple cup waiting. Prioritizing the hard-to-get cups early prevents the "last-minute scramble" that causes jams.
Priority Tier 2: Yellow and Cream (The Connectors)
These colors serve as excellent filler during the mid-game. They are usually abundant but not overly so. Strategy: Use Yellow and Cream to fill the gaps in your conveyor belt when you are waiting for Cyan or Orange to become accessible. They are safe "middle of the road" colors that keep your belt moving without pushing any single meter into the danger zone too quickly.
Priority Tier 3: Gold (The Late Bloomer)
Gold is often located in the center of the tray and is easy to load, but it fills up deceptively fast. Strategy: Treat Gold as a late-game color. Pour it casually in the mid-game, but switch it off aggressively once it hits 80%. It is very easy to overshoot Gold because the cups are often grouped together, making it tempting to load two or three in a row. Resist that urge.
Priority Tier 4: Red and Purple (The Overflow Risks)
These are the "trap" colors. They are visible, stacked high, and easy to load from the very start. Strategy: actively restrict your intake of Red and Purple. In the opening phase, load them only if the belt is empty and you have no other choice. Your goal is to use these colors to "chase" the other meters. If Cyan is at 80% and Purple is at 60%, *then* you spam Purple. Using Purple early is a guaranteed way to lose.
Common Mistakes to Avoid
The "Full Belt" Syndrome
The most common error is treating the 5-slot conveyor like a closet that needs to be stuffed full. When you load all 5 slots early on, you lose the ability to react. If a Cyan cup becomes available, you have no slot to put it in. The Fix: Keep 1 slot empty. It feels inefficient to run a half-empty belt, but in Level 178, that empty slot is your "strategic reserve" for unblocking the tray.
The "Tunnel Vision" Pour
Players often stare at the active cup pouring at the top of the screen and ignore the meters below. You pour a Purple, look down, and realize Purple was already at 98%. The Fix: Watch the meters, not the cup. The cup pouring animation happens automatically; your eyes should be on the percentages. Anticipate the fill: if a meter is at 95%, assume the next cup will finish it and prepare to switch colors immediately.
Premature Unblocking Attempts
You see a gray "4" block and try to drag the cup underneath it before the block has moved. This wastes time and can glitch the tray logic. The Fix: Only interact with cups that are fully visible. If you see a sliver of a cup under a block, wait. Let the belt cycle, clear a few slots, and the block will slide away naturally. Patience with the tray mechanics is faster than fighting them.
Ignoring the "Hidden" Corners
The visual design draws your eye to the center, but the corners often hold the rare colors. The Fix: Make a conscious sweep of the four corners of the supply tray every 10 seconds. This simple habit ensures you never miss a lonely Cyan cup hiding in the bottom-left while you were busy managing the Gold stack in the middle.
Panic-Loading at the End
When the timer is low (if there is one) or when you see multiple colors near 90%, players tend to speed up and mash buttons. The Fix: This is the exact moment to slow down. The closer you get to 100%, the higher the probability of an overflow. Slow, rhythmic single-taps are the only way to close out Level 178 without overshooting.
Speed Run and Pro Tips
The "Predictive Load" Technique
Advanced players utilize the 2-second travel time of the conveyor to "predict" their needs. The Tip: If your Purple meter is at 50% and you have a queue of 3 cups already on the belt, do not load more Purple even if it looks low. Those 3 cups are about to dump a lot of paint. Load the color you *will* need 5 seconds from now, not the one you need right now. This forward-thinking prevents the "sudden overflow" surprise.
Using "Filler" Colors to Manipulate the Tray
Sometimes you need a cup that isn't currently accessible because it's buried under a stack. The Tip: Load and pour a "useless" color (a color you have already finished or one that is at 90%) just to clear space in the tray. This forces the tray to refresh and slide the stacks, often revealing the specific cup you actually need. Use waste pours strategically to mine for resources.
The Reset Rhythm
If you mess up the first 10 seconds (e.g., you loaded too much Purple), don't try to fight it. The Tip: Immediately restart the level. The first 15 seconds of Level 178 dictate the entire run. If you don't unblock the Cyan and Orange early, the math simply won't work out at the end. A quick restart is faster than a 2-minute struggle that ends in failure.
Pattern Recognition
Level 178 has a fixed layout. The Tip: Memorize the location of the "4" blocks. They are always in the same spots. Knowing that the Left-4 block hides an Orange cup allows you to plan your belt loading *before* the level even starts. You can preemptively leave that slot open on your mental map, saving precious seconds of reaction time.
Booster Strategy (If Applicable)
If you are using a version of the game with power-ups, The Tip: The only useful booster here is the "Slot Expander" (if available) which gives you a 6th slot. This gives you the breathing room to unblock everything safely. Do not use the "Time Slow" booster; the delay makes it harder to judge the rhythm of the belt. The "Undo" button is also viable if you misclick on a color during the final 10%.