
Level 179
HARDHow to solve Sand Loop level 179? Get instant solution for Sand Loop 179 with our step by step solution & video walkthrough. Sand Loop 179 tips and guide.
Play Sand Loop Now
Experience the puzzle challenge firsthand
Game Screenshots
Sand Loop Level Guides
Sand Loop Level 179: The Ultimate Strategy Guide
Understanding the Landscape Puzzle
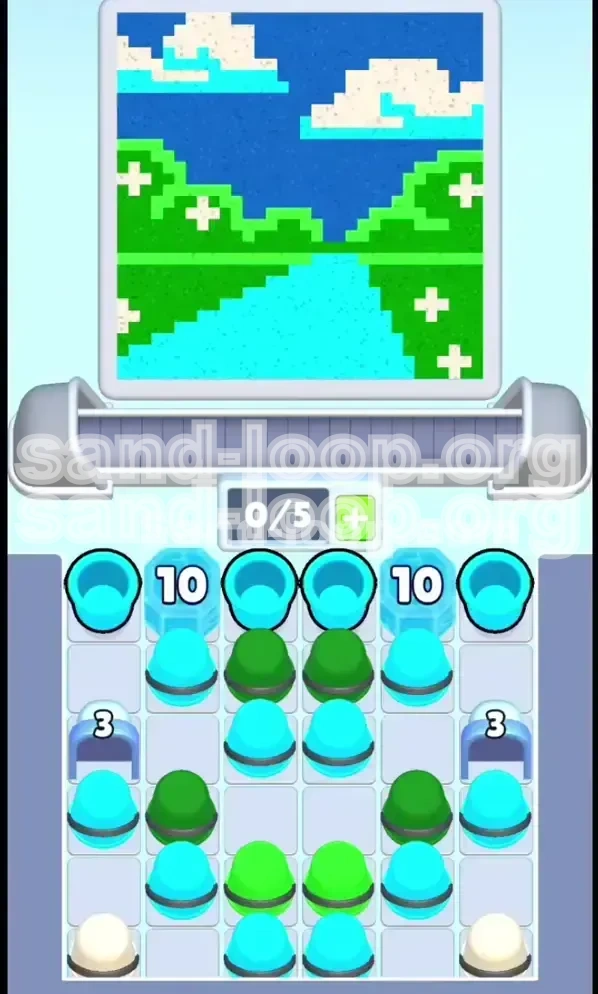
Sand Loop Level 179 presents a deceptive scenic challenge. The canvas features a vibrant blue sky, cyan clouds, and a cyan water feature cutting through lime green hillsides. While visually simple with its three-color palette (Blue, Cyan, Green), the level requires precision. You are not just filling space; you are managing a strict economy of movement. The primary difficulty lies not in the painting itself, but in the logistics of your cup tray and the limited capacity of your conveyor belt.
Core Objectives for Victory
Your goal is to achieve 100% completion for all three color zones: Sky (Blue), Water/Clouds (Cyan), and Hills (Green). To do this, you must successfully navigate a 0/5 conveyor belt system. You start with a specific stack of cups: Cyan (ranked 10, 10, 3, 3), Green (ranked 10, 10), and several obstructing Cream/White cups. You must clear the obstructing cups and utilize the colored cups in a specific sequence to avoid overflowing any single color.
The Slot Economy Challenge
The defining constraint of Level 179 is the 5-slot conveyor limit. You cannot simply load all your cups at once. You must adopt a "Load > Pour > Release" rhythm. If you load a 5th cup while the previous one hasn't started pouring, you create a deadlock that ruins the run. Efficiency isn't about speed; it's about timing your loads to ensure there is always an empty slot ready for the next necessary cup.
Why Most Players Fail
Most attempts fail due to "Color Lock." Players often pour both high-value Cyan 10-cups immediately, filling the water and clouds to 90% while the Green hills remain at 0%. By the time they clear the Green cups, they have no room to maneuver, and the remaining Green 10-cups overshoot the target. The solution requires mixing small and large pours to keep all progress meters within a 20-30% range of each other.
Understanding the Tray Setup
Your tray is a trap. The critical Green 10-cups are sandwiched between Cyan cups and blocked by unusable White cups. You cannot access the Green cups until you have moved the initial Cyan obstacles. Furthermore, the White/Cream cups on the edges are useless "filler" that clutter your view. Do not attempt to load them; treat them as walls that limit your access to the usable colors in the center stack.
Phase 1: The Opening Sequence (Moves 1-5)
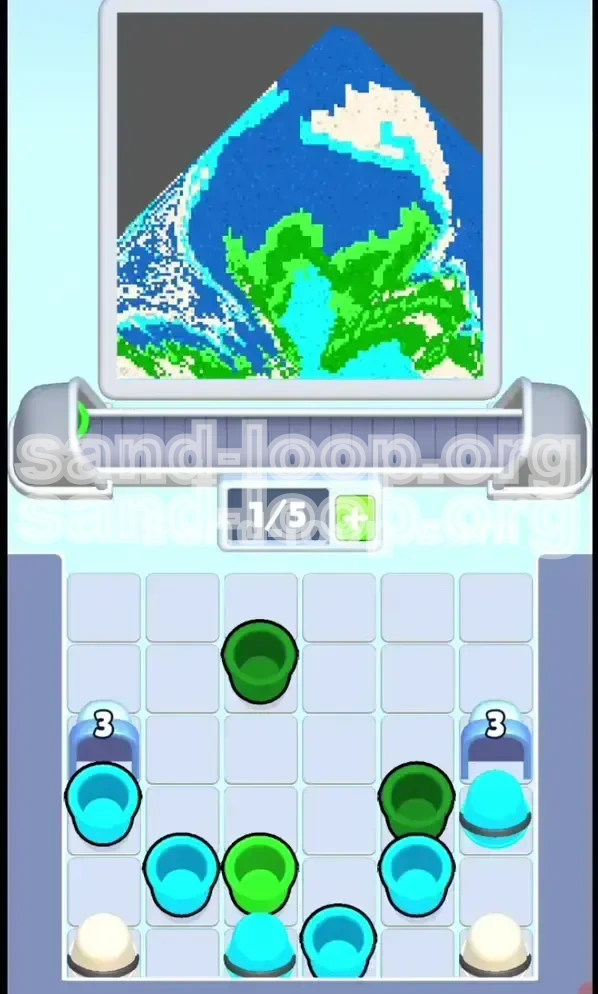
Step 1: Clearing the Initial Cyan Blockers
The level begins with Green cups inaccessible. You must load and pour the Cyan cups first to free up the center stack. Start by loading one of the Cyan 10 cups from the top layer. Do not load both immediately. Load one, wait for it to reach the pour point, and tap it to fill the cyan water zones.
Step 2: Managing the First Pour Cycle
While the first Cyan 10 is pouring, load the Cyan 3 cup. This is a crucial "spacer" move. The smaller 3-ranked cup prevents you from hitting the Cyan cap too early. As the Cyan 10 finishes and leaves the belt, immediately tap the Cyan 3 to pour. This keeps your conveyor belt flowing at 2/5 or 3/5 capacity, leaving you with flexible slots for the upcoming Green phase.
Step 3: Unblocking the Green Supply
Once the first wave of Cyan is pouring, the center Green 10-cups become accessible. Do not rush to load them yet. Ensure your conveyor has at least 2 empty slots. If you load a Green cup while the belt is full (5/5), you lose the ability to correct mistakes. Wait for the Cyan 3 to finish pouring, creating a buffer, before grabbing your first Green cup.
Step 4: The First Green Pour
Load the Green 10 cup. Your target for the Green hills is roughly 40-50% after this pour. Tapping the cup immediately upon loading is risky if other cups are still on the belt. Wait for a clear moment, then tap. Watch the progress meter closely. If the Green meter rises too fast, you are committed to a fast pace; if it rises slowly, you have time to balance with Cyan.
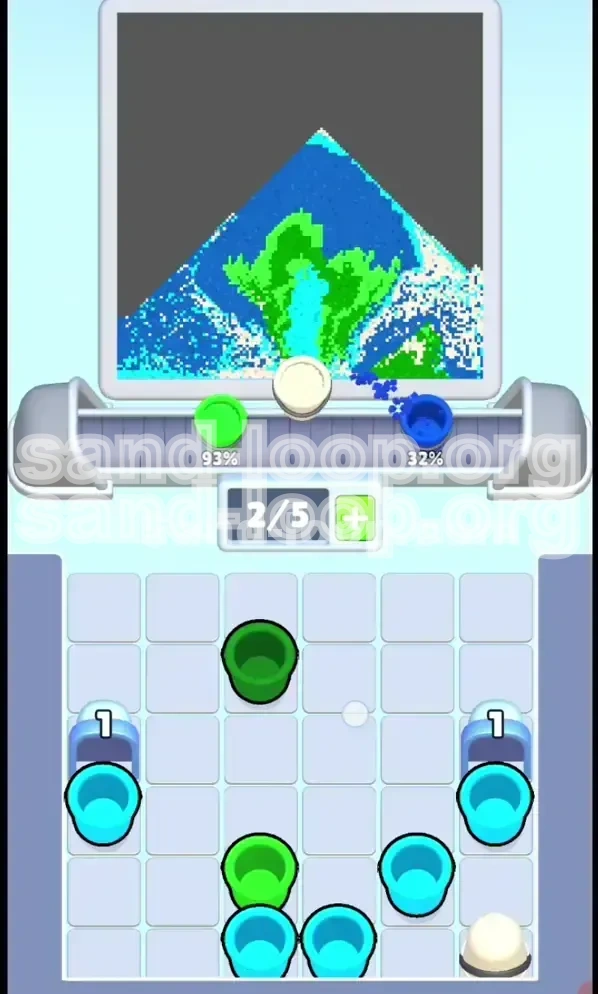
Step 5: Balancing the Meters
At this stage (Move 5-6), your Cyan should be around 40-50%, and Green around 30-40%. If one color is lagging behind significantly (e.g., Cyan is 60% and Green is 20%), prioritize the lagging color in the next load cycle. Never let one color hit 80% while another is below 30%. This imbalance is the primary cause of failure in the late game.
Phase 2: The Mid-Game Logistics (Moves 6-12)
The "Sandwich" Strategy
By move 8, you should be in a rhythm of alternating colors. The ideal pattern is: Cyan > Green > Cyan. This "sandwiching" ensures that neither color dominates the canvas. If you have two Green 10s left, try to place a Cyan pour between them. This breaks up the Green fill rate and allows the Cyan meter to catch up, preventing the Green overflow that ruins many runs.
Using Rank-3 Cups as Precision Tools
Do not treat the 3-ranked cups as weak; treat them as surgical tools. If a color is at 85% and you only have a 10-ranked cup left, you are likely to overshoot and lose. This is where the Cyan 3 or Green 3 (if available) shines. Use them to "nudge" a meter from 92% to 100% exactly. If you don't have small cups left, you must rely on the conveyor timing to let the 10-cup run its course without tapping early.
Monitoring Slot Capacity (The 4/5 Rule)
From move 6 onwards, adopt the 4/5 Rule. Never let your conveyor belt fill up completely unless you are 100% sure the next cup will pour immediately. Always keep one slot open as an "emergency brake." This open slot allows you to grab a sudden required cup or fix a timing error without causing a traffic jam on the belt.
Handling the White Cups
As the level progresses, the useless White/Cream cups might shift into the "pickable" zone. Ignore them. Loading a White cup is a waste of a slot. It clogs your conveyor and does not contribute to the color percentage. Even if the tray feels empty, do not grab a White cup just to have something on the belt. Patience is better than a useless cup.
Mid-Game Correction Protocol
If you realize you made a mistake (e.g., Green is at 95% but Cyan is only at 60%), stop loading Green immediately. Load the remaining Cyan cups onto the belt. Even if they sit there for a moment, getting them loaded is the priority. Pour them to catch up. If you run out of cups and the meters aren't full, you lose. Correct imbalances aggressively in the mid-game before the cups run out.
Phase 3: The End-Game Precision (Moves 13-15+)
The Final Countdown Logic
Enter the final phase with a plan. You should have roughly 3-4 cups left. Ideally, this is a mix of large and small cups, or two different colors. If you have two cups of the same color (e.g., two Cyan 10s) but only need 10% more Cyan, you are in danger. You must hope the level auto-fills the remainder or that the cups pour slowly. Ideally, you saved a 3-ranked cup for this exact moment.
Preventing the "Last Cup" Overflow
The most common loss is watching the last drop of sand overflow the tube. To avoid this, stop tapping the cup once the meter hits 100%. The game usually registers a win the moment the bar fills, even if sand is still in mid-air. Do not get greedy and try to "empty" the cup completely; focus on the meter. The moment you see the "Complete" checkmark or color shift, you can usually stop interacting with that cup.
Dealing with "Short" Cups
Sometimes, despite perfect play, you will be 2-3% short on a color with no cups left. This usually happens if you relied too much on 3-ranked cups earlier. If you are consistently finishing at 97%, you need to be more aggressive with your 10-ranked pours in the mid-game (Phase 2). Don't be afraid to let a 10-cup pour fully if you are behind on that color.
The "Three-Color" Sync
In the final moves, try to sync your pours so that all three colors (Blue, Cyan, Green) finish within seconds of each other. This minimizes the risk of one color sitting at 100% while you struggle to finish another. If one color finishes early, it is out of the way, freeing up your mental focus for the remaining two.
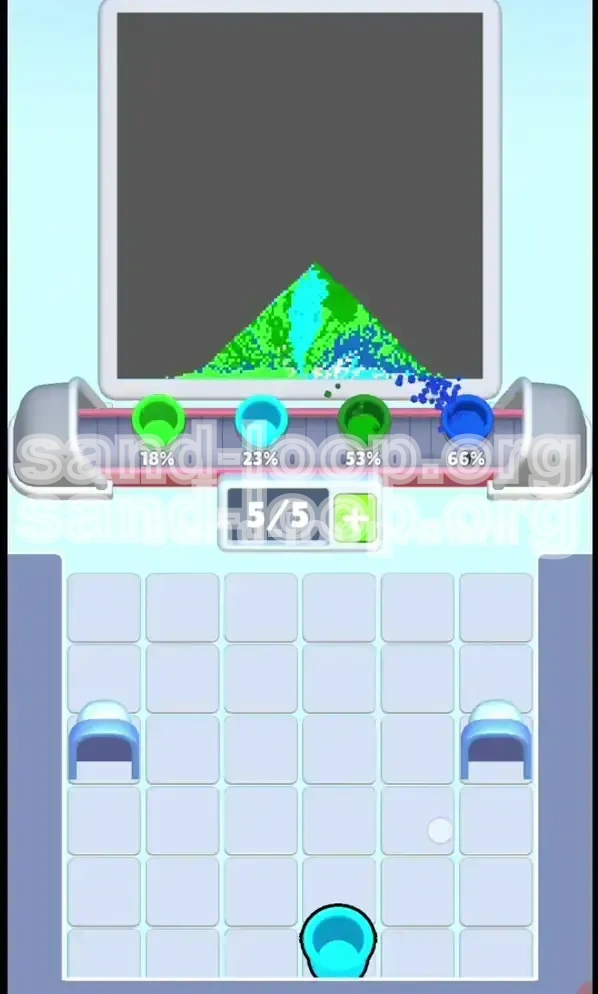
Winning with Time to Spare
A successful run of Level 179 often ends with 1 or 2 empty slots on the conveyor and all meters full. This "clean finish" is the result of good pacing. If you finish with a full belt of unused cups, you played too safely. If you finish with zero cups left and barely made the targets, you cut it close. Aim for the clean finish—it’s the most repeatable strategy.
Advanced Tactics & Troubleshooting
Diagnosing the "Cyan Bottleneck"
Symptom: You are stuck at 50% Green and 90% Cyan with no Green cups left.
Cause: You poured both Cyan 10s before unblocking the second Green 10.
Fix: On your next restart, force yourself to load the Green 10 immediately after the *first* Cyan 10 finishes. Do not load the second Cyan 10 until the Green 10 is on the belt and pouring.
Speed Running the Level
For a fast completion time, ignore the 4/5 rule. Pre-load your belt. Load a Cyan 10, then immediately load a Green 10 behind it, then a Cyan 3. Tap them as fast as the game allows. This is high-risk, high-reward. It relies on the game's physics allowing rapid taps. If you are skilled, you can finish Level 179 in under 45 seconds using this aggressive method, but one jammed belt ends the run instantly.
Psychological Tips for Focus
Level 179 is mentally taxing because the "wrong" cups (White) look tempting when you are stressed. When the screen gets chaotic, visually block out the top and bottom rows of the tray. Focus your eyes only on the center column where the Green and Cyan cups sit. Pretend the White cups do not exist. This reduces cognitive load and helps you make better decisions.
Understanding "Padding" Percentages
Sometimes, a color meter might move slower than the sand pours. This is "padding." The game gives you a small margin for error (usually 1-2%). However, never rely on this. Always aim to stop the pour *exactly* at the line. Assuming padding exists is how you end up with a 102% overflow loss screen.
Hardware/Performance Note
If you are playing on a slower device, the "lead time" (the delay between tapping a cup and it pouring) increases. Adjust your strategy by loading cups even earlier than usual. If you are on a fast device, you can afford to wait until the last second to load. Adapt to your device's lag; don't fight it.