
Level 190
HARDHow to solve Sand Loop level 190? Get instant solution for Sand Loop 190 with our step by step solution & video walkthrough. Sand Loop 190 tips and guide.
Play Sand Loop Now
Experience the puzzle challenge firsthand
Game Screenshots
Sand Loop Level Guides
Level Overview: The Perched Bird Challenge
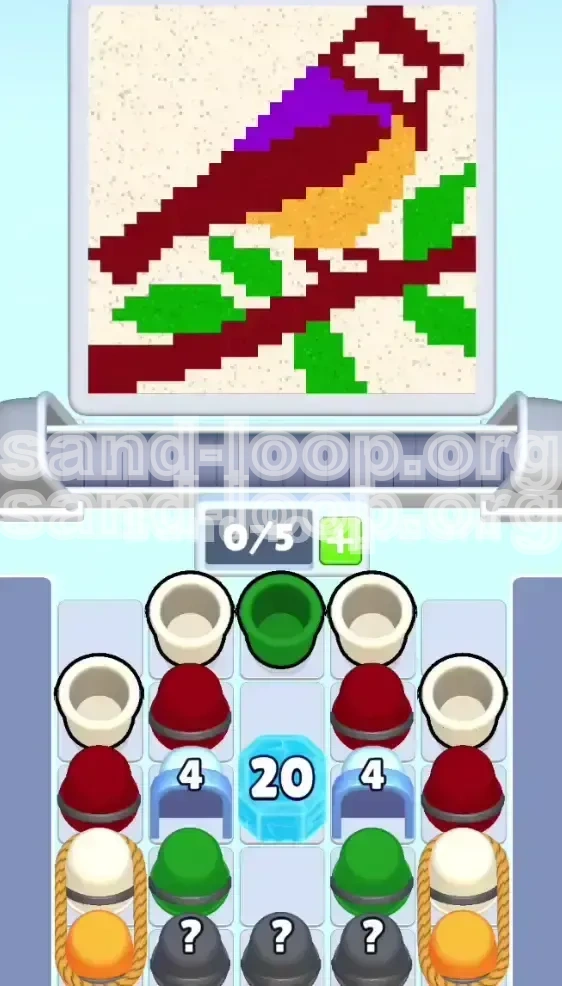
Welcome to Level 190 of Sand Loop, a stage that tests your patience and strategic planning rather than your speed. Unlike previous levels where reflexes ruled, this stage is a bottleneck puzzle designed to halt your progress if you rush. The visual theme features a beautiful, pixelated songbird—resembling a finch or tanager—perched on a branch. The aesthetic is charming, but the layout is brutal.
The primary difficulty here stems from the severe restriction of space. You are working with a board that is effectively cut in half. A massive "Ice Block 20" sits squarely in the center column, acting as a gatekeeper that prevents you from accessing the rear supply of cups until you have cleared a significant portion of the board. This creates a "supply line" crisis where you must carefully manage the front-line resources to unlock the back.
Furthermore, the level introduces a high-risk variable with the "Mystery Cups" concealed at the bottom row. These are essential for completing the bird's wing but will result in an instant failure if triggered at the wrong time. You must navigate color dependencies, manage gate counters, and time your moves perfectly to succeed.
Clear Objectives and Goals
To secure a victory on Level 190, you need to move beyond simple color matching and think in terms of "unlocking layers." Your primary goal is not just to paint the bird, but to dismantle the board's defenses systematically.
Master the Color Dependencies
Before you make a single tap, understand the color hierarchy. The bird consists of five distinct zones: Deep Red (branches/tail), Bright Green (leaves), Orange (belly), White (face), and Purple (wing). The challenge is that these colors are not available simultaneously. You have access to Red and Green immediately. White and Orange are locked behind side gates. Purple is hidden entirely. Your objective is to clear the visible colors to trigger the release of the hidden ones.
Neutralize the Central Blockade
The "Ice Block 20" in the center is a timer, not a target. You cannot break it directly with a hammer or a specific combo. It functions as a counter that decreases by one for every cup you clear elsewhere on the board. Your objective is to ignore the temptation to focus on it; instead, treat it as a progress bar. You must clear 20 cups from the *perimeter* to shatter this block and access the supplies behind it.
Safely Extract the Mystery Paint
The most critical objective is to successfully convert the Mystery Cups at the bottom into Purple Paint for the wing. These cups are gray and unmarked. If you send them to the nozzle while it is dispensing Red or Green, they will become contaminated, and you will likely run out of moves to fix the wing. You must wait for the specific purple color cycle to trigger these cups.
Efficient Conveyor Management
You have a 5-slot conveyor belt, which seems spacious, but it will fill up quickly with "junk" colors you don't need immediately. Your goal is to keep the belt fluid. Do not clog it with colors that aren't currently active on the board. If you clog the belt, you cannot cycle the dispenser to find the colors you actually need.
Strategic Walkthrough: Phase by Phase
This guide breaks the level down into three distinct phases. Follow these steps in order to maintain control over the board.
Phase 1: The "Green and White" Opener
The start of the level is a deceptive trap. You will see a massive amount of Red cups, but you should not start with them if possible.
- Step 1: Immediately look for the Bright Green Cup located in the top center row. This is your safest starting move. It clears space and fills the leaf background.
- Step 2: Locate the two White Cups on the flanks. These are high priority because they fill the bird's face markings. Tapping them early clears the top row and pushes the board forward.
- Step 3: Watch the Nozzle Color. This is crucial. Do not simply tap every cup you see. Only tap a cup if the nozzle is currently pouring that color. If the nozzle is Red, do not tap the Green cup. Wait for the cycle to switch.
- Step 4: Once the top row is cleared, assess the "Blue Gates" marked with a "4". These are your next roadblock.
Phase 2: Breaching the Side Gates
With the top clear, you are now staring at the Blue Gates. These block the lower tiers of the side columns.
- Step 1: Focus entirely on the Deep Red Cups on the far left and right edges. The branches require a lot of red, so these cups are abundant.
- Step 2: Feed Red cups onto the belt consistently. As you clear these, the internal counter on the Blue Gates will decrease.
- Step 3: Ignore the center column for now. It is blocked by the Ice Block. Treat the left and right 2 columns as your active play area.
- Step 4: Once you have cleared 4 cups adjacent to the gates, they will shatter. This reveals the Roped Cups (White/Orange stacks) underneath.
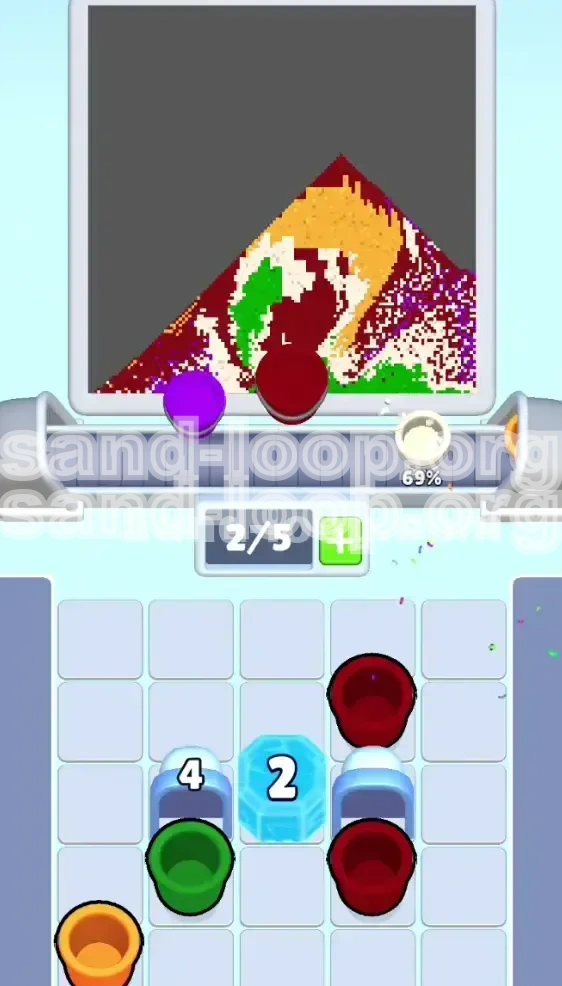
Phase 3: The Ice Block and Mystery Cups
After breaching the gates and clearing the roped stacks, you will have likely cleared enough cups to trigger the Ice Block 20 destruction.
- Step 1: Clear the remaining cups in the center. The Ice Block will shatter automatically when the counter hits zero.
- Step 2: You will now see the bottom row containing the Gray Mystery (?) Cups.
- Step 3: STOP. Do not tap these yet. Look at the bird's wing. It is the only unpainted section left.
- Step 4: Wait for the dispenser to cycle. You need Purple. Since there are no purple cups on the board, the nozzle will eventually turn purple to dispense the paint for the hidden cups.
- Step 5: As soon as the nozzle turns Purple, tap the Mystery Cups. They will fill with purple, completing the wing and the level.
Color Order and Processing Logic
Understanding the sequence in which colors must be processed is the key to avoiding a "soft lock" where you have moves left but no valid moves to make.
The Primary Colors (Red and Green)
Priority: High (Immediate)
Red and Green are your "workhorse" colors. They appear in the top rows and are used for the background elements (branches and leaves). You should process these first for two reasons: they clear the most space, and they help reduce the counters on the Blue Gates and Ice Block. Do not hold onto Red cups; process them as soon as the nozzle allows.
The Secondary Colors (White and Orange)
Priority: Medium (Mid-Game)
These colors are locked behind the Blue Gates. You cannot access them until you have processed enough Red/Green cups. Once the gates are open, prioritize the White cups for the face details before moving to the Orange belly. Orange is often plentiful, so don't panic if you have to let a few sit on the belt while you wait for the nozzle to cycle.
The Tertiary Color (Purple)
Priority: Critical (End-Game)
Purple is the "boss" color of this level. It is the scarcest resource. You only get one shot at the Mystery Cups. If you process Purple too early (before the Mystery Cups are accessible), you waste it. If you process it too late (after filling the cups with the wrong color), you fail. The rule is simple: Purple is strictly for the Mystery Cups and nothing else.
The Danger Zone Sequence
The most dangerous moment in the level is the transition from Mid-Game to End-Game. When the Ice Block breaks, the board shifts. New cups might slide into view. Ensure you have cleared all non-Mystery cups from the bottom row before you start hunting for the Purple nozzle cycle. This minimizes the risk of accidentally tapping a cup while the nozzle is on the wrong color.
Nozzle Cycling Management
The nozzle follows a specific logic: it prioritizes colors that are currently on the conveyor belt. If you want Purple to come up, you must clear the Red, Green, White, and Orange cups from the belt first. If your belt is full of Red cups, the dispenser will keep giving you Red. You must clear the belt (temporarily stalling if necessary) to force the dispenser to cycle into the hidden Purple color.
Key Tips for Success
These practical tips will help you navigate the trickier aspects of Level 190 without frustration.
Tip #1: The "Empty Belt" Strategy
When you are ready to reveal the Purple paint for the Mystery Cups, clear your conveyor belt completely. Do not have any cups waiting on the line. An empty belt forces the game engine to check the next required color for the level (Purple). If you have other cups on the belt, the game will prioritize dispensing paint for them, delaying the Purple switch.
Tip #2: Identifying the Mystery Cup Location
Scan the bottom row before you even start clearing the top. Memorize exactly where the Gray (?) Cups are located. Usually, in this level, they are positioned at the very bottom center. Knowing their location prevents you from blindly tapping the bottom row when the gates open and accidentally feeding them into the wrong color stream.
Tip #3: Don't Fear the Pause
This is not a speed run. If the nozzle is cycling through colors you don't need (e.g., it's pouring Blue for a stage that doesn't have blue, just as an example), or if it's pouring Green but you only need Red, it is better to pause and wait for the cycle than to force a move that clogs your belt. Patience prevents "board clog."
Tip #4: Gate Counter Awareness
Keep a mental count of how many cups you have cleared near the Blue Gates. The gates require 4 clears. If you have cleared 3 and tap a cup that doesn't clear the 4th (because it was the wrong color match), you have wasted a cycle. Ensure every tap when a gate is close to breaking counts towards the break.
Tip #5: The Center "Dead Zone"
Train your eyes to ignore the center column for the first 50% of the match. The Ice Block 20 makes that column unusable. Constantly scanning it is a waste of mental energy. Focus your visual attention on the left 2 columns and right 2 columns exclusively until the center explodes.
Common Mistakes to Avoid
Players often fail Level 190 not because they lack skill, but because they fall into specific traps designed by the level developers.
Mistake #1: The Premature Mystery Tap
This is the number one cause of failure. Players get into a rhythm of tapping cups and see the Gray Mystery Cups appear. They tap them out of habit. The nozzle is currently pouring Red (because they were clearing branches). The Mystery Cup fills with Red. Now the wing is ruined, and there are no more Purple sources. Solution: Never tap a Gray cup unless you have explicitly verified the nozzle is Purple.
Mistake #2: Obsessing Over the Ice Block
Players see the "20" and think they need to match colors near it or hit it with something. They waste moves trying to interact with it directly. Solution: Ignore it. It is a passive mechanic. Playing the level correctly (clearing sides) will break it automatically. Trying to force it will only drain your moves.
Mistake #3: Clogging the Conveyor
In the early game, players tap every Red and Green cup they see, filling the 5-slot belt instantly. Then, a White cup becomes available, but they can't use it because the belt is full of Red/Green waiting for a nozzle switch that takes too long. Solution: Keep 1 or 2 slots open on your belt at all times to allow for new cups to slide in from the sides.
Mistake #4: Color Confusion
The lighting in this level can make the Deep Red look like Brown or the Bright Green look like Yellow. Pouring the wrong color into a section doesn't just fail that cup; it messes up your nozzle rhythm. Solution: If you are colorblind or unsure, rely on the position of the cup (e.g., top center is always Green) rather than just the hue.
Speed Run and Optimization Tips
Once you have beaten the level and want to achieve a high score or a fast time, you can optimize your playstyle.
Pre-Planning the Path
Before the timer even starts (or before your first tap), trace the path of the bird with your eyes. Identify the "bottleneck" colors. Knowing that Purple is the final boss allows you to rush through the Red/Green phase much faster, as you know you don't need to "save" any moves for the early game.
Batch Processing
Instead of tapping one cup, waiting for the fill, tapping the next, try to batch your inputs. If the nozzle is Green and there are three Green cups accessible on the board, tap all three in rapid succession. This reduces the downtime spent waiting for the nozzle to move into position.
Using the "Shuffle" to Your Advantage
If you have a "Shuffle" power-up or ability, save it for the moment the Ice Block breaks. Often, the board state after the break is messy, with cups scattered far apart. A shuffle can cluster the Mystery Cups together, allowing you to fill them all in one single Purple nozzle cycle.
Minimizing Nozzle Travel
The nozzle physically moves from left to right. Tapping cups on the far left when the nozzle is on the far right takes longer. Try to clear columns in a spatial sequence (Left to Right) so the nozzle doesn't have to traverse the whole screen for every single cup. This saves fractions of seconds that add up.