
Level 195
HARDHow to solve Sand Loop level 195? Get instant solution for Sand Loop 195 with our step by step solution & video walkthrough. Sand Loop 195 tips and guide.
Play Sand Loop Now
Experience the puzzle challenge firsthand
Game Screenshots
Sand Loop Level Guides
Level Overview: The "Floral Grid" Challenge
Visual Breakdown of the Canvas
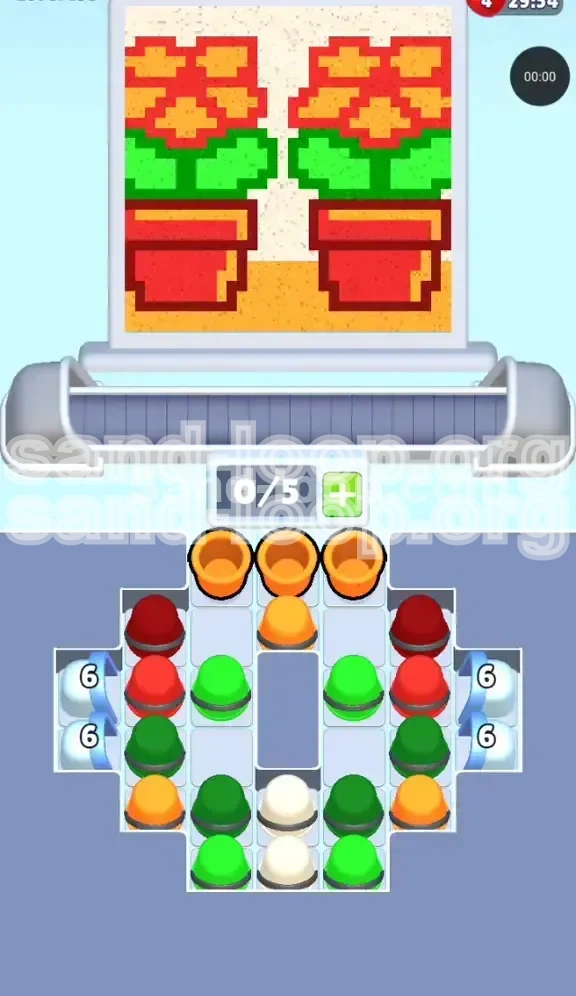
Level 195 presents a vibrant, pixelated floral arrangement set against a light beige background. The composition is roughly split into three horizontal zones. The top third is dominated by large, circular red and yellow flower heads. The middle section consists of dense green foliage and leaves. The bottom third features rustic brown planter boxes which require a mix of orange and dark red tones. While the beige background seems prominent, it fills in automatically as you pour other colors, so you should focus 90% of your attention on the four primary colors.
Conveyor Belt Constraints
The specific difficulty of this level lies in your limited workspace. You are granted a conveyor capacity of only 5 slots out of a potential 7. This means if you load 5 cups, the belt locks up completely until a cup is used or discarded. The supply tray below is chaotic, featuring tightly stacked columns where critical colors (specifically Green and Red) are often buried under less urgent Whites or Creams. Managing this bottleneck is the core gameplay loop.
Progress Bar Distribution
To achieve victory, you must balance four distinct color meters simultaneously. Based on the pixel density of the image, here is the approximate color distribution you need to hit:
- Red: ~30% (Heavy requirement for flowers and boxes)
- Green: ~25% (Foliage is dense but concentrated)
- Yellow: ~20% (Flower centers and highlights)
- Orange: ~15% (Accents and box shading)
- Background: ~10% (Fills passively)
The "Stacking" Mechanic
Unlike earlier levels, the cups in this stage are not always immediately accessible. The game uses a stacking mechanic where taking a White cup might reveal a Green cup, or taking a Red cup might unblock a Yellow one. The mistake most players make is treating the belt like a buffet line; instead, you must treat it like a puzzle where taking a cup is a strategic move to unlock the next one.
Clear Objectives: Your Mission Goals
Maintain Slot Fluidity
Your primary objective is not just to fill colors, but to keep the belt moving. You must never allow the conveyor to reach a full 5/5 lock state unless you have a specific plan to clear it immediately. Aim to keep 1 to 2 slots empty at all times. This "buffer space" allows you to grab a newly exposed color from the tray without being forced to pour something you don't need.
Prevent Color Overflows
Overfilling a single color by even 1% results in failure. Because the background fills naturally, the greatest risk is accidentally pouring Red or Orange on top of a full meter. Your objective is to "feather" the pours—tapping gently rather than holding down the flow—especially when a meter is above 80%. You must stop pouring a color the second it hits the 100% mark, even if you have half a cup left in your hand.
Unlock the Buried Greens
At the start, Green cups are often trapped beneath columns of White or Cream. A key sub-objective is to clear the surface-level blockers (Whites/Creams) to expose the Green stash underneath. If you ignore this and focus only on the readily available Reds and Oranges at the top, you will enter the late game with a 40% Green meter and no way to access the remaining Green cups.
Timing the Background Fill
Do not actively hunt for Beige or White cups to fill the background. The background fills as a byproduct of pouring the main colors near the edges of the pixel grid. Your goal is to let the background meter rise organically to about 90%, then use your final spare White/Cream cups to top it off precisely. This saves valuable belt space for the harder-to-find colors.
Step-by-Step Walkthrough: The Ideal Run
Phase 1: The "Opener" (0% - 25% Progress)
Action: Start by loading exactly one Orange cup and one Green cup onto the belt.
Strategy: Ignore the Red cups at the very top of the tray for a moment. By taking Orange and Green first, you force the tray to shuffle, often revealing a Red cup in a more accessible position for the second wave. Pour the Orange and Green in short bursts. Your goal here is to get the meters moving: Orange to 10%, Green to 10%. Keep 3 slots open.
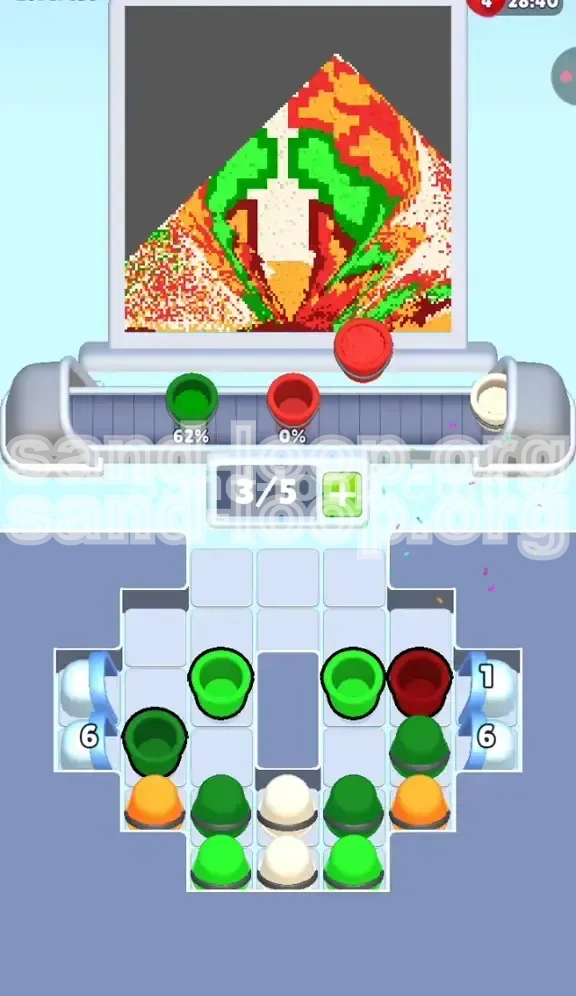
Phase 2: The Red Initiation (25% - 50% Progress)
Action: Load two Red cups and one Yellow cup.
Strategy: Now that Green and Orange are flowing, Red becomes the priority. Load the Reds onto the belt but do not pour them yet. Let them ride the belt until you have cleared the previous colors. Pour Red until it hits roughly 35%. Do not over-pour. Switch to Yellow immediately after to bring that meter up from 0% to about 20%. This alternating pattern prevents the belt from clogging with a single color type.
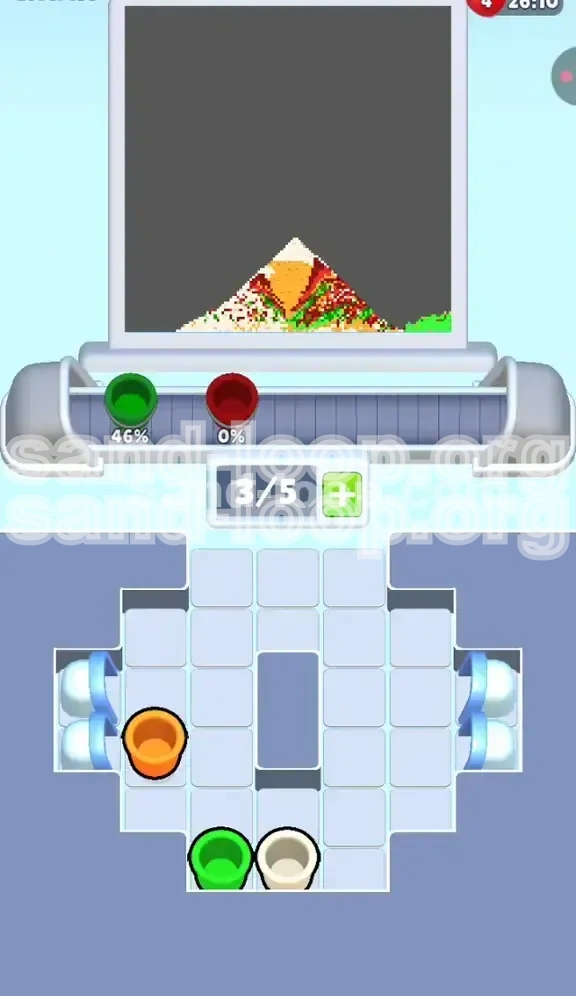
Phase 3: The Mid-Game Shuffle (50% - 75% Progress)
Action: Focus on clearing "Blocker" cups (Whites/Creams) to find more Greens.
Strategy: You will likely notice your Green meter stalling around 40-50% while Red is climbing fast. You must now load White or Cream cups, not to pour them, but to remove them from the tray. Load a White cup, let it pass through the pour point without pouring (just let it ride), and discard it. This action physically clears the slot in the supply tray, allowing the hidden Green cups to rise to the top. Grab those Greens immediately.
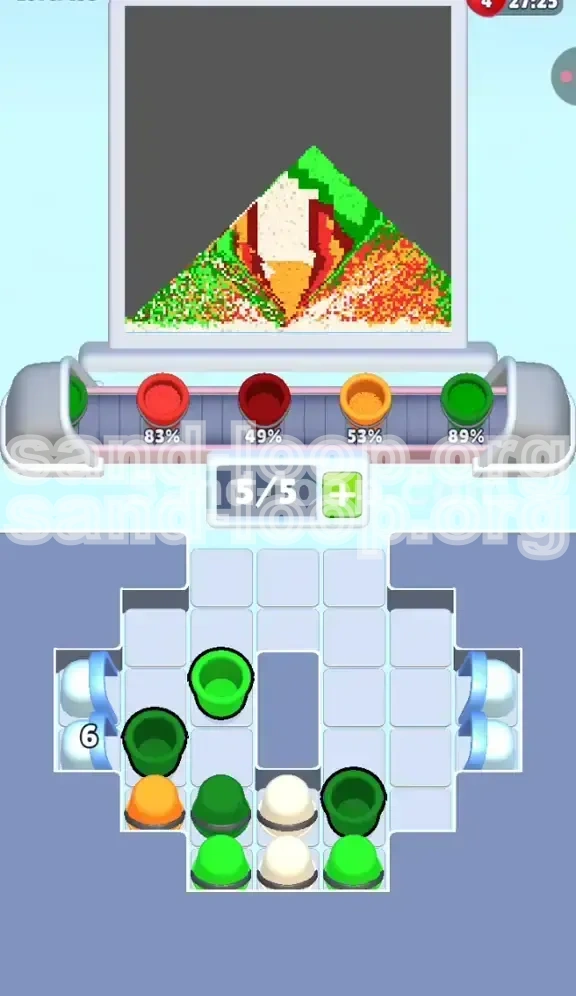
Phase 4: The End-Game Precision (75% - 100% Progress)
Action: Switch to single-cup loading.
Strategy: Stop loading multiple cups at once. Load one cup, pour it completely or until the meter is full, then load the next. If Red is at 95% and you have a Red cup on the belt, pour a tiny drop and stop. If you have a cup left over, let it ride to the end without pouring. Use any spare White/Cream cups to finish the Background meter. Do not risk a big pour of Red or Orange in the final 5%.
Color Order: Processing Priorities
The "Red First" Rule
While Green is hard to find, Red is the most abundant color on the screen (flowers + boxes). You should prioritize pouring Red early because it takes the longest to fill. If you wait until the 80% mark to start focusing on Red, you will likely run out of belt space trying to cram in the necessary volume. Get Red to 50% before you worry about perfecting Yellow or Orange.
The "Green Relief" Strategy
Green usually comes in bursts. Because it is often buried, you might go 30 seconds without seeing a Green cup, then suddenly have access to three. When you see a Green cup available, grab it immediately, even if you don't need to pour it right away. Putting it on the belt reserves it for when you *do* need it. Never leave a Green cup sitting in the tray if you have an open belt slot.
The "Yellow and Orange" Balancers
Yellow and Orange are your "flex" colors. They usually appear more frequently than Green. Use them to fill the gaps in your conveyor belt. If you have 2 empty slots and no Red/Green is available, load an Orange and a Yellow to keep the production line moving. Pour them only when your primary colors (Red/Green) are on cooldown or waiting to be loaded.
The "Background" Filler
Background (Beige/White) is your lowest priority. Only pour White/Cream cups if:
- All your main colors (Red, Green, Yellow, Orange) are above 80%.
- The belt is empty and you need to clear a slot.
- You are specifically trying to avoid overflowing another color.
Key Tips for Success
Tip 1: The "Tap and Stop" Technique
In the final 20% of the level, stop holding down the pour button. Instead, tap it rapidly. This releases the liquid in small drops. It is much easier to recover from an accidental small drop than to reverse a full stream that overfills the meter by 5%. Treat the trigger like a sensitive hair trigger.
Tip 2: Watch the Tray, Not the Belt
Novice players stare at the cups moving on the conveyor belt. Pros stare at the supply tray below. By predicting which cup will rise next in the tray, you can plan your load order 2 steps in advance. If you see a Green column about to unblock, clear a slot on your belt immediately to make room for it.
Tip 3: Sacrifice the Small Colors
If you are completely stuck and the belt is full, you must sacrifice a cup. The best candidate to sacrifice is usually Orange or White, as they are often easier to reacquire later than Green or Red. Let the unwanted cup ride all the way to the end of the belt and fall off without pouring it. This frees up a slot and can save a failed run.
Tip 4: Reset Early, Reset Often
If you make a mistake in the first 30 seconds (e.g., overflow a color), don't try to recover. The math in Level 195 is too tight to recover from a 10% overflow early on. Immediately restart the level. The time you spend "trying to save it" is better spent starting a fresh, perfect run.
Common Mistakes to Avoid
Mistake 1: The "Hoarding" Trap
Many players try to save specific cups for later by loading them onto the belt and refusing to pour them. This clogs your machinery. A full belt of "saved" cups is a dead belt. Only load a cup if you intend to pour it within the next 10 seconds.
Mistake 2: Ignoring the Overflow
It is tempting to pour just a "little bit more" to finish a color, but if the meter is at 98%, a "little bit more" is often 2% too much. If a color is close to full, switch to another color and let the background fills or natural edge spillage take it to 100% naturally.
Mistake 3: Focusing on Background Too Early
The beige background looks like it needs a lot of paint because it covers the whole image, but it fills up much faster than the detailed flower pixels. Pouring White/Beige in the first half of the game is a waste of valuable belt space that should be used for Green and Red.
Mistake 4: Panic Loading
When you see meters rising unevenly (e.g., Red is 60% and Green is 20%), don't panic-load Green cups if they aren't available. Instead, slow down the Red pours. Pour Red in tiny micro-bursts to let the other colors catch up naturally via the background fill. Patience beats panic in this level.
Solutions for When You Are Stuck
Problem: Belt Locked at 5/5
Solution: You have no room to maneuver. Look at the cup at the very front of the belt (closest to the pouring point). Is it a color you absolutely need? If yes, pour it. If no, or if it's a color you have already maxed out, you must let it fall off the end. Do not pour it. Wait for it to cycle out. This wastes time but unlocks your belt so you can grab the colors you actually need.
Problem: Green Meter Stuck at 40%
Solution: This means the Green cups are buried. You need to "mine" the tray. Look for columns that have White or Cream cups on top. Load those White/Cream cups. Pour them into the background (if it's not full) or just let them ride to clear the tray. Once the top layer is removed, the Greens will appear.
Problem: Red is Full but I Still Have Red Cups
Solution: You have "Red dead weight" on your belt. You cannot pour them. You must clear space to load other colors. Your only option is to stop loading new cups entirely. Let the belt move until the Red cups fall off the end unused. Once they are gone, you will have 2-3 empty slots to load the Yellow and Orange cups you need to finish the level.
Speed Run Tips
The "Combo" Load
For experienced players looking to beat the clock, you can combine steps. As the first cup is pouring, immediately tap the tray to load the next cup. Don't wait for the pour animation to finish. This "queueing" method saves precious seconds over the course of the level.
Pre-loading the Endgame
In the final 10%, try to predict the final colors needed. If you know you need 5% more Red and 5% more Background, load a Red cup and a White cup onto the belt before you finish pouring your current color. This seamless transition prevents the "downtime" of looking at the empty tray.
Ignoring Small Meter Variations
In a speed run, perfectionism is the enemy. If a color is at 98% and you can't find the specific cup to finish it, move to the next color. The "spillage" from pouring adjacent colors often tops off the last 2% automatically. Don't spend 20 seconds hunting for one specific Yellow cup if the level is essentially done.