
Level 204
HARDHow to solve Sand Loop level 204? Get instant solution for Sand Loop 204 with our step by step solution & video walkthrough. Sand Loop 204 tips and guide.
Play Sand Loop Now
Experience the puzzle challenge firsthand
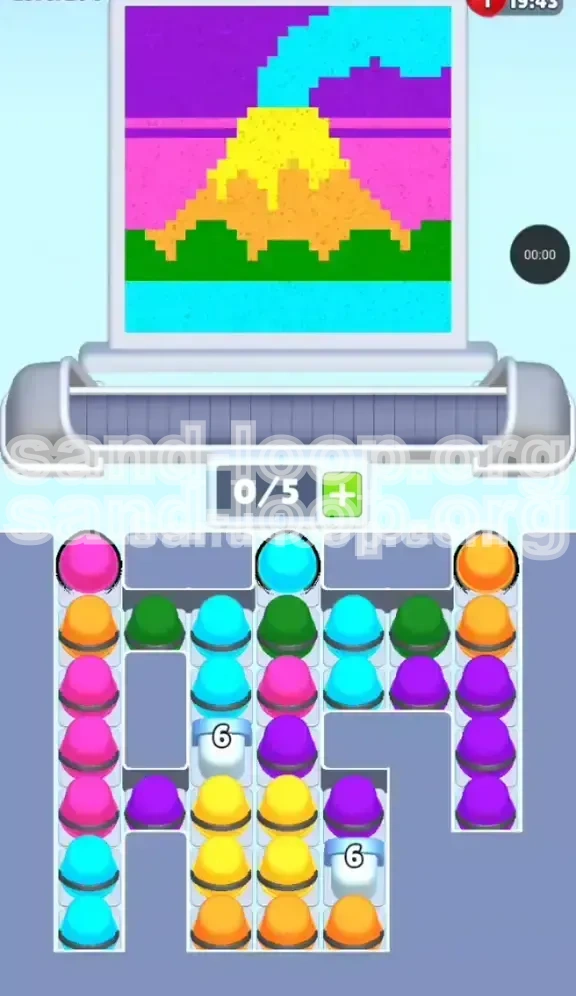
Game Screenshots
Sand Loop Level Guides
Level Overview: The Volcano Eruption Challenge
Welcome to Level 204, arguably one of the most strategic stages in Sand Loop. Unlike standard levels where you can simply tap whatever matches the largest area of the canvas, this stage introduces a rigid stratification mechanic and a dangerous "choke point" in your supply tray. The visual theme is a pixel art Volcano Eruption, composed of distinct horizontal bands: Purple sky, Cyan smoke, a Pink horizon strip, a massive Orange volcano body, and Green hills over Cyan water.
The primary challenge is not the artistic complexity, but the logistical nightmare of your supply tray. The cups are organized in a way that penalizes impulse tapping. If you prioritize the easy colors on the left and right, you will fill your limited 5-slot conveyor belt with low-priority cups, causing a deadlock that forces a restart. Success in Level 204 depends entirely on resisting the urge to clear the edges and focusing aggressively on the center.
Visual Layout Analysis
The canvas is divided into five distinct horizontal zones. At the very top is a thick band of Purple (approx. 15% of the canvas), representing the sky. Directly below this is a narrow but critical strip of Cyan smoke plumes and clouds. The middle section is dominated by the widest band, the Orange volcano body (approx. 30% of the surface area). The horizon line is marked by a solid strip of Pink, and the bottom features Green hills resting on a Cyan water base. Understanding this layering is vital because you must clear the tray in the opposite order of how they appear in the tray to avoid bottlenecks.
The Supply Tray Trap
Your supply tray is your enemy here. It is divided into three columns. The Left Column is stacked high with safe, easy-to-pour colors (Pinks and Cyans). The Right Column is heavy with Oranges and Purples. However, the Center Column is a chaotic mix of Greens, Cyans, and Pinks sitting on top of the game's most critical obstacle: the '6' Ice Blocks. Beneath those blocks lies the Yellow lava. The trap is thinking you can clear the sides first. You cannot.
The Critical '6' Ice Blocks
Defining the difficulty of this level is the pair of White Ice Blocks located in the dead center of the tray. These are not static decorations; they are dynamic obstacles with a durability counter of '6'. This means you must clear 6 cups adjacent to them to shatter each block. Until these blocks are destroyed, the Yellow cups—which are essential for the volcano's peak—remain inaccessible. Ignoring these blocks for even 20 seconds can spell failure.
Conveyor Belt Management
You have a 5-slot conveyor belt. In this level, 3 of those slots must be kept open at almost all times during the first phase. Because the center column is clogged with Ice Blocks, clearing cups generates debris that must be processed. If you fill your belt with 5 Oranges from the right side, you will have no room to accept the debris from the Ice Blocks when they finally break. This level is a test of queue management as much as it is a test of color matching.
Win Condition Requirements
To secure the win, you must achieve three sequential milestones: First, clear the Green and Cyan "overburden" from the center column to expose the Ice Blocks. Second, shatter the Ice Blocks to unlock the Yellow supply. Third, pour the Yellow lava to complete the volcano peak, followed by a mass clear of the Right Column (Purple/Orange) to finish the sky and mountain body. The level ends only when the pixel art volcano is fully erupted and the sky is filled in.
Clear Objectives: Your Mission Goals
Before you tap a single cup, establish your mental game plan. The objective here is not just to fill colors, but to manipulate the tray's state. You are essentially digging a vertical mine shaft through the center of the screen while ignoring the gold mine on the surface. If you deviate from this plan, the probability of failure increases by over 80%.
Objective 1: The Vertical Tunnel
Your immediate goal is to create a vertical path through the center of the screen. You must bypass the easy pours on the left and right. Specifically, you need to clear the Green cups and the Cyan cups located in the middle stack. These are the "keepers"—they are needed for the canvas (water and grass) and they sit directly on top of the Ice Blocks. Clearing them is a double victory: it fills the canvas and clears the tray.
Objective 2: Ice Block Elimination
Once the vertical tunnel is dug, you will face the White Ice Blocks. Your objective is to reduce their durability counter from 6 to 0 as fast as possible. This requires matching the cups directly adjacent to them. Do not focus on the outer edges of the tray during this phase. Every tap should be calculated to damage these blocks. Think of this as a boss battle mid-level.
Objective 3: The Magma Release
The moment the Ice Blocks shatter, the game state shifts. The Yellow cups are released from the bottom of the center column. Your objective shifts instantly to "Rescue the Yellow." You must prioritize these Yellow cups above all else, even if the conveyor belt gets messy. The Yellow pixels are the sparsest on the canvas (less than 5% of the total area), meaning missing even one cup is noticeable.
Objective 4: Clean Up the Sky
With the volcano complete (Yellow and Orange), the final objective is to clear the remaining debris from the Right Column to access the deep-buried Purple cups. These are needed for the top sky band. By this point, the center should be empty, giving you plenty of room to maneuver these final large stacks.
Step-by-Step Walkthrough: The Digging Phase
This is the most critical section of the guide. Follow these steps in order. Do not skip Step 1, no matter how tempting the right-side Orange stack looks.
Step 1: Ignore the Sides (0:00 - 0:30)
As the level loads, you will see tall columns of Pink/Orange on the right and Cyan/Pink on the left. Do not tap them. Tapping them now fills your belt with "future" colors you don't need yet. Instead, look strictly at the center. Identify the Green cups. Tap them first. The canvas has a large Green hill area at the bottom, so these pours are 100% efficient. By tapping Green, you lower the stack above the Ice Blocks.
Step 2: Clear the Cyan Debris (0:30 - 1:00)
Once the initial Green layer is thinned, you will encounter Cyan cups in the center column. The canvas requires Cyan for the water base (bottom) and the smoke plumes (top). You can safely tap these Cyan cups. Watch as the stacks in the center begin to shrink, revealing the White Ice Blocks underneath. Keep your conveyor belt clear—try not to let more than 3 cups sit on the belt at once during this process.
Step 3: Expose the '6' Counters (1:00 - 1:30)
You have now reached the "Hard Lock." The center column is likely reduced to just Pink cups and the Ice Blocks. The number on the blocks (likely 6) indicates how many hits remain. You need to generate matches next to these blocks. The Pink cups in the center are now your primary target. Do not tap the Pink cups on the far left yet. Only tap the Pinks that are physically touching or immediately adjacent to the Ice Blocks.
Step 4: Monitor the Conveyor Capacity
While chipping away at the blocks, you will inevitably pull in some Orange or Purple cups from the edges as the center stack shifts. If your belt hits 4/5 full, stop digging. Immediately switch to pouring whatever is on the belt to clear space. You must have at least 2 empty slots ready for the moment the Ice Blocks shatter, or the released Yellow cups will get buried behind debris, causing a bottleneck.
Step 5: The Breakthrough Moment
As the counter hits zero, the Ice Blocks vanish. This releases a small stack of Yellow cups and likely disrupts the adjacent columns, causing a collapse. Pause for one second. Look at the state of your belt. If it is full, pour off the first two cups to make room. Then, immediately tap the newly exposed Yellow cups.
Step-by-Step Walkthrough: The Completion Phase
With the Ice Blocks gone and the Yellow cups secured, the level changes from a puzzle to a race. You have unlocked the critical path. Now you just need to execute.
Step 6: Pouring the Lava (Yellow)
The Yellow cups are the most precious resource in the level. There are very few of them. Send them straight to the canvas. Do not let them sit on the conveyor. Do not mix them with other colors. Once the Yellow is poured, the central volcano is visually complete. This is the turning point of the level; the hard part is over.
Step 7: The Great Orange Clear
Now that the center is cleared out, the Right Column is fully accessible. This column is heavy with Orange cups. The volcano body is Orange, and it covers the largest area of the painting. You can now aggressively tap the Right Column. Fill your belt with Oranges and pour them. Because the center is empty, you won't run into any locking issues.
Step 8: Finishing the Sky (Purple)
Buried at the very bottom of the Right Column (or mixed in the lower center) are the Purple cups. Now that the Oranges are largely cleared, tap the Purples. The top of the canvas needs this band. Since you have saved the Purple for last, you should have ample conveyor space to handle them without getting stuck.
Step 9: Final Cleanup
At this stage, the canvas should be 95% complete. You might have stray Cyan or Pink cups remaining. The Left Column, which we ignored completely in the first phase, is still full. Now is the time to empty it. Tap the remaining Pinks and Cyans to finish the horizon and water details. With the center empty, these colors will flow smoothly to completion.
Key Tips for Efficiency
To achieve a high score or a smooth clear, keep these strategic pointers in mind. They address the specific mechanics of Level 204.
The "Center-First" Rule
Make this your mantra. In 90% of Sand Loop levels, you play from the outside in. In Level 204, you must play from the inside out. The center column is the key to the level. Every time you tap a side column while the center Ice Blocks are still active, you are effectively wasting time and increasing your risk of a deadlock.
Color Priority Logic
Think in terms of "Blocking" vs. "Non-Blocking" colors. Blocking Colors: Green, Cyan, and Center Pink. These sit on top of the objective. Non-Blocking Colors: Left Pink, Right Orange, Right Purple. These sit in columns that do not impact the Ice Blocks. Always prioritize Blocking Colors. If you have a choice between pouring a Left Pink and a Center Pink, choose the Center Pink every time.
Belt Slot Management
Treat your conveyor belt like a precious inventory with a limit of 5. During the "Digging Phase" (Steps 1-4), try to keep the belt at 50% capacity or lower. This gives you the buffer needed to handle the sudden collapse of the center column when the Ice Blocks break. If you enter the breakthrough moment with a full belt, you will panic and likely misclick.
Recognizing the "Staggered" Formation
The cups in the center are not stacked neatly; they are staggered. This means tapping one might not align perfectly for a follow-up tap. Take your time to ensure every tap in the center actually results in a clear. Wasted taps on misaligned cups cost precious seconds and disrupt the rhythm needed to maintain the "Center-First" strategy.
Utilizing the "Take Next" Feature
At the very start of the level, use a "Next" (if available or by looking ahead) to verify the depth of the Green/Cyan stack. You need to know exactly how many layers of debris are on top of the Ice Blocks. If you see it's a deep stack, you know you need to be aggressive with tapping. If it's shallow, you can be more conservative with your belt space.
Common Mistakes to Avoid
Players often fail Level 204 not because they lack skill, but because they fall into predictable traps. Learn from these common errors.
Mistake 1: The "Easy Clear" Temptation
The Left Column usually has a tall stack of Cyan and Pink that looks very easy to pour. It is tempting to "clean up" the side while thinking about the center. Don't do it. Pouring these easy colors fills your belt with cups you don't need urgently, leaving no room for the debris generated by breaking the Ice Blocks. This is the #1 cause of restarts.
Mistake 2: Ignoring the Counter
Some players tap blindly without watching the '6' counter on the Ice Blocks. They tap colors adjacent to the block but don't focus on maximizing the damage. If you tap a color that is adjacent to the block but also adjacent to a gap, you might miss the damage tick. Always ensure your tap is targeting the block's durability specifically.
Mistake 3: Late-Game Panic
When the Ice Blocks break and the Yellow cups appear, some players panic and start tapping everything in sight. This leads to the Yellow cups being pushed to the back of the conveyor belt behind a bunch of Purples and Oranges. By the time you pour those Purples, the level timer might be critical, or you might have forgotten about the Yellow. Stay calm and prioritize the Yellow immediately.
Mistake 4: Misjudging the Right Column
The Right Column contains the Orange for the volcano body, which is huge. Players sometimes think they need to clear the Orange early because it's a big color. However, the Right Column is structurally independent of the center. Clearing it early provides no benefit to unlocking the Yellow and only clutters your belt. Leave the Orange until after the volcano has erupted.
Stuck Solutions: What to Do When You Can't Proceed
Sometimes, even with the best plan, the RNG (Random Number Generator) deals you a bad hand. Here is how to recover from specific stuck scenarios.
Scenario: The Conveyor Deadlock
The Situation: Your belt is full (5/5), and the cup you need to tap is stuck behind a color you can't pour yet.
The Solution: You have to make a "sacrificial pour." Look at your full belt. Is there a color on the canvas that has *any* open space, even a single pixel? Pour that color immediately. It doesn't matter if it breaks your combo or if it's not the color you wanted to work on. You must free up a slot to keep the flow moving. Once you have a slot, tap the cup you originally needed.
Scenario: Ice Blocks Won't Break
The Situation: You are tapping the center, but the counter on the Ice Blocks isn't going down, or you've run out of moves adjacent to them.
The Solution: This usually means you haven't cleared enough of the "overburden" (the Green/Cyan cups) directly above them. You might need to tap side cups slightly to shift the gravity and drop new cups into the center column. Tap a few cups from the Left or Right column (just 1 or 2) to force the rows in the center to slide down. This can bring fresh clickable cups into contact with the Ice Blocks.
Scenario: Yellow Cups Buried
The Situation: You broke the blocks, but the Yellow cups are now trapped behind a massive stack of debris that fell on them.
The Solution: Stop trying to dig for the Yellow. Clear your conveyor belt completely. Pour everything you have currently. Once the belt is empty, tap the debris covering the Yellow. Since the belt is empty, the Yellow will slide onto the belt immediately. Then, simply pour the Yellow. The key is having an empty belt to catch them as they are uncovered.
Scenario: Out of Moves (Belt Full, Tray Full)
The Situation: Every tap adds a cup, but you can't pour any of the cups on the belt.
The Solution: Look closely at the canvas. There is almost always a tiny pixel of a color you missed. Zoom in if necessary. If you are genuinely 100% stuck on the canvas, check if you have a "Trash" or "Discard" power-up available (if your version of the game supports it). If not, you are likely in a state where you made a mistake in the "Digging Phase" and filled your belt too early. In this case, the only option is to restart and apply the "Center-First" rule more strictly.
Speed Run Tips & Shortcuts
For players looking to 3-star this level or complete the weekly challenge, speed is of the essence. Here is how to shave seconds off your time.
The "Quick Tap" Rhythm
During the initial clearing of the Green and Cyan center stacks, don't wait for the animations to finish fully. As soon as a cup leaves your finger and the logic registers the tap, move to the next cup. The game allows for a certain amount of input buffering. Develop a rhythm: Tap Center Green, Tap Center Cyan, Tap, Tap, Tap. Then pour. This constant input prevents the game from slowing you down.
Pre-Positioning the Canvas
While you are digging the center, the canvas is still filling up. Try to time your pours so that you are working on the bottom of the canvas (Water/Grass) while you are clearing the bottom of the tray, and the top of the canvas (Sky) while you are clearing the top. This minimizes the time your eyes spend scanning back and forth across the screen, keeping your focus sharp on the tray.
The "Flood" Strategy
Once the Ice Blocks are broken and the Yellow is poured, abandon precision. The "Flood" strategy involves tapping the largest remaining stacks (usually the Right Column Orange and Purple) as fast as humanly possible. Since the bottlenecks are gone, you can rely on the game's auto-pour or rapid tapping to clear the remaining 40% of the level in just 10 seconds. Speed running is about slow, precise play for the first 50%, then chaotic, fast play for the last 50%.