
Level 205
HARDHow to solve Sand Loop level 205? Get instant solution for Sand Loop 205 with our step by step solution & video walkthrough. Sand Loop 205 tips and guide.
Play Sand Loop Now
Experience the puzzle challenge firsthand
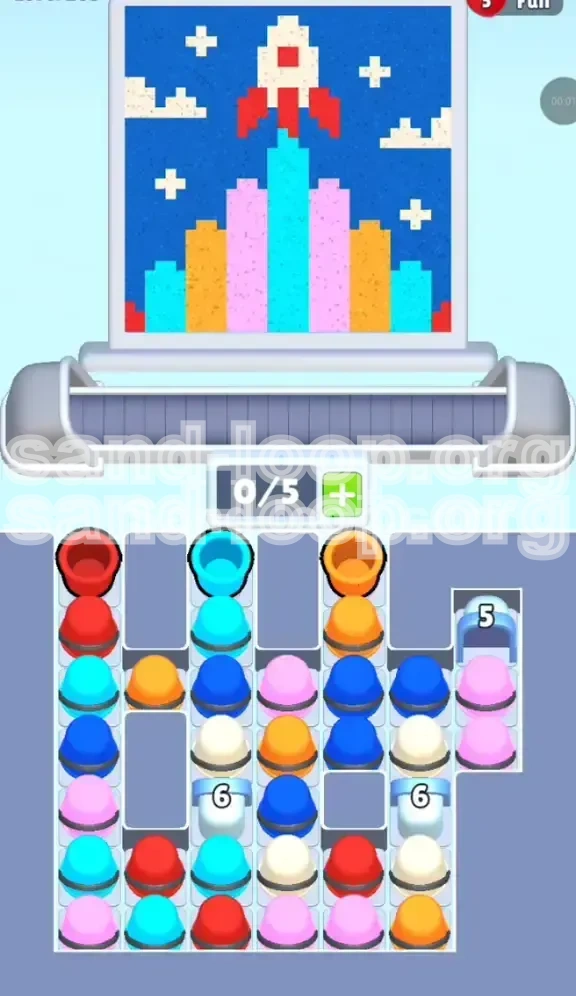
Game Screenshots
Sand Loop Level Guides
Level Overview: The Rocket Launch Challenge
Welcome to Level 205, commonly known as the "Rocket Ship" stage. This level represents a significant shift in difficulty, introducing a complex visual composition disguised as a simple children's drawing. The canvas depicts a white rocket blasting off against a deep blue night sky, surrounded by colorful exhaust fumes. While the artistic style is whimsical, the underlying logic puzzle is strictly unforgiving. The primary difficulty spike in this level stems from the "Slot Economy"—you have a very limited capacity (5 slots) on your conveyor belt, which is极易 choked by the wrong combination of cups.
Unlike previous levels where you could rely on a steady flow of materials, Level 205 forces you to mine for resources. The most critical resources—specifically the White and Deep Blue cups required for the background and rocket body—are locked behind multiple layers of obstructions. You cannot simply paint what you see; you must follow a strict logical progression to unlock the colors you need, or you will find yourself stuck with a belt full of useless Pink or Orange cups and nowhere to put them.
The Slot Management Crisis
The conveyor belt in Level 205 is shorter than it appears, and the penalty for mismanagement is high. With only 5 available slots, you have zero margin for error. If you fill the belt with colors you aren't ready to use, you block the pipeline for new cups to enter. This "choke point" is the main reason players fail here. You must treat every slot as valuable real estate. Avoid pulling cups from the front of a stack unless you have an immediate, high-volume target for them. For example, pulling a Pink cup when you only have single-pixel stars left to fill is a fatal mistake that will jam your machine.
Visual Composition Analysis
The image is divided into three distinct horizontal zones, each requiring a different strategy. The top zone is the Deep Blue sky, which covers approximately 45% of the canvas and acts as your "dumping ground" for excess blue cups. The middle zone features the white rocket body, which requires precision rather than volume. The bottom zone is the "danger area"—a chaotic mix of Cyan, Pink, and Orange vertical stripes representing the rocket exhaust. These bottom stripes are tricky because they are narrow; if you have a stack of 6 Orange cups and only a 3-cup wide gap to fill, you will inevitably clog your system.
The Ice Block Wall
This level introduces a triple-threat obstacle: three massive Ice Blocks sitting at the bottom of the tray. These aren't just passive barriers; they are active counters that must be reduced to zero. The Left Block requires 6 matches, the Middle Block requires 6 matches, and the Right Block requires 5 matches. These blocks sit directly on top of the White and Blue cup stacks you desperately need. This means the game is played in two phases: the "Mining Phase," where you clear the top layer to access the ice breakers, and the "Painting Phase," where you actually color the image. Trying to paint the image before clearing the ice blocks is the quickest way to get stuck.
Color Accessibility Ratings
Not all colors are created equal in this stage. Red is highly accessible but low demand (used only for fins). Orange is accessible and medium demand. Pink is locked behind the '5' Ice Block and is medium demand. Cyan is accessible but low demand. Deep Blue is locked behind the '6' Ice Blocks and is extremely high demand. White is the most critical resource; it is locked behind the '6' Ice Blocks and is required for both the large rocket body and the tiny, fiddly details like stars. Prioritizing the unlocking of White and Blue is the key to victory.
The "Sand Loop" Mechanic
The unique mechanic of this game title—the Sand Loop—means that unused cups are recycled to the front of the line. This can be a blessing or a curse. If you pull a Red cup you don't need, it loops back around, taking up a slot again and again. To succeed in Level 205, you must clear cups from the board entirely. The only way to do this is to match them. Therefore, your strategy must be aggressive: you must create matches on the canvas not just to paint the picture, but to purge cups from your inventory to make room for the ones trapped under the ice.
Strategic Objectives and Preparation
Before you tap a single cup, you need a clear battle plan. Rushing into this level without a strategy will result in a frozen board within 20 moves. Your primary objective is not to "paint the rocket," but to "clear the path to the white and blue cups." The rocket is merely the byproduct of clearing the board efficiently. Below are the core objectives you must follow to achieve a 100% completion rate.
Objective 1: Clear the Top Debris
Your immediate first goal is to remove the top layer of cups that are shielding the Ice Blocks. These are primarily Red, Cyan, and Orange. You cannot touch the White or Blue cups yet. Do not worry about making the picture look good initially. You will be making "temporary matches"—placing colors in spots that might not be their final home just to clear the cup and reduce the Ice Block counters. For example, placing an Orange cup in a temporary spot just to get it off the belt is a valid tactical move if it helps you chip away at the ice.
Objective 2: Shatter the Triple Ice Barrier
This is the turning point of the level. You must focus all your early efforts on reducing the counters on the three Ice Blocks from 6/5 to 0. Once these shatter, the level opens up completely. The strategy here is to identify which cups are adjacent to the ice. Usually, this means processing the columns immediately to the left and right of the frozen blocks. Do not waste moves on the far edges of the tray unless necessary. Every move should count toward the total of 5 or 6 needed to break the seals.
Objective 3: Unlock the "Big Three" Colors
There are three colors that dictate the flow of the game: White, Deep Blue, and Pink. White is for the rocket and stars (High Priority). Deep Blue is for the background (Infinite Demand). Pink is for the exhaust stripes (Medium Priority). Your mid-game strategy revolves around unlocking these. Once the ice breaks, you will have access to a massive reservoir of these cups. You must ensure your conveyor belt is empty (0/5 slots used) the moment the ice breaks, so you can slurp up these crucial colors without spilling any.
Objective 4: Master the Stripe Pattern
The bottom of the rocket features a complex stripe pattern: Cyan-Pink-Orange. This is a trap for inexperienced players. The stripes are vertical and narrow. If you have a stack of 10 Pink cups, you cannot pour them all at once. You must "pulse" the paint. You will learn to tap the dispenser, let one or two cups fill the stripe, stop to let the dispenser reset, and then tap again. This prevents the sand from spilling over into the adjacent colors. Mastering this rhythm is essential for the final 20% of the level.
Objective 5: Precision Star Placement
The final 5% of the level is the most dangerous. The canvas features small White stars and clouds scattered in the blue sky. These are single-pixel or small cluster targets. If you have a "stream" of White cups active (where the dispenser is locked in the 'on' position), you will inevitably over-fill these tiny shapes and ruin the level. Your final objective is to switch from "flow mode" to "drop mode," ensuring that every grain of sand lands exactly where it belongs.
Step-by-Step Walkthrough: The Mining Phase
The first half of this level is a logic puzzle. You are effectively mining for the keys to the rest of the board. Follow these steps in order to ensure you break the ice without jamming your belt.
Step 1: The Initial Assessment
Start the level and watch the initial layout. Do not touch anything for 5 seconds. Identify where the Ice Blocks are. Look at the column immediately to the left of the Right-Side Ice Block (the one with '5'). You will likely see a stack of Orange or Deep Blue cups here. These are your primary targets. Also, locate the Red stack on the far left. Note that the Red area on the canvas (the fins) is very small. Keep this mental note: "Do not touch the Red stack until the end."
Step 2: Processing the Exhaust Colors (Cyan/Orange)
Begin by tapping the Cyan and Orange stacks. Look at the bottom of the canvas. You see the vertical stripes of exhaust smoke? Good. Start filling these. This serves two purposes: it starts the picture, and more importantly, it clears the cups sitting on top of the columns adjacent to the ice blocks. Focus on the Orange stripe first. By clearing these cups, you are exposing the fresh cups underneath that are needed to chip away at the ice counter. Do not worry about the Pink stripe yet; Pink is locked.
Step 3: The "5-Block" Strategy
Focus your attention on the Right-Side Ice Block (the '5' counter). Your goal is to clear 5 cups adjacent to it. You don't need to match the specific color of the ice; you just need to remove the cups next to it. This usually means processing the column to its left. aggressively pull cups from this column. As you remove them, new ones slide into place. Keep removing them until the counter hits zero. Pro Tip: If you pull a cup you can't use immediately, look for a "garbage spot" on the canvas—a place where that color already exists and can accept a little extra sand—to dump it.
Step 4: Managing the Red Trap
You will see a tempting stack of Red cups on the left. The rocket fins need Red. However, the fins are tiny (approx. 2% of the canvas area). If you pull more than 2 or 3 Red cups now, they will cycle through your belt endlessly, blocking you from getting to the good stuff. Action: Pull exactly 3 Red cups. Fill the left fin. Fill the right fin. Stop. Do not pull any more Red until the very end of the level. This discipline is crucial for keeping your slot count low (Target: 2/5 slots used).
Step 5: Cracking the '6-Blocks'
Once the '5-Block' is down, you have a flood of Pink available. Ignore it for a second. Shift focus to the two '6-Blocks' in the middle-left and middle-right. These are guarding the White and Deep Blue cups. You need to clear the columns adjacent to these. This is harder because the stacks are mixed. You will need to alternate between clearing a cup, placing it, and clearing another. Warning: You might be forced to place some temporary colors (like Cyan) in the background area just to get them off the belt. This is acceptable. Keep chipping away. When the counters hit '1', get ready for the phase shift.
Step-by-Step Walkthrough: The Painting Phase
Once the Ice Blocks shatter, the game changes from a puzzle to an action-painting game. You now have access to the bulk of your resources. Speed and efficiency become the priority.
Step 6: The Great Blue Sky Fill
The moment the ice breaks, you will see massive stacks of Deep Blue cups exposed. This is your safety net. The Deep Blue sky covers the top 40% of the canvas. It is huge. Strategy: Immediately start pulling Blue cups. Pour them into the sky. This does three things: it finishes the largest part of the image, it clears your conveyor belt of any lingering non-Blue cups (by cycling them out), and it generates the "loop" space needed to handle the tricky White cups coming up. You can be aggressive here; it is very hard to mess up the blue sky.
Step 7: The Pink Stripe Rush
Remember that flood of Pink cups from the '5-Block'? Now is the time to use them. Go back to the bottom exhaust area. You have a vertical Pink stripe. Technique: Activate the Pink dispenser. Since you cleared the other colors (Cyan/Orange) earlier, the Pink stripe should be the only one left in that cluster. Fill it rapidly. If you spill a little into the adjacent areas, it's okay, provided you haven't filled those adjacent areas yet. However, precision is better. The Pink stripe acts as a separator between the Orange and Cyan, so getting it right makes the rest of the exhaust easier.
Step 8: The White Rocket Body
This is the core of the image. You now have access to the White cups from the broken '6-Blocks'. The rocket body is a large, solid vertical shape in the center. Action: Pour the White sand. This is satisfying but requires focus. The rocket body has straight edges. Do not overfill the top or bottom, or you will bleed into the Blue sky or the Exhaust smoke. Keep the stream steady. If you see the White sand creeping over the line, cut the stream immediately. This is the highest volume White task, so get it done while your belt is clear.
Step 9: Precision Detail Work (The Stars)
This is the "Sudden Death" phase of the level. The sky is blue, the rocket is white, the exhaust is colored. What remains? The tiny White stars and the Red window. Crucial Rule: Do not use a continuous stream for the stars. You must tap the White dispenser to release one single cup. Let it fall. Watch it fill the star shape. Wait for the dispenser to reset. Then tap again. If you hold the button, the sand will pour out and cover the Blue sky surrounding the star, forcing you to restart the level. Take your time. There is no timer.
Step 10: Final Polish and Red Cap
With the stars placed, check the top of the rocket. Is the nose cone White or Red? Usually, it needs a Red cap, and the window needs a Red center. Recall the Red cups we saved in Step 4? Now is their time. You likely have 2-3 Red cups cycling in your loop. Pull them now. Fill the nose cone. Fill the window. The level should now be 100% complete. If you are missing a spot, scan the edges of the Blue sky and the corners of the fins for any gaps.
Advanced Tactics and Speed Run Tips
Once you have beaten the level, you might want to improve your time or efficiency. This section is for players looking to optimize their playstyle and achieve the fastest clear possible.
The "Zero-Slot" Speed Run Strategy
Speed running this level is all about maintaining a 0/5 or 1/5 slot count. The more empty slots you have, the faster the new cups arrive from the tray. To do this, you must be ruthless about "pre-loading" the canvas. Before you even break the ice, try to fill as much of the Blue sky as possible using the limited Blue cups available in the open columns. By pre-filling 20% of the sky before the ice breaks, you save yourself 30 seconds of digging later. Keep the belt flowing like water.
The "Partial Pour" Technique
For advanced players, there is a technique called "Partial Pouring." This involves stopping the sand flow mid-cup to save material. For example, if a star shape is almost full but you have a full cup coming, you can cut the stream early to top it off perfectly without spilling. This requires excellent timing and a deep understanding of how the physics engine handles the sand dispersion. Mastering this allows you to handle the star clusters without stopping the dispenser entirely, saving precious seconds.
Optimized Color Order
The most efficient color processing order is: Orange -> Cyan -> Pink -> Deep Blue -> White -> Red. Why this order? Orange and Cyan are at the very bottom and are easiest to clog, so clear them first. Pink is usually the bottleneck, so doing it third while you have momentum helps. Deep Blue is the cleanup crew. White is high-risk, so you do it when the board is stable. Red is lowest volume, so it's saved for last to avoid belt clutter. Deviating from this order usually leads to a jammed conveyor belt.
Handling the "Garbage Cups"
In a speed run, you will inevitably pull a cup you don't need (e.g., a Pink cup when you are focusing on the sky). Do not let it loop! Immediately look for a "holding pen" on the canvas. A holding pen is a large area of the same color where you can dump a mismatched cup temporarily. For example, if you pull a stray Pink cup while painting the Blue sky, find a corner of the Blue sky that is already full and dump the Pink there. It will create a small error that you can fix later (by covering it with Blue), but it keeps your belt moving fast. Fix the error at the very end when you have Blue cups to spare.
Prediction and Anticipation
Don't wait for the ice to break to plan your next move. Watch the counters. When the Right Block is at '1', you know exactly what is coming next: a Pink stack. Anticipate this by finishing any non-Pink tasks immediately. Clear your belt. As soon as the block shatters, you should already be moving your finger toward the Pink stripe. This seamless transition saves seconds and prevents the "mental load" of scrambling to find where the colors go.
Mental State Management
Level 205 is a "panic inducer." The tight slots and the bright colors create visual noise that can make you anxious. The best speed runners stay calm. If you jam your belt, don't panic-tap. Stop, assess which cup is causing the blockage, and find a place for it. Panic-tapping usually leads to mis-presses and accidental sand spills in the wrong zones. Treat the level like a rhythm game; find the beat of "pull, pour, clear, pull, pour, clear."
Troubleshooting and Common Mistakes
Even with a guide, things can go wrong. This section addresses the specific pitfalls players encounter in Level 205 and how to recover from them, or better yet, avoid them entirely.
The "Red Jam" Error
The Mistake: Pulling the full stack of Red cups at the beginning because they look accessible.
The Consequence: Your belt is now 4/5 full of Red cups. The fins are small, so you place 2 cups and have 2 left. Those 2 Red cups cycle endlessly, taking up 40% of your capacity. You can no longer pull the cups you need to break the ice.
The Fix: Never pull more than 3 Red cups in the first phase. If you have already jammed yourself, you must "waste" the excess Red cups by placing them in the exhaust area temporarily, even if it's the wrong color, just to clear them from the belt. You can fix the exhaust colors later.
The "Star Spill" Catastrophe
The Mistake: Using a continuous stream of White sand to fill the tiny stars in the sky.
The Consequence: The sand pours out faster than the pixel can fill it. It spills over the edges, turning the surrounding Deep Blue sky into a milky white mess.
The Fix: As soon as you see a spill, stop immediately. The level is not necessarily failed, but you are now in "damage control." You will need to cover that spilled White sand with Deep Blue sand later. To avoid this, adopt the "Single Tap" method for stars permanently. It is slower, but it is 100% safe.
The "Ice Block Deadlock"
The Mistake: Focusing on painting the rocket body (White) before breaking the ice blocks.
The Consequence: You run out of White cups. The rest of the White cups are frozen. You can't break the ice because you don't have any matching cups left to clear the adjacent columns (you used them all on the rocket). You are stuck.
The Fix: Always prioritize the Ice Blocks over the art. If you run out of colors to chip the ice, look at the "garbage colors" (Cyan/Orange). Use them to make temporary matches anywhere on the board just to cycle the tray and get new cups into position next to the ice.
The "Pink Flood" Mismanagement
The Mistake: Breaking the '5' Ice Block and then immediately switching to the Blue sky, leaving the Pink cups to pile up.
The Consequence: You now have a belt full of Pink. When you finally go back to the exhaust stripe, you have 20 Pink cups queued up. You will inevitably overfill the narrow stripe.
The Fix: Deal with the unlocked color immediately. When the Pink ice breaks, the game is telling you: "Do Pink now." Switch tasks instantly. Clear the Pink cups from your belt by filling the stripe, then return to your previous task (Blue sky).
Recovering from a Slot Choke
Symptoms: Your belt is 5/5 full. No cups are moving. You can't pull anything new.
The Solution: You are in a choke. Look at the 5 cups on your belt. Is there ANY place on the canvas where any of those 5 colors can go? Even a tiny dot? If yes, place it. If no, you are in a hard lock. The only way out is to identify a "sacrifice" area on the canvas—a large, already-filled area where you can dump a cup of the wrong color just to free up a slot. This creates a mess, but it unjams the machine so you can continue. Prioritize fixing that mess at the very end of the level.