
Level 240
HARDHow to solve Sand Loop level 240? Get instant solution for Sand Loop 240 with our step by step solution & video walkthrough. Sand Loop 240 tips and guide.
Play Sand Loop Now
Experience the puzzle challenge firsthand
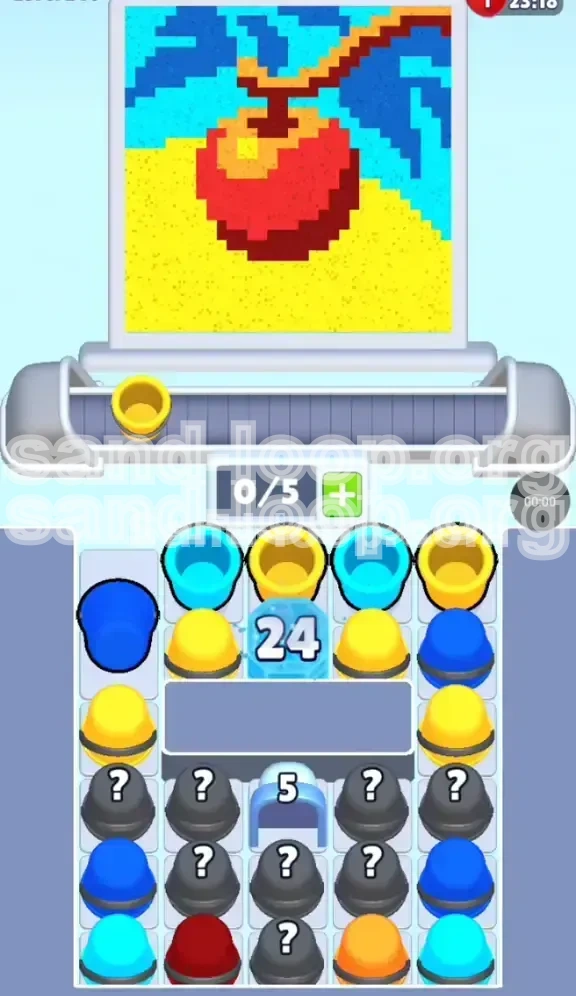
Game Screenshots
Sand Loop Level Guides
Level Overview: The Hanging Apple Challenge
Welcome to Level 240, "The Hanging Apple." This stage is a deceptive puzzle that masquerades as a simple art task but functions as a rigorous test of resource management and spatial logic. Unlike standard levels where you can simply tap cups in the order they appear, Level 240 introduces two major mechanical hurdles: a massive "Ice Block" locking your primary resource column and a "Blind Logic" layer obscured by Mystery Cups.
The visual target is a pixel-art Red Apple suspended from a brown branch, set against a Cyan sky with Teal leaves, resting on Yellow sand. The difficulty lies not in the art itself, but in the chaos of the supply tray. You are forced to play a "mining" game with the Mystery Cups on the edges while waiting for the central column to thaw. This level requires you to balance speed with extreme caution; one wrong move—such as unlocking three Brown cups too early—can clog your conveyor belt and end your run immediately.
The Ice Block Bottleneck
The most defining feature of this level is the "24" Ice Block dominating the center of the tray. This is not just an obstacle; it is a countdown timer. You cannot access the 20-30 cups buried beneath this block until you have processed 24 valid pours elsewhere on the board. This effectively reduces your playable area by 20% right from the start, forcing you to rely on the unpredictable outer columns.
The Mystery Cup Minefield
While the center is frozen, the edges are a gamble. The bottom half of the tray is filled with grey "?" cups. You cannot know what color lies inside until you tap it. This introduces a heavy RNG (Random Number Generation) element. If you tap these cups blindly hoping for the best, you will likely fill your belt with useless colors (like Brown Stem cups) before the canvas is ready for them.
Strict Slot Management
Your conveyor belt has a capacity of 5 cups. In this level, 5 slots = 5 lives. Because the Mystery Cups can reveal colors you aren't ready for, keeping your belt empty is more important than keeping it full. A full belt means you have zero flexibility to handle bad RNG, leading to a soft-lock where you cannot make any moves.
Complex Layering
The target image requires a specific pouring order that conflicts with the cup supply. The Apple (Red) is the largest area, but the Sky (Cyan) and Sand (Yellow) are the base layers. You must discipline yourself to clear the base layers first, even when you see Red cups available, or you risk running out of space.
Clear Objectives: Your Mission Goals
To conquer Level 240, you must stop treating it like a coloring game and start treating it like a logistics simulation. Your primary goal is to survive the opening sequence until the Ice Block shatters. Once the central column unlocks, the pace shifts from survival to speed.
Unlock the Central Column
Your metric for success in the first phase is the number on the Ice Block. You need to generate 24 successful pours to crack it. Every single tap you make in the opening minutes should be dedicated to lowering this number. Do not focus on the Apple yet; focus on breaking the ice.
Establish the "Base Layers"
Before you can place the Red Apple or the Brown Stem, you must clear the bottom and sides of the canvas. You need to deposit the Yellow Sand and the Cyan Sky to create a foundation. Pouring these colors early also serves the dual purpose of clearing cup slots, keeping your belt fluid.
Isolate and Process "Danger" Colors
You must identify the "Danger Colors"—Brown and Teal. These colors have small, specific targets (the stem and leaves). If these cups enter your belt too early, they become dead weight. Your objective is to leave them in the tray (covered) for as long as possible. Only tap them when the canvas is 100% ready to receive them.
Prevent Belt Clogging
Maintain at least 2 empty slots on your conveyor belt at all times during the first phase. This buffer allows you to absorb a bad Mystery Cup reveal without jamming the entire system. If your belt is full, you are one unlucky tap away from a "Game Over."
Color Order: The Strategic Processing Guide
The difference between a successful run and a failed attempt often comes down to the order in which you process the colors. You cannot simply pour cups as they appear; you must prioritize based on the geometry of the pixel art.
Phase 1: Cyan (The Sky)
Priority: HIGH
Availability: Immediate
The Cyan background is located on the far left and right edges of the canvas. Crucially, the supply tray usually spawns Cyan cups in the top rows of the side columns. These are "safe" taps. Tapping these serves three purposes: it clears the canvas edges, it lowers the Ice Block counter, and it clears space on your belt to handle future risks. Always clear visible Cyan cups before tapping Mystery Cups.
Phase 2: Golden Yellow (The Sand)
Priority: HIGH
Availability: Immediate
The Yellow sand covers the entire bottom width of the canvas. This is your "dumping ground." Because the target area is so wide (spanning the full width of the screen), you can pour Yellow cups rapidly and continuously. If you reveal a Yellow cup from a Mystery block, consider it a blessing. Pour it immediately to free up a slot.
Phase 3: Bright Red (The Apple Body)
Priority: MEDIUM (Wait for Ice Break)
Availability: Hidden (Center)
This is your main mid-game objective. Do not worry if you can't pour Red early on. The bulk of the Red cups are trapped under the "24" Ice Block. Once the ice breaks, you will likely get a flood of Red cups. Ensure you have enough open space on your belt to handle this flood before you start aggressively tapping the center column.
Phase 4: Teal (The Leaves)
Priority: LOW
Availability: Random
The leaves are small accents in the upper corners. They require precision and a small amount of sand. Pouring Teal is risky because the target area is small and can be easily over-poured (wasted). Save Teal cups for the very end, or only pour them if you accidentally have a spare slot and the target area is open.
Phase 5: Dark Brown (The Stem)
Priority: CRITICAL / LAST
Availability: Rare
The Brown stem is the "Boss" of this level. It is a tiny, 2-3 pixel wide line at the top of the apple. You do not need many cups to finish it, but you must not pour it until the very end. If you pour Brown sand while the Red Apple is still growing, you will likely miss the stem and waste the cup, or worse, clog your belt with a color you can't use. Leave Brown cups in the tray until the Apple is 100% complete.
Step-by-Step Walkthrough: From Start to Finish
Follow this exact sequence of actions to navigate the RNG and mechanical challenges of Level 240.
Step 1: The "Safe Row" Sweep
As soon as the level loads, inspect the very top row of the supply tray. Ignore the Ice Block and ignore the grey "?" cups for a moment. Look for the visible, non-frozen colors.
- Action: Tap any visible Yellow or Cyan cups in the top row.
- Result: You will immediately clear the bottom sand and side sky areas. This gives you a visual win and lowers the Ice Block count from 24 to 20 or 18 immediately.
- Note: Do not tap the Red cups yet if they are blocked by other geometry, and definitely do not tap any Brown cups.
Step 2: The Ice Block Grind (Phase 1)
Now you must face the grey Mystery Cups. You have 5 slots on your belt. The strategy here is "Tap and Check."
- Action: Tap a single Mystery Cup. Wait for the grey lid to pop off.
- Scenario A (Good): It reveals Yellow or Cyan. Send it to the belt immediately. It will pour fast.
- Scenario B (Bad): It reveals Brown or Teal. Do not send it to the belt. Leave it in the tray if it's not obstructing other moves. If you must send it, ensure you have 3 or more empty slots to spare, or be prepared to lose the game.
- Goal: Repeat this until the Ice Block counter hits 0.
Step 3: The Central Release (Phase 2)
Once the Ice Block shatters, the center column will shift upwards. This is a turning point in the level.
- Action: Assess the newly revealed cups in the center. They are likely Red.
- Tactic: If your belt is empty (or near empty), tap the center column rapidly. You want to load 2-3 Red cups onto the belt.
- Execution: Pour them into the Apple center. The Apple is a large "sink"—it can accept a lot of sand quickly. This is your chance to clear a massive chunk of the level progress.
Step 4: Managing the "5" Lock Gate
At the bottom of the screen, there is a small tunnel or gate labeled "5". This is a common mechanic in Sand Loop levels.
- Context: This gate prevents you from accessing a stash of bonus cups (usually located in the bottom-right or bottom-left corner).
- Strategy: Do not go out of your way to open this. It usually requires 5 "matches" or specific clears.
- Outcome: As you pour the Red Apple and Yellow Sand, you will naturally trigger the conditions to open this gate. Once it opens, treat the cups inside as emergency reserves.
Step 5: The Endgame (The "Cleanup")
After the central Red burst, you will be left with a messy canvas: 90% full, with jagged edges and missing details.
- Action: Switch to precision mode. Stop tapping fast.
- Target: Look for the Teal leaves. Pour them slowly.
- Final Move: The very last thing you should do is pour the Brown Stem. Ensure the apple body is complete and the red pixel is right up against the stem area.
- Win Condition: Once the stem connects to the branch, the level is complete.
Key Tips & Stuck Solutions
Sometimes, even with the best plan, the RNG (Random Number Generation) can work against you. Here is how to handle common failure points.
Tip 1: The "3-Brown" Soft Lock
The Problem: You tapped three Mystery Cups in a row, and they all revealed Brown. Your belt is now full of Brown, but the stem isn't ready.
The Solution: You have one desperate option. Look for any open area on the canvas, even if it's the "wrong" color (like pouring Brown into the Green leaves). Pouring a small amount of "wrong" color into a corner is better than having a full belt of unusable cups. This wastes a bit of percentage but clears the slot so you can continue playing. Alternatively, if you have space, you can "store" the Brown cups on the belt by letting them cycle around, but this is risky.
Tip 2: The Ice Block Won't Drop
The Problem: You are at 24/24, and you feel like you've poured a lot, but the block isn't cracking.
The Solution: You might be pouring incorrectly. Ensure you are pouring into valid target zones. Pouring "Red" into a "Green" leaf area usually doesn't count as a valid "match" for the ice counter in some game modes. Stick to the high-percentage areas: The Yellow Sand (huge target) and the Cyan Sky (easy sides).
Tip 3: The "Highlight" Confusion
The Problem: The apple looks red, but your Red cups aren't pouring.
The Solution: Check the pixel art carefully. The apple likely has a "shine" or "highlight" that is actually Orange or Light Yellow, not Red. If you have a cup that looks orange-ish, try pouring it into the shiny spot on the apple.
Tip 4: Speed Running the Level
If you are trying to achieve a 3-star score or a time bonus:
- Pre-loading: While the Red cup is pouring (which takes 2-3 seconds), immediately tap the next Mystery Cup in the tray. Don't wait for the pour to finish. Use the pouring time as your "thinking time" to clear the Ice Block counter.
- Chain Reaction: Try to have 2 Red cups queued up behind each other on the belt. This allows for a continuous flow of sand into the apple without pause.