
Level 239
HARDHow to solve Sand Loop level 239? Get instant solution for Sand Loop 239 with our step by step solution & video walkthrough. Sand Loop 239 tips and guide.
Play Sand Loop Now
Experience the puzzle challenge firsthand
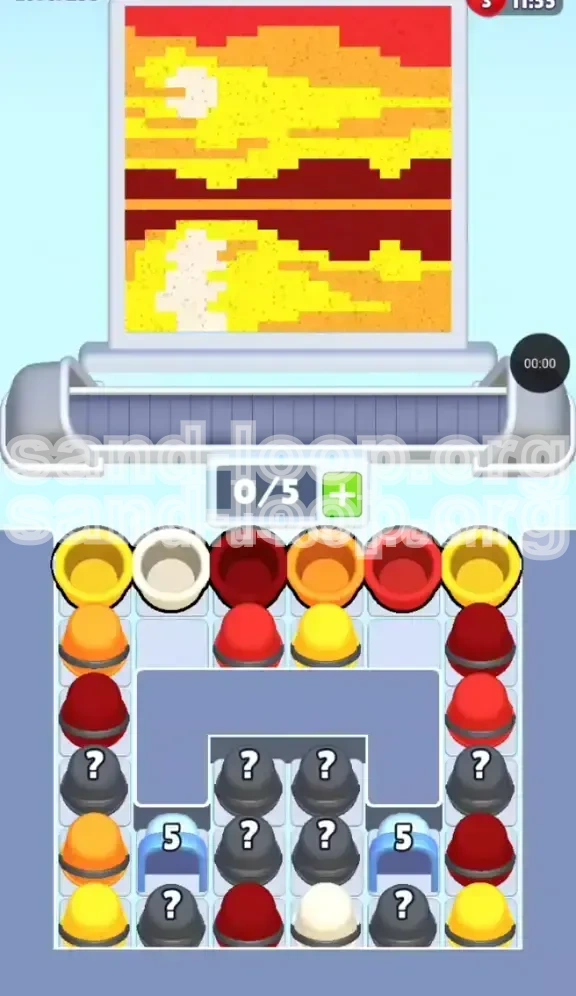
Game Screenshots
Sand Loop Level Guides
Sand Loop Level 239: Comprehensive Walkthrough Guide
Welcome to the ultimate guide for Sand Loop Level 239, officially known as the "Sunset Horizon" challenge. This stage is a rigorous test of your inventory management skills and ability to recognize visual patterns amidst chaos. While the image appears to be a serene landscape, the gameplay mechanics are designed to induce decision paralysis through asymmetric color distribution.
The core difficulty lies in the "U-Shaped" supply tray which holds your paint cups. Unlike previous levels where resources might be centrally located, Level 239 forces you to work from the outside in. This guide will break down every pixel movement, color choice, and timing strategy you need to secure a 3-star finish.
The Core Challenge: Capacity Management
This is not a level about speed; it is a level about logic and restraint. You are given a 5-slot conveyor belt. If you fill these slots with the wrong colors, you create a deadlock that forces a restart. The primary antagonist here is not the timer, but the "White" paint cup.
In the Sunset Horizon image, the white pixels (the sun and reflection) represent less than 5% of the total canvas area. However, white cups are abundant in the supply tray. Grabbing them too early will clog your belt, preventing you from picking up the high-volume reds and oranges required for the sky.
Visual Analysis: The Sunset Horizon
Before making a single move, you must internalize the structure of the painting. The image is divided into four distinct horizontal bands. Understanding this vertical stratification is the key to choosing the right color at the right time.
- Top Band (Sky): This is the largest area, requiring heavy applications of Red and Orange.
- Middle Band (Sun): A distinct intrusion of Bright Yellow, topped with a White circle.
- Horizon Line: A thick separator of Dark Maroon (appearing almost brown).
- Bottom Band (Water): A mix of Yellow and White, mirroring the sky but paler.
The "U-Shape" Trap
The supply tray is deceptive. The most critical colors (Reds and Oranges) are located at the far ends of the "U", while the center is blocked by Ice Gates. The game tries to tempt you with easy-to-reach yellows and whites in the middle-top section. You must resist this temptation. If you prioritize the center cups before the outer edges, you will run out of belt space exactly when the high-value sky colors become available.
Objective Summary
To beat Level 239, your goal is to clear the peripheral stacks to unlock the center, manage your 5-slot inventory to prioritize high-area colors (Red/Orange), and avoid picking up low-volume colors (White) until the precise moment they are needed.
Strategic Preparation: Before You Tap
Starting Level 239 without a plan is the fastest way to fail. Spend the first 10 seconds of the level just observing. Do not touch any cups. Check the position of your paint nozzle. Is it hovering over the sky or the water? This dictates your starting move.
Analyzing the Paint Nozzle Position
The starting position of the nozzle is randomized. You must adapt your first pull to wherever the nozzle happens to be.
- Nozzle over Sky (Top): Your priority is immediately finding the Red/Orange cups.
- Nozzle over Horizon (Middle): Look for the Maroon cup immediately.
- Nozzle over Water (Bottom): You can start with Yellow, but be careful not to overcommit.
The Inventory "Slot" Theory
Your conveyor belt has 5 slots. Think of them as currency. You are "spending" a slot every time you pick up a cup. You want to spend your slots on colors that cover the most pixels. Red covers roughly 40% of the screen. White covers less than 5%. Therefore, picking up a White cup is a "bad investment" until the very end. Keep your slots liquid for high-volume colors.
Understanding the Ice Gates
At the bottom center, you will see two blue gates marked with a "5". These are blocking a hidden cache of "?" cups. These gates require you to clear 5 adjacent cups to open. This mechanic acts as a timer. You cannot access the center until you have done enough work on the edges.
Color Priority Ranking
Memorize this hierarchy. When choosing between two available cups, always pick the one higher on this list:
- Red / Orange: Essential for the massive sky section.
- Maroon: Needed for the horizon separator.
- Yellow: Needed for the sun and water base.
- White: Lowest priority. Only pick up when directly over the sun pixels.
The "Deadlock" Scenario
A deadlock happens when your belt is full (5 cups), but none of the cups on the belt match the pixel currently under the nozzle. This usually happens because you picked up White cups too early. To avoid this, never have more than 1 White cup on your belt at any time.
Phase 1: The Peripheral Opening
The first phase of the level is purely about survival and setup. You are restricted to the left and right columns of the supply tray. Your goal here is to clear space and lower the stack counts on the sides.
Step 1: Clear the Top Corners
Start by clearing the top-left and top-right visible cups. These are usually your "key" colors. By removing the top layer, you allow the second layer of cups to slide into position, which is often necessary to create a path to the cups sitting adjacent to the Ice Gates.
Step 2: Target the Ice Gate Adjacents
Look for the cups immediately touching the blue Ice Gates. These are your golden tickets. Every time you clear one of these, you reduce the counter on the gate. Prioritize any Red, Orange, or Maroon cups that are touching the gates. Do not worry about the Yellow or White cups touching the gates yet; they are secondary.
Step 3: Ignore the Mystery Pile
Do not waste time tapping the "?" cups in the middle yet. They are blocked anyway. Even if you could tap them, identifying them uses up time you don't have. Focus strictly on the known quantities in the side columns.
Step 4: Establish the Horizon Line
As soon as you see the Maroon cup available and your nozzle passes the horizon line, grab it. Painting the horizon early gives you a visual "anchor" for the rest of the level. It clearly demarcates where the "Sky" work ends and the "Water" work begins, reducing mental load.
Step 5: Feed the Gates
Keep working on the side columns until you hear the shatter sound of the Ice Gates breaking. This sound is your cue to transition to Phase 2. If the gates are still closed, you are not done with the sides.
Step 6: Monitor Belt Capacity
During this phase, try to keep your belt at 50% capacity (2-3 cups max). You want empty slots available for when the center unlocks, as the center will likely flood the board with new options.
Phase 2: The Center Breakout
Once the Ice Gates shatter, the gameplay shifts. The "?" cups in the center will reveal themselves, and a flood of new resources will become available. This is the most dangerous part of the level.
Step 1: Pause and Assess
When the gates break, the center cups transform. Stop tapping for a split second. Look at what colors were revealed. The center usually contains a massive reserve of Red and Orange, but it is often mixed with traps like White or low-priority Yellow.
Step 2: Chain-Load Red/Orange
If the nozzle is currently in the Sky zone, this is your window to clear it. Quickly fill your belt with 3 or 4 Red/Orange cups from the newly revealed center. You want to "chain" these colors so you can paint the entire top half of the canvas without stopping to reload.
Step 3: The Sky Sweep
With your belt loaded with Red/Orange, work the nozzle back and forth across the top band. Do not stop for small details. Just flood the sky with the primary colors. This is the fastest way to clear the bulk of the pixels.
Step 4: Managing the Water Reflection
Once the sky is mostly red/orange, shift focus to the bottom. The water requires Yellow and White. By now, your belt should be emptying out. Start picking up the Yellow cups from the center or remaining side stacks.
Step 5: Avoiding the White Trap
Even in Phase 2, White is dangerous. Only pick up a White cup if you are ready to paint the sun *immediately*. If you pick up a White cup and then have to go back to painting Red sky, you have wasted a slot. Keep the White cup as a "last resort" tool in your inventory.
Step 6: Final Cleanup
At this stage, the canvas should be 90% full. You will likely have scattered pixels left over. Use your remaining belt space to pick up "Stray" cups—single cups of specific colors needed to fill in the gaps. Do not aim for large chains here; aim for precision.
Advanced Tactics & Key Tips
These tips are for players who understand the basics but want to achieve faster times or higher scores. This section focuses on the finer details of queue management.
The "White Sun" Micro-Management
The sun in the center is the trickiest part. It requires White, but it is surrounded by Yellow.
The Strategy: When approaching the sun, ensure your belt has one Yellow and one White cup. Paint the outer glow of the sun with Yellow first (consuming the yellow cup), and then instantly switch to the White cup to hit the center. If you do this in reverse, you will smear White into the Yellow sky, requiring a correction.
The "Reflection" Logic
The water reflection is a mirror of the sky, but washed out. You do not need to use the same bright Reds you used for the sky. If you run out of Red, look for Maroon or dark Orange. These colors often serve as acceptable substitutes for the "shadowy" part of the water reflection.
Predicting the "?"; Reveals
The "?" cups are not random; they are predetermined. If you replay the level, note that the center stack always contains the same colors. After a few attempts, you will memorize that the "bottom-left center" is always Red, for example. Use this muscle memory to grab cups faster without thinking.
Belt Slot Optimization
Try to maintain a rhythm of "Load -> Paint -> Load". Never let your belt sit full while the nozzle is moving. If the belt is full, you are losing time. Ideally, you should have 3 cups on the belt, 1 being processed, and 1 empty slot for a new pickup.
Dealing with "Metal Banded" Cups
Some cups in this level have horizontal gray bars (metal bands). These act as blockers for the cups below them. You must clear the cup above (or the activator cup) to free them. Don't waste time tapping a locked cup; tap the lock mechanism or the cup feeding the lock.
The 80/20 Rule for Speed
In speed running, aim for 80% accuracy. Don't try to paint every single pixel perfectly. It is better to leave 3 pixels unpainted and finish the level, than to restart because you obsessed over a single missed pixel in the corner. The game is forgiving of small gaps.
Troubleshooting & Common Mistakes
Even experienced players can get tripped up by Level 239. Here is a diagnosis of common failure points and how to fix them.
Mistake: The Early White Grab
Symptom: You have 3 White cups on your belt, the nozzle is in the Red Sky zone, and you can't pick up the Red cup you need.
Fix: You must abandon the White cups. Paint the tiny white reflection spots immediately to clear the slots, or if you are truly stuck, restart the level. White is the highest risk color in this stage.
Mistake: Ignoring the Horizon Line
Symptom: You accidentally paint the sky with Blue or the water with Red because you misjudged the boundary.
Fix: Always paint the Maroon Horizon Line as your first or second action. It acts as a safety barrier. If you see Maroon on the canvas, you know everything below it is water and everything above is sky.
Mistake: Panicking at the Gate Break
Symptom: The Ice Gates break, and you start tapping randomly, filling your belt with a mix of useless colors.
Fix: When the gates break, take a mental breath. Do not tap for 1 second. Identify the *single* most abundant color in the reveal (usually Red) and only pick up that color.
Mistake: Vertical Tunnel Vision
Symptom: You focus only on the column directly under the nozzle and ignore the rest of the U-shape.
Fix: Constantly scan the entire supply tray. Sometimes the cup you need (Red) is on the far left, while the nozzle is on the right. You need to grab that Red cup *now* so it travels across the belt and arrives exactly when the nozzle gets there.
Stuck in a "Color Swap" Loop?
If you find yourself constantly switching between Red and Yellow, you are likely painting the sun and sky edges inefficiently. Group your movements. Do all the Red sky first, then come back and do all the Yellow sun/water. Minimizing the number of color switches saves precious seconds.
What to Do if You Run Out of Cups
Sometimes the side columns run dry, and the gates aren't open yet. If this happens, look for "activator" cups—cups that, when cleared, will lower a stack elsewhere. You might have to paint a few unwanted pixels (like Yellow in the sky) just to free up a stack of Red cups hidden behind a blocker. It's a short-term loss for a long-term gain.