
Level 287
HARDHow to solve Sand Loop level 287? Get instant solution for Sand Loop 287 with our step by step solution & video walkthrough. Sand Loop 287 tips and guide.
Play Sand Loop Now
Experience the puzzle challenge firsthand
Game Screenshots
Sand Loop Level Guides
Sand Loop Level 287: The Tropical Parrot Master Guide
1. Level Overview: The Supply Chain Crisis
Welcome to the definitive guide for Sand Loop Level 287. This stage is not just a puzzle; it is a rigorous lesson in resource management and supply chain logistics. Unlike previous levels where you could rely on speed or brute force to break through obstacles, Level 287 demands patience, foresight, and strict adherence to an inventory system.
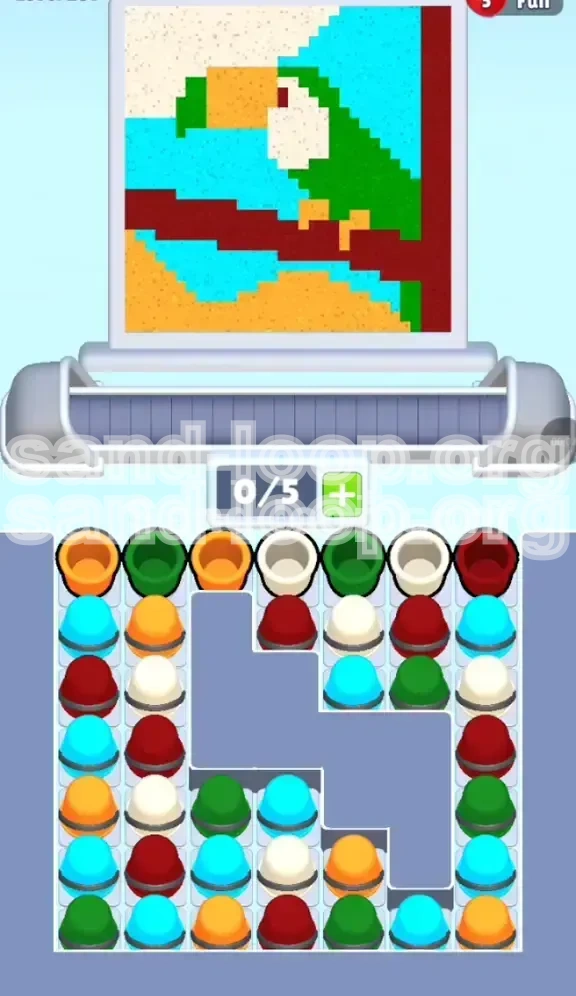
The visual theme, "The Tropical Parrot," features a vibrant bird sitting on a dark branch against a split background of blue sky and sandy ground. While the art is beautiful, the layout is designed to trick you. The board presents a deceptive abundance of sand in the center row, but this is a trap. The jagged gray dead zone beneath the center cups means the middle columns are effectively "shallow"—once you use a cup there, that column is permanently empty. Your true reservoirs are hidden in the deep stacks on the far left and far right. If you treat the center cups as an infinite supply, you will fail.
2. Core Mechanics: The U-Shaped Trap
To succeed, you must understand the unique geometry of this level. The gray barrier at the bottom creates a "U" shape in your supply trays. This physical barrier fundamentally changes how you must approach the game.
- The Shallow Center (Columns 2-6): These columns contain single-use cups resting directly on the gray barrier. You have exactly one shot with each of these cups. Once they are poured, they are gone forever.
- The Deep Reserves (Columns 1 & 7): Only the far left and far right columns have depth, containing 6-7 cups each. These are your safety net.
- The Scarcity Principle: You will likely feel "color starved" during this level. You will see colors you need (like White or Green) in the center, but if you use them too early, you will have no way to finish the details later when the side stacks are blocked.
3. Strategic Color Analysis
Success in Level 287 depends on knowing your palette. The colors are not distributed evenly, and understanding the volume required for each section is crucial.
- Deep Red (High Priority): Used for the horizontal branch and the parrot's eye. This color is scarce but acts as the anchor for the entire image. You must secure it early.
- Bright Green (High Volume): Used for the wing and back. This requires the most sand and careful placement to avoid bleeding into the face.
- White (Critical): Used for the face. This is your most endangered resource. The white cups are often buried or placed in the shallow center. Timing the white pour is the single most difficult part of this level.
- Orange (Medium Priority): Used for the beak and the sandy ground. This is your "buffer" color—useful for filling space but less critical for definition.
- Cyan (Low Priority / Trash): Used for the sky background. This is your largest area but least defined. You can use excess Cyan to clear the conveyor belt if needed.
4. Completion Objectives
Your goal is not just to fill the canvas, but to fill it in a specific order that prevents you from getting stuck with inaccessible colors.
- Establish the Branch: Use Deep Red first to create the foundation of the image.
- Clear the Blockers: Use Cyan (Sky) to empty the top layers of the side stacks.
- Execute the Face: Save White for a precise window when the belt is clear and the Eye is ready.
- Fill the Ground: Use Orange last to cap off the level and use up remaining stragglers.
Detailed Walkthrough: Step-by-Step Execution
Phase 1: Excavating the Left Stack (The Opening Move)
The level begins with a bottleneck. Your Deep Red is buried under layers of "useless" colors in the Left Column. Do not touch the center cups yet.
Step 1: Analyze the Left Column (Col 1)
You will likely see a stack order similar to: Orange (Top) -> Cyan -> Red (Bottom). Your goal is to reach that Red.
Step 2: Deploy the Top Orange
Tap the top cup of the Left Column. Pour this Orange into the parrot's beak or the sandy ground at the bottom. Do not pour it into the body or wing. You need to clear this cup to expose what's underneath.
Step 3: Clear the Cyan Blocker
With the Orange gone, the Cyan is now exposed. Tap the Left Column again to pour the Cyan. Direct this into the large Cyan sky area at the top of the canvas. The sky is vast and forgiving; it can handle large amounts of liquid without ruining the details.
Step 4: Secure the Red Anchor
You have now successfully excavated the first Deep Red cup without using any of your precious shallow center resources. Pause here. Do not pour the Red immediately if the belt is cluttered.
Phase 2: The Right Stack Rotation
With the left side prepared, look at the Right Column. This side often holds the complementary pieces of the puzzle.
Step 1: Analyze the Right Column (Col 7)
This stack typically follows a pattern like: Red (Top) -> Cyan -> White. This is a delicate stack because it contains the White face color buried under Red.
Step 2: The Double-Red Maneuver
Tap the top of the Right Column to pour the Red. Ideally, you should combine this with the Red you just exposed on the left. If timed correctly, pouring two Red cups in quick succession will finish the dark branch completely. This stabilizes the image and removes the pressure from the Red color requirement.
Step 3: Isolate the White Cup
Once the Right Red is gone, you will see a Cyan cup sitting on top of a White cup. This is a critical moment. You must avoid pouring that Cyan into the White face area.
Phase 3: Managing the "Shallow Middle" Danger Zone
Now that the deep stacks are opened up, you can cautiously utilize the center row. Remember: These are single-use.
Step 1: Inventory the Center Row
Look at the cups in the middle (Cols 2-6). You will likely see a mix of Green (for the wing) and White (for the face). Count them. If you have 3 Greens and 2 Whites, that is your entire budget for those colors.
Step 2: The Green Wing Burst
Begin tapping the Green cups in the center row. Pour them into the parrot's wing and back area.
Pro Tip: Do not pour all the Green at once. Pour one cup, wait for it to settle, then pour the next. If you flood the belt with Green, you might mix it with the upcoming White cups.
Step 3: The Diagonal Neck Risk
The parrot's neck is a diagonal line separating the Green body from the White face. If Green and White touch on the conveyor belt, they will bleed into each other, turning the neck a muddy teal. Always leave at least one empty slot on the belt between Green and White pours.
Phase 4: The White Face Precision Strike
This is the most high-risk phase of the level. You must execute the White pour perfectly.
Step 1: Check Your Reserves
Do you still have that White cup buried in the Right Column? If so, you might be able to use the Center White cups now. If the Right Column White is your ONLY backup, you must conserve the Center Whites.
Step 2: Clear the Belt
Before pouring White, ensure the conveyor belt is clear of Green residue. If there is even a drop of Green on the belt, the White face will be ruined.
Step 3: Pouring the Face
Tap the Center White cups. Pour them carefully into the face area. Do not overlap with the beak (Orange) or the eye (Red). The face is small; it does not require a huge amount of sand, but it requires pure sand.
Step 4: The Eye Detail
If you have a specific Red cup designated for the eye (often a very small pour required), now is the time to use it, right after the White face is established.
Phase 5: The Endgame - Cyan Dump and Orange Ground
You are in the final stretch. The shallow center is empty, and you are working with the bottom dregs of the side stacks.
Step 1: Clear Remaining Blockers
You will likely have a stack of Cyan cups blocking access to the bottom colors. Pour these aggressively into the sky. The sky is the "trash can" of this level—use it to dump excess volume while you dig for the good stuff.
Step 2: The Final Orange Push
You will likely find Orange cups at the very bottom of the Left or Right stacks. Pour these into the sandy ground at the very bottom of the canvas. This fills the remaining space and finishes the level.
Step 3: Final Review
Check for gaps. If the wing looks thin, you might have missed a Green cup. If the ground looks patchy, use the last bits of Orange. Once the canvas is 100% filled without color bleeding, Level 287 is complete.
Advanced Tactics & Error Prevention
Common Mistake: The "Premature Center" Trap
The most common reason players fail Level 287 is tapping the center Green cups too early.
- The Mistake: You start the level and immediately pour the center Greens into the wing because they are easy to access.
- The Consequence: Ten moves later, you need Green to finish the wing, but the center is empty. The side stacks are clogged with Cyan and Orange, and you have no way to get to the Green buried deep underneath. You are forced to restart.
- The Fix: Pretend the center row doesn't exist for the first 10 moves. Only touch it after you have uncorked the side columns.
Common Mistake: Color Bleeding on the Belt
The conveyor belt physics in Sand Loop can be unforgiving.
- The Mistake: Pouring a Green cup immediately followed by a White cup with no gap.
- The Consequence: The two colors mix while sliding. When the mixed sand hits the canvas, it creates a streak across the parrot's neck.
- The Fix: Always buffer your pours. Let the first cup clear the spout before tapping the next column.
What To Do If You Get Stuck
Sometimes, despite best planning, the RNG (Random Number Generator) gives you a bad cup order. Here is how to recover:
- Scenario: You are blocked by Cyan. You need Red, but there are 3 Cyan cups on top of it. Solution: Look at the sky. Is it 100% full? If not, pour the Cyan into the sky. Even if the sky looks "done," it can usually take another 10-15% volume. Use the sky as a dump to clear the blockage.
- Scenario: You ran out of White. The face is only half-filled. Solution: Check your "undo" history. Did you pour a White cup into the wing by mistake? Undo that pour and redirect it. If you are truly out of White, you may have to restart the level, as there is no way to generate more.
- Scenario: The Belt is Full. You have a queue of 4 cups waiting. Solution: Stop tapping. Wait for the queue to clear. Tapping more cups now will only cause a jam or mix colors at the dispenser.
Speed Run Strategies
For players looking to achieve 3 stars or top the leaderboards, speed is secondary to efficiency.
- The Two-Finger Tap: While the Left Red is pouring, immediately tap the Right Red. Having both Reds on the belt simultaneously is safe and faster than waiting for one to finish.
- Pre-Positioning: While pouring the "trash" Cyan, look ahead to where the Green cups are. Plan your finger's movement to go from the Cyan tap to the Green tap instantly.
- Skip Perfection: In a speed run, 95% fill is sufficient. Do not obsess over making the branch perfectly straight. If the branch looks slightly wavy but the game accepts it, move on. The only exception is the White face—keep that pure or the game might fail you on quality control.