
Level 357
HARDHow to solve Sand Loop level 357? Get instant solution for Sand Loop 357 with our step by step solution & video walkthrough. Sand Loop 357 tips and guide.
Play Sand Loop Now
Experience the puzzle challenge firsthand
Game Screenshots
Sand Loop Level Guides
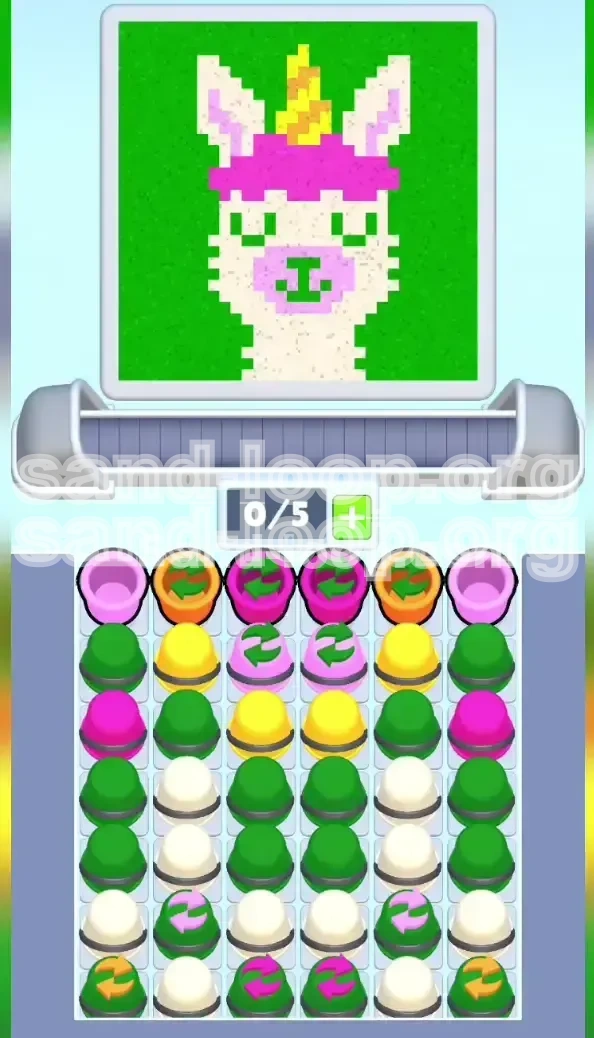
Level Overview: The "Unicorn Llama" Burial Challenge
Welcome to Level 357, a stage that shifts the focus from speed to strategic excavation. You are tasked with building a pixel art masterpiece featuring a "Unicorn Llama" (or Alpaca). This level is classified as a Burial Challenge, meaning the resources you need immediately are hidden at the bottom of the supply tray, while the resources you need last are blocking the top. The level demands a 60% focus on Green background management and precise execution to prevent color contamination of the central figure.
The Core Challenge: Inverted Resource Stacking
Unlike standard levels where resources flow from top to bottom, Level 357 utilizes a dense grid system where your primary color (White) is buried deep. The difficulty lies in accessing these bottom layers without polluting the canvas with the top-layer colors (Magenta and Orange). You are essentially playing a game of vertical Tetris within the supply tray.
The Canvas Layout
The canvas represents a pyramid structure where sand accumulates from the bottom up. The bottom center is the most critical zone, designated for the White neck and face. As you build higher, the canvas narrows, naturally guiding colors toward the top for the Horn and Headband. Understanding this geometry is crucial for deciding where to pour your "waste" colors.
The "Cycle Bucket" Mechanic
This level introduces specific "Cycle Buckets" marked with green arrows. These are not static resources; they toggle between colors or act as placeholders. In this level, they act as the primary barrier, sitting directly on top of the White cups you need. You must clear them to access the crucial White sand below.
The Color Distribution
Be prepared for a deceptive visual setup. While you see a rainbow of colors, the breakdown is roughly: 60% Green (Background), 20% White (Neck/Face), 15% Magenta/Pink (Headband), and 5% Yellow/Orange (Horn). Managing the Green overflow is just as important as placing the White.
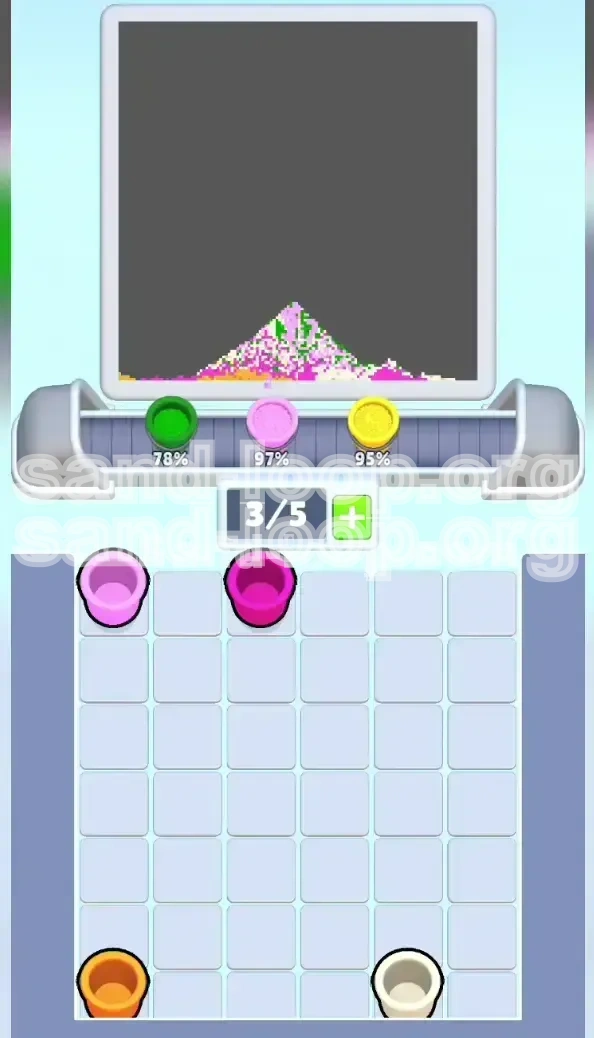
Winning Condition
To secure victory, you must achieve a 100% match rate on the pixel art without getting stuck with a full tray of unusable colors. The game ends if the supply tray overflows or if you incorrectly place a color that cannot be overwritten, such as putting Magenta on the White neck before the face is complete.
Clear Objectives: Your Mission Checklist
Before you tap a single cup, understand the sequential goals of this level. Rushing the top rows will result in an immediate loss. Patience is your greatest asset here.
Objective 1: Clear the Peripheral Blockers
Your initial goal is not to build the Llama, but to clear space in the supply tray. You must focus on the far left and far right columns (Columns 1 and 6) to remove the top-layer Cycle Buckets and Green cups. This creates the necessary "breathing room" to manipulate the center columns later.
Objective 2: Establish the White Foundation
This is the most critical phase. You must excavate the White cups located in Rows 3, 4, and 5 of the tray. Until you pour White sand into the bottom center of the canvas, you cannot proceed with any other colors. The White neck serves as the anchor for the entire level.
Objective 3: Manage Green "Waste"
Throughout the level, you will accumulate Green cups that you don't immediately need. You must use the corners of the canvas to dump this Green sand. Failing to do so will clog your tray, preventing you from grabbing the White cups when they finally become available.
Objective 4: Construct the Upper Features
Once the White neck is roughly 40% complete, you can transition to the secondary colors. The goal here is to layer the Magenta headband and the Yellow/Orange horn without bleeding into the White face. This requires waiting for the sand pyramid to rise high enough so that new pours slide off the white face and onto the "slopes" of the Llama.
Step-by-Step Instructions: The Excavation Strategy
Follow this exact sequence of actions to navigate the Supply Tray safely. Do not deviate from the early steps unless you are fully confident in your ability to recover.
Phase 1: The Side-Dump Maneuver (Start)
Ignore the center four columns (Columns 2, 3, 4, 5) completely. They are a trap containing Magenta and Orange. Tap only the Green cups and Cycle Buckets in Columns 1 and 6. Pour this Green sand into the far corners of the canvas. Your aim is to reduce the tray height by one full layer without dropping a single grain of sand into the center "Danger Zone."
Phase 2: Unlocking the Cycle Buckets
As you clear the edges, you will expose more Cycle Buckets. Tap them to see their color. If they turn Green, pour them immediately into the corners. If they turn into a head color (Magenta/Yellow), do not pour them yet. Instead, use them as temporary storage or hold them if you have an empty slot. You need to clear a path to the middle rows.
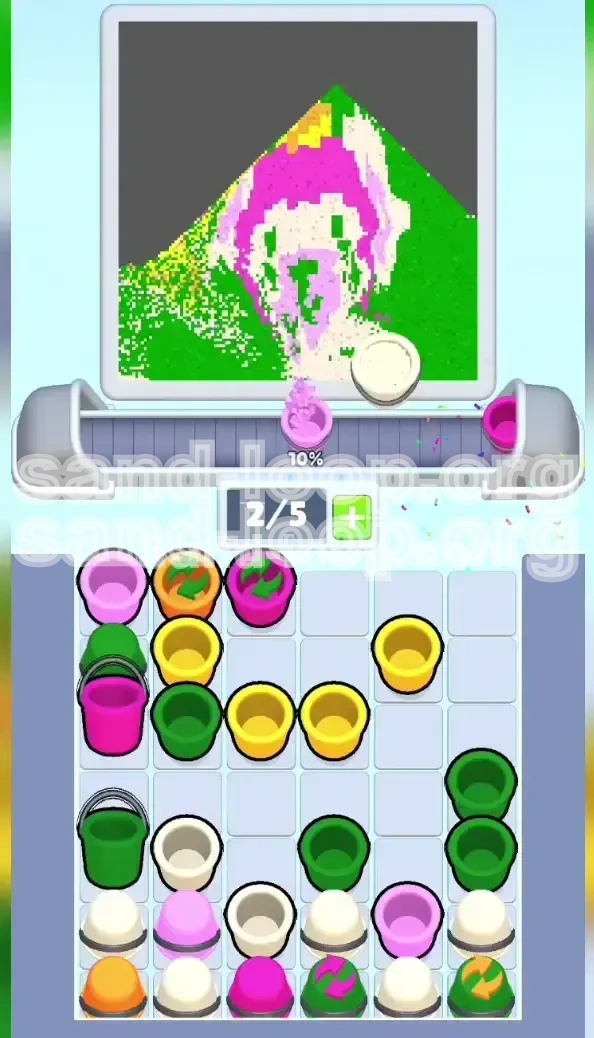
Phase 3: The White Rush (Mid-Game)
Once you have cleared enough of the top layer, you will see White cups in the middle rows. At this point, your slot capacity (0/5) becomes precious. Drop any non-essential Green cups to free up a slot. When you see a White cup, tap it immediately. Pour it directly into the center. You need to build the White neck up to about 30% of the total image height before moving on.
Phase 4: Structuring the Face
With the neck established, look for Light Pink cups. These are for the snout and inner ears. Pour these carefully. The sand should land on top of the White neck and begin forming the head shape. Ensure you do not accidentally drop Magenta here; Light Pink is distinct from the Magenta headband color.
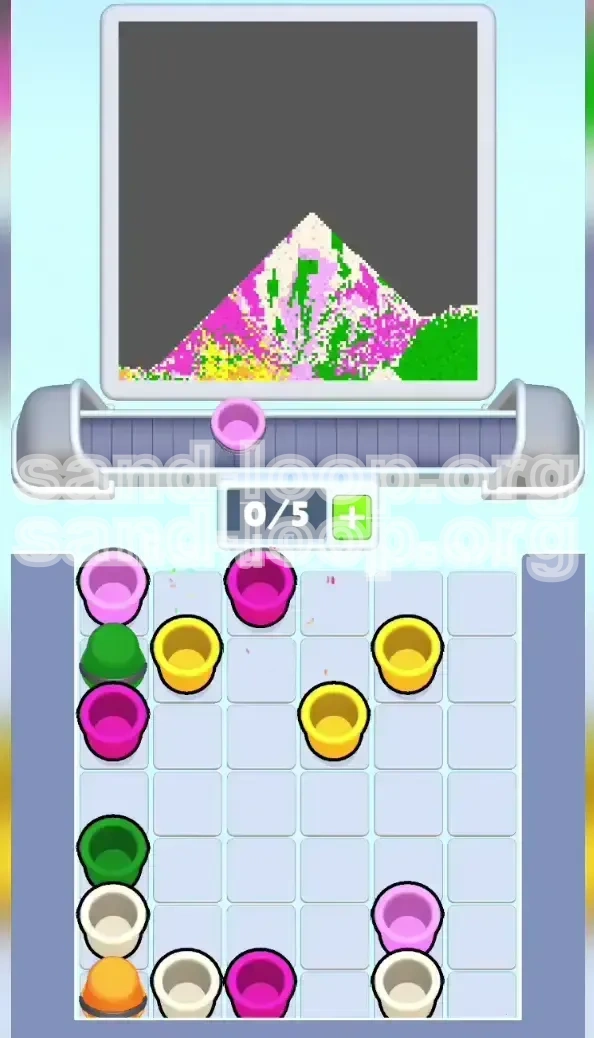
Phase 5: The Horn and Headband Finale
Only when the face is fully formed should you touch the Magenta and Orange cups from the top row. By now, the sand pile is high. Pouring Orange and Magenta will cause them to slide down the slopes to the very top of the Llama's head, perfectly placing the horn and headband without touching the face.
Color Order: The Processing Priority
Understanding the hierarchy of colors will save you from costly mistakes. This is the specific order in which you should address the colors in your supply tray.
Priority 1: White (The Neck & Face Base)
White is the "Lock" color. It must be placed first because it occupies the lowest and most central point of the canvas. If you place any other color first, it will be buried under the White neck, or worse, it will sit on top of the White neck and make the Llama look dirty. Rule of thumb: If you see a White cup and your center canvas is empty, drop everything else and pour the White.
Priority 2: Green (The Background)
Green is your "Dump" color. It has the highest volume (60%) and the most forgiving placement area (the entire top left and right corners). Process Green constantly to keep your tray empty, but never pour Green into the center columns until the White neck is fully grown. Pour Green only into Columns 1 and 6.
Priority 3: Light Pink (The Snout)
Light Pink is a secondary detail color. It sits just above the White neck. It is safe to pour once the White stack is about 20% built. It helps define the transition between the neck and the head.
Priority 4: Magenta (The Headband)
Magenta is a "High" color. It belongs on the forehead. If you pour it too early, it will slide down the White neck and create a "beard." You must wait until the sand pile is steep enough to catch the Magenta high up.
Priority 5: Yellow/Orange (The Horn)
This is the "Peak" color. It is the final touch. It sits at the very top of the pyramid. You usually cannot pour this successfully until the very end of the level, often when the tray is almost empty, as it requires the existing structure to guide it into the narrow point of the horn.
Key Tips & Common Mistakes
Mastering Level 357 is as much about avoiding errors as it is about executing the strategy. Here are the critical success factors and pitfalls.
Key Tip: Slot Management
You have a 0/5 Slot Capacity. Do not hoard colors. If your tray is full of Magenta and Orange, and a White cup appears, you are stuck. It is better to "waste" a Green cup by pouring it into the corner to keep a slot open than to hold onto a color you can't use yet. Always keep at least one empty slot for emergency excavations.
Key Tip: The "Slide" Physics
Learn to predict where the sand will land. Sand poured onto an empty canvas stays in the center. Sand poured onto an existing pile slides to the sides. Use this to your advantage: pour Green on the sides to build up the "walls," which will help keep your subsequent White pours contained in the center.
Common Mistake: The "Beard" Error
The most common failure in this level is dropping Magenta too early. This results in a strip of pink across the Llama's chin. Solution: If you accidentally drop Magenta early, you must immediately pour White to cover it up. If you don't have White, you may need to restart the level, as it is nearly impossible to correct later.
Common Mistake: Ignoring the Corners
Players often focus so hard on the center that they neglect the background corners. If the corners remain empty, the sand physics won't work correctly for the upper levels, and you might run out of space to dump your Green "trash," causing a tray overflow.
Stuck Solutions & Speed Run Tips
If you find yourself at a standstill or are looking to optimize your time, these advanced techniques will help you cross the finish line.
Stuck Solution: The White Lock-Out
Scenario: You need White, but it's buried under 3 layers of Magenta, and you can't pour Magenta without ruining the center.
Fix: Look for the "Green-Locked" columns. Check Columns 1 and 6. If they have Green cups, pour them to build up the corner height. This increased corner height can sometimes alter the flow of sand just enough to allow you to "clip" a Magenta pour into the corner/slope rather than the dead center, allowing you to burn through the blocker without ruining the art.
Stuck Solution: Cycle Bucket Roulette
Scenario: You are trapped with full slots and no moves.
Fix: If you have a Cycle Bucket, tap it. It might toggle to a color you need (Green) or a color you can use. If it toggles to a bad color, you might be forced to restart. However, sometimes tapping it changes the arrangement of the cups above it, revealing a new path to a White cup.
Speed Run Tip: The "Parallel Build"
For advanced players, you don't have to wait for the neck to be 100% done to start the background. Once the neck is ~20% stable, start aggressively pouring Green into the far corners (Columns 1 and 6). This clears the tray faster, ensuring that when you finally dig down to the White cups in Rows 4 and 5, you have plenty of open slots to grab them all at once.
Speed Run Tip: Pre-Loading the Tray
At the very start of the level, tap the top row of Cycle Buckets immediately before pouring anything. If you can "preload" them into a useful state (or clear them) in the first 5 seconds, you save valuable seconds later that would otherwise be spent waiting for animations to finish while your tray clogs up.