
Level 358
HARDHow to solve Sand Loop level 358? Get instant solution for Sand Loop 358 with our step by step solution & video walkthrough. Sand Loop 358 tips and guide.
Play Sand Loop Now
Experience the puzzle challenge firsthand
Game Screenshots
Sand Loop Level Guides
Level Overview: The Beach Castle Challenge
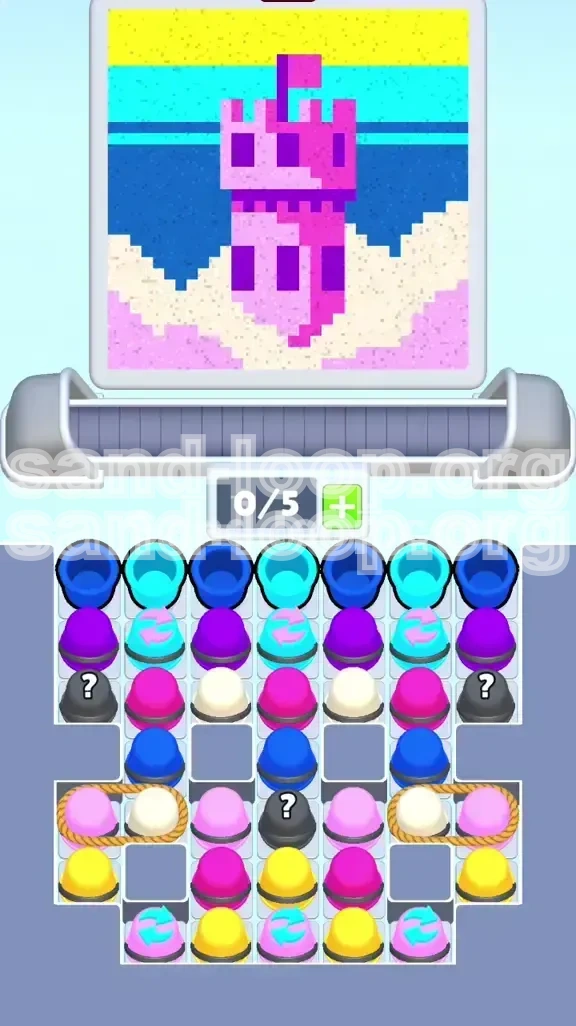
Welcome to the intricate pixel-art world of Level 358, famously known as the "Beach Castle." This stage is a significant shift from the high-speed adrenaline of previous levels, presenting instead a methodical logic puzzle that tests your spatial reasoning and tray management skills. The visual goal is to paint a beautiful seaside scene featuring a majestic castle against a backdrop of sky and sea. However, the reality is a tight spatial constraint challenge where resources are scarce and the margin for error is slim.
The primary difficulty in this level stems from the "bottleneck" effect created by the initial cup arrangement. You are not dealing with a wide-open tray; you are working with a congested setup where the colors you need immediately (the background blues) are physically blocking the colors you need later (the structural pinks and purples). Furthermore, the conveyor belt space is severely limited to a maximum of 5 slots. This means every tap must be calculated. You cannot simply clear cups randomly; you must orchestrate a sequence that keeps the belt moving without jamming, all while ensuring the paint lands on the correct pixel segments of the canvas.
Visual Breakdown of the Canvas
Before you tap a single cup, take a moment to visualize the target image. The canvas is divided into three distinct horizontal zones, each requiring a specific approach. The top 20% of the canvas is the "Sky Zone," dominated by bright Yellow. The middle 40% is the "Ocean Zone," a gradient of Cyan and Dark Blue. The bottom 40% is the "Castle and Sand Zone," where the complexity lies with Beige, Pink, and Purple. Understanding this vertical separation is crucial because it dictates the order in which you must free your colors from the tray.
The Bottleneck Constraint
This level introduces a severe resource management challenge. Your conveyor belt has a hard capacity of 5 slots. In practice, you should treat it as having only 4 usable slots. If you allow the belt to fill up completely (5/5), you lose the ability to rearrange incoming cups. This is fatal in Level 358 because the "Mystery" cups and "Roped" bundles require open slots to be utilized effectively. Keeping the belt at 3/5 or 4/5 capacity is not just a suggestion; it is a survival strategy.
Color Density Analysis
Analyzing the pixel distribution reveals a hidden trap. The background colors (Cyan and Dark Blue) cover approximately 40% of the canvas, whereas the castle details (Pink and Purple) cover about 35%, and the Sky/Sand covers the remaining 25%. The game tries to trick you by prioritizing the Blue cups at the top of the tray. If you mindlessly clear them to fill the ocean first, you will flood your belt with Blue cups, leaving no room for the critical Pink and Purple cups needed for the castle structure shortly after. You must pace your Blue pours.
The "Roped" Mechanic
Level 358 features specific "Roped Clusters" located at the bottom left and right of the tray. These are not single cups but pairs tied together—typically a Pink cup and a Beige cup. These act as physical locks. The Pink cup is tied to the structural integrity of the castle, while the Beige is for the sandy beach. These ropes sit on top of other cups, meaning you cannot access the lower layers (including the vital Yellow for the sky) until you cut these ropes. This mechanic forces you to decide when to "release" these colors, adding a layer of strategic timing to the gameplay.
Mystery Cup Variables
Scattered among the arranged cups are three Mystery Cups (marked with a ?). In this specific level, these are not random obstacles; they are functional bridge colors. Based on the level's algorithm, these Mystery Cups almost exclusively reveal Purple or Dark Blue—colors essential for the castle's shadow work and the deep ocean. Do not treat these as filler; treat them as strategic reserves to be deployed when you are running low on the primary stack of those colors.
Clear Objectives: Your Mission Checklist
To conquer the Beach Castle, you need a clear set of goals rather than a vague desire to "win." The level is won by managing the flow of materials from the tray to the belt, and finally to the canvas. Your primary objective is to deconstruct the tray layer by layer, starting from the top and working your way down to the bottom, all while maintaining a rhythmic pouring schedule on the conveyor belt.
Objective 1: The Ocean Layer Foundation
Your immediate goal is to establish the background. This involves clearing the initial top row of Cyan and Dark Blue cups. However, the objective isn't just to empty them; it is to pour them in a sequence that fills the ocean section of the canvas (the middle band) without creating a backup on the belt. You must clear the "Blue Blockade" to expose the underlying castle colors. Aim to keep exactly one slot open on your belt at all times during this phase to allow for cup shifting.
Objective 2: Unlocking the Castle Core
Once the Blues are partially cleared, the "Castle Core" (Pink and Purple cups) becomes accessible. Your goal here is precision. The castle features a checkerboard pattern requiring you to alternate between Pink (highlights) and Purple (shadows). You must avoid "spamming" Pink cups. If you pour all your Pink at once, you will lose the ability to create the shadow detail required by the Purple cups later. The objective is to alternate pours: Pink, then Purple, then Pink.
Objective 3: Managing the Roped Bundles
The mid-game crisis will revolve around the Roped Bundles. Your objective is to clear enough space on your conveyor belt to accommodate the sudden release of two cups simultaneously. When you cut the rope on a Pink/Beige bundle, both cups enter play. If your belt is full, this causes an immediate jam. Therefore, you must aim to have 2 empty slots available before you tap any rope knot. This objective is critical for progression.
Objective 4: The Sky and Sand Finale
The final objective is to close out the level with the top and bottom bands. The Yellow (Sky) and Beige (Sand) cups are the most buried in the tray. You cannot reach them until the central tower of Pink/Purple cups is demolished. Your goal is to reach the bottom of the tray stack to free these colors, then pour them rapidly to complete the top and bottom 20% of the image. This is the "cleanup" phase where speed becomes a priority again.
Objective 5: Zero Jam Policy
Throughout all other objectives, you must adhere to a strict "Zero Jam Policy." A jammed belt in this level is often unrecoverable because the cup density is so high. You must actively prevent the belt from reaching 5/5 capacity. If you find yourself at 4/5 with no immediate color match on the canvas, you must prioritize shifting cups to the storage slots (if available in your game mode version) or strategize a pour to free up space immediately.
Step-by-Step Instructions: The Execution Phase
This is the core of the walkthrough. Follow these steps in order. Do not skip ahead, and do not improvise heavily until you have mastered the rhythm. The logic here is based on the standard algorithm of Sand Loop, which prioritizes top-row access and left-to-right belt movement.
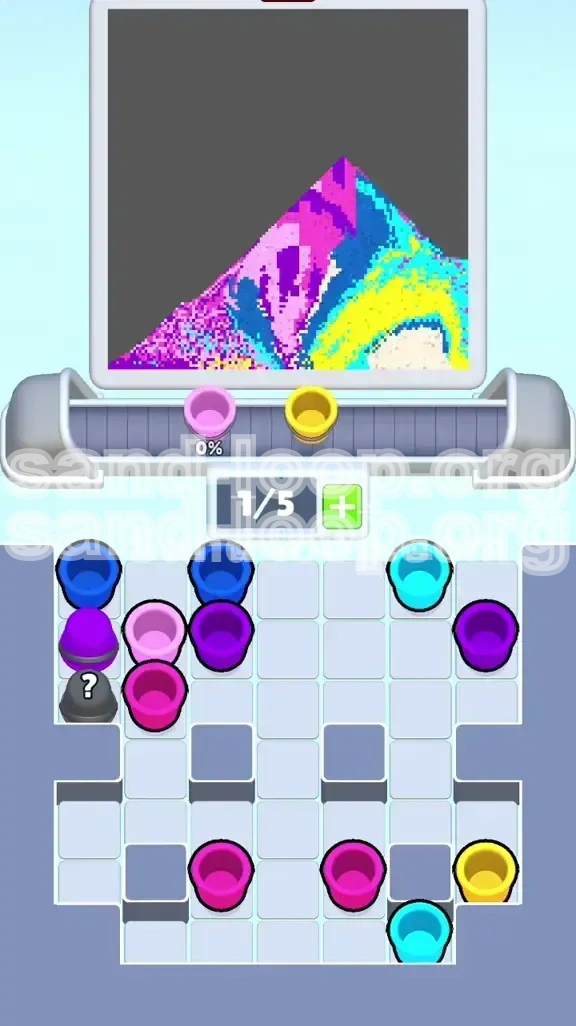
Phase 1: Breaking the Blue Seal (Start - 20% Progress)
The game begins with a wall of Blue. Locate the top-center cluster of Dark Blue and Cyan cups.
- Step 1.1: Tap the top-row Dark Blue cup. It will move to the conveyor belt.
- Step 1.2: Immediately tap the adjacent Cyan cup. Move it to the belt next to the Dark Blue.
- Step 1.3: Allow the nozzle to pour the Dark Blue first. As it pours, scan the tray. The Dark Blue pour will likely hit the horizon line or deep ocean.
- Step 1.4: Once Dark Blue is emptying, tap the next Dark Blue in the tray. Keep the flow moving. The goal is to create a "stream" of Blue.
- Step 1.5: CRITICAL: Do not fill the belt with only Blues. After placing 2 Blue cups on the belt, wait for one to finish pouring before tapping the third. You must preserve slots.
Phase 2: Exposing the Castle Towers (20% - 40% Progress)
As the top Blue layer vanishes, you will see the Pink and Purple cups underneath.
- Step 2.1: Stop tapping Blue cups for a moment. You need to transition to the castle structure.
- Step 2.2: Identify a Pink cup that has been exposed. Tap it to send it to the belt.
- Step 2.3: Look for a Purple cup. Tap it next.
- Step 2.4: Allow the Pink to pour. It will fill the upper battlements of the castle.
- Step 2.5: As the Pink is pouring, look at the Mystery Cup (Grey ?) in the center. If you have an open belt slot, tap it. It usually reveals Purple or Blue. This acts as a free refill.
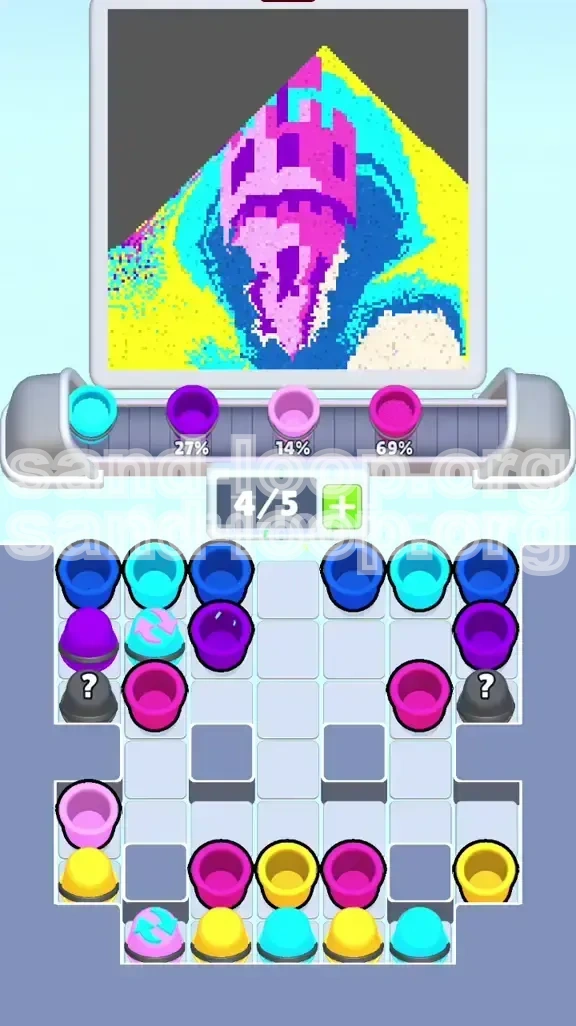
Phase 3: The Rope Operation (40% - 60% Progress)
This is the most dangerous part of the level. You are now dealing with the roped clusters on the sides.
- Step 3.1: Check your conveyor belt count. Is it at 3/5 or lower? If it is 4/5 or 5/5, stop. Wait for a cup to empty.
- Step 3.2: Locate the Roped Bundle on the left (usually Pink + Beige).
- Step 3.3: Tap the Rope Knot. Both cups will release onto the belt.
- Step 3.4: Quickly assess the order. If the Beige is closer to the nozzle, be ready. The nozzle moves automatically. If the canvas is currently painting the upper castle (Pink/Purple zone), you might need to swap cups on the belt (if the game allows) or just wait. Ideally, the Pink should pour first to finish the castle walls.
- Step 3.5: Repeat this process for the right-side Roped Bundle when you have space again.
Phase 4: Digging for Gold (60% - 80% Progress)
The middle of the tray is now emptying out. You are hunting for the Yellow cups buried at the very bottom center.
- Step 4.1: Aggressively tap the remaining Purple and Pink cups in the center column. You need to clear the debris to reach the bottom.
- Step 4.2: Ignore the side Blues for now. Focus purely on the central stack.
- Step 4.3: Once you see a Yellow cup peeking through at the bottom of the tray, tap it immediately.
- Step 4.4: Move the Yellow to the front of the queue (by managing the belt shift). The top of the canvas (Sky) needs to be filled now.
- Step 4.5: Pour the Yellow. This is usually safe because it's the top layer and won't overwrite the castle or ocean.
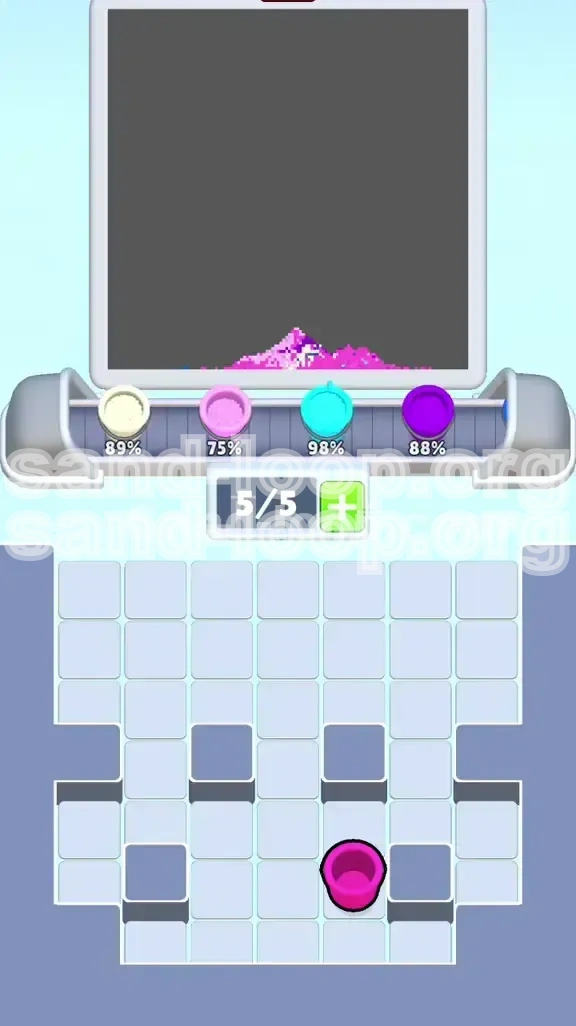
Phase 5: The Sand Sweep (80% - 100% Progress)
The final stretch. The castle is built, the sky is blue. Now you just need the beach.
- Step 5.1: Gather the remaining Beige cups (from the ropes or tray).
- Step 5.2: Line them up on the belt.
- Step 5.3: Wait for the nozzle to align with the bottom 15% of the canvas (the sand area).
- Step 5.4: Rapid fire the Beige cups. Since this is the bottom layer, there is no risk of ruining the details above.
- Step 5.5: Finish any remaining Blue or Pink drops to clear the tray completely.
Color Order: The Science of the Pour
In Sand Loop, the order of operations is everything. You cannot paint the sky before the roof is built, or the roof before the walls are up. Level 358 requires a strict vertical hierarchy in your pouring strategy. Understanding this logic prevents 90% of "failed level" retries where you run out of moves or jam the belt.
The Vertical Priority Rule
The general rule of thumb in pixel art games is "Back to Front." In Level 358, this translates to "Middle-Out" followed by "Top-Down." You must fill the background (Ocean) and the mid-ground (Castle) before you can effectively fill the foreground (Sand) and the extreme background (Sky). If you pour the Sand (Beige) too early, it sits at the bottom. If you pour the Sky (Yellow) too early, it's fine, but it wastes belt space that should be used for the harder-to-manage Blues and Pinks.
Stage 1: The Blue-Cyan Sandwich
Start with the Dark Blue and Cyan. These colors form the canvas. Why? Because the castle sits *on top* of the ocean, and the sky sits *behind* it. If you try to do Pink (Castle) first, you will eventually have to place Blue cups on the belt to fill the gaps behind the castle. This interrupts the flow of Pink pouring. It is much more efficient to clear the Blue "debt" first. Establish the ocean horizon, then move to the castle structure.
Stage 2: The Checkerboard (Pink & Purple)
This is the most critical sequence. Do not do all Pink then all Purple. The castle texture is generated by the intersection of these colors. The game's algorithm for this specific pixel art relies on a specific ratio. You should aim for a 1:1 ratio initially. Tap one Pink, pour it. Tap one Purple, pour it. This alternation ensures that the "windows" and "shadows" of the castle are rendered correctly. If you pour 3 Pinks in a row, you risk "bleeding" the color into areas meant for Purple, creating a flat, blob-like castle instead of a detailed one.
Stage 3: The Yellow "Cap"
Yellow is the safest color, but it is the most buried. Treat it as the "Capstone." Save Yellow for when the tray is mostly cleared. Why? Because Yellow covers the top 15% of the screen. It doesn't interact with the complex geometry of the castle. If you have a random Yellow cup early, you can pour it, but don't go hunting for it until the Pink/Purple phase is stabilized. It is your "Get Out of Jail Free" card—if you are stuck with a weird cup arrangement, pouring Yellow is often a safe move to clear a slot.
Stage 4: The Beige "Foundation"
Beige is the floor. It goes last. Because it covers the bottom pixels, it can be poured over almost anything without ruining the upper details. The only risk is pouring Beige when the nozzle is in the middle of the screen (aiming at the castle). You must time your Beige pours for when the nozzle swings to the bottom. This is why Beige is saved for the end when you have full control over the belt and can time the pours perfectly.
Key Tips and Common Mistakes
Even with a perfect walkthrough, small habits can lead to failure. These tips are derived from analyzing common failure points in Level 358. Avoiding these mistakes is often more important than perfect execution.
Key Tip: The "Mystery Cup" Gamble
Don't be afraid of the Mystery Cups (Grey ?). In many levels, they are dangerous. In 358, they are helpful. They statistically drop Purple or Cyan. Since Purple is your bottleneck color (often in short supply for the castle shadows), using the Mystery Cup is a great way to top up your Purple reserves. Treat the Mystery Cup as a "Purple Battery." Tap it when you are running low on standard Purple cups.
Common Mistake: The "Blue Flood"
The most common way to lose this level is by tapping every Blue cup you see immediately. This floods your conveyor belt with 4 or 5 Blue cups. You pour the ocean, great. But now the belt is clogged with Blue, and the only cups available to tap in the tray are Pink and Purple. You have no room to put the Pink on the belt! The game jams. Correction: Tap Blue, wait for it to pour, tap Purple, tap Blue. Intermix your taps to keep the belt diverse.
Common Mistake: Ignoring the Rope Lock
Players often see the rope and think, "I'll deal with it later." Then they clear the rest of the tray and are left with just the roped bundles sitting at the bottom, often with no way to combine them or open them because the belt is jammed with the last remaining colors. Correction: Make the ropes a priority event. Clear space specifically for them when they are the only major obstacle left in the top/middle tray.
Key Tip: Nozzle Awareness
Watch the spray nozzle (the paint dispenser). It moves up and down. If you have a Beige cup (for the bottom) and a Pink cup (for the middle) on the belt, look at the nozzle. If the nozzle is at the top (Sky/Castle), pour the Pink first. If you pour the Beige while the nozzle is at the top, you waste the sand or, worse, glitch the graphics. Always match the cup color to the nozzle height. Blue/Pink/Purple = Middle/Top. Beige/Yellow = Bottom/Top.
Common Mistake: Pre-Tapping
Do not tap cups in the tray just because you can. Only tap a cup when you have a plan for it. If you tap a Purple cup and throw it on a full belt just to "clear the tray," you might push a needed Blue cup out of the pouring queue, causing it to recycle and waste time. Correction: Only tap when you have 1 open slot and the current cup is pouring.
Stuck Solutions and Speed Run Strategies
So, you followed the guide, but something went wrong. The belt is jammed, or you are out of moves. Here is how to perform emergency surgery on your game state. Additionally, for the veterans, here is how to shave seconds off your time.
Solution: The Belt Jam Rescue
If your belt is stuck at 5/5 and nothing is pouring (because the needed color isn't in the nozzle yet), you are in a jam. Look for a Mystery Cup in the tray. If you can tap it and it creates a match of 3 on the belt (if your game mode allows matching on the belt), do it. If not, look for a cup in the tray that matches a cup on the very end of the belt (the one about to pour). Tapping it might trigger a combo or a shift that clears a space. If all else fails, simply close the app and restart the level (the "nuclear option").
Solution: The Missing Color Bug
Sometimes, you need Pink, but the tray only shows Blue. This means the Pink cups are buried under the Blues. You have no choice but to "burn" the Blue cups. Tap the Blues and put them on the belt, even if you don't need to pour Blue right now. Let them pour into the already-filled ocean sections (this is allowed; it just tops up the color). This removes the Blues, physically uncovering the Pinks underneath. It wastes a bit of time, but it unearths the resources you need.
Speed Run Tip: The "Tap-Wait" Rhythm
Speed running isn't about tapping fast; it's about eliminating "dead time." The fastest players tap a cup, then immediately look at the *next* cup they need, waiting for the exact millisecond the belt has an open slot. Do not tap randomly. Pre-select your target. If you know you need Yellow next, hover your finger over the Yellow cup while the current cup is pouring. As soon as the slot opens, tap.
Speed Run Tip: Pre-loading the Belt
In the first 10 seconds, try to load the belt with Dark Blue, Cyan, Dark Blue, Cyan. By pre-loading a pattern, you can essentially take your hands off the screen for 4-5 seconds while the belt auto-pours the background. This frees up your eyes to scan the tray for the location of the first Roped Bundle or the first Mystery Cup. Planning while the machine works is the key to speed.
Advanced Strategy: The "Beach Bypass"
If you are confident, you can ignore the Beige (Sand) cups entirely until the very last second. Since the Sand is at the very bottom, it doesn't affect the playability of the rest of the level. You can fill the Sky, Ocean, and Castle to 95% completion. Then, in the final 10 seconds, cut the ropes on the Beige bundles and pour them all at once. This is a high-risk, high-reward strategy that prevents the "sand cups" from clogging your belt during the complex castle-building phase.