
Level 407
HARDHow to solve Sand Loop level 407? Get instant solution for Sand Loop 407 with our step by step solution & video walkthrough. Sand Loop 407 tips and guide.
Play Sand Loop Now
Experience the puzzle challenge firsthand
Game Screenshots
Sand Loop Level Guides
Sand Loop Level 407: The Lily of the Valley Mastery Guide
Level Overview: A Logic and Sequencing Test
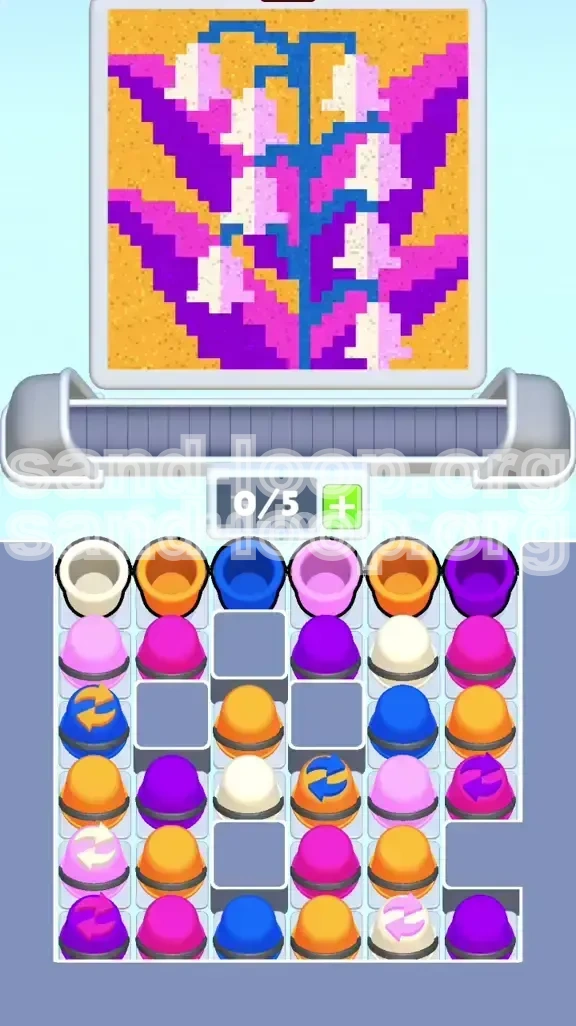
Sand Loop Level 407 is a deceptive puzzle that shifts the gameplay focus from reflexes to strict logic and inventory management. In this stage, you are tasked with constructing the "Lily of the Valley," a pixel art image characterized by a vibrant blue stem, lush magenta and purple leaves, and delicate white bell-shaped flowers, all set against a massive orange background.
Core Challenges and Restrictions
The primary difficulty in Level 407 stems from the "Grey Pillar Grid," a set of immovable obstacles in the center of the board. Unlike standard levels where sand falls in straight vertical lines, these pillars force your supply cups to slide diagonally. This physics mechanic makes it incredibly easy to jam critical color cups behind obstacles, rendering them inaccessible. Furthermore, you are limited to a 5-slot conveyor belt, but the board starts with 6 available cups, immediately forcing a resource management decision.
Why Speed is Not the Priority
Attempting to rush this level will result in failure. The physics engine creates a "sand mound" effect; if you pour the heavy background colors before the delicate foreground details, the excess sand will physically spill over into unfilled pixels, contaminating your art. This level requires a disciplined, slow-and-steady approach, prioritizing precision over rapid clicking.
The Physics of Sand Contamination
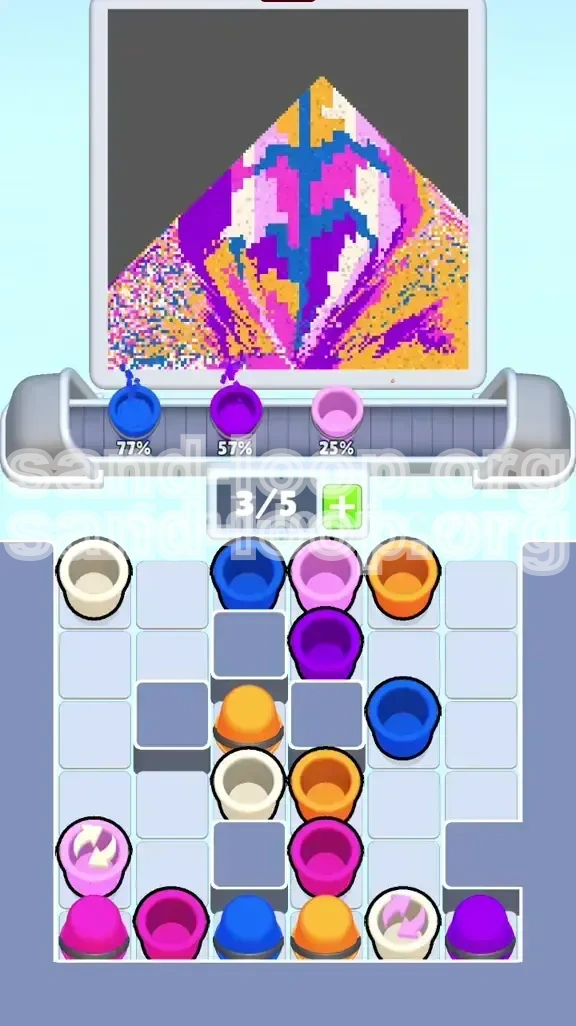
Understanding the triangular peak of sand is vital. As you drop colors, the sand piles up. If you pour the high-volume Orange background (which covers about 60% of the canvas) before completing the thin Blue stem (less than 10% of the canvas), the rolling Orange physics will bleed into the empty White and Blue zones. You must fight the urge to clear the board quickly and instead focus on the fragile internal structures first.
Clear Objectives: Your Mission Checklist
Primary Goal: Construct the Skeleton
Your first objective is to secure the high-detail, low-volume colors. You must isolate and deposit the White and Blue cups to form the flowers and the stem. These are the most fragile parts of the image and are easily overwritten by larger sand volumes. Do not focus on the background until these elements are fully rendered.
Secondary Goal: Manage the 5-Slot Economy
You must maintain at least one empty slot on your conveyor belt at all times. If you allow all 5 slots to fill up, the board locks, and you cannot drop new cups until you clear space. This "deadlock" is the most common cause of failure in the first 10 seconds of the level.
Tertiary Goal: Navigate the Pillar Maze
You need to successfully maneuver cups from the top row down to the bottom conveyor without getting them stuck on the Grey Pillars. This involves using the outer columns (1 and 6) as "chutes" to slide cups diagonally into the center.
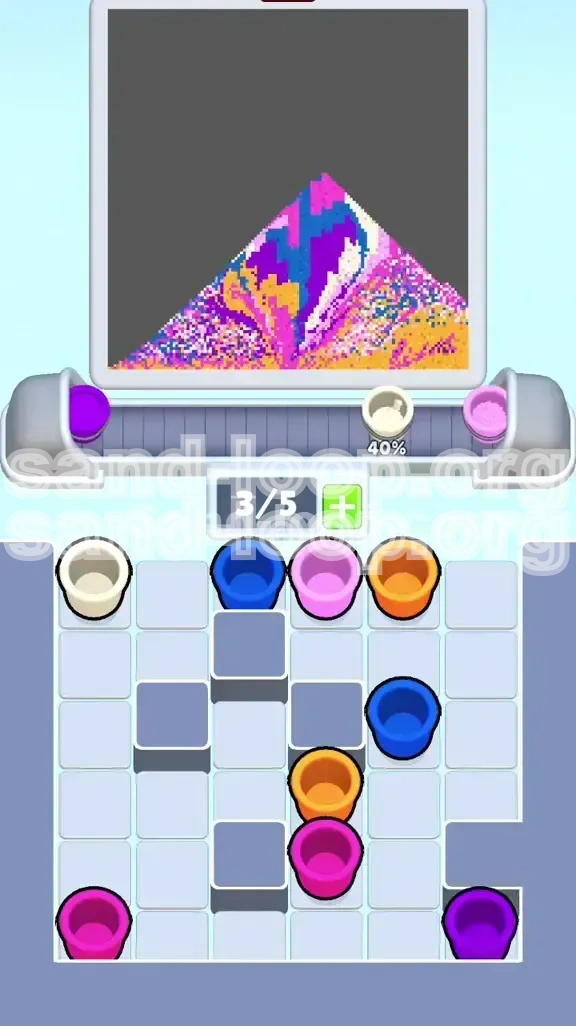
Final Goal: The Orange Flood
The final 40% of the level is a rapid-flood exercise. Once the delicate art is protected by the surrounding leaves, you must unleash the massive volume of Orange sand to complete the background. This is the only time speed becomes a factor.
Step-by-Step Walkthrough: From Start to Finish
Phase 1: The Opening Sequence (Seconds 0-15)
The board begins with a specific arrangement: White, Orange, Blue, Pink, Orange, Purple. You only have 5 slots. Do not spam clicks.
- Step 1: Tap the White Cup (Column 1). This sends the first flower color to the belt.
- Step 2: Tap the Blue Cup (Column 3). This secures the stem.
- Step 3: Tap the Purple Cup (Column 6). This opens the right-side chute.
- Warning: Ignore the two Orange cups in Columns 2 and 4. Tapping them now fills your belt with low-priority colors.
Phase 2: Stem and Flower Detailing
With White and Blue on the conveyor, focus entirely on pouring them.
- Action: Pour the White sand into the small bell-shaped pixels. Do not overfill.
- Action: Follow up immediately with the Blue sand to draw the jagged central stem.
- Result: You have now "capped" the most vulnerable pixels. Even if sand spills later, it won't easily destroy the core structure.
Phase 3: Diagonal Drops and Clearing Pillars
Now you must clear the top row to access the Cycle Cups.
- Strategy: Look at the cups sitting directly on top of the Grey Pillars. They cannot move down vertically.
- Maneuver: Tap the cups in the outer columns (1 and 6). As these drop, the cups on the pillars will slide diagonally into the empty space.
- Target: You are trying to reach the "Cycle Cups" (marked with looping arrows) buried in the grid. These refresh your color supply.
Phase 4: The Leaf Construction (Mid-Game)
With the stem done, the canvas demands Purple and Magenta.
- Timing: Trigger the Cycle Cup for Purple only when your current Purple progress is 100% complete.
- Execution: Pour the Purple and Magenta leaves. These colors are thick and blocky. They act as a "dam" or wall, which will help contain the final flood of Orange sand.
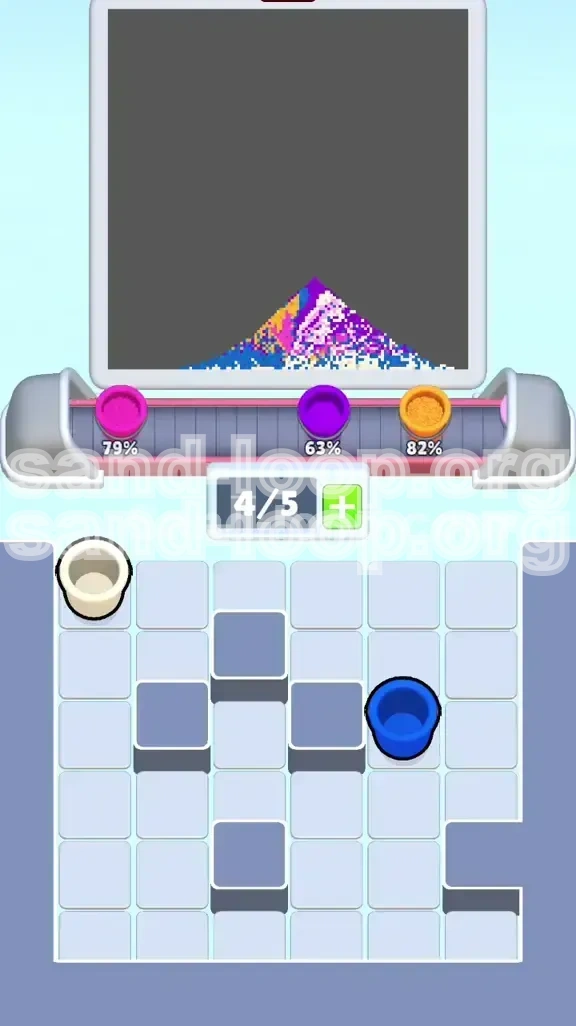
Phase 5: The Orange Finale
Only when the leaves, stem, and flowers are fully visible should you touch the Orange cups.
- The Flood: Tap the remaining Orange cups rapidly.
- Volume: Because the foreground is built, the Orange sand will fill the negative space around the leaves without destroying the details.
- Completion: Watch for the "Level Complete" banner as the final orange pixels settle.
The Color Order: Why Sequence Matters
Priority Tier 1: White (The Bells)
White is the highest priority color despite having the smallest volume. It represents the "focal point" of the art. If White is contaminated by Orange or Blue, the image looks ruined. Always pour White first to ensure the pixels land in a clean, empty well.
Priority Tier 2: Blue (The Stem)
The Blue stem is thin and jagged, representing a vertical crack in the canvas. It is highly susceptible to being buried by adjacent sand colors. Pouring Blue second ensures it connects the White bells to the base of the plant before the heavier colors arrive.
Priority Tier 3: Purple and Magenta (The Leaves)
These are your "bulwark" colors. They are thick and heavy. By pouring them third, you create a physical barrier around the delicate Blue and White pixels. Think of the leaves as a castle wall protecting the flower inside.
Priority Tier 4: Orange (The Background)
Orange is the "Filler." It makes up approximately 55-60% of the canvas area. In physics terms, it is a liquid seeking to fill the lowest point. If you pour it first, it creates a sloped floor that causes your subsequent careful drops of Blue and White to slide off-target. It must always be last.
Key Tips for Success
Master the "Diagonal Slide"
The Grey Pillars are not just walls; they are ramps. If a cup is stuck on a pillar, clear the cup diagonally below it. The top cup will slide down into the gap. Use this to your advantage to fetch Cycle Cups that seem out of reach. Never try to clear a cup that is pinned directly under a grey block without first creating a slide path.
Conveyor Belt Management
Treat your empty conveyor slots as gold. A good rule of thumb is the "3+2 Rule": keep 3 active colors on the belt and leave 2 slots empty. This buffer allows you to catch falling cups from the top row without causing a bottleneck jam at the intake chute.
Watch the Progress Bar, Not the Canvas
While you need to look at the canvas to aim, your eyes should constantly dart back to the color progress bar. Do not trigger a Cycle Cup if you are only at 80% completion for that color. Wait for 100%. Triggering it early wastes a cup slot and fills your belt with a color you don't need yet.
The "Sand Mound" Strategy
Use the physics to your advantage. When pouring the Purple leaves, pour slightly higher than necessary. The mound will form and spread the pixels to the edges. However, reverse this for the Blue stem—pour low and slow to keep the line thin.
Identifying Cycle Cups
Memorize the icon. The Cycle Cup (two arrows in a loop) is your lifeline. It refreshes the specific color you need most. In Level 407, these are often trapped. Prioritize freeing the Cycle Cup over a standard color cup if your belt is empty.
Common Mistakes to Avoid
The "Full Belt" Panic
Many players see 6 cups at the top and tap them rapidly to clear the row. This fills your 5-slot belt instantly. When the belt is full, the game logic prevents new cups from dropping, and you are stuck waiting for colors to drain. Do not clear the top row randomly. Pick and choose based on the Priority Tier list.
The Early Orange Trap
Orange is abundant. It is tempting to clear the Orange cups early because they are cluttering the board. This is a trap. If you pour Orange early, you create a "hill" on your canvas. When you eventually try to pour the White bells, they will roll down the Orange hill and land in the wrong spot.
Ignoring the Grey Pillars
Tapping a cup that sits directly on top of a pillar without checking the column below is a guaranteed jam. If the space below a pillar is blocked by another cup, the top cup will not move. You have to clear the blocker first. Always look two steps ahead.
Wasting Cycle Cups
A common error is tapping a Cycle Cup as soon as it appears on the belt. This spawns a new color immediately. If your belt was already full (3/5 slots used), the new color pushes a critical color (like White) off the belt or forces a jam. Only tap Cycle Cups when you have 2 or more empty slots.
Overfilling the Details
The White bells are small. Holding the tap too long will overflow the White sand into the adjacent Green or background zones. Tap and release quickly for the details. Hold down only for the background.
Stuck Solutions: Troubleshooting the Board
Scenario: "My board is frozen, cups won't drop."
Diagnosis: You have a Column Jam. This usually happens in Columns 2, 3, 4, or 5.
Solution: Look for a cup that is hovering over a Grey Pillar. The cup directly below it is likely the problem. You must clear the bottom cup first. If the bottom cup is a color you don't need (e.g., Orange), you may have to bite the bullet and waste it on the canvas just to unjam the column.
Scenario: "I ran out of Blue/White sand."
Diagnosis: You missed the Cycle Cup, or it is stuck.
Solution: Stop pouring. Scan the grid for the Blue or White Cycle Cup. It is likely pinned against a wall. Clear the cup next to it (horizontally or diagonally) to create a slide path. Once it drops, tap it to refresh your supply.
Scenario: "The Orange sand keeps ruining my Blue stem."
Diagnosis: You are pouring Orange too early, or your "dam" (leaves) isn't built.
Solution: You cannot undo the pour. However, you can try to "cap" the stem by quickly pouring the Purple leaves *over* the spilled Orange. The Purple pixels are darker and opaque, so they might hide the Orange mistake. Pour thicker Purple leaves to hide the error.
Scenario: "Conveyor belt is full and I can't get the color I need."
Diagnosis: Inventory mismanagement.
Solution: Identify the least important color on your belt. If you have Orange on the belt but still need to finish the stem, you have to waste the Orange. Pour the Orange onto a completed part of the canvas (an area that is already Orange). This clears the slot instantly and allows you to tap the grid to drop the needed Blue or White cup.
Speed Run Tips: For the Time Attackers
The "Skip" Strategy
Once you have mastered the level, you can skip the "Wait for 100%" rule for Cycle Cups. If you are confident in your aim, you can trigger a Cycle Cup at 80% progress. The new cup will arrive just as you finish the previous one, saving you 3-5 seconds of waiting.
Pre-Loading the Belt
During the "Orange Flood" phase, don't wait for the belt to clear. As you are pouring the last batch of Purple leaves, use your other hand to start tapping the Orange cups in the grid. By the time you finish the leaves, the belt should be fully loaded with Orange, ready for the final rapid-fire sequence.
Bulk Pouring
For the Orange background, do not use single taps. Click and hold. Since the foreground details are already protected by the leaves, you can dump the remaining sand volume rapidly. The physics engine will handle the distribution of the background fluid without damaging the capped art.
Memorizing the Grid Layout
The Grey Pillar layout never changes. Memorize exactly which columns are blocked (2, 3, 4, 5). This allows you to tap the correct side columns (1 and 6) instinctively without scanning the board, shaving milliseconds off every drop.
The Reset Point
If you make a mistake in the first 10 seconds (e.g., pouring Orange too early), hit restart immediately. Trying to fix a physics error in the first 15 seconds will always be slower than restarting. A perfect run relies on the first 20 seconds being error-free.