
Level 416
HARDHow to solve Sand Loop level 416? Get instant solution for Sand Loop 416 with our step by step solution & video walkthrough. Sand Loop 416 tips and guide.
Play Sand Loop Now
Experience the puzzle challenge firsthand
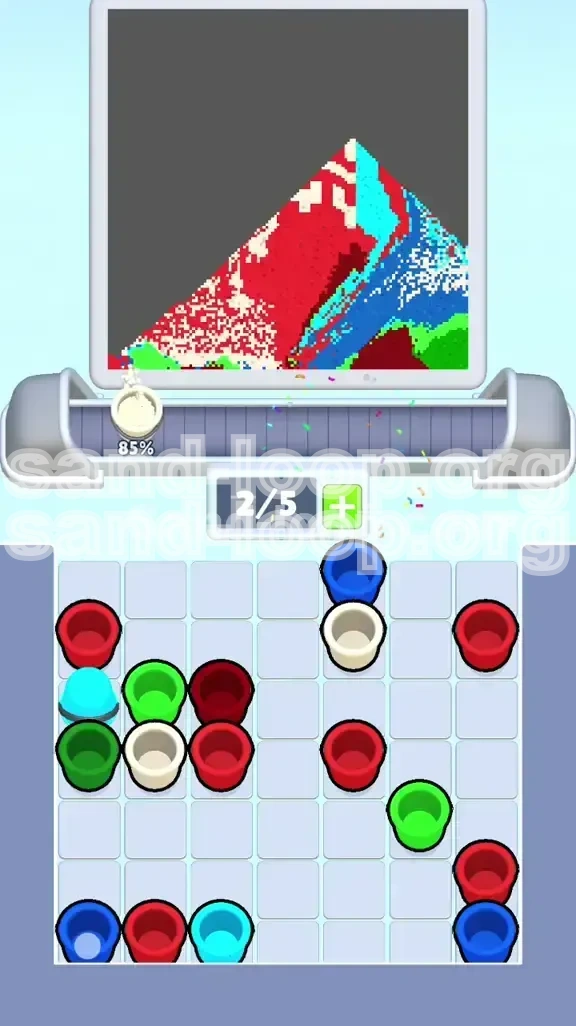
Game Screenshots
Sand Loop Level Guides
Level 416 Overview: The Christmas Stocking Challenge
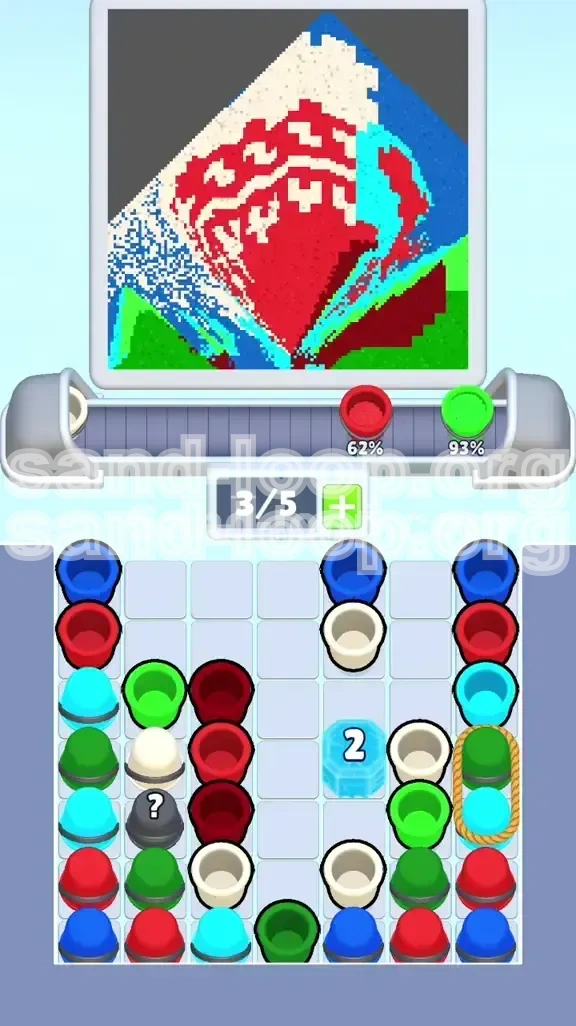
Level 416 in Sand Loop is deceptively festive. While the screen displays a cheerful holiday stocking, the underlying mechanics are purely brutal logic. This level tests your ability to manage limited Slot Capacity (5 slots) while dealing with obstructive Ice Blocks and binding Ropes. Unlike standard "Pixel Art" levels where you can simply relax and fill space, Stage 416 requires aggressive resource management.
The primary difficulty spike comes from the inventory setup. Your most crucial colors—specifically the Dark Red (Maroon) for the heel/toe and the White for the trim—are locked behind high-value Ice Blocks (5, 11, and 17 counts). If you do not plan your moves to chip these blocks early, you will find yourself with a full conveyor belt, no empty slots, and critical sections of the stocking remaining unfilled.
The Visual Layout
The image is split into two distinct zones: the Foreground (the stocking) and the Background (sky and grass). The stocking takes up the center-left, featuring a large Red body, White fluffy trim, and Maroon accents. The right side holds a small Red Heart. The bottom is Lime Green, and the top is Cyan. This layout requires you to handle large background areas without wasting your limited supply of specific detail colors.
Core Mechanics
This stage relies heavily on the Ice Block and Rope mechanics.
- Ice Blocks: These act as timers. You must perform a specific number of actions (pouring sand) to break them. They block access to new columns of cups.
- Ropes: These link two cups together (e.g., Green and White). Selecting one pulls both onto the belt, consuming 2 slots instantly.
- Mystery Cups: Hidden behind the ice, these provide random colors, acting as a wildcard when you are desperate for specific fills.
Winning Conditions
To achieve 100% completion, you must fill every pixel of the stocking, the heart, and the background. The challenge is maintaining a flow where you are constantly filling the large background areas (Cyan/Green) to cycle your belt, while simultaneously whittling down the Ice Blocks to free up the detail colors (Red/Maroon/White).
The "Slot Capacity" Constraint
Your biggest enemy here is the 5-slot limit. Because Ropes pull double cups, tapping a Rope when you have 4 full slots will cause a deadlock. You must aggressively dump colors into the large background zones to free up space before triggering new Ropes.
Why This Level Fails Most Players
Most players fail because they focus on the Red Body too early. They fill the main stocking, use up all their Red and White cups, and then realize the Maroon heel and toe are still locked behind the '11' Ice Block. With no slots left to generate new actions to break the ice, the game stalls. The key is prioritizing the Ice Blocks over the aesthetics early on.
Strategic Color Order and Management
The difference between a successful clear and a restart in Level 416 comes down to the order in which you process your colors. You cannot rely on the order the game gives you; you must impose your own logic on the chaos.
Priority 1: Cyan (Sky) and Lime Green (Grass)
These are your "dumpster" colors. The Cyan sky and Green grass cover nearly 40% of the canvas. Use these colors liberally whenever your slots are full. Filling these large areas serves two purposes: it completes the easy parts of the level, and more importantly, it clears cups off your conveyor belt. Clearing cups allows new cups to enter the screen, which counts as the "actions" needed to shatter the Ice Blocks.
Priority 2: Maroon (Dark Red)
This is your bottleneck color. The heel and toe of the stocking are small, comprising less than 5% of the total area, but they are required for completion. The Maroon cups are trapped behind the '11' Ice Block. You must mentally flag this color as "Critical." Do not wait until the end to start breaking the ice blocking these, or you will be stuck with a full belt and no way to generate the hammer hits needed to free them.
Priority 3: White (Trim and Stripes)
White is dangerous. It is used for the fluffy top trim and narrow stripes. If you pour White too fast, it spills into the Red body or Green grass, creating "pollution" that requires extra sand to fix. Treat White as a precision color. Only pour it when you have a steady hand and clear access to the top of the stocking.
Priority 4: Primary Red
Red is the bulk of the stocking (approx. 35% of the image). It is abundant but often locked behind Ropes or Mystery Cups. While important, you should not prioritize Red over breaking the Ice Blocks for Maroon. It is better to have an unfilled Red body than an unfilled Maroon toe, as the Red cups are generally more accessible on the conveyor belt.
Managing the Mystery Cups
The black cups with question marks are risky. They can be a lifesaver or a waste of a slot. If you are full on Red and Green, and a Mystery Cup appears, it might turn into Blue or White. If you don't need that color, you've wasted a slot. Only tap Mystery Cups when you have at least 2 empty slots to buffer the bad luck.
Background vs. Foreground Balance
Constantly switch your gaze between the tray (bottom) and the canvas (top). A common mistake is staring only at the canvas. You need to watch the tray to see which Ice Blocks are close to breaking. If a block has 1 hit left, prioritize pouring from that column to free the trapped colors immediately.
Step-by-Step Walkthrough Guide
Follow this exact sequence to navigate the logic of Level 416. This path assumes a standard distribution of Mystery Cup RNG (Random Number Generation).
Phase 1: The Initial Break (Start)
As soon as the level loads, assess your top row. You likely have accessible Cyan and Green cups.
- Fill the Sky: Immediately pour all available Cyan cups into the top background. Do not worry about the stocking yet.
- Fill the Grass: Pour Lime Green into the bottom floor area.
- Monitor the '5' Block: By filling these background colors, you should see the '5' Ice Block (Column 5) cracking. Keep pouring until it shatters.
- Immediate Result: This frees up the first set of White cups and potentially some Red cups.
Phase 2: The Rope Management
Once the '5' block breaks, you will encounter the first Ropes (likely Green/White or Green/Cyan).
- Check Slots: Before tapping a Rope, ensure you have 2 or more empty slots.
- Tap the Rope: Pull the pair onto the belt.
- Process the Green: Immediately pour the Green cup into the grass to empty it. This returns 1 slot to you.
- Hold the White: If the second cup is White, keep it on the belt but do not pour it yet. You need to clear space elsewhere first.
Phase 3: Targeting the '11' Block (The Heel/Toe)
This is the most critical phase. You need to break the '11' Ice Block in Column 3 (or nearby, depending on specific tray RNG).
- Focus Fire: Look at the columns feeding into the '11' block. Pour whatever colors are available there, even if they aren't perfect for the image. You need to generate actions.
- Use Mystery Cups: If Mystery Cups appear behind the ice, you must clear the path to get them. They often contain the Maroon you need.
- Free the Maroon: Once the block breaks, immediately queue the Maroon cups. Do not let them sit on the belt where they might get pushed off or buried.
Phase 4: Precision Detailing (The Heart and Trim)
With the Ice Blocks gone, the tray is open. Now switch to precision mode.
- The Red Heart: This is a small target on the right. Zoom in if possible. Use short taps to fill the heart. Do not overflow into the sky.
- The White Trim: Take the White cups you saved from Phase 2. Tap gently to fill the top cuff of the stocking. If you have White stripes, do those now.
- The Maroon Heel/Toe: Use the Maroon cups freed in Phase 3. These areas are small but distinct. Overfilling here looks very obvious, so be careful.
Phase 5: Final Assembly
The home stretch. The background should be 90% done, and the details are filling in.
- Fill the Body: Now that the heels/toes/trim are done, dump your remaining Red cups into the main body of the stocking.
- Cleanup Spillage: If you accidentally poured White into the Green grass earlier, use Green cups to cover it up now.
- Scan for Pixels: Look for the "checkerboard" pattern (empty pixels). Usually, these are hiding in the corners of the White trim or the edges of the heart.
Common Mistakes and Stuck Solutions
Even experienced players can hit a wall in Level 416. Here is how to troubleshoot the most common failure points.
Mistake 1: The "Full Belt" Deadlock
The Scenario: You have 5 cups on the conveyor. 3 of them are colors you don't need right now (e.g., extra Cyan), and 2 are Ropes you can't cut because you have no room. The belt stops moving.
The Solution: You must waste sand. Pick a color you have in abundance (usually Cyan or Green) and pour it into an area that is *already full*. This will "overfill" the zone, wasting the cup and removing it from the belt. This frees up a slot to let you cut the Rope or process the next cup.
Mistake 2: Breaking Ice Too Late
The Scenario: You reach 95% completion. The stocking is filled, the background is done. But the heel is still grey. The Maroon cups are trapped behind an Ice Block that still has 5 hits left. You have no cups left to pour to break the ice.
The Solution: This is usually a restart situation. However, if you have Mystery Cups left, hope they turn into a color you need to pour. To prevent this, always count the Ice Block hits remaining. If you have 3 cups left on the belt and the ice needs 5 hits, you are already dead.
Mistake 3: Polluting the Background
The Scenario: You poured Red sand into the Cyan sky by accident. Now you have a permanent red blob that ruins the "clean" look of the level.
The Solution: You have to cover it up. Pour Cyan sand over the red blob until it disappears. This wastes Cyan sand. If you run out of Cyan, you may fail the level. Always keep a reserve of background colors (Cyan/Green) specifically for fixing these errors.
Mistake 4: Ignoring the Rope Pairing
The Scenario: You see a Rope with Green and White. You really need the Green, so you tap the Rope. But you only had 1 slot open. The game forces both Green and White onto the belt, filling it to 100%. Now you can't process the White because you're busy with the Green.
The Solution: Always calculate the "Net Slot Change." Tapping a Rope consumes 1 extra slot (since 2 enter, but you only had space for 1 net addition). Make sure you have 2 empty slots before tapping, or immediately pour one of the colors to rebalance.
Stuck? Use the "Dump" Strategy
If you are completely stuck and the belt isn't moving, look for the color with the highest percentage of completion on the screen (usually Cyan or Green). Pour that color into a full section of the canvas to deliberately delete the cup. This is the only way to cycle the belt when logic fails.
Recalibrating the Aim
Sometimes the "pour" stream drifts. If you find yourself constantly missing the White stripe on the stocking, stop pouring. Wait for the cup to center itself again. Trying to "steer" a bad pour usually results in a bigger mess. Tap, release, and reposition.
Advanced Tips and Speed Run Strategies
Once you understand the logic, you can optimize your playstyle to finish Level 416 faster and with fewer restarts.
Speed Run Tip: Pre-Loading the Tray
While you are pouring one color, look at the tray to see what is coming next. If you see a Mystery Cup approaching the dispensing point, try to finish your current pour just as it arrives. This minimizes the downtime between cups. Keep the flow constant.
Advanced Tip: The "Maroon First" Rule
In standard play, you fill background first. In a Speed Run, you might take a risk. If you can break the '11' Ice Block within the first 10 moves, do it. Get the Maroon cups on the belt as early as possible, even if it means ignoring the background for a while. This ensures you don't die at 98% completion waiting for Maroon.
Handling the '17' Block
The '17' Ice Block is a time sink. Don't try to break it with "small" pours. Use your biggest, longest pours (Cyan/Green) to chip away at it. Don't waste precision color pours (Red/White) on this block unless you have no other choice.
Optimizing Rope Cuts
If a Rope connects Green and Cyan (two background colors), it is a "Safe Rope." You can tap this anytime, as you can always dump background colors into the background. Prioritize cutting these ropes early to clear the tray faster.
Mystery Cup Gambling
If you have 3 empty slots, you can afford to tap a Mystery Cup. If you have 1 empty slot, do not tap it. The risk of it being a color you don't need is too high. Keep that slot open for a color you can actually use.
Visual Cues for Completion
The "Level Complete" check is aggressive. Even if it looks done, it might not be. The most common missed pixels are:
- The corners of the White cuff (inside the curve).
- The very bottom tip of the stocking toe.
- Under the Red Heart (sometimes the heart doesn't touch the body, leaving a gap).