
Level 53
HARDHow to solve Sand Loop level 53? Get instant solution for Sand Loop 53 with our step by step solution & video walkthrough. Sand Loop 53 tips and guide.
Play Sand Loop Now
Experience the puzzle challenge firsthand
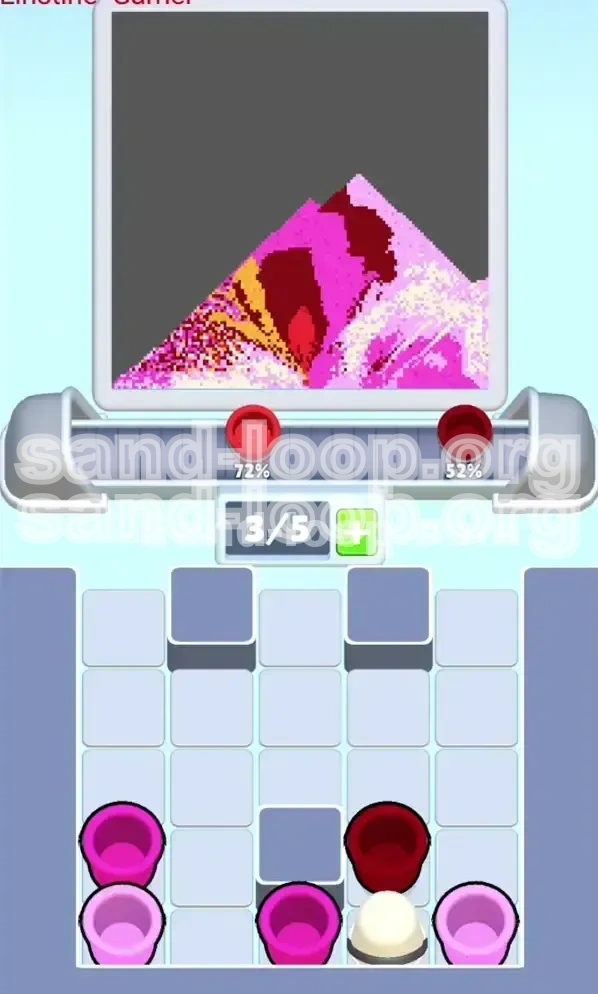
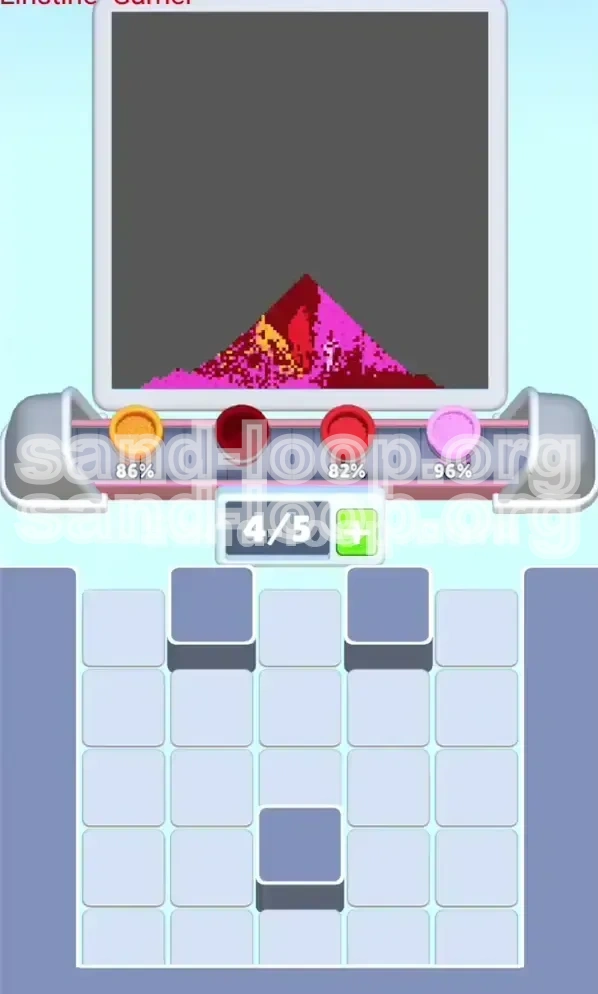
Game Screenshots


Sand Loop Level Guides
Sand Loop Level 53 Walkthrough: Mastering the Pastel Village
Welcome to the comprehensive guide for Sand Loop Level 53. This level, often referred to as the "Pastel Village," presents a deceptive challenge. While the visuals of the three pixelated houses under a pink sky seem calming, the gameplay requires strict inventory management and precise color timing. The core difficulty lies in the "Rope Mechanic," which forces you to take unwanted inventory items to access the ones you need. This guide breaks down every aspect of the level to ensure you can clear your conveyor belt and paint the village without getting stuck.
Understanding the Visual Layout
The level features three distinct pixel-art houses: a Red house in the front, a Yellow house on the left, and a Pink house on the right. Behind them sits a massive Light Pink sky. The detail work on this level is high, with small windows and chimneys that require precise filling. Recognizing the layout helps you understand which colors belong to which layers.
The Core Inventory Constraint
Your conveyor belt has only 5 available slots. In this level, you will be dealing with up to 8 distinct color requirements. Because several cups are "roped" together, you cannot simply pick and choose freely. You must plan your moves so that your belt does not become clogged with unused colors, effectively ending your run.
The Rope Mechanic Explained
This is the defining feature of Level 53. Certain cups in the supply tray are tied together. Tapping one cup pulls both onto the belt. For example, the essential Dark Red for roofs is tied to the Light Pink for the sky. Since the sky is painted last, the Light Pink cup is effectively "dead weight" for 80% of the level. Managing this dead weight is the key to victory.
Layering and Logic
The painting follows a specific physical logic. Background layers must generally be poured before foreground layers, or conversely, foreground details must be settled before background washes. In Level 53, the "fill from bottom" physics means that pouring the background sky too early will cover the roofs of the houses, forcing you to redo them.
Winning Condition
To complete the level, you must fill the Red House, Yellow House, Pink House, their respective Dark Red roofs and windows, the White smoke, and the Light Pink sky to 100% completion. The challenge is accomplishing this while your belt is half-full of unusable inventory.
Clear Objectives for Stage 53
Before you start tapping, you need a clear mental roadmap. Your primary goal is not just to paint, but to cycle your conveyor belt efficiently. You are aiming to separate the "urgent" colors from the "background" colors despite the game trying to force them together.
Primary Goal: Clear the Top Row
Your immediate objective in the first 10 seconds is to empty the top row of the supply tray. These are your "free" colors—colors that are not tied to a rope partner. Clearing these early frees up visual space and prevents you from accidentally tapping a rope pair when you are desperate for space.
Secondary Goal: Isolate Dark Red
Dark Red is your critical color. It is needed for the roofs and the tiny windows. However, it is roped to Light Pink. Your objective is to get the Dark Red onto the belt, use it immediately, and discard the cup before the Light Pink cup can clog your system.
Tertiary Goal: Mid-Game Color Juggling
Once the roofs are done, your goal shifts to the main body colors (Red, Yellow, Hot Pink). You must maintain at least 2 open slots on your belt during this phase to allow for the cycling of these main colors. If your belt is full, you cannot generate the new cups needed to finish the houses.
Final Goal: The Sky Fill
The last 20% of the level is dedicated entirely to the background. You can only initiate this phase when the houses are structurally complete. Attempting to pour the sky earlier is a waste of a slot and risks burying house details under sand.
Hidden Objective: Slot Management
Always keep an eye on your slot count. If you have 4 cups on the belt, do not tap anything unless a cup is currently pouring and about to disappear. Letting the belt fill to 5/5 with static cups is the most common way to lose.
Step-by-Step Walkthrough Instructions
Follow this exact sequence of actions to navigate the supply tray and the painting logic efficiently. This method minimizes the time "wasted" holding unused colors.
Phase 1: The "Free" Colors (Start)
As soon as the level loads, ignore the bottom rows entirely. Look at the top row of the supply tray. You will see un-tethered Red and Hot Pink cups.
- Action: Tap the Red cup immediately. It will align with the front house.
- Action: Tap the Hot Pink cup immediately. It will align with the right-side house.
- Result: You have 2 cups on the belt. The top row of the tray is now clear, giving you a visual buffer.
Phase 2: The Rope Dilemma (Early Game)
Now you must deal with the roped pairs in the second row. You will see a Light Pink cup tied to a Dark Red cup.
- Action: Tap only one of these roped pairs. Do not tap the second pair yet.
- Strategy: As soon as they hit the belt, the Dark Red will align with the roof/windows. The Light Pink will likely be out of alignment and will loop around harmlessly.
- Focus: Pour the Dark Red into the windows and roof sections immediately. You want to empty this cup fast.
Phase 3: Excavating the Mid-Row (Mid-Game)
With one roped pair active, you now have some "dead" inventory (the Light Pink) looping. You need to find the Yellow and White cups which are buried deeper in the tray.
- Action: Wait for a slot to open up as the Red or Hot Pink cups finish pouring.
- Action: Tap the supply tray deep in the rows to fish out the Yellow cup.
- Strategy: The Yellow house needs to be filled concurrently. Do not let the Yellow cup sit on the belt without pouring; you don't have the space for idle inventory.
Phase 4: The Smoke and Details
Locate the White cup. This is often buried at the bottom or mixed in with the second set of ropes.
- Action: Retrieve the White cup.
- Timing: Pour the White smoke only when the Red and Yellow houses are substantially filled. If you pour it too early, a subsequent mis-pour might cover it.
- Note: The smoke area is small, so the White cup will drain quickly, freeing up a slot.
Phase 5: The Final Clean-Up
Your houses should now be about 80-90% complete. You likely have one or two looping Light Pink cups doing nothing.
- Action: Tap the second roped pair (Light Pink + Dark Red) if you haven't already.
- Strategy: Use the Dark Red to fix any patchy roof areas. Ignore the Light Pink alignment for now.
- Goal: Ensure the Red, Yellow, and Pink houses are 100% solid before you touch the sky logic.
Phase 6: The Sky Execution (End Game)
This is the final stretch. You should have two Light Pink cups on your belt.
- Action: Wait until all other cups have poured and vanished.
- Action: Align the first Light Pink cup with the top background.
- Result: The sky will fill, covering the top edges of the roofs and completing the Pastel Village scene.
Optimal Color Processing Order
Understanding the priority of colors is crucial for decision making. Not all colors are created equal in this level. Some are structural, while others are atmospheric.
Priority 1: Dark Red (Structural)
Dark Red is the highest priority color despite being a background shade in the pixel art. Why? Because it fills the windows. If you pour the main house colors (Red/Yellow) before the Dark Red windows, you risk covering the window divots, making it impossible to fill them correctly later without a restart.
Priority 2: Red, Yellow, Hot Pink (Bases)
These are your "meat and potatoes" colors. They constitute 60% of the screen. They should be processed as soon as they appear on the belt. Never let a Base Color cup sit on the belt while you wait for a "perfect" alignment. It is better to pour and fix than to clog the belt.
Priority 3: White (Detail)
White is medium priority. The smoke stack is a small target, so it can be finicky. However, because it sits on top of the roof, it must be poured after the Dark Red roof is established. Treat it as a "filler" task between your main Base Color pouring.
Priority 4: Light Pink (Atmosphere)
This is the lowest priority. It is dangerous because it takes up a slot. You should treat Light Pink cups as "trash" that eventually becomes treasure. Do not actively try to align the Light Pink until the very last second. Let it loop. Let it cycle. Just keep it out of the way until the houses are done.
The "Fill Logic" Exception
Sand Loop physics usually fill from the bottom up. However, the sky acts as a universal "top-down" wash. This is why Light Pink is last. If you pour it early, it sits on top of the roof pixels. When you later pour Red for the house, the physics engine might register the Sky pixels as "blocking" the House pixels, leading to incomplete fills.
Dependency Chain
Visualize the colors as a chain: Dark Red (Windows) -> House Colors (Body) -> White (Smoke) -> Light Pink (Sky). You cannot break this chain. If you try to do the Sky before the Smoke, the Smoke will be buried. If you do the House before the Windows, the Windows disappear.
Essential Tips and Strategies
These are the pro-tips that separate a clear from a "Game Over." Use these rules of thumb to manage the chaos of the roped pairs.
Tip #1: The "One Empty Slot" Rule
Always strive to keep at least one slot on your conveyor belt empty. If you have 5 cups, you are in danger. If you have 4 cups, and 1 is about to pour, you are safe. If you have 5 cups and none are aligned to pour, you have already lost. Stop tapping the supply tray immediately if your belt hits 4/5 capacity.
Tip #2: Ignore the Looping Cups
It is anxiety-inducing to see a Light Pink cup loop around the belt 5 or 6 times. You might feel the urge to use it. Don't. That cup is waiting for the end-game. Treat it like a passenger on a train. Just let it ride. Focus your mental energy on the active colors that are currently aligned to pour.
Tip #3: Speed vs. Precision
In the first 30 seconds of this level, Speed is key. You need to clear the top row and get that first roped pair onto the belt. However, once the belt is full, switch to Precision. Wait for the exact millisecond a cup empties to tap your next supply. A single mistap when your belt is full can cost you the level.
Tip #4: The "Roof Anchor" Technique
When pouring Dark Red for the roofs, don't just tap it once. The roofs have peaks and valleys that require a steady stream. Ensure the Dark Red cup is aligned correctly and let it flow until the roof silhouette is sharp. A patchy roof leads to confusion later about whether the level is actually finished.
Tip #5: Tray Fishing
Since specific colors are hidden in the middle rows, you need to "fish" for them. If you need Yellow and it's buried behind a rope, you may need to tap other cups to shift the tray's contents. Be careful not to accidentally pull a roped pair while fishing for a single cup. Patience is your best asset here.
Common Mistakes to Avoid
Learning what not to do is just as important as learning what to do. These are the specific errors that cause 90% of failed runs on Level 53.
Mistake #1: The "Double Tap" Trap
The most common error is tapping both roped pairs (Light Pink + Dark Red) right at the start. The Consequence: You will have 2 Light Pink cups and 2 Dark Red cups on the belt. Since you can only use Dark Red, the Light Pink cups occupy 2 slots. Now you only have 3 slots left for Red, Yellow, Pink, and White. You will run out of space, and the Yellow cup will be trapped in the tray, inaccessible.
Mistake #2: Painting the Sky Too Early
Players often see the Light Pink align and think, "Oh, I should do the background now." The Consequence: The Light Pink sand covers the top of the houses. When you eventually pour the Red or Yellow house colors, they cannot penetrate the Light Pink layer already there. You end up with a level that looks 95% full but has transparent/gaps at the top of the houses that you cannot fix.
Mistake #3: Clogging the Belt with White
The White cup (smoke) is tempting because it's a single, often easy to grab. The Consequence: If you grab the White cup too early and just let it sit on the belt while you hunt for Yellow, you are wasting a slot. The White cup should be grabbed, poured immediately, and discarded. It is a "fast burn" color, not a "hold" color.
Mistake #4: Ignoring the Windows
Focusing entirely on the big blobs of color for the houses. The Consequence: The windows are tiny. If you fill the Red house first, the window hole might disappear or become unusable. You must hit the windows with Dark Red before the main house color floods that area.
Mistake #5: Panic Tapping
Seeing the belt get full and tapping random supply tray items to try to "fix" it. The Consequence: This almost always adds more cups to the belt, exacerbating the problem. If the belt is full, stop tapping. Wait. Let the physics of the game clear a cup, then tap.
Stuck? Troubleshooting Solutions
So you followed the guide, but you're still staring at a stuck screen. Here is how to diagnose and fix specific blockage scenarios.
Scenario: "The Yellow Cup is Trapped"
Symptoms: Your houses are red and pink, but you can't get the Yellow cup to spawn because your belt is full of looping Light Pink cups.
Fix: You likely pulled both rope pairs too early. You have to restart the level. In your next run, be very strict: only pull one rope pair until the Yellow and White cups are safely on the belt and poured. You must endure the "empty belt" feeling before pulling the second trigger.
Scenario: "The Windows Won't Fill"
Symptoms: You are pouring Red sand, but the little square window remains empty or doesn't change color.
Fix: You have already filled that area with the "wrong" color (likely Red or Yellow). You cannot overlay colors in Sand Loop easily once the base is set. You need to restart and ensure the very first thing you do is pour Dark Red into those window divots.
Scenario: "Belt Jam at 4/5"
Symptoms: You have 4 cups, but none are pouring because they are misaligned, and you can't pick up anything new.
Fix: This is a timing crisis. Look for a cup that is close to alignment. Wait for it to slide into the pour zone (usually at the top or bottom center). Do not tap the supply tray. Just wait the 3-4 seconds it takes for the cup to align and drain. Patience is the only solution here.
Scenario: "Sky is 90% Full"
Symptoms: You poured the sky, but there are weird gaps near the chimney or roof peaks.
Fix: The Light Pink sand flowed around the other colors. You need to go back and ensure the house colors (Red/Yellow) and the Roof (Dark Red) are totally filled to the brim. The Sky fills the negative space. If there is a house-colored pixel poking up, the Sky won't touch it. Fix the base layers first.
Speed Run Tips and Shortcuts
Once you have mastered the logic, you might want to improve your time or clear the level with fewer moves. Here is how the experts do it.
The "Pre-Load" Technique
While the "Start" animation is playing or immediately upon loading, you can preemptively tap the top row. If your muscle memory is fast enough, you can tap the Red and Hot Pink cups before the rope mechanic even fully registers, giving you a 2-second head start on the fill.
Combining Pour Zones
If you are confident in your aim, you can align the Dark Red (roof) and the Red House (body) to pour almost simultaneously. As one cup finishes pouring, the other slides into place. This "staggered pouring" keeps the progress bar moving constantly without ever letting the belt run dry.
The "Loop-Ignore" Method
Speed runners don't even look at the Light Pink cups until the end. They treat the belt as if it only has 3 slots. They mentally block out the 2 slots occupied by the looping sky colors. If you can train your brain to ignore the "dead" slots, you will make faster decisions regarding the "live" slots.
Skipping the "Perfect" Window Fill
While precision is usually good, in a speed run, you don't need the windows to be 100% perfect. A 90% fill on the windows is often enough to let the game register the area as "done" and let the main house color flood over it. Don't obsess over the tiny pixels if the clock is ticking.
Batch Processing the Second Rope
If you manage to clear the top row and the first rope pair incredibly fast, you can pull the second rope pair while the first Dark Red is still pouring. This advanced move risks a belt jam, but if timed right, it ensures you have all your roof material ready immediately after the first cup drains.