
Level 54
HARDHow to solve Sand Loop level 54? Get instant solution for Sand Loop 54 with our step by step solution & video walkthrough. Sand Loop 54 tips and guide.
Play Sand Loop Now
Experience the puzzle challenge firsthand
Game Screenshots
Sand Loop Level Guides
Sand Loop Level 54: The "Sunflower" Master Strategy Guide
The Core Challenge: Logic Over Speed
Level 54, "The Sunflower," represents a significant difficulty spike in Sand Loop. Unlike previous stages that relied on quick reflexes, this level is a logic puzzle disguised as an art game. The primary challenge here is not the color palette itself, but the strict layering requirements combined with a restrictive inventory system. You are not just pouring sand; you are constructing a 3D pixel structure where the order of operations is absolute.
Visual Breakdown of the Target
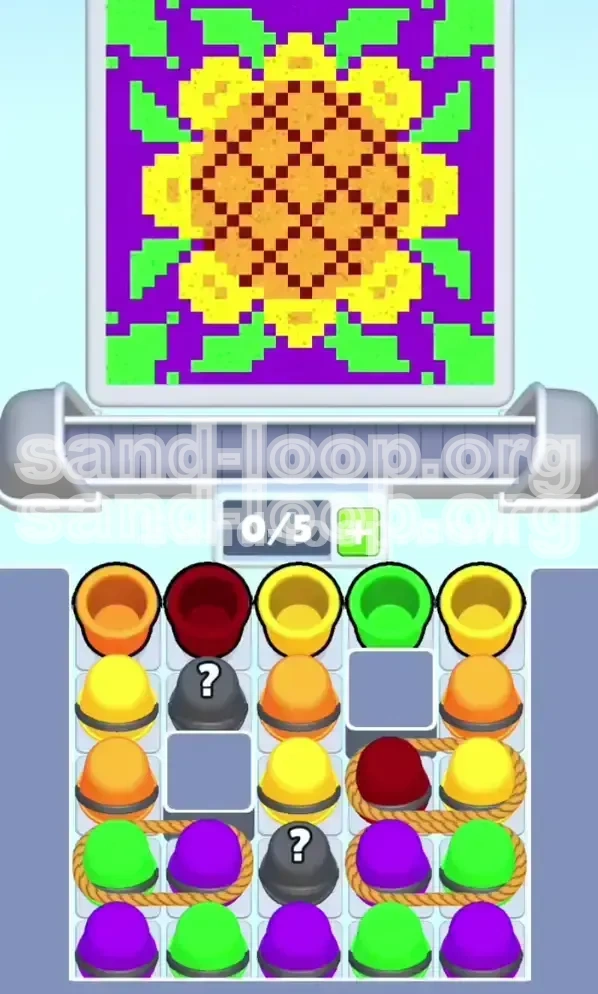
The target image depicts a vibrant sunflower against a purple background. However, you must deconstruct this image into four distinct color zones:
- The Seed Head (Center): This is the most critical part. It requires a checkerboard pattern of Orange and Dark Red (Maroon).
- The Petals (Mid-Layer): Bright Yellow sand that must sit on top of the seed head.
- The Leaves (Corners): Green accents located at the bottom corners.
- The Void (Background): Deep Purple that fills the remaining space.
The Inventory Bottleneck
Your biggest enemy in this stage is the conveyor belt capacity. With a limit of 5 cups and the introduction of "Roped Pairs" (which count as 2 items), space management becomes a tactical nightmare. If your belt has 4 items, you cannot pick up a roped pair. This necessitates a rhythm of "burst-fire pouring" followed by immediate inventory management.
The Roped Pair Mechanic
This level introduces chained cups (e.g., Green-Purple). You cannot separate these. When you pick one up, both occupy slots in your inventory. This means you must have at least two empty slots before attempting to interact with these pairs. Attempting to grab them with a full belt will cause the game to lock the interaction, wasting precious time and breaking your rhythm.
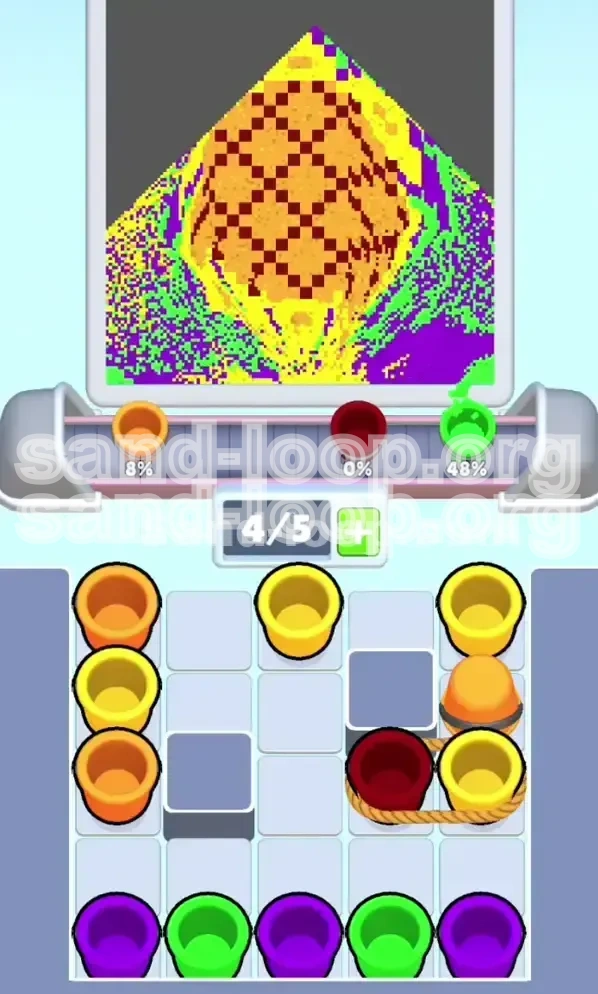
Physics and Piling Logic
Sand in Sand Loop piles in a pyramid shape. The bottom layer always spreads the widest. Therefore, if you pour the background Purple first, it will cover the entire base, making it impossible to place the Green leaves or the Sunflower body neatly on top later. You must build the center "mountain" first and fill the "valley" (background) last.
Primary Objectives for Success
Objective 1: Construct the Central Core
Your first and foremost goal is to build the central disc of the sunflower. This requires mixing Orange and Maroon (Dark Red) sands. You must achieve a 50/50 visual blend. If you pour all Orange first, the texture will be flat, and you will fail the accuracy check. You need to alternate these colors to simulate the "seeds" of the flower.
Objective 2: Establish the Yellow Boundary
Once the core is roughly 30% built, you must introduce Yellow. However, timing is key. If you pour Yellow too early, it will be buried by the remaining seed colors. If you pour it too late, it will sit on top of the background purple, looking messy. The Yellow petals must drape over the finished center.
Objective 3: Manage the "Mystery" Void
Scattered throughout the level are Black Mystery Cups ("?"). In Level 54, these typically act as filler for the background layer. Your objective with these is to use them as "resets." When your inventory is clogged with specific colors you don't need immediately, use a Mystery Cup to buy time or fill the deep background corners without affecting the flower details.
Objective 4: Clear the Top Row Debris
The top row of the level contains the initial setup cups (Orange and Maroon). You cannot access the lower, more complex colors (Green and Purple roped pairs) until you clear this debris. Clearing the top row efficiently is the only way to trigger the spawn of the necessary mid-game tools.
Objective 5: The Clean Background Sweep
The final 20% of the level is purely cosmetic cleanup. Once the flower is perfect, you must fill the rest of the canvas with Purple. This sounds easy, but roped pairs often make this messy. The goal is to cover the exposed corners without spilling over the flower petals.
Step-by-Step Walkthrough: Phase 1 (The Foundation)
Step 1: The Orange-Maroon Alternation
As soon as the level starts, ignore everything else. Locate the single Orange and Maroon cups in the top row. Pick up one Orange, pour it onto the exact center of the canvas. Immediately pick up a Maroon, pour it directly onto the wet Orange spot. Repeat this. The goal is to create a small, textured mound in the center. Do not spread this sand too wide; keep it tight.
Step 2: Inventory Hygiene (Keep it at 2/5)
Do not hoard cups. In other levels, keeping a full belt is fine. Here, it is fatal. After every pour, check your belt count. If you are holding 3 cups, pour one immediately. You need to keep 2 empty slots available at all times in preparation for the "Roped Pairs" that will appear shortly. A good rule of thumb is to operate with a maximum of 3 cups in your inventory.
Step 3: Dealing with Grey Blocks
As you clear the top row, you will hit Grey Blocks (immovable obstacles). Do not waste pours on these. They act as separators. Use this time to scan the tray for the first "Roped Pair." It will usually be a Maroon/Yellow combination. This is your bridge to the next phase.
Step 4: The First Roped Pair (Maroon-Yellow)
Once the belt is clear (0/5 or 1/5), tap the Maroon-Yellow roped pair. Since you have been alternating Orange and Maroon in Step 1, the Maroon in this pair will continue the seed pattern. The Yellow attached to it is dangerous—pour the Maroon first, then hold the Yellow. Do not pour the Yellow yet. Place the Yellow cup in an empty slot and wait.
Step 5: Introducing the Petals (Yellow)
Once the center mound is about 40% complete, you can start using the Yellow cups you have accumulated. Pour Yellow in a ring around the center mound. Do not cover the center yet. The goal is to let the Yellow sand flow down the sides of the central mound, creating the "petal" effect. If the pile is too steep, the yellow will slide off; if too flat, it looks like a blob. Aim for a 45-degree slope.
Step-by-Step Walkthrough: Phase 2 (The Structure)
Step 6: Mystery Cup Usage
By now, single cups are spawning rapidly. You will see Black "?" cups. If your current inventory is full of Green or Purple (which we don't need yet), use a Mystery Cup to flush your inventory. Pour the mystery sand into the far corners of the tray. This is "waste" sand that acts as a base for the background later.
Step 7: The Green-Purple Trap
A Green-to-Purple roped pair will appear in the lower section. Warning: Do not pick this up yet. If you pour Green now, it will mix with your Yellow petals and turn them into a muddy, ugly brown-green color. You must wait until the Yellow is completely isolated and finished before touching Green.
Step 8: Finalizing the Seed Head
Continue alternating Orange and Maroon. The center needs to be the highest point on the canvas. If you run out of single Maroon cups, look for more roped pairs. The center should be roughly 60-70% of the total height of the final art piece. It needs to dominate the composition.
Step 9: Completing the Petals
Now, unleash all remaining Yellow cups. Pour them over the Orange/Maroon center. The physics engine should cause the yellow to spread out at the base. If you see gaps where the background (canvas) is still visible, fill them with Yellow. We want the flower to look like a solid sun shape.
Step 10: The Leaf Placement
Now that the flower body is solid, you can pick up the Green-Purple roped pair you avoided in Step 7. Carefully pour the Green into the bottom corners. The Green should hug the base of the Yellow petals, acting as leaves. Do not overlap the Green onto the Yellow petals. Precision is key here.
Step-by-Step Walkthrough: Phase 3 (The Cleanup)
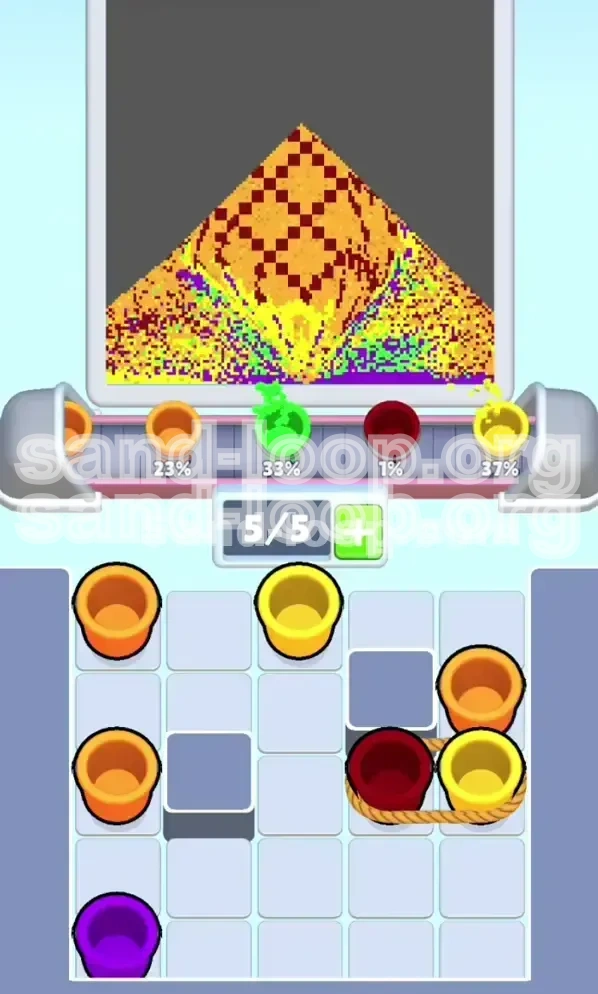
Step 11: The Purple Flood
The flower is done. The leaves are placed. Now, the level becomes a race against the clock to fill the "void." Look for all remaining Purple cups. Since Purple is the background color, it doesn't matter if it covers the edges of the Green leaves or the bottom of the canvas. Pour aggressively now.
Step 12: Using Grey Blocks as Anchors
Use the Grey Blocks as visual anchors. Pour Purple up to the edge of the grey blocks. This creates a sharp, clean line that the game's scoring algorithm rewards. "Painting within the lines" at the borders increases your final score percentage significantly.
Step 13: Final Inventory Flush
You will likely have a mix of random single cups left. Check your remaining capacity. If you have 4 single cups and a Roped Pair appears, you must dump the singles immediately, even if it means wasting a bit of sand. Clearing the belt for the final Roped Pair is often required to trigger the "Level Complete" check.
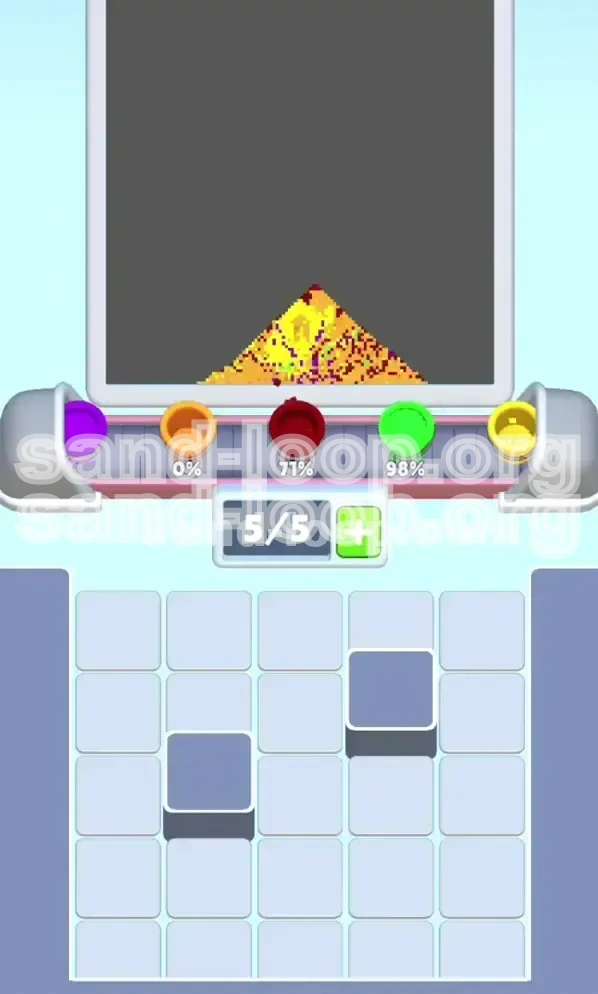
Step 14: The 95% Rule
The level ends when the canvas is roughly 95% full. Do not try to be perfect with the background. Once the main features (Flower, Leaves, Background) are distinct, the game will auto-fill the remaining pixels. Stop pouring once the "Completion" bar is full to avoid overflows.
Color Processing Order: The Priority Sequence
Priority Tier 1: Orange and Maroon (The Skeleton)
These are your structural colors. They build the foundation. Without a solid Orange/Maroon core, the flower has no height. Process these first. Think of them as the "bones" of the level. If you see them, pour them immediately, unless your belt is critically full.
Priority Tier 2: Yellow (The Skin)
Yellow is secondary but time-sensitive. It must come after Tier 1 but before Tier 3. Yellow cannot touch the bottom background, or it loses its definition. Process Yellow only after the center mound is visible. Never hold Yellow cups in your inventory if you can avoid it; pour them to free up space.
Priority Tier 3: Green (The Accent)
Green is low priority until the end. It is purely decorative. If you have Green cups clogging your belt, you are playing inefficiently. Only process Green when the main flower body is finished and you are ready to frame the bottom of the image.
Priority Tier 4: Purple (The Void)
Purple is the filler. It is the lowest priority because it physics-ly fills whatever space is left. You can pour Purple at almost any time (as long as it doesn't bury the center), but it is best saved for the end to clean up edges. Do not start with Purple.
Pro Tips & Common Pitfalls
Tip 1: The "Two-Finger" Drag Technique
When clearing the top row, don't tap individual cups one by one. Use two fingers to rapidly drag multiple cups into the pouring zone simultaneously. The game allows queueing actions. Dragging an Orange and a Maroon at the same time can speed up the checkerboard creation process by 50%.
Tip 2: Predicting Roped Pair Spawns
Roped pairs spawn based on a timer and your belt usage. If you keep your belt empty (0-1 items), the game spawns Roped Pairs faster to flood you. If you keep your belt full (4 items), the game spawns singles. Keep your belt at 3 items to balance the spawn rate and prevent getting locked out by a sudden Roped Pair.
Mistake to Avoid: The "Purple Early Start"
Many players try to pour Purple in the corners while building the flower to "save time." Don't do this. The pyramid physics of the sand means the center mound will eventually slide down and bury that early Purple, or the Purple will rise up and stain the Yellow petals. Always build the center peak first, then fill the corners.
Mistake to Avoid: Hoarding Mystery Cups
Mystery cups are tempting because they are free points. However, in Level 54, they often contain Purple. If you hold onto a Mystery cup, you take up a slot. Pour it immediately into a "safe zone" (away from the center) or discard it if your inventory is full. A full inventory is a death sentence in this level.
Stuck? Troubleshooting & Speed Run Strategies
What to Do If You Can't Get the Checkered Pattern
If your sunflower center looks like a solid orange blob rather than seeds, you poured too fast. You need to pour one color, wait for the animation to finish, then pour the next. The layers need to settle. If it's already messed up, you can't undo it. Restart the level and focus on the "One Orange, One Maroon" rhythm.
Dealing with a "Full Belt" Lock
If you have 4 single cups and a Roped Pair appears, and you can't pour because the placement is wrong, you are in a soft lock. The solution is to pour your current sand onto the exact same spot repeatedly. This builds the pile vertically (which is good for the center) and clears your cups rapidly without ruining the composition.
Speed Run Strategy: The Center-Only Focus
For speed runners, ignore the leaves (Green) and background (Purple) entirely for the first 30 seconds. Focus 100% of your effort on building the Orange/Maroon/Yellow center tower. Once the tower is tall and perfect, the rest is just filling empty space. You can clear 80% of the level's difficulty by just finishing the flower head first.
Speed Run Strategy: Pre-Loading the Conveyor
Watch the conveyor belt as it loads new items. You can see the next 3 items. If you see a Roped Pair coming, ensure you are at 3/5 capacity. This allows you to grab it the instant it hits the tray. Waiting for cups to arrive is the biggest time waster. Anticipate the spawn.
Final Advice: Embrace the Restart
Level 54 is unforgiving. If you mess up the center in the first 10 seconds, no amount of clever pouring will fix it later. The background physics will not allow you to "fix" a bad foundation. If the flower looks wrong at the start, hit the restart button immediately. A perfect restart is faster than a messy fix.