
Level 421
HARDHow to solve Sand Loop level 421? Get instant solution for Sand Loop 421 with our step by step solution & video walkthrough. Sand Loop 421 tips and guide.
Play Sand Loop Now
Experience the puzzle challenge firsthand
Game Screenshots

Sand Loop Level Guides
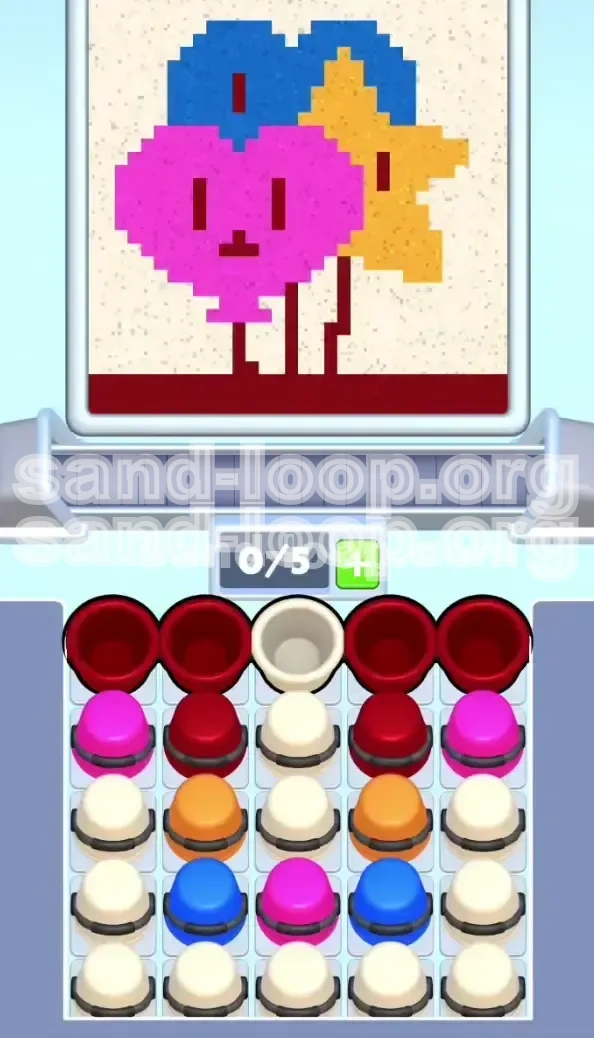
Level Overview: The Balloon Trio Challenge
Sand Loop Level 421 is a deceptive puzzle that masquerades as a simple art project but functions as a strict logistics test. The objective is to complete a pixel art masterpiece featuring three floating balloons—a Pink Heart, a Yellow-Orange Star, and a Blue Circle—set against a clean White background. While the visual appeal is cute, the underlying mechanics are unforgiving. This level is less about artistic flair and more about queue management and understanding the game's gravity physics. You will face a dense 5x5 grid of sand cups where resources are buried under layers of "blocker" colors. A single tap on the wrong cup in the first ten seconds can jam your conveyor belt, making the level impossible to finish. Success requires treating your supply tray like a game of chess; you must think three moves ahead, ensuring that the colors you need are accessible exactly when the structural integrity of the canvas allows for them.
The Visual Layout and Structure
The canvas in Level 421 is composed of three distinct vertical layers that interact dynamically. At the very bottom, you have the "Foundation Layer," which consists of the floor and the strings of the balloons. This must be constructed first using Dark Red sand. Above this lies the "Balloon Layer," where the Pink, Orange, and Blue cavities wait to be filled. The top layer is the "Background Layer," a vast expanse of White space that surrounds the balloons. The challenge lies in the fact that you cannot effectively fill the top layer without the balloons acting as dams, and you cannot fill the balloons without the strings acting as walls. The 5x5 supply tray mirrors this complexity, burying the essential Pink and Orange cups beneath a top row of Dark Red "Blockers." If you misinterpret this layering and try to paint the background first, you will contaminate the entire image.
Strict Dependencies and Sequencing
This level is governed by a rigid dependency tree that dictates the order of operations. The primary rule is Structure > Aesthetics. You are strictly prohibited from filling the balloons until the strings (vertical walls) are fully formed. If you attempt to pour Pink or Orange sand before the Dark Red base has risen high enough to create these vertical barriers, your colored sand will simply leak out of the balloon outlines and mix with the floor, creating a permanent gray mess. Furthermore, the White background sand is extremely heavy and fluid; if poured before the balloons are solid, it will flood the lower cavities, displacing the lighter colors and ruining the 100% completion requirement. You must follow the Red -> Pink/Orange/Blue -> White sequence religiously.
The 5-Slot Conveyor Belt Constraint
The most critical mechanic in Level 421 is the 5-slot limit on your active conveyor belt. Unlike earlier levels where you could tap freely, here you must practice "Slot Discipline." The supply tray is designed to tempt you into clogging your belt. Specifically, the top row contains four Dark Red cups and one White cup. If you tap the White cup early, it occupies 20% of your valuable belt space while being completely useless for the current phase of construction. A clogged belt prevents you from accessing the Dark Red cups needed to build the strings. To win, you must maintain a "Breathe State"—keeping at least one slot open on your belt at all times during the first two phases to allow for queue rotation and prevent deadlock.
Win Conditions and Failure States
To achieve victory in Level 421, you must reach 100% completion with pure color separation. The "Win State" is triggered only when every pixel on the canvas is filled, and no colors are bleeding into one another. The "Failure State" usually manifests as a "Belt Jam." This occurs when your 5 slots are filled with cups that cannot currently be used (e.g., holding White cups while the strings are still incomplete). Once jammed, you are forced to watch the sand pour uselessly, unable to tap the cups you actually need. If you find yourself in a position where the required colors are buried behind untouchable rows, or if your balloons have "holes" in them that let White sand leak through, you must restart immediately.
Physics and Gravity Exploits
Understanding how the game engine handles fluid dynamics is key to optimizing your play. Sand in Sand Loop is not a solid block; it settles at the lowest available point. You can exploit this by using the "Rising Wall" technique. When pouring the Dark Red foundation, the sand will fill the bottom of the canvas first. Only when the "floor" reaches the specific height of the balloon string openings will the sand flow upward into those narrow vertical channels. You must use this physics behavior to "draw" the strings for you. Additionally, the "Cascading" mechanic implies that sand poured from the top will slide off curves. This is useful for the White background phase, where the sand should flow around the filled balloons like water around rocks in a stream, rather than mixing with them.
Strategic Resource Allocation
Your resources in the supply tray are finite and positioned specifically to challenge your planning. The tray is a 5x5 grid totaling 25 cups. The breakdown typically includes roughly 40% Dark Red (for the base/strings), 15% Pink, 15% Orange, 15% Blue, and 15% White. The distribution is skewed towards Red because the foundation requires the most volume to create the strings and floor. The scarcity of White cups is a trap; because there are fewer of them, players often prioritize them early, but this is fatal. You must mentally map the tray: Top Row (Red Blockers), Middle Rows (Balloon Colors), Bottom Row (Background). Allocating your taps to match the physical vertical layers of the tray is the only way to ensure a smooth workflow.
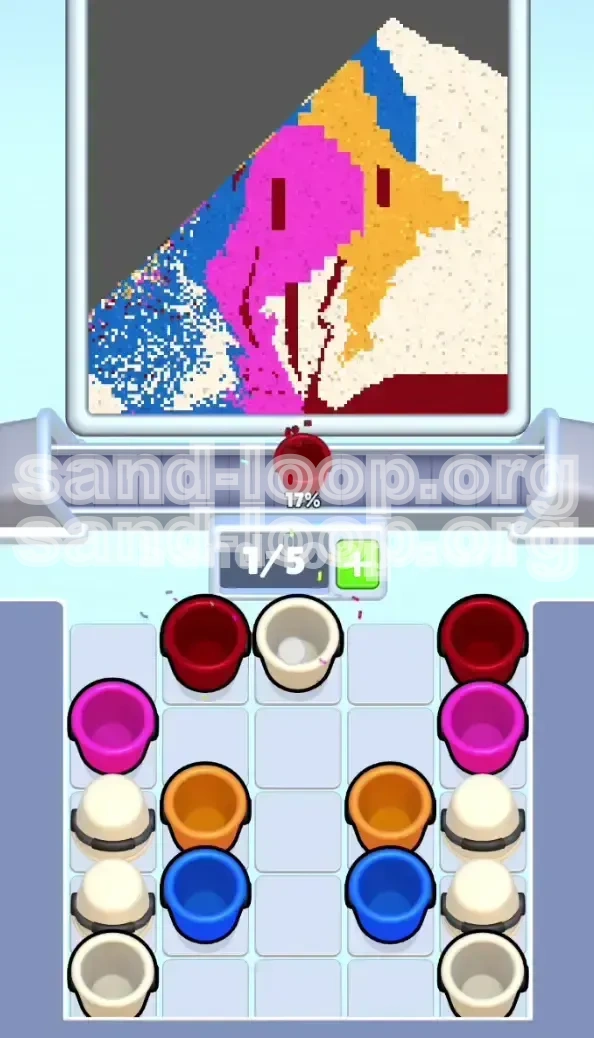
Step-by-Step Walkthrough: Phase 1 (The Foundation)
The first phase of Level 421 is the most critical. It is here that 90% of players fail. Your sole objective during this phase is to construct the "containment vessel" for the balloons. This involves building the floor and, more importantly, drawing the vertical strings using Dark Red sand. You must ignore the colorful balloon cups and the White background cups entirely during this step. If you focus on anything other than Red, you will lose.
Identifying the "Red Blockade"
As soon as the level loads, ignore the canvas and look strictly at the supply tray. You will see a top row dominated by four Dark Red cups. These are your priority. There is likely a single White cup in the top row, perhaps in the center or to the side. This White cup is "bait." The game is testing your impulse control. You must recognize that these Dark Red cups are sitting on top of the Pink and Orange cups you need later. They form a physical "Blockade" in the grid. You cannot access the balloon colors until these Red cups are tapped, moved to the belt, poured out, and removed from the tray. Identifying this blockade is the first step to avoiding a jam.
Initial Tap Sequence: The 3-Slot Rule
Start the level with your belt empty (0/5 slots used). Do not tap all four Red cups at once. Instead, employ the "3-Slot Rule." Tap the Top-Left and Top-Right Red cups first. As they move to the belt and begin pouring, tap a third Red cup. This leaves you with 2 empty slots on your belt. This "breathing room" is crucial. It allows you to react if the grid shifts or if you need to quickly grab a Red cup that has slid into a different position. By never filling your belt past 80% capacity in this phase, you ensure that the flow of sand remains continuous and manageable.
Constructing the Vertical Strings
Watch the canvas closely as the Red sand pours. Initially, it will spread across the floor. Your job is to guide this sand so it fills the base completely. Once the floor level rises to the bottom opening of the balloon strings, the physics engine will divert the flow upward into these narrow channels. You must wait until these strings are fully formed and solid before considering this phase complete. Imagine the strings as drinking straws; they must be filled from the bottom up. If you stop pouring Red before the strings reach the top of the balloons, you will have structural failures later when you pour the lighter colors.
Micro-Managing Facial Features
Level 421 includes small details like eyes and mouths on the balloons, which are also made of Dark Red sand. These features act as "pixel traps." As the main Red pour finishes, you may notice small gaps in the eyes or mouth of the balloon shapes. You must time your final Red taps to address these. Do not let the main flow cut off while the features are empty. The strategy here is "Rhythm Tapping": tap a new Red cup every 3 seconds. This keeps a steady stream of sand flowing, ensuring the small cavities of the eyes and mouths are filled without overflowing the main balloon chamber. Once the facial features are distinct and solid, your work with Red is done.
The Trap of the Early White Cup
Throughout Phase 1, the single White cup in the top row will catch your eye. It might seem convenient to "just get it out of the way." Resist this urge with extreme prejudice. If you tap that White cup now, it enters your 5-slot queue. Since you cannot use White sand until the very end of the level, that cup becomes a "dead slot." It effectively reduces your belt capacity from 5 to 4. With only 4 slots, managing the flow of Red, Pink, and Orange becomes exponentially harder. A dead slot creates a bottleneck that leads to the "Full Belt" deadlock, where you are forced to watch helplessly as the timer ticks down, unable to tap the color you actually need.
Verifying the Foundation Seal
Before you transition to Phase 2, perform a visual inspection. The "Foundation Seal" is your confirmation that the Red phase is successful. Check the following: Is the floor completely flat and red? Do the vertical strings rise all the way to the top of the balloon outlines without any breaks? Are the eyes and mouths filled in? If you see any gaps or "holes" in the red layer, you must fix them now. Once you move to Phase 2, you cannot go back. A weak foundation will cause the Pink and Orange sand to leak out of the balloons, contaminating the background. Only when the Red structure is 100% solid should you proceed.
Step-by-Step Walkthrough: Phase 2 (The Balloon Fill)
With the foundation complete, you now have "containers" ready to be filled. Phase 2 is about color discipline. You will process the Pink, Orange, and Blue cups to fill the balloons. The order in which you do this is dictated by the position of the balloons on the canvas to prevent bleeding.
The Color Priority Logic
Do not tap colors randomly. Follow the "Front-to-Back" rule. The Pink Heart balloon is positioned in the visual foreground. The Orange Star is behind it, and the Blue Circle is at the very back. You must fill the foreground objects first. Why? Because in Sand Loop, sand behaves like a fluid. If you fill the back (Blue) first, and then try to fill the front (Pink), the stream of Pink sand might splash over the Blue, or settle on top of it in a way that creates a jagged, uneven edge. By filling Pink first, you create a solid wall that the subsequent Orange and Blue sands can flow behind cleanly.
Executing the Pink Heart Fill
Now that the top row of Red cups is gone, the Pink cups should be revealed in the grid. Tap the Pink cups to load them onto your belt. You can be slightly more aggressive here, perhaps filling 3 or 4 slots, but leave 1 slot open for safety. Pour the Pink sand into the Heart cavity. Because the Red strings are already there, the sand will be trapped perfectly inside. Watch the "Heart Rate"—the speed at which the heart fills. You want it to pile up slightly, creating a convex mound. This ensures that even if the physics engine jiggles, no Red will be exposed at the bottom. Stop tapping Pink the moment the heart is completely full.
Transitioning to Orange and Blue
Once the Heart is solid, immediately switch to the Orange Star. Tap the Orange cups. The sand will flow behind the Pink Heart, filling its designated cavity. The Red string acts as a dam, keeping the Orange separate from the Pink. Follow up immediately with the Blue cups for the Circle balloon. Since these are background elements, they don't need to be as perfectly "mounded" as the Pink heart, but they must be completely filled to the brim. At this stage, your canvas should be a colorful island of three balloons floating on a sea of Red strings.
Managing the "Mixed Fill" Risk
A common error in Phase 2 is having two different colors pouring onto the canvas at the exact same time. For example, having a Pink cup and an Orange cup draining simultaneously. While the game allows this, it increases the risk of "Color Bleed" at the edges where the balloons meet. To ensure a perfect 100% score, try to let one color finish draining before tapping the next. This "Sequential Pouring" method is slower but much safer. It ensures that the first color has fully settled and hardened before the next color lands on top of or beside it.
Belt Capacity Check
By the end of Phase 2, your grid should be looking sparse. Most of the Red, Pink, Orange, and Blue cups should be gone. Your belt should be cycling rapidly. This is a good time to clear the deck. Let all remaining colored cups drain completely. Ensure your belt is empty (0/5) before looking at the remaining supply tray. This clean slate is necessary for the final chaotic phase. You don't want any leftover Blue sand interfering with your White background pour.
Verifying the Balloon Seal
Before you unleash the White sand, perform the "Upside Down Test." Visually imagine flipping your phone or screen upside down. If the balloons were loose sand, they would fall out. You need them to be packed so tight that they hold their own weight. Look for any tiny gaps between the colored sand and the Red strings. If you see a gap, tap a corresponding colored cup to top it off. This "Seal" is vital because the upcoming White sand is heavy and fluid. It acts like water; if there is a crack in your balloon dam, the White sand will force its way in, turning your colorful balloon into a diluted whitewash.
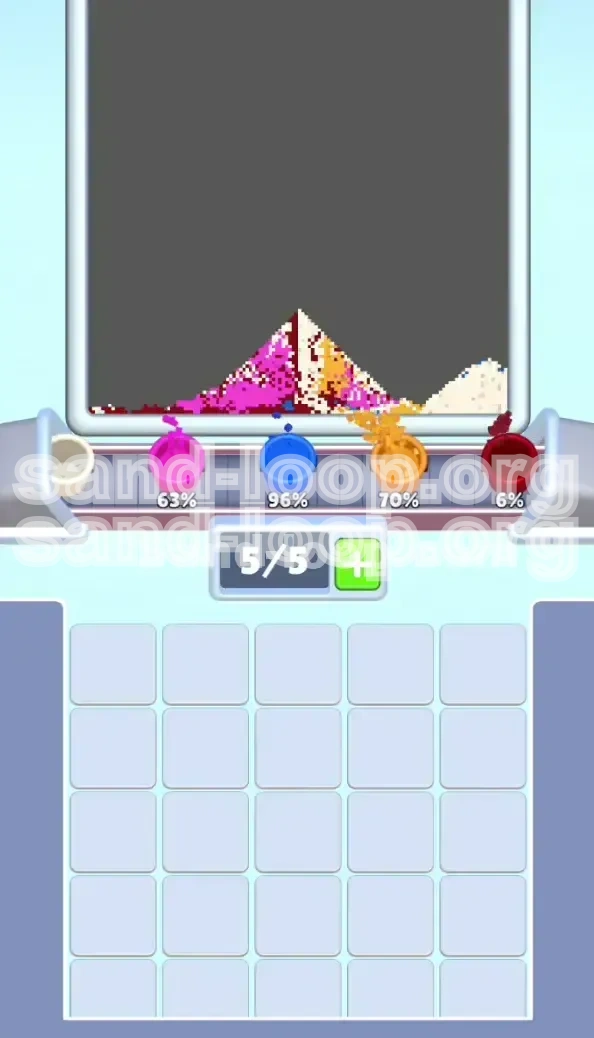
Step-by-Step Walkthrough: Phase 3 (The White Out)
This is the cleanup phase. The hard work is done. You have successfully painted the complex objects and established the boundaries. Now you must finish the job by filling the massive negative space of the background with White sand.
Unleashing the Final Row
Look at your supply tray. The colorful chaos is gone, likely leaving you with a clean row of White cups at the bottom, plus that one White cup from the top row that we wisely ignored. Now is the time to tap them. Since there are no more complex color decisions to be made, you can abandon the "3-Slot Rule." You can employ "Spam Tapping" here. Tap every White cup you see as fast as possible. Load your belt to the max (5/5). The goal is to generate a massive volume of White sand quickly.
The "Waterfall" Technique
The White sand serves as a background filler that cascades over the balloons. This is the most visually satisfying part of the level. The White sand enters from the top of the screen and slides down the "sides" of the Red strings and the filled balloons. It fills the top-left, top-right, and top-center gaps that the balloons didn't occupy. Because the Red strings act as dams and the filled balloons act as rocks in a river, the White sand flows *around* them, keeping the colors pure. This "Waterfall Effect" relies on the balloons being totally full; the water slides off the "rock" of the colorful sand.
Gap Filling and Top Corners
As the White sand pours, you will notice it rushing to the lowest point, which is usually the top area of the canvas (since the balloons float in the middle). The White sand will fill the space above the balloons first. It will then cascade down the sides. Your job here is just to ensure the supply doesn't run dry. Keep tapping White cups until the percentage meter hits 99%. The final 1% is usually the hardest—the tiny nooks and crannies between the balloon strings and the edge of the screen. Be patient; the fluid physics will eventually find these gaps.
Final Belt Clearance
As the White sand pours, your level completion percentage will climb from 80% to 100%. As the last cup drains, watch the canvas carefully. You are looking for any "Grey" areas—spots where the White might have mixed slightly with the Red or Pink. If you followed the steps, this won't happen. Once the conveyor belt is empty and the canvas is 100% filled with no mixed colors, the level ends immediately. The "Victory State" is triggered by the emptying of the final cup combined with full pixel coverage.
Post-Level Analysis
After the level clears, take a moment to appreciate the layering. The White background is the "Sky." The Red strings are the "Tethers." The Pink, Orange, and Blue balloons are the "Payload." Level 421 teaches you the importance of building the container before filling the content. If you tried to fill the content (balloons) before the container (strings), you failed. If you tried to paint the background (sky) before the objects were solid, you failed. This level is a masterclass in sequencing and dependency management.
Resetting for the Next Attempt
If you failed, don't get discouraged. Level 421 is often a game of millimeters. The difference between success and failure is usually a single tap on that first White cup. If you lost, ask yourself: Did I clog my belt? Did I let the strings break? Did I mix the colors? Identify the failure point and adjust your strategy for the next run. The reset is immediate, allowing you to jump back in and correct your mistake.
Pro Tips & Speed Run Strategy
Once you have beaten Level 421 normally, you might want to improve your time or efficiency. This section is for players looking to master the mechanics and achieve a perfect speed run. We will move from careful management to aggressive optimization.
Capacity Management Math
The 5-Slot limit is your biggest enemy, but also your biggest tool if used correctly. Here is the optimal math for a Speed Run: Early Game (Red Phase): Keep your belt at 60% capacity (3/5 slots). This gives you the throughput to build the floor fast enough to beat the clock but keeps enough buffer to avoid a jam. Mid Game (Balloon Phase): Keep your belt at 80% capacity (4/5). You need more volume here to fill the cavities quickly. Late Game (White Phase): Max it out to 100% (5/5). There are no more complex decisions to be made, only filling space. By mathematically adjusting your queue usage, you minimize downtime.
Speed Run Tap Order
To finish the level as fast as possible, follow this rapid-tap sequence. Practice this rhythm until it becomes muscle memory. Start: Double tap Red-Top-Left and Red-Top-Right immediately. Build: Tap the remaining Top-Row Reds in a "Z" shape (Left-to-Right, then diagonal). Pivot: As soon as the strings visually connect (approx. 50% Red completion), start tapping Pink. Flow: Tap Orange immediately after Pink starts draining; overlap them slightly. Finish: Scan the bottom row, tap all Whites in a rapid 1-2-3-4-5 count. This minimizes the "thinking time" between pours.
Advanced Tricks: The "Gravity Bridge"
There is a pro technique known as the "Gravity Bridge" that can save you seconds. When pouring the Red strings, if you pour slightly faster than the settling speed, the sand will form a temporary "bridge" or arch across the balloon opening. While this looks like a mess, in a speed run, it effectively seals the top of the balloon early. This allows you to start pouring Pink *sooner* because the bridge prevents the Pink from leaking out the top of the unfinished string. It is a high-risk, high-reward move that requires precise timing, but it shaves seconds off the clock.
Common Mistakes to Avoid
We have touched on this, but for a speed run, the stakes are higher. The "Early Bird" Error—tapping the White cup in the top-center during the first 5 seconds—is fatal. In a speed run, you might be tapping so fast you accidentally hit it. This is the number one cause of failure. Be careful with your tap radius. The "Weak String" Error is also common when rushing. If the strings aren't fully drawn because you rushed the Red phase, your Pink sand will leak. A leak in a speed run is an automatic restart; you cannot recover the time lost fixing a leak.
What to Do If You Get Stuck
Sometimes, despite best efforts, the level goes wrong. Here is the emergency protocol: If the Belt is Full: Stop tapping entirely. Watch the sand pour. You have to wait for a cup to empty and leave the belt. Once a slot opens, assess: Do I need Red? Or can I move to Pink? If a Balloon is Leaking: This means you didn't use enough Red. You can't fix it with the current color. You have to wait (hopelessly) or restart. Prevention is better than cure here. The Restart Rule: If you tap the wrong color (e.g., White too early), don't try to salvage it. The math of the remaining cups won't work out. Hit the Restart button immediately to save time.