
Level 422
HARDHow to solve Sand Loop level 422? Get instant solution for Sand Loop 422 with our step by step solution & video walkthrough. Sand Loop 422 tips and guide.
Play Sand Loop Now
Experience the puzzle challenge firsthand
Game Screenshots
Sand Loop Level Guides
Sand Loop Level 422: The "Mushroom Patch" Comprehensive Walkthrough
Introduction and Core Concept
Welcome to Level 422, "The Mushroom Patch." This level is notorious for its high failure rate among new players, primarily due to the unforgiving physics engine interactions between the mushroom caps and the background. Unlike standard "fill-in-the-blank" levels, this stage requires you to build vertical structures using sand physics. The challenge is not just about matching colors, but about understanding gravity, friction, and the "angle of repose"—the steepest angle at which sand can rest without sliding.
Visual Layout and Mechanics
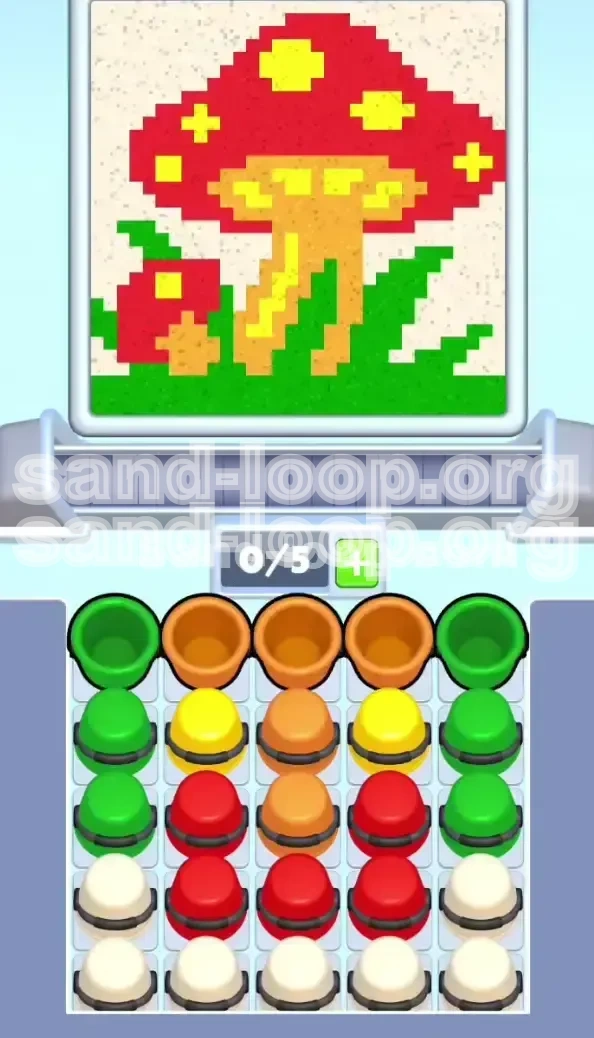
The canvas is dominated by a 5x5 supply tray grid and a painting area featuring a large, spotted red toadstool on the right and a smaller mushroom on the left. The terrain is uneven; the grass areas act as a funnel. If you pour sand too quickly, it will overflow the grass zones and contaminate the white "sky" area. The key mechanic here is the "Layering System": you cannot place the lighter-colored spots (Yellow) on top of the Red cap unless the Red is already wet and sticky.
Difficulty Analysis: Why It's Hard
The difficulty spike in Level 422 comes from the "Slot Economy" management. You have a 5-slot conveyor belt. It is incredibly tempting to tap all the available Green and Orange cups immediately. However, doing so fills your slots, leaving you unable to access the critical Red and Yellow cups when they are uncovered. Furthermore, the physics engine calculates the "slide" factor—if a Red pile becomes a pyramid (too steep), any Yellow sand poured on top will slide off into the Green grass, creating a muddy mix that ruins the 100% score requirement.
The 100% Completion Criteria
To secure the perfect three-star rating, you must achieve a purity score of over 95%. This means there should be almost zero "stray sand" pixels in the wrong zones. The white background must be pristine, the mushroom spots must be perfectly circular (not smeared), and the grass must not mix with the mushroom stem. The "Coverage" metric requires you to fill every pixel of the stencil, meaning you must carefully maneuver sand into the nooks and crannies of the mushroom gills without spilling over.
Strategic Objectives and Preparation
Mastering the 0/5 Slot Economy
The most critical objective is managing your conveyor belt capacity. Never allow your slots to reach 5/5 full. If the belt is full, you cannot pick up new cups, and the game enters a "wait state" where you are forced to watch sand pour without being able to prepare the next move. Ideally, maintain 2 or 3 empty slots. This allows you to instantly grab a color the moment it is revealed in the tray, keeping the flow of the game uninterrupted and giving you time to react to physics shifts.
The "Bottom-Up" Construction Strategy
You must visualize the image in layers. Layer 1 is the Green Grass (bottom). Layer 2 is the Orange Stem (middle). Layer 3 is the Red Cap (top). Layer 4 is the Yellow Spots (very top). Layer 5 is the White Background (filling the void). Attempting to draw Layer 3 before Layer 1 is solid will result in the Red sand sinking into the Green areas, creating a dark, unfixable brown border. Ensure each layer is 80% solid before moving to the next.
Decoding the Supply Tray Grid
The supply tray is not random; it is a puzzle. The top two rows contain "Blocker" colors (Green, Orange) that sit on top of the "Essential" colors (Red, Yellow). Your strategic goal is to clear the top rows methodically. Do not just tap randomly; prioritize the corners. Clearing the Top-Left and Top-Right corners first usually reveals the center column faster than clearing the center-top. You need to uncover the Red cups in the third row to begin the main build.
Timing and Rhythm Management
Sand Loop is a rhythm game as much as a puzzle game. You need to establish a beat: Tap... Wait... Tap... Wait. The "Wait" is crucial. It allows the sand to settle. If you tap the next cup too early, the dispenser nozzle is still occupied, and your tap is buffered (delayed). This delay often causes players to tap again, thinking the game didn't register, leading to accidental double-taps and slot overflow. Establish a slow, deliberate tapping rhythm.
Preventing Color Contamination
Your final objective is color purity. The White background is the "undo" function of the level—it covers mistakes. However, if you pour White too early, you paint yourself into a corner. The objective is to use White only as a finishing touch. You must prevent the Red sand from touching the White zone at all costs. Once Red hits White, the contrast is ruined, and the level aesthetic shifts from "Crisp Cartoon" to "Messy Abstract."
Step-by-Step Execution Guide
Phase 1: The "Grass Foundation" (0:00 - 0:15)
Start the level, but do not touch the screen for 2 seconds. Observe the layout.
- Action: Simultaneously tap the Top-Left Green and Top-Right Green cups.
- Analysis: This clears the wings of the tray. Your slot counter is now 2/5.
- Next Action: Locate the Top-Center Orange cup. Tap it. Slot counter: 3/5.
- Why: Green covers the widest area. You need maximum Green flow early to build a "floor" for the rest of the sand to land on.
Phase 2: The "Stem and Unveiling" (0:15 - 0:30)
While the initial Green cups are pouring, observe the second row of the tray.
- Wait: Let the first Green cup finish pouring and return to the tray. This frees up a slot (2/5).
- Action: Tap the Second-Row Center Orange cup.
- Observation: As the top row clears, you will see Yellow cups exposed in the second row. DO NOT TAP THEM YET. They are traps.
- Focus: Watch the canvas. Ensure the Green sand has created a flat bed at the bottom. If there are bald spots, prioritize Green again.
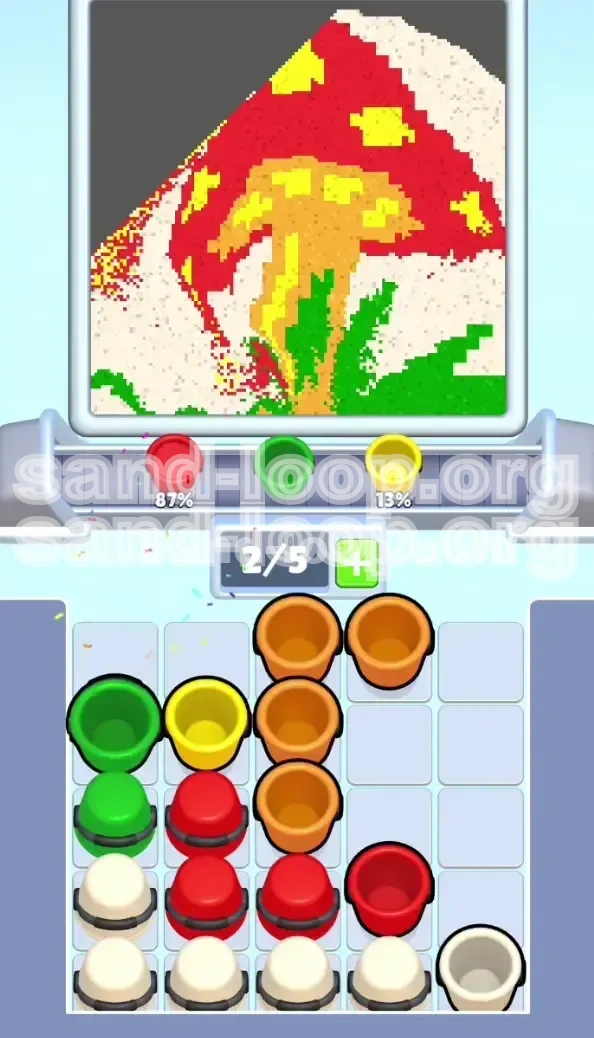
Phase 3: The "Red Cap Build" (0:30 - 1:00)
This is the make-or-break phase. The Red cups are now revealed in the middle of the tray.
- Action: Tap the first available Red Cup.
- The Physics Trick: Watch the Red sand hit the canvas. It will pile up. You want it to pile slightly higher than the stencil outline.
- The Transition: When the Red cup is about 70% empty, tap a Yellow Cup.
- Result: The Red sand is still wet. The Yellow sand lands on top of it and sticks, forming the spots. If you wait until the Red cup is empty, the sand dries, and the Yellow slides off.
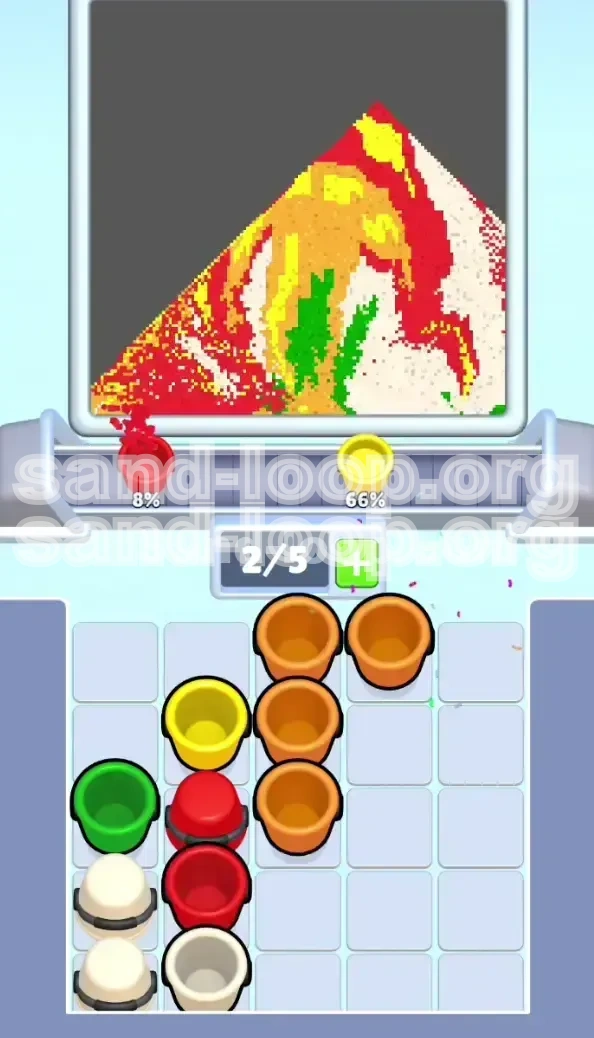
Phase 4: The "Baby Mushroom" Detail (1:00 - 1:15)
While the main mushroom is filling, look at the left side of the screen.
- Problem: The small mushroom is often neglected.
- Solution: Use the "drippings" from your main pours. If you aim your main pour slightly to the right, the excess sand will cascade left.
- Direct Action: If the small mushroom is still empty, sacrifice one slot. Tap a specific Red or Green cup and drag the pouring stream physically to the left side of the dispenser nozzle to "flick" sand onto the small mushroom.
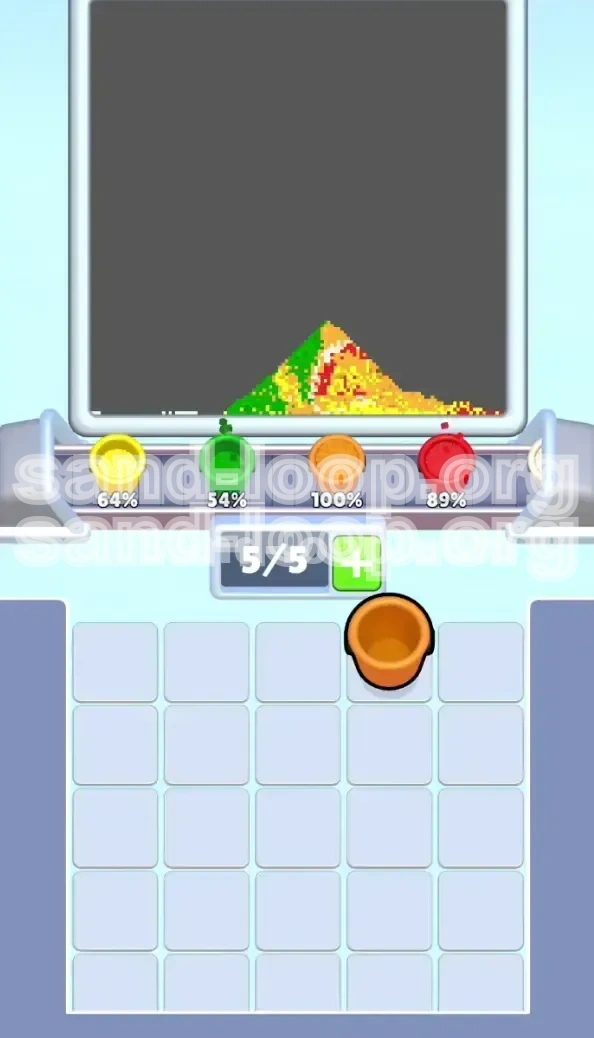
Phase 5: The "White Wash" Finale (1:15 - End)
Only touch White when the mushrooms look solid.
- Check: Are the spots visible? Is the stem connected to the grass?
- Action: Tap the Bottom-Row White cups rapidly.
- Strategy: Since the foreground is now built up like a wall, the White sand will flow behind the mushrooms, filling the sky without touching the red caps.
- Final Polish: If a White cup is pouring and the level is at 98%, drag the nozzle over any remaining tiny holes to patch them.
Color Order and Processing Logic
The "G-O-R-Y-W" Hierarchy
Memorize this priority chain: Green -> Orange -> Red -> Yellow -> White.
- Green (Foundation): Absolute first priority. It covers the grass and the base of the stem. If you run out of Green, you cannot fix the bottom layer later.
- Orange (Structure): Secondary priority. It builds the vertical strength of the mushroom.
- Red (Volume): Tertiary priority. Requires the most amount of sand, but must be contained by the Green base.
- Yellow (Detail): Quaternary priority. Needs Red to be present, but must be applied while Red is fresh.
- White (Background): Last priority. It is the "flood" that cleans up the edges.
Understanding the "Wet Sand" Effect
The game simulates "wetness." When a cup is pouring, the sand it deposits is "wet" and sticky. About 2 seconds after the sand lands, it becomes "dry" and slippery. This is why the Red-Yellow transition is time-sensitive. You must pour Yellow onto wet Red. If you pour dry Yellow onto dry Red, it bounces off like balls on a trampoline. This mechanic dictates that you must queue the Yellow cup while the Red cup is still pouring.
The "Shadow" Technique for Color Placement
Use the visual shadow of the sand pile to determine when to switch colors.
- When pouring Red, watch the shadow cast by the growing pile.
- When the shadow touches the line of the next color zone (e.g., the grass line), stop.
- This visual cue tells you the pile has reached maximum height. Attempting to add more sand will cause a landslide. Switch to the next color in the hierarchy immediately.
Inventory Management Strategy
Treat the supply tray like a game of Tetris.
- Always clear the "Top Row" first. Think of it as clearing the roof of a house to get to the second floor.
- Do not leave single cups hanging in the middle of a cleared row; this blocks the view of the row beneath it.
- Target "Pairs." If you see two Red cups side-by-side, tap them both. This ensures a massive volume of sand hits the canvas at once, creating a stable "wet" layer that is perfect for catching the Yellow spots.
Calculating Sand Volume
Not all colors are created equal in volume.
- Green requires 40% of total sand. It has the largest surface area (the ground).
- Red requires 30% of total sand. It has high verticality but a narrow top.
- White requires 20% of total sand. It fills negative space.
- Yellow/Orange require 10%. These are accents.
- Do not tap 5 Green cups if you only need 3. You will starve the conveyor for the colors you actually need later (Red). Stop tapping Green once the grass looks 80% covered.
Speed Run and Optimization Tips
The "2-1-2" Rush Method
For players aiming for a time under 45 seconds.
- The Opening Salvo: Tap the two top Greens and the top Orange instantly (3 taps).
- The Bridge: Do not wait for the first Green to finish. As soon as the dispenser opens (gap between cups), tap the next Orange.
- The Transition: As the second Green is finishing, visually locate the Red cups. Tap Red the *microsecond* the previous cup leaves the dispenser.
- This minimizes the "downtime" (the moments the dispenser is empty). A fast run has zero downtime.
Advanced "Slot Banking" Technique
This is how pros handle the 5-slot limit without jamming.
- The Concept: Treat the conveyor like a revolving door.
- The Move: When you have 4/5 slots full and a cup is currently pouring at the dispenser, hover your finger over the next cup you need in the tray.
- The Timing: The moment the pouring cup hits 0% and vanishes from the dispenser, tap the tray cup.
- The Result: The new cup slides into the dispenser instantly. This shaves 0.5 seconds off every transition, compounding to a massive time save.
Device Performance Optimization
Sand Loop's physics engine is CPU-intensive.
- Lag is the Enemy: If your device lags, the "pouring" animation stutters, but the physics calculation continues. This leads to "overpouring" because you thought you stopped the sand, but the game kept pouring.
- The Fix: Turn off "Reduce Motion" in accessibility settings? No, actually enable "Reduce Motion" on older devices to offload the rendering, or switch your phone to Airplane Mode to prevent background notifications from causing micro-stutters during the critical Red-Yellow transition.
Troubleshooting and Common Failures
Issue: The "Muddy Grass" Syndrome
Problem: The green grass at the bottom has turned brown or reddish.
Diagnosis: This is caused by "Runoff." You piled the Red mushroom cap too high, and the sand cascaded down the stem and into the grass. Or, you poured Yellow too early, and it slid off the cap onto the grass.
Fix: You cannot un-mix colors. However, you can "bury" the mistake. Pour a massive amount of Green sand on the spot to cover the mud. If the contamination is in the stem, use Orange sand to reinforce the stem walls and hide the bleed.
Issue: The "Ghost Spots" (Yellow Disappearing)
Problem: You poured Yellow on the Red cap, but the spots vanished or look very faint.
Diagnosis: You poured the Yellow before the Red. The Red sand then buried the Yellow sand. Yellow is lighter and has less mass, so it sinks if Red is poured on top of it.
Fix: Always pour Red first. Then, while the Red is still wet, pour Yellow. If the spots are too small, you can carefully "drip" Yellow onto the exact center of the existing spot by tapping the Yellow cup and immediately tapping it again (to stop the flow) to drop a single blob.
Issue: Conveyor Jam (The "Death Lock")
Problem: You have 5 cups on the belt. The cup at the dispenser is Green. You desperately need the Red cup that is visible in the tray, but you can't pick it up.
Diagnosis: This is "Slot Greed." You tapped 5 things in a panic.
Prevention: If you see 5 cups on the belt, stop tapping entirely. Watch the flow. As soon as one cup finishes, you have a split second to grab the Red. If you miss that window, you are forced to wait for the next cup to finish, which ruins your rhythm.
Issue: The "White Sky" Contamination
Problem: The white background has red or yellow streaks through it.
Diagnosis: You flicked the dispenser nozzle too hard, or the sand pile "avalanched" over the stencil line.
Fix: This is hard to fix. If the streak is thin, you can try to cover it with White sand. However, White sand is translucent. It might not cover bright Red. Your best bet is to build up the area below the streak with the correct color (Red or Green) to try and "suck" the stray sand back into the main pile via gravity, or restart the level.