
Level 423
HARDHow to solve Sand Loop level 423? Get instant solution for Sand Loop 423 with our step by step solution & video walkthrough. Sand Loop 423 tips and guide.
Play Sand Loop Now
Experience the puzzle challenge firsthand
Game Screenshots

Sand Loop Level Guides
Level 423: The "Inventory Management" Nightmare Walkthrough
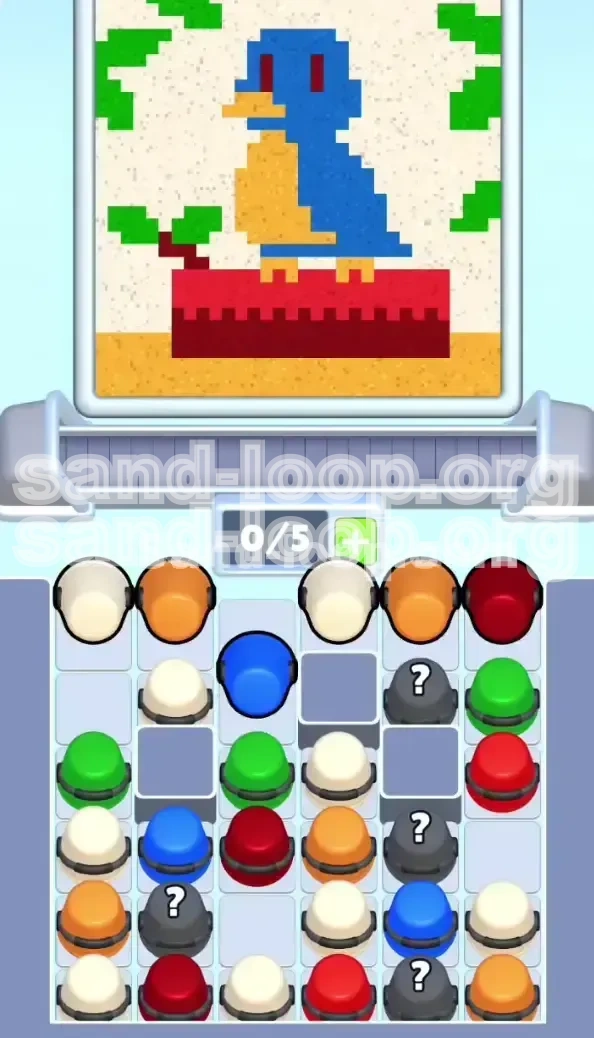
Welcome to the most notorious logic puzzle in Sand Loop: Level 423. Community guides often refer to this stage as the "Inventory Management Nightmare" because it punishes hoarding behaviors. In this level, you are tasked with painting a Blue Bird resting on a Red Pedestal, surrounded by a Cream environment. The difficulty does not come from complex shapes, but from the chaotic supply tray and the strict limit of 5 active slots on your conveyor belt. If you fill your belt with the wrong colors early on, you will face a deadlock that forces a restart. This guide is designed to help you navigate the resource queue, prioritize the correct color order, and secure a 3-star finish through precision and logic.
Understanding the Deadlock Mechanic
The core challenge of Level 423 is the vertical stack in the supply tray. You cannot access a bucket buried in the second or third row until you have removed the buckets sitting on top of it. A "Deadlock" occurs when your 5-slot conveyor belt is full of colors you cannot currently use (e.g., three buckets of Cream background paint), while the specific color you desperately need (like Blue for the bird) is trapped in the supply tray behind a "Blocker" bucket. Since you cannot pick up the blocker to reach the Blue, and you cannot use the colors on your belt, your game effectively ends. To survive, you must treat every slot on your belt as a premium resource.
The Zone Priority System
To beat the clock and the inventory limit, you must ignore your natural instinct to fill in the background first. Instead, adopt a "Subject First" priority system. The canvas is divided into four distinct zones, each requiring a different approach. The Bird (Top Center) is the highest priority because it defines the level. The Pedestal (Middle) is second, but it carries a high risk of drowning the bird's legs. The Environment (Sides) comes third, and the Background (Filler) is dead last. Do not touch the Cream background sand until the main subject is 100% complete.
Toolbox and Mindset Requirements
Before you attempt this level, adjust your settings and mindset. Unlike earlier levels where you could hold the pour button to flood an area, Level 423 requires "Tapping." Holding the pour will result in "Pixel Bleeding," where liquid sand spills over the tight boundaries of the bird's features. You need a precise touch input method to execute the "Tap-Release" technique effectively. Patience is also a tool here; rushing the opening 30 seconds is the number one cause of failure. Treat the level as a logic puzzle where you must solve the queue before you can paint the picture.
Required Color Palette Analysis
Success depends on knowing exactly how much volume of each color is required. Based on the pixel count of the target image, here is the breakdown of your needs:
- Blue Sand: Requires approximately 3 full buckets for the body and head.
- Red Sand: Requires 2.5 buckets for the pedestal. Be careful not to pick up a third unless you have space.
- Cream Sand: Requires a massive 4-5 buckets for the background. This is the "Trap" color.
- Dark Red: Requires only 0.5 buckets (a few drops) for the eyes.
- Green & Yellow: Secondary colors for leaves and feet.
Phase 1: The Opening Sequence (Seconds 0-30)
The first 30 seconds of Level 423 are purely a logistical challenge. If you survive the initial queue management without deadlocking your belt, the rest of the level is a straightforward painting task. The supply tray usually spawns with a dangerous configuration: essential colors like Blue and Red are buried in the bottom rows, while "Trap" colors like Cream are sitting on top, blocking access. Your goal in this phase is to surgically remove the blockers to unlock the tray.
Step 1: The 3-Second Assessment
As the level loads, do not touch anything. Pause for exactly 3 seconds and analyze the far left and right columns of the supply tray. You are looking for the "Blocker" configuration. In 90% of playthroughs, the Blue bucket you need is buried in the second or third row, covered by a useless bucket (often Cream or a Mystery bucket). Identify which column holds the Blue and which color is sitting on top of it. This single piece of intelligence dictates your entire opening strategy.
Step 2: The "Blocker" Disposal Protocol
You will likely see a Cream or Orange bucket sitting on top of your critical Blue bucket. You need to get rid of this blocker without clogging your conveyor belt.
- If the Blocker is Orange: Pick it up immediately. Pour it strictly onto the bird's beak or chest area. Since this is part of the final design, you aren't wasting a slot.
- If the Blocker is Cream: This is dangerous. Do not fill the background yet. Instead, pick up the Cream bucket and pour a single, thin line along the very top edge of the canvas (or a corner) just to empty the bucket. This frees up the slot and removes the physical bucket from the tray, revealing the Blue underneath.
Step 3: Securing the Blue Bird
Once the top blocker is gone, tap the Blue Bucket immediately. This is your number one priority.
- Fill the Bird's Body and Head. Keep the sand tight to the center of the canvas.
- The Eye Gap: Do not fill the entire head with Blue. You must leave a 1-2 pixel gap for the Dark Red eyes. If you fill this gap now, you won't be able to add the eyes later without color mixing.
- Use the Blue sand to define the wing contours. Ensure you have a solid shape before moving to the next color.
Step 4: Managing the Red Pedestal Risk
While clearing the left side, keep an eye on the top right of the supply tray. A Red Bucket is usually exposed there.
- Grab the Red Bucket as soon as you have a free slot.
- Start pouring the Pedestal. This is a large rectangle at the bottom.
- The 10% Rule: Do NOT fill the pedestal to the top. Stop pouring when the Red sand is about 90% full. You need to leave room for the bird's Yellow legs. If you fill the pedestal now, the legs will be buried, and the bird will look like it is melting into the floor.
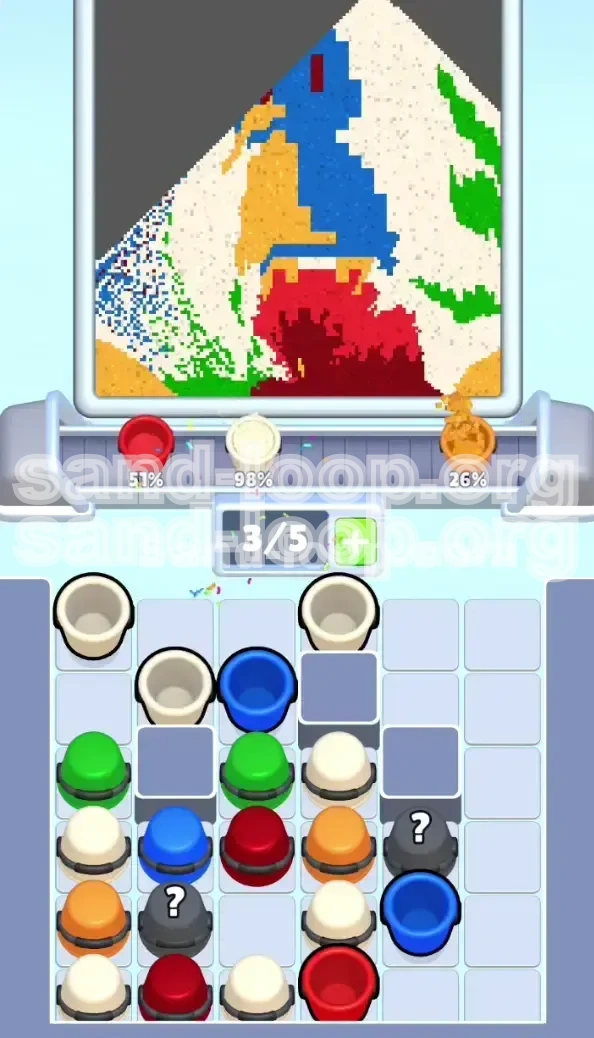
Step 5: The 3/5 Inventory Rule
After executing the first four steps, check your conveyor belt. The "Ideal State" is to have only 3 or 4 buckets active.
- The Danger Zone: If you are at 5/5 capacity, stop picking up new items.
- The Buffer: Always try to keep 1 empty slot on your belt. This buffer allows you to instantly pick up a "Blocker" bucket if your critical color gets buried again.
- Action: If you are full, you must pour what you have—imperfectly if necessary—to clear a slot. It is better to have a slightly messy background than a deadlocked belt.
Phase 2: Precision Detailing and Mystery Logic
With the main shapes established, we enter the precision phase. The supply tray will begin to cycle faster, introducing "Mystery Buckets" (Gray buckets with '?'). These are wildcards that can provide the essential Dark Red for the eyes, or waste your time with Green leaves. This phase requires micro-management of your pixels and your inventory queue.
Decoding the Mystery Buckets
Level 423 typically features 4 Mystery Buckets. They are not random; they follow a logic based on what you need.
- The Key Drop: One bucket is almost guaranteed to be Dark Red. You need this for the eyes.
- The Secondary Drop: One bucket is usually Green for the leaves.
- The Strategy: Do not tap a Mystery Bucket unless you have an empty slot. If you tap it and get Green while you are working on the bird's face, you will clog your belt. Wait for a clear slot before gambling.
The "Eye" Micro-Management Technique
This is the hardest technical step in the level. The eyes are 1x1 pixels. Using a full bucket of Dark Red is overkill and risky.
- Wait until you have the Dark Red bucket.
- Zoom In: If your device supports pinch-to-zoom, use it.
- Tap-Release Method: Do not hold the pour. Perform a quick "tap-tap" motion directly over the eye gap.
- Error Margin: It is better to under-pour and tap again than to over-pour. If you spill Dark Red on the Blue head, you cannot fix it. The contrast will be ruined.
Finalizing the Bird and Legs
With the eyes placed, return to the Yellow/Orange inventory.
- Locate a Yellow Bucket.
- Draw the stick-thin legs connecting the chest to the pedestal.
- Once the legs are dry and visible, go back to your Red Bucket (if you kept it) to top off the pedestal.
- Warning: Pour the final 10% of Red slowly to seal the legs without touching the Yellow body of the bird.
Processing the Green Leaves
By now, your belt should be clearer. You can process the environment.
- Pick up the Green Bucket (likely from a Mystery reveal).
- Pour on the Left and Right Sides of the canvas.
- Avoidance: Be extremely careful not to let Green sand slide down and touch the Red pedestal. Green and Red create a muddy brown color that ruins the clean aesthetic of the level.
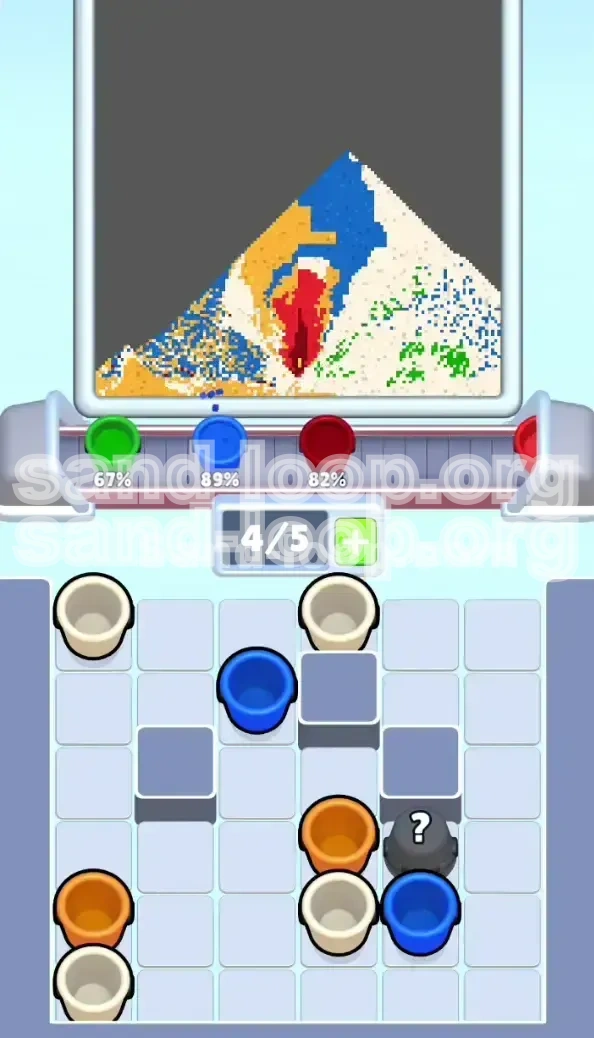
Phase 3: The Clean Sweep and Optimization
The bird is safe. The pedestal is solid. The leaves are placed. Now we enter the "Zen Mode"—filling the background. This is the easiest part, but it requires discipline to finish cleanly. This is also where speed runners make their time, so efficient movement is key.
The Cream Background Flood
You have likely accumulated several Cream Buckets on your belt or in the tray. Now is the time to unleash them.
- Pick up 2 or 3 Cream buckets at once if possible.
- Start pouring at the Top Center of the canvas.
- Flood the entire upper area. Since the bird's head is already solid Blue, the Cream sand will flow around it like a river. You don't need to be precise anymore. Just hold the pour until the bucket is empty.
- Work your way down the sides, filling the voids between the leaves and the bird.
Completing the Tan Floor
The final piece of the puzzle is the floor at the very bottom.
- Look for Tan or Dark Yellow buckets.
- Pour a solid line across the bottom 10% of the screen.
- This grounds the Red pedestal and finishes the composition.
Final Inspection Checklist
Before the timer runs out, do a quick scan of the canvas. Look for the three common errors:
- The "Ghost Eye": Did you forget to fill the eye gaps with Dark Red? If the eyes are still blue or empty, the level fails the detail check.
- The "Short Leg": Do the Yellow legs actually touch the Red pedestal? If there is a gap, the bird looks like it is floating.
- The "Color Bleed": Is there Green sand on the Red pedestal? If yes, try to cover the mistake with more Red, or accept the point deduction.
Speed Run and Advanced Tips
For players aiming for the leaderboard, efficiency is everything. Speed running Level 423 is not about pouring sand faster; it is about minimizing the distance your cursor travels and managing the queue perfectly.
The 5-Slot Shuffle Technique
Advanced players constantly cycle their conveyor belt to keep fresh colors available.
- The Dump Move: If you pick up a Mystery Bucket and it turns out to be a color you don't need (e.g., Green when you need Blue), do not place it carefully. Immediately "Dump" it into a safe zone (like the corner background) just to empty the bucket. The goal is to get the empty bucket off your belt immediately to make room for the next color.
Pre-Cognitive Tray Reading
After playing Level 423 a few times, you will memorize the supply tray layout.
- The Prediction: You know the Blue bucket is under the Orange bucket. You can tap the Orange, and *before* it finishes pouring, hover your finger over the Blue bucket's location. This saves milliseconds that add up over the course of a level.
- The Spawn Logic: Mystery buckets at the bottom usually spawn as Green when you are working on the bird. Plan your leaf painting route while the bucket is still traveling from the tray to the active slot.
Troubleshooting and Common Mistakes
Even with a guide, things can go wrong. Here is how to fix the most common failure points in Level 423 without restarting immediately.
Mistake 1: The "Cream Deluge"
The Problem: You started the level by grabbing all the visible Cream buckets and filled the background first.
The Consequence: Your belt is now full of Cream. The Blue bucket is buried behind an Orange bucket in the tray. You can't pick up the Orange bucket because your belt is full. You can't use the Cream because the background is already full. Result: Total Deadlock.
The Fix: Unfortunately, there is no recovery from a full deadlock with a full background. You must restart the level. Remember: Ignore the Cream until the bird is blue.
Mistake 2: The "Red Swamp"
The Problem: You poured the Red Pedestal too high, covering the bird's legs.
The Consequence: The bird looks like it is sinking into the stone block.
The Fix: You cannot "erase" sand in this game. Your only option is to try and "draw" the legs on top of the Red using Yellow sand. However, Yellow on Red often looks Orange/Brown. It is usually better to restart and be more careful with the Red pour height. Keep the Red strictly to the bottom block and leave the gap.
Mistake 3: Mystery Bucket Mismanagement
The Problem: You tapped a Mystery Bucket hoping for Dark Red (for eyes), but it was Green. You put it on the belt, but now you are stuck with it while you are trying to finish the bird's face.
The Fix: Don't let it sit there. Use the "Dump Move" described in the Speed Run section. Pour the Green quickly onto the side leaf area in a messy pile just to clear the bucket from your belt. This frees up the slot so you can tap the *next* Mystery bucket to find the Dark Red.