
Level 441
HARDHow to solve Sand Loop level 441? Get instant solution for Sand Loop 441 with our step by step solution & video walkthrough. Sand Loop 441 tips and guide.
Play Sand Loop Now
Experience the puzzle challenge firsthand
Game Screenshots
Sand Loop Level Guides
Level Overview: The Sunset Ship Challenge
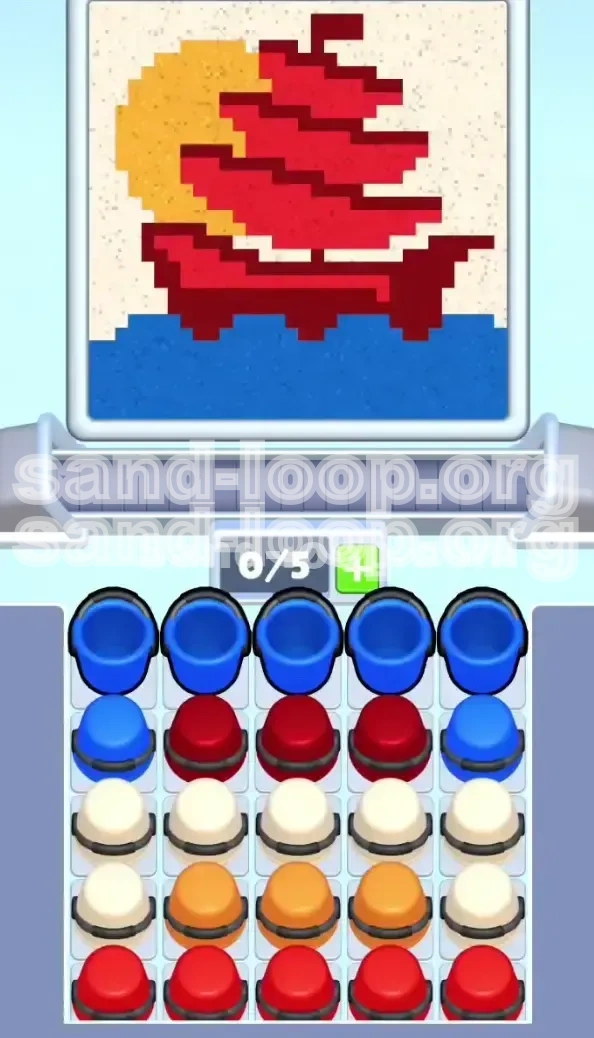
Welcome to Level 441 of Sand Loop, a stage known to the community as "The Sunset Ship." Unlike previous levels that relied on reflexes or speed, this stage is a pure test of logic and resource management. The goal is to construct a pixel-perfect scene: a majestic red junk ship sailing on a deep blue ocean, set against a glowing orange sun and a white sky. However, the beauty of the image is deceptive. This level is plagued by "gridlock," a state where a single wrong move fills your limited conveyor belt with the wrong color, creating a bottleneck that can ruin the entire run.
The Visual Composition
The canvas is divided into four distinct zones that interact through gravity. The bottom layer is the Deep Blue Ocean, which acts as the foundation. Above it sits the Crimson Red Ship, the heaviest and most structurally critical element. Behind the ship, in the upper-middle canvas, is the Bright Orange Sun. Finally, the top layer and negative space are filled by the Stark White Sky. Because sand flows downward, the order of creation is critical. If you paint the sky before the ship is built, gravity will pull the white sand down, contaminating the red hull and making it impossible to reach 100% completion for the ship layer.
The Conveyor Constraint
The defining mechanic of Level 441 is the severe limitation on your conveyor belt. You are restricted to exactly 5 slots. This means you cannot store extra buckets or create a buffer. You must process exactly what you need, precisely when you need it. If you accidentally tap a sixth bucket while the belt is full, the game locks your input, forcing you to wait and potentially causing a color mix in the dispenser that leads to a game over. Managing this flow is the core challenge of the stage.
The Supply Tray Layout
Your supply tray is a 5x5 grid of buckets arranged to obstruct your progress. The top row is a solid barrier of Blue. The middle rows contain a chaotic mix of Red and White, while the crucial Orange sun buckets are buried deep in the fourth row, hidden behind a deceptive wall of White buckets. You cannot simply tap the colors you want; you must "excavate" them by clearing the top layers first to reveal the tiles underneath.
Physics and Contamination Risks
Sand Loop uses a physics engine that simulates gravity and avalanching. In Level 441, the "Avalanche Risk" is extreme. The white sand acts as the background. If you release the white sand before the red ship structure is fully built, the white grains will tumble down the slopes of the unfinished red piles. This results in a "contaminated" hull—white pixels mixing with red pixels—which prevents you from reaching the 100% completion threshold for the red layer. You must build the structure from the bottom up to stabilize the canvas.
Strategic Objectives and Color Order
To conquer Level 441, you must abandon impulse tapping and adopt a rigid, dependency-based strategy. Your goal is not just to clear the board, but to clear it in a specific order that respects the physics of the sand. Below is the precise hierarchy of objectives you must follow to succeed.
Primary Objective: Establish the Ocean Floor
Your first and most immediate goal is to secure the bottom 15-20% of the canvas. This is the Deep Blue ocean. The blue sand acts as the foundation for the entire level. If the blue layer is uneven or incomplete, the ship will float incorrectly. You must prioritize clearing the top row of the supply tray immediately to release the blue flow. Do not touch any other color until the blue percentage meter is fully satisfied and the conveyor belt is empty.
Secondary Objective: Construct the Sun
It may seem counterintuitive to build the sun before the ship, but logic dictates this order. The sun is a background element located in the middle-upper part of the canvas. To access the orange sand, you have to clear the white rows above it. Once the blue base is down, your next target is the Bright Orange buckets located in Row 4. You need to tap these early so the orange sand can settle behind the space where the ship will eventually go. Doing this later is impossible because the ship's bulk will block the dispenser.
Tertiary Objective: Raise the Hull
With the ocean flat and the sun glowing, the Crimson Red ship becomes the priority. This is the most physically demanding part of the level. You are building a heavy, dense structure that needs to rise high. The red sand will pile up in the center of the canvas. You must manage the flow carefully to ensure it fills the ship's outline without spilling over into the sky areas. The red build-up creates the slopes that will eventually catch the falling white sand, so stability here is key.
Final Objective: The Sky Fill
The Stark White sky is your final act. This is the "cap" for the level. You must have extreme patience here. Do not tap the white buckets until the red ship is structurally sound and 100% complete. When you finally release the white sand, it will pour in massive quantities. It should flow around the ship, filling the negative space and the gaps in the sails. If you do this correctly, the white sand acts as the finishing touch that pushes your overall completion to 100%.
Step-by-Step Walkthrough
This section provides the exact actionable steps required to dismantle the 5x5 supply tray grid. Follow this sequence religiously. Do not deviate, and do not tap extra buckets "just in case." Precision is your only path to victory.
Phase 1: Breaking the Blue Barricade
The supply tray starts with a full row of 5 Blue Buckets blocking access to everything else. This is your entry point.
- Action: Locate Row 1 (the top row). You will see 5 Blue Buckets.
- Step: Tap all 5 Blue Buckets in Row 1 simultaneously or in rapid succession.
- Result: Your conveyor belt maxes out at 5/5 slots. The blue sand begins to pour, forming the ocean base.
- Wait: Do not tap anything else. Watch the slots counter. Wait until the 5 slots empty completely (0/5) and the blue sand has finished pouring.
Phase 2: The Final Blue Drops
Even after clearing Row 1, you aren't done with the ocean yet. You need to secure the remaining blue sand to finish the base layer before moving to other colors.
- Locate: Look at Row 2. You will see a pattern: Blue - Red - Red - Red - Blue.
- Action: Ignore the Red Buckets for now. Tap only the two outer Blue Buckets (leftmost and rightmost).
- Monitor: Two blue buckets load onto the conveyor (2/5 slots).
- Result: These final drops complete the water requirement. Let them process. Your conveyor is now empty again.
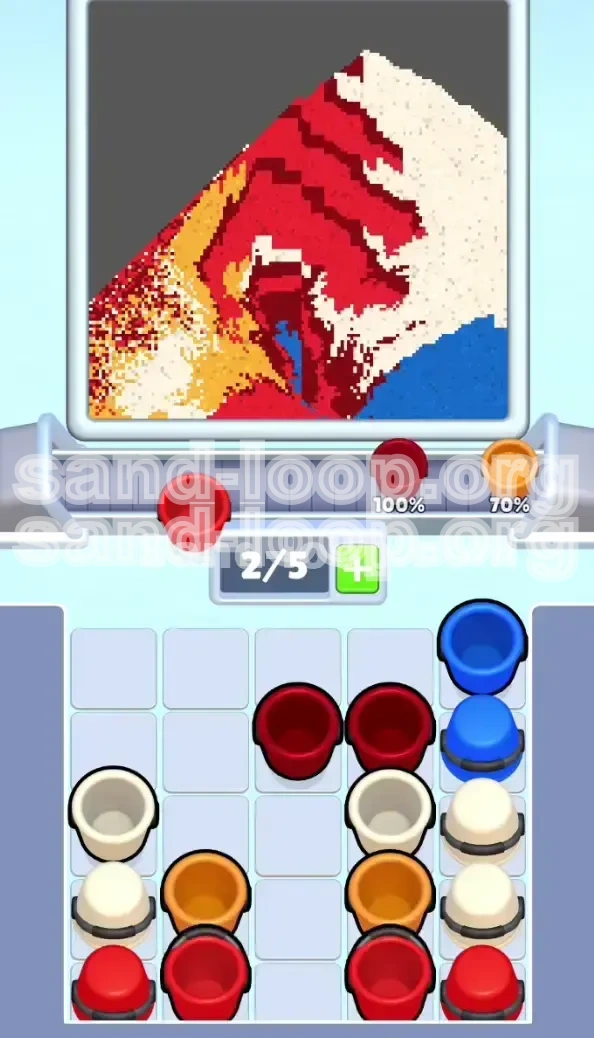
Phase 3: Unlocking the Red Hull
With the blue barrier gone, you now have access to the initial supply of red sand needed to start the ship's hull.
- Target: Return your attention to the three middle buckets in Row 2. These are the Red Buckets you ignored in the previous phase.
- Step: Tap all three Red Buckets in Row 2.
- Observe: The conveyor loads 3 red buckets. They travel up and pour onto the blue canvas, beginning the vertical structure of the ship.
- Status Check: Ensure the red sand lands on the blue, not in the sky. Wait for these to finish processing.
Phase 4: The White Trap Row
Row 3 is the most dangerous part of the level. It consists of 5 solid White Buckets. This is a trap. If you tap all 5, you fill your tray with white sky sand before the ship is built, causing a mess.
- The Restriction: You have a 5-slot limit. You need to tap SOME white to get down, but not ALL white.
- Action: Tap only the middle three White Buckets in Row 3.
- Hold Back: Leave the outer left and outer right White Buckets strictly alone. Do not tap them yet.
- Result: The conveyor fills with 3 white buckets. This is safe. Let them pour. This exposes the row below.
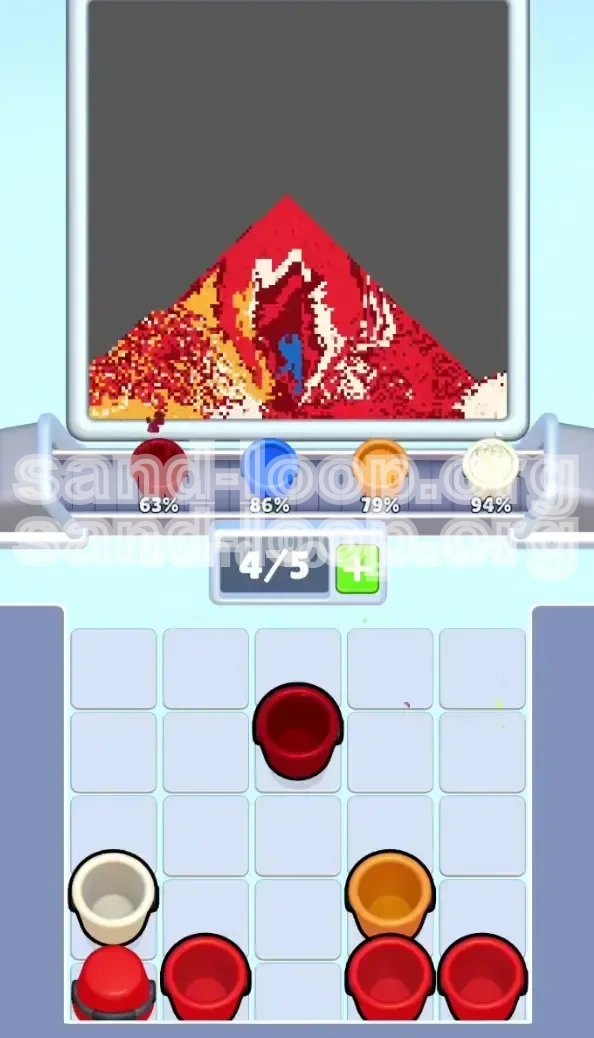
Phase 5: Extracting the Sun
By clearing the middle of Row 3, you have revealed Row 4. This row contains the Bright Orange sun buckets.
- Target: Identify the three Orange Buckets in the middle of Row 4.
- Step: Tap these three Orange Buckets immediately.
- Timing: Send them up the conveyor while the previous white sand is still settling or just finished.
- Effect: The orange sand pours out and forms the perfect circular sun behind the red ship structure you started in Phase 3.
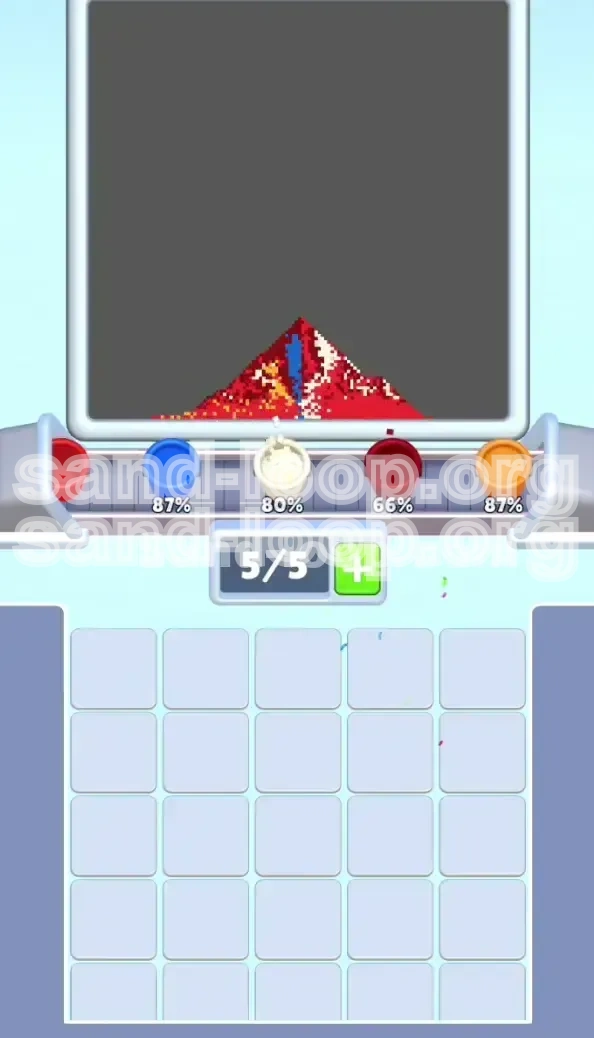
Phase 6: The Grand Finale
You are now in the endgame. You have a massive amount of sand left to pour. You have the final red buckets and the remaining white buckets.
- Step A (Red): Locate Row 5 (the bottom row). It contains 5 solid Red Buckets. Tap all 5. Also, tap the two remaining Red Buckets from the top rows if you haven't already.
- Build: Let this massive wave of red sand build the ship's sails and high superstructure. Wait until the red percentage hits 100% and the pile is stable.
- Step B (White): Now, tap every single remaining White Bucket on the screen (the two you left in Row 3, plus any others).
- Completion: The white sand will flood the screen, filling the top sky box and slipping into the sails, finishing the level.
Common Mistakes and Stuck Solutions
Even with a guide, it is easy to misjudge a tap or panic when the board looks full. Here is how to troubleshoot the most common failure points in Level 441.
Mistake: The "White Wash" Error
The most common error players make is tapping the entire row of 5 White Buckets in Row 3 early on.
- What happens: You fill your conveyor with White Sand while the Red Ship is only half-built.
- The Consequence: The white sand pours out and covers the unfinished red ship. It creates a gray/pink mix that ruins the distinct color separation required for the puzzle.
- The Fix: You cannot fix this once the sand pours. You must restart the level and remember to only tap 3 white buckets initially.
Mistake: Ignoring the Blue Foundation
Some players try to rush and tap Red or Orange buckets while the Blue is still pouring from the first row.
- The Problem: If you tap Red buckets while Blue is occupying the dispenser queue, the Red sand gets delayed. When it finally pours, the water level has already risen too high, submerging your ship.
- The Solution: Always clear a color completely (check the percentage bar) before moving to the next distinct color block.
Solution: Dealing with Gridlock
Gridlock occurs when your 5 slots are full, but the sand is pouring very slowly, and you can't tap the next bucket you need.
- The Scenario: You have 5/5 slots full of Blue, but you really need to tap that Red bucket to keep the rhythm going.
- What to do: Wait. Do not spam the screen. The game physics engine will process the sand. As soon as one slot frees up (4/5), you can tap the next required bucket. Patience is the only solution to gridlock.
Solution: Fixing "Leaning" Structures
Sometimes, the ship might look crooked or the sand might pile up on one side.
- The Cause: This is usually due to tapping the buckets in the wrong order (e.g., Left-to-Right vs. Right-to-Left).
- The Fix: While you can't control the exact pixel physics, tapping buckets in the center first (as this guide suggests) helps distribute the sand evenly. If the ship looks unstable, ensure you are building symmetrically by tapping the middle buckets before the outer edge buckets.
Speed Run and Pro Tips
Once you understand the logic, you can optimize your playstyle to complete Level 441 faster and with fewer retries. These tips are for players who want to master the mechanics.
Efficiency Tip: The Tap-and-Wait Method
Speed running isn't just about tapping fast; it's about eliminating downtime.
- Technique: Memorize the "Cluster" sizes. Since you know the Blue comes in clusters of 5 and 2, and the Red comes in clusters of 3 and 5, you can pre-load your taps.
- Execution: Tap the 5 Blue buckets. Immediately look at the supply tray to spot the next targets (the 2 side Blues). As soon as the conveyor hits 4/5 slots, tap the next target. This ensures the conveyor never idles at 0/5 when it could be pulling supplies.
Advanced Tip: Visualizing the "Negative Space"
Train your eyes to see what isn't there, rather than what is.
- Concept: The White Sky is essentially the "negative space" around the positive object (the Ship).
- Application: Don't think "I need to fill the sky." Think "I need to build a solid wall that stops the sky from falling." If you view the White buckets as a hazard rather than a goal until the very end, you will naturally avoid the trap of pouring them too early.
Shortcuts: Skipping the Animation
While you can't skip the sand pouring physics, you can speed up the decision-making process.
- Focus: Keep your eyes entirely on the Supply Tray, not the canvas, once you know the pattern.
- Why: Watching the sand fall is hypnotizing and wastes time. Watch the grid. As soon as the slots clear, your finger should already be moving to the next bucket in the sequence. This muscle memory is what separates a beginner from a pro in Level 441.