
Level 442
HARDHow to solve Sand Loop level 442? Get instant solution for Sand Loop 442 with our step by step solution & video walkthrough. Sand Loop 442 tips and guide.
Play Sand Loop Now
Experience the puzzle challenge firsthand
Game Screenshots
Sand Loop Level Guides
Level Overview: The "Desert Window" Puzzle
Welcome to the ultimate guide for Level 442, colloquially known as the "Desert Window." This level is a deceptive challenge that presents itself as a simple artistic task but quickly reveals itself to be a rigorous exercise in inventory logistics and spatial management. Unlike earlier stages where you could rely on improvisation, Level 442 is a deterministic logic puzzle that punishes hesitation and rewards precise calculation.
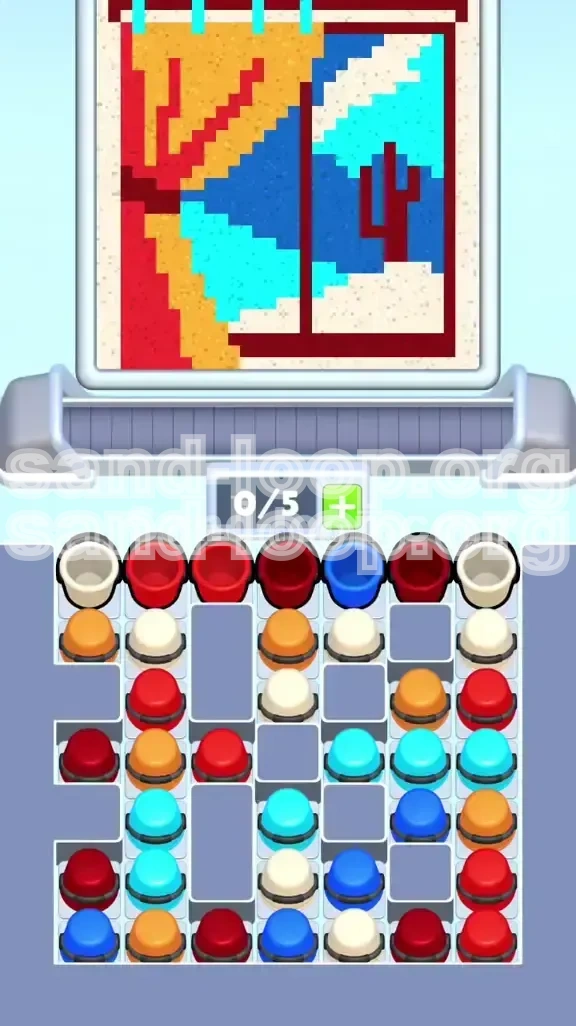
The visual goal is to assemble a picturesque scene: a view of a desert landscape framed by a window. The composition is split into two distinct zones. The left side is dominated by heavy, velvet curtains in shades of Red, Orange, and Maroon. The right side opens up to a sky painted in gradients of Cyan and Dark Blue, anchored by a Maroon cactus silhouette in the foreground. The entire scene is tightly bound by a rigid White window frame.
The core difficulty of this level stems from two interlocking mechanics: the 0/5 Slot Capacity constraint on your conveyor belt and the intrusive placement of Grey Blocks (Concrete Obstacles) within your supply tray. These elements combine to create a "vertical silo" gameplay style where you cannot simply play from top to bottom. Instead, you must methodically drain specific columns to free up trapped resources, all while managing a conveyor belt that has zero margin for error.
The 0/5 Conveyor Constraint
The most critical mechanic in Level 442 is the 0/5 Capacity indicator. This means your conveyor belt starts with zero buffer slots. Every single slot on the belt is accounted for the moment a cup enters the queue. This effectively eliminates the ability to "queue up" extra cups for future use.
This constraint turns the level into a "Just-in-Time" manufacturing simulation. If you pull a Dark Blue cup while you are still focused on the Red curtain, that Dark Blue cup becomes a "plug," occupying a slot and looping around the belt. This prevents you from accessing the White cups you desperately need for the frame, potentially causing a deadlock that forces a restart.
The Grey Block "Geography"
Your supply tray is not a clean, open grid; it is fragmented by several Grey Blocks. These blocks act as permanent ceilings for the cups beneath them. Cups will only rise up in a column if the space directly above them is cleared.
These blocks dictate your entire strategy. Specifically, the blocks in the middle columns create a hard separation between the top and bottom halves of the tray. You must clear the top layers of these specific columns before you can access the critical White and Maroon cups buried at the bottom. Ignoring the block geometry will lead to a premature soft-lock where you have colors on the belt but no way to pour them because the required resources are physically trapped.
Color Volume and Distribution
Understanding the "economy" of colors is crucial for planning your route. The level utilizes a palette of six specific colors, each with a different role and availability.
- Red & Orange (High Volume): These colors make up approximately 45% of the total volume. They are the "bulk" resource required for the curtain. You will be processing these constantly for the first 40% of the level.
- White (Critical Resource): Although it accounts for only about 15% of the volume, it is the most time-sensitive resource. It is scattered but often blocked by Grey Blocks. Access to White is the primary bottleneck.
- Maroon (Dual Purpose): This is the most dangerous color. It is used for both the curtain folds (left) and the cactus (right). Mixing up the source of Maroon can ruin your percentage completion for one section while trying to fill another.
- Blues (Late Game): Cyan and Dark Blue are mostly buried in the lower rows. They represent the "endgame" content and should generally be ignored until the upper tray is cleared.
The "Silo" Strategy Philosophy
Because of the Grey Blocks, you cannot play this level row-by-row. You must play it column-by-column. We refer to this as the "Silos" strategy. You will focus on draining specific vertical columns (specifically 2, 4, and 6) to create breathing room in the tray.
By draining a column completely, you allow any cups trapped under Grey Blocks in that column to slide up, becoming available for use. If you only take the top cup from every column, you will eventually be left with a tray full of columns that have 2-3 cups stuck under a block, and no way to retrieve them because your belt is clogged with the wrong colors.
Clear Objectives: The Strategic Goals
To achieve 100% completion on Level 442, you must adhere to a strict workflow. Your primary goal is to manage the queue on your conveyor belt so that it perfectly matches the immediate needs of the canvas. Here are the five strategic objectives you must conquer, in order of priority.
Objective 1: Establish the Structural Frame
Your very first priority is to secure the White cups necessary to outline the window. The frame acts as a container for the rest of the sand. If you delay the frame and start pouring background colors (like Blue or Red) first, you risk "bleeding" colors into areas where they don't belong, creating messy edges that are impossible to clean up later.
You must locate the White cups in the top row and get them onto the belt immediately to set the boundaries of the image. Do not focus on filling the frame 100% yet, but ensure the outline is established so you have a safe zone to work within.
Objective 2: Clear the "Red" Bulk (Curtain Phase)
Once the frame is started, shift 100% of your focus to the left side. The Red curtain is the largest single color block in the level. Clearing this serves two purposes: it completes a large visual section of the painting, and, more importantly, it drains the Red cups from your tray.
Removing the Red cups is the only way to unblock the columns that hold the Blue cups for the sky. You cannot move to the sky phase until the Red cups are gone. Treat this as a resource extraction mission: you are mining Red to uncover Blue.
Objective 3: Unlock the Lower Tray (Grey Block Management)
This is an invisible objective but arguably the most important. You must pour cups in a specific order to trigger the "slide up" mechanic. Every time you clear a cup sitting directly above a Grey Block, you unlock the inventory underneath it.
Your goal here is to reach the "bottom row" of cups. The most vital cups—such as the final White cups for the window pane and the Maroon cup for the cactus—are trapped at the bottom by the concrete blocks. You cannot free them until you clear the "rubble" (the top cups) sitting on top of the blocks.
Objective 4: Paint the Sky (Late Game Phase)
Only after the curtain is largely finished (around 80%) and the frame is secure should you touch the Blue cups. The sky requires smooth, continuous pours. If you start the sky too early, you will be interrupted by the need to finish the frame or curtain, causing the Blue sand to sit on the belt and take up space.
Wait until your tray is predominantly Blue, then switch modes entirely from "Curtain Mode" to "Sky Mode."
Objective 5: The Cactus Precision (Finale)
The final objective is the placement of the cactus. This is a high-risk step because Maroon is a dark color that can easily overpower the lighter sky or clash with the curtain if placed incorrectly. You must wait for the perfect window of opportunity—when the sky is filled but the frame is still active—to place the cactus. This usually happens when your belt is almost empty, allowing for final precision touches.
Step-by-Step Instructions: The Execution Phase
Follow this exact sequence of moves to navigate the level without getting stuck. Do not deviate from the order unless you are fully adapting to the specific state of your tray. This walkthrough assumes a standard spawn layout.
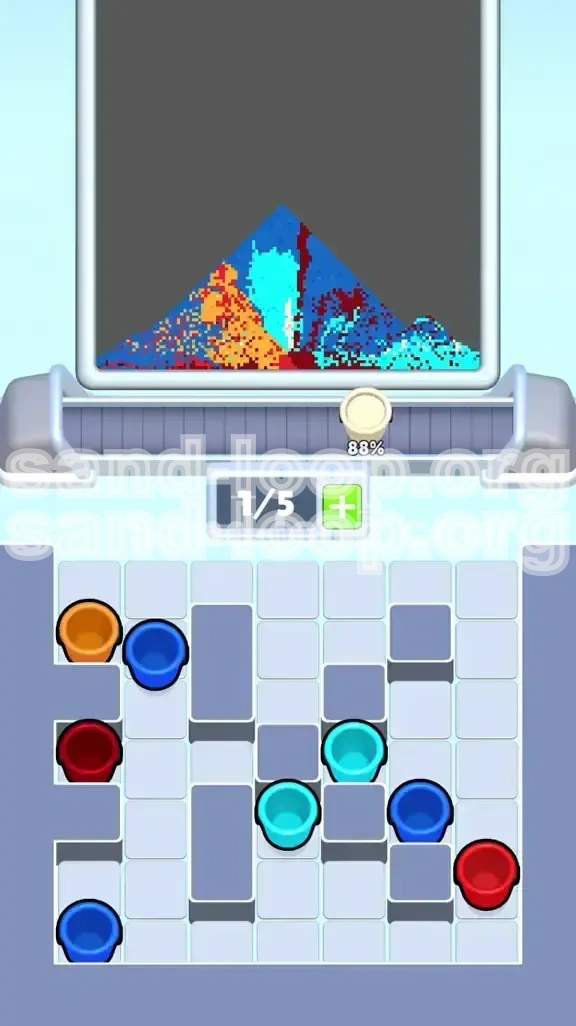
Phase 1: The Opening Salvo (0-15% Completion)
As the level loads, immediately scan the top row of your supply tray. You will likely see two White cups (one on the far left, one on the far right) and several Red cups.
- Tap the White Cups: Immediately pull both White cups from the top edge. Send them to the conveyor belt. This starts the frame.
- Pull Column 2 & 3 Red: Look for Red cups in the second and third columns. Pull these next. Your belt should now have [White, White, Red, Red]. You have 1 slot open.
- Monitor the Pour: Watch the progress bar on the window frame. As the first White cup finishes pouring, it leaves the belt. Immediately fill that slot with the first Orange cup you see (usually in Column 1).
Phase 2: Breaking the Concrete Lock (15-40% Completion)
At this point, you will notice that columns 2, 4, and 6 are stagnant. This is because of the Grey Blocks.
- Focus on Column 4: Identify the cup directly above the Grey Block in Column 4. It is likely a Red or Maroon cup. Pull this cup immediately. This is the "key" to the lower half of the tray.
- Drain the Top Half: Continue pulling from columns that have no Grey Blocks in the top 3 rows. You want to lower the "floor" of the top half of the tray to expose the Grey Blocks clearly.
- Slot Management: Keep your belt at 4/5 capacity. Keep one slot open as an "emergency buffer" in case you need to pull a specific cup to unstick a column.
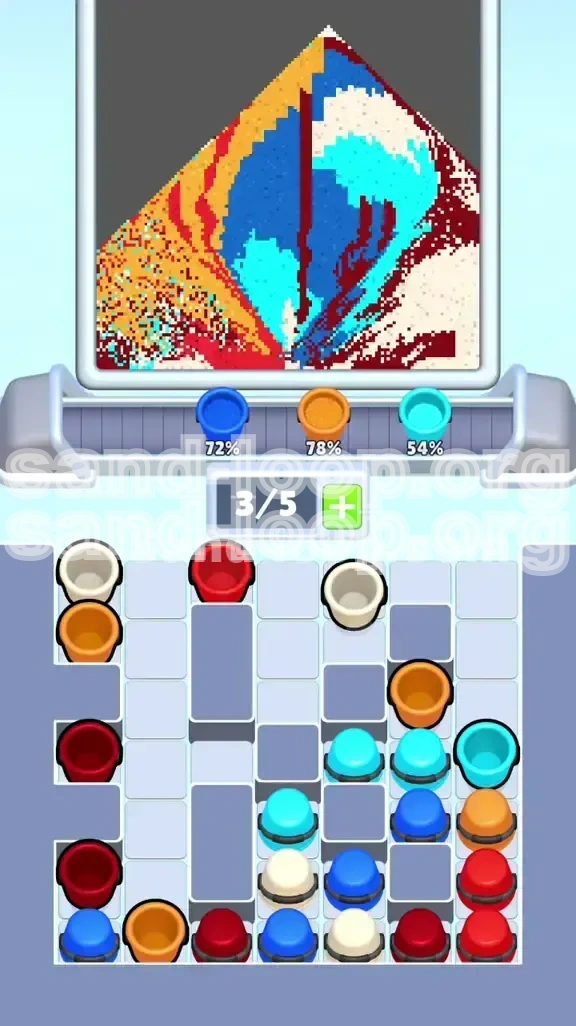
Phase 3: The Mid-Game Transition (40-70% Completion)
Once the top rows are cleared, you will see the "Second Wave" of cups slide up. This is where the Blues appear.
- Do Not Pull Blue Yet: Even though the Cyan and Dark Blue cups are now available, ignore them if your curtain is less than 80% done.
- Finish the Maroon Folds: Use the Maroon cups that have slid up to finish the deep shadows in the curtain. This clears the Maroon cups out of the way so they don't accidentally get used for the cactus later.
- Check Your White Stock: By now, the initial White cups are gone. You need the White cups that were trapped under the Grey Blocks in Column 1 and 7. Ensure these are flowing onto the belt to maintain the window crosshair.
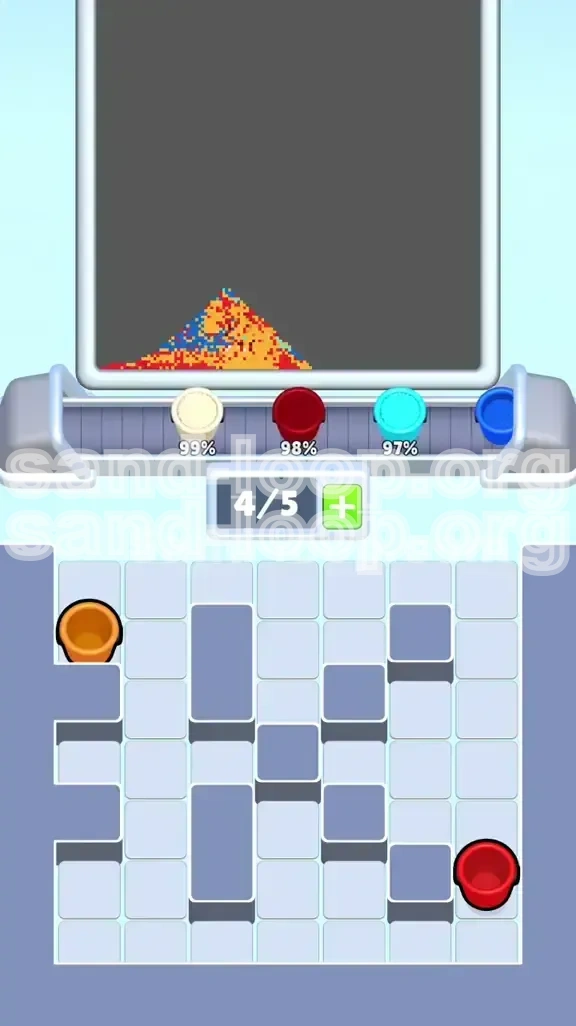
Phase 4: The Sky and Cactus Finale (70-100% Completion)
Now the tray should be mostly empty except for the bottom rows. The Red and Orange cups should be gone.
- Flood the Sky: Pull the Cyan (Light Blue) and Dark Blue cups simultaneously. Since the belt is no longer clogged with Red, you can process these quickly. Fill the sky to about 90%.
- Deploy the Cactus: Locate the last remaining Maroon cup. It should be isolated in a column by now. Pull it when the sky is mostly full. Pour it to create the silhouette on the right side.
- Clean Up: Use the very last White cups (likely from the bottom of Column 4 or 5) to fix any gaps in the window frame or to sharpen the edges of the cactus against the sky.
Color Order: The Processing Priority
The order in which you process colors is the single biggest factor in winning Level 442. Here is the priority hierarchy, ranked from most important to least important. Following this list ensures you never get stuck with a full belt and nowhere to pour.
Priority Tier 1: White (The Frame)
White is your Tier 1 priority for the entire duration of the level, but in different phases.
- Start: Top row White. Establish the borders immediately.
- Middle: "Choke Point" White. You must carefully drip White into the frame corners while doing other colors. If you wait until the end to do the frame, you won't have enough belt space to cycle back to it.
- End: "Clean Up" White. The final 5% of the level involves using the last few White cups to fix percentage errors.
Priority Tier 2: Red and Orange (The Curtain)
This is your "volume" color. You will process more Red than anything else.
The Logic: You need to get Red out of the tray to unbury the Blues. However, you can't just dump it all at once. You must process Red in "batches." Pull 3 Red cups, let them pour, clear the space, then pull 3 more. Do not queue up 5 Red cups in a row, or you will block yourself from adding White to the belt when the frame needs it.
Priority Tier 3: Maroon (The Separator)
Maroon is a "Tier 3" color because it is dangerous.
The Rule: Process Maroon only when you have a clear visual target. Do not put Maroon on the belt unless you are ready to pour it immediately. Leaving a Maroon cup on the belt while you wait for a Red cup to finish is a recipe for disaster, as you might accidentally pour it into the sky area.
Priority Tier 4: Cyan and Dark Blue (The Background)
These are "Tier 4" (Low Priority) for the first half of the game, then "High Priority" at the end.
Strategy: Physically block yourself from clicking these cups if you have to. They are trap colors. If you pull them too early, they act as "plugs" in your conveyor belt, preventing you from cycling back to the Red and White cups you desperately need to clear the Grey Block obstacles.
Key Tips and Common Mistakes
To master Level 442, you need to anticipate problems before they happen. These tips highlight the subtle mechanics of the level that often go unnoticed until it's too late.
Tip 1: The "Slot Buffer" Rule
Always keep at least one slot on your conveyor belt empty.
Why? If you have 5/5 slots full, and the game presents you with a White cup you need to unblock a column, you can't take it. You are stuck waiting for a cup to finish pouring. By keeping 4/5 or 3/5 slots full, you maintain the flexibility to grab key cups the moment they appear. This flexibility is vital for managing the columns with Grey Blocks.
Tip 2: The "Silent" Maroon Death
One of the most common mistakes is the "Silent Maroon Death." This happens when you pour Maroon for the curtain, but the game registers it as filling the "Cactus" meter prematurely, or vice versa.
The Fix: Be hyper-aware of the Maroon pour location. If the curtain needs a tiny dot of Maroon, and you pour for 2 seconds, you might overflow the target area. Tap the pour button instead of holding it down for Maroon.
Tip 3: Don't Trust the "Top Row"
Just because a cup is in the top row doesn't mean it's the right one to pull.
Often, the game will offer you a Cyan cup in the top row because the column below it is empty. However, pulling it might be the wrong strategic move. Look at the *columns* with Grey Blocks first. Prioritize pulling cups that are sitting on top of Grey Blocks over cups that are just in empty columns. Clearing the "Block Columns" is the only way to win.
Tip 4: The 80% Rule
Never take any color to 100% completion until the very end.
Stop pouring at 90-95%. Why? Because "splash damage" or slight overflows from a neighboring pour might accidentally push you to 100% early, leaving you with a cup of that color still on the belt which you now can't get rid of easily. Stop just short, let the belt clear, then do a final "clean up" pass for the last 5%.
Stuck Solutions and Speed Run Tips
If you find yourself in a deadlock situation or if you are aiming for a three-star speed run, these advanced strategies will help you recover and optimize your play.
Solution: The "Full Belt" Recovery
What if you messed up and your belt is full of 5 cups that you don't need (e.g., 5 Blue cups when the frame needs White)?
The Recovery: You cannot just wait. You must force the issue. Look at the canvas. Is there *any* part of the image that can accept Blue? Even a tiny patch? Pour it there just to get the cup off the belt. If there is absolutely no spot for Blue, you are in a "Hard Deadlock." Your only option is to restart, as the level design does not allow for a discard mechanic once the belt is full.
Solution: Unblocking a "Stuck" Column
Sometimes a column refuses to move up even though you cleared the cup above it.
The Check: This is usually a visual illusion. There might be a Grey Block one layer lower than you thought. Zoom in (if possible) or carefully count the rows. Alternatively, you might have missed a cup in that column. Scan every single column to ensure you didn't leave a single Red cup hiding in a corner, preventing the stack from rising.
Speed Run Strategy: The "Pre-Load"
For speed runners, the key to Level 442 is the "Pre-Load."
As the level starts, don't wait for the first pour to finish before tapping the next cup. You can queue up taps slightly before the belt slot opens. If you know the next cup needed is White, and the current pouring cup is 90% done, tap the White cup in the tray. It will fly to the belt the millisecond the slot opens. This shaves seconds off your time, which is vital for the 3-star rating.
Speed Run Strategy: Batch Processing
Instead of alternating White -> Red -> White -> Red, group them.
Once the frame is established, pull 3 Reds. Pour them. While they pour, scan the tray for the next batch of 3 Reds or Oranges. Do not touch the belt again until those 3 are done. This minimizes the time spent scrolling and searching, allowing you to process the bulk colors (Red/Blue) in large, efficient chunks.